Manipulating textures
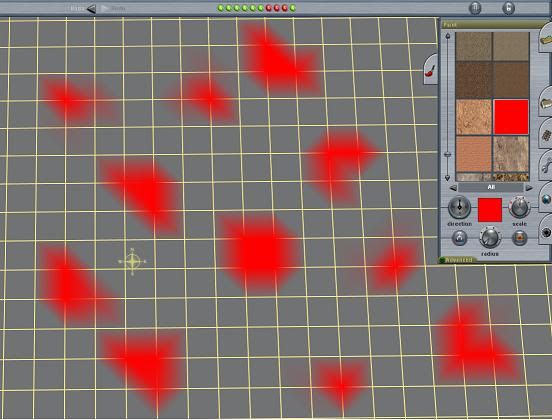
Paint seems to be applied by the Trainz software in an unusual spray pattern. I’ve noticed it varies according to where the mouse pointer is in relation to the grid square when the texture is placed. Here are some examples with radius on minimum which show a plain red texture separately sprayed several times with a very quick click of the LMB.
Although the radius and scale is identical in each example, the pattern is very different. This seems to occur because the cursor point was moved each time to a different relative position within the grid space. A click at the centre of a 10m square will produce a very different result to one placed nearer the edge.
For the most part this won’t matter too much, but these shapes can be exploited to help provide some creative effects. Examples where it can be useful is when want to place piece of feature texture like a rock, shrubs or a puddle. Sometimes these just won’t go exactly where you want. But by rotating and/or changing the cursor position point where the spray is directed it can usually get very close after a bit of trial and error.
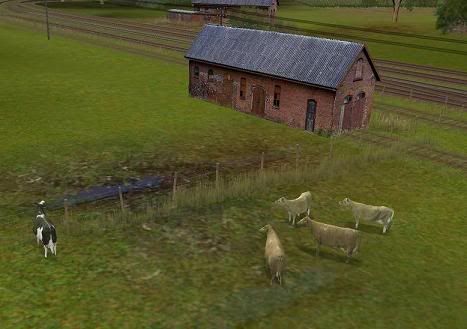
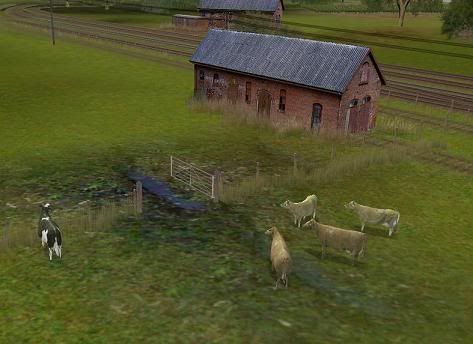
With this example I’ve tried to get a muddy effect in one of the two fields. The “plash” (
is that Trainz speak for a cross between a puddle and a splash?) is asset
plash 03 kuid:149987:21403. In this first image it neatly lines up with the fence.
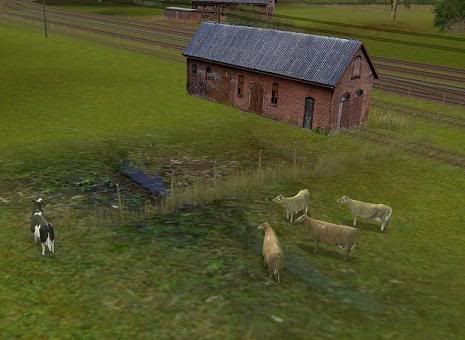
With the rotation tool I can shift it 90 degrees to bisect the fence which could make a neat gateway where the ground has been trodden down by the livestock.
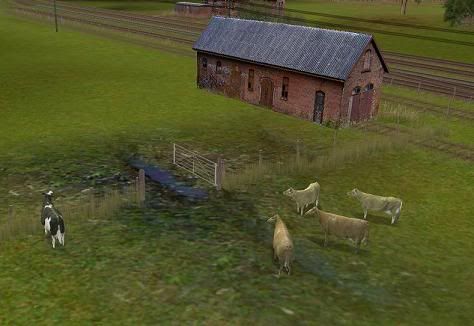
Just break up the spline fence and put in a gate. For best effect in examples like this it’s usually best put in the texture first, then place the gate and fence spline. It’s not always possible to get a detailed texture exactly where you want it, but you have total control over the placement of objects and splines, so I tend to move those to fit in around the less obliging required texture.
You’ll notice that there is some grass placed under the fence where the farmer can’t cut, or the cattle can’t graze. I’ve removed it from the open gate area.
The other texture effect you should be able to see in the above three shots is the area around the group of four cattle. The plash texture has started to “tile” which can give an unwanted checkerboard effect if repeated. That’s why it’s best to give just a sparing single small radius squirt with these detailed textures.
In this instance I think it is acceptable because it is on the edge of where it is blended with the next texture and therefore quite pale. If you want to eliminate it just increase the scale a bit when it won’t be seen if you keep the radius small.
However, what it does show is that blended textures have the effect of doubling the amount of viewable texture in the same area because the newest texture has not completely obliterated the previous one. You can get some great effects doing this thus creating your own unique textured effects in much more detail than a single texture on its own. These effects work well towards the edges where the different textures merge together.
It’s worth experimenting with positioning as well given the variations shown with the red example shapes shown above. It doesn’t always come good first time. A very light touch on the LMB is needed with a very (very!) quick squirt of paint. I do use the undo button a lot!
That old rail shed doesn’t look too good in the above images. It seems to be floating because there is nothing visually “anchoring” it to the ground. A quick fix for this is to place some vegetation around the base which helps to fix it to the landscape.
Obscuring those edges at the base can improve the look of all sorts of hard objects where they meet the ground. Here’s another comparison with some bridge supports.
That's all for now.
Cheers
Casper


