Nature Screenshots! (BIG and NUMEROUS pictures!)

Bob most beautiful this shot wi mnt Oregon. Can you give me hint on the textures you use on the mnt in background and what exact distance this shot was taken that you still see details of the rocky mnt and snow patches? i ask since I refain from trying many times and fail to find a good mix of texutres that fit my purpose on my routes as the distance of the 3D scenery mountains can me km or miles away and than the tetures blur or square or triangle and look hopelessly messy.

Roy;)
 
Hi Casper,

I read with interest your ccomments and replies and notice like all Trainz experts i have met they all have one thing in common: Expertise and skills in Trainz is reflected in rather what not to do than what to do:hehe: or better to avoid:cool:

Keep up the great work you're the TRS2004 grandmaster and lined up together with my fellow countryman Darkdan who sadly "vanished from the trinz scenery".

Warmest regards,

Roy:wave:
 
Tariacuri,
congrats on great shots and crispy textures! The rock is it spline object or just texture and if texture which one you use there look very sharply detailed.

Roy;)
 
Roy: Thank you for the comment..The distance I have my slider on is 2000m..The reason I do is because at 5000m they seem to check out or square like you said, besides it helps the frame rate..I do not have any fog turned on, I get better color results..The Textures I use is as follows: Alps Snow No. 1 kuid -1:100661, Alps Mountain Kuid -1:100660..Then I come back with small circle (Alps Snow) and put the snow into that are low or walled..Thanks for asking it makes me feel good..Tell ning Hi..Happy Trainzing..
 
Thanks Bob,

at least I feel good I not out of this world and tried most of the things possible in Trainz. my sliders or 5km to 8.5km that is why I cannot detail steep rocky sloops far to detailed and keep it sort of heavy snowy and shade from sun to simulate rock sort of.
You really do well but try to look for spots where your textures look to much stretch and simply use F1 d or height down to make the piece of texture smaller and less or not stretched over his visual limites if you know what i mean otherwise your more than on track!

Roy:)
 
Now, where are all of those best match bridges...

Hang on, Casper.. (sigh!) :)

vb1.jpg
 
Bridge building!

Blimey, talk about spoiled for choice!

@vendel

Thanks for the link. :Y:

I didn’t have the iron bridge but did have your FMA series of steel bridge arches in different widths which might be a better match. The w 8 size looks about right for the single track line. It has a nice rusty look which could provide a nice “pre-refurbishment” version of that scene.


@Jayholland


Here’s me making do, and up comes a bespoke versions from the Severn Valley railway!

Very many thanks J. I do hope this won’t be interrupting valuable drinking time! :hehe:

Looks like I’ll have to make two versions of this scene.


@joosten


Hello Roy.

Being a great fan of jazz music I agree with your sentiments. What you leave out is sometimes more important than what you put in.

It‘s a great pity that Darkdan has not been active for a while. It would be nice to think that he is not too far away. His return would be very welcome.


Cheers
Casper
:)
 
I thought I'd share some pics of my continuing project.
I've been updating my Laurel Line Layout from TS09 to TS12. Here are some of the latest pics...I thought they would fit nice in this thread.
laureljunc.jpg

Laurel Junction
connelljunc.jpg

Connell Juction
More detail will be added down the road. I'll post in it's own thread when there are plenty more pictures to share.
 
Victoria Bridge – work in progress

So far so good. I’ve done some work on the bridge area and landscaping.

This is the kitbashed version using one of Vendel’s FMA bridges and one of the German bridges. I’ll put Jay’s in as soon as I can download it.

The first problem I’m having is going through endless building assets to find the best match for each item. I’ll get there though.

The second is the fixed camera’s field of view. It’s such a shame that we don’t have a proper zoom. The present one just tracks.

The original photo that Scratchy’s posted (what have you started!) was taken with a telephoto lens which Surveyor’s camera zoom cannot emulate. I’ll have to experiment with the various “fov” tweaks in TrainzOptions, but from memory the last time I played with these they only affected the Surveyor view and possibly one of the views (?Cab) in Driver. I don’t recall the fixed and tracking camera “fov” being variable at all.

I might be able to get the right perspective and scaling by forgetting the cameras and taking a screenshot in Surveyor after adjusting the TranzOptions surveyorfov value. The problem there is that the train won’t be moving to get the best steam/smoke effects, and getting it to line up perfectly each time is harder to do than with a fixed camera.

Oh well. Press on regardless.

Cheers
Casper
:eek:


11a9d5fb.jpg~original
 
Last edited:
Jay: Nice bridge!

Casper: I think I see a new type of screenshot competition coming up! You've made great progress on this one!
 
The original photo that Scratchy’s posted (what have you started!) was taken with a telephoto lens which Surveyor’s camera zoom cannot emulate. I’ll have to experiment with the various “fov” tweaks in TrainzOptions, but from memory the last time I played with these they only affected the Surveyor view and possibly one of the views (?Cab) in Driver. I don’t recall the fixed and tracking camera “fov” being variable at all.
:hehe: Hey, looking good there casper!
umm with the camera views i might have something for you to mess around with, its true, the camera in surveyor is only tracking, however the camera in the cabs while in driver does allow you to zoom in and such. I'll throw an example in to show you what i mean (one of my first screenshots and the one that started the horseshoe curve project!)
scratchy201102180018.jpg

So this shot was achieved by putting a section of invisible track at a right angle to the track in the shot over the area i wanted to photograph. Then i stuck on a loco- i used a QR steam engine that was built-in and offered many camera locations outside the cab (you can shift locations by pressing the ([ and ]) keys and zoom using the scroll thingy) and bingo, there u go, no interference from any window tint or any section of the cab and zoom.. Im not sure if this is in 04 it was in 06 when i used that last. Maybe give that a go? :)
 
Hi Scratchy.

Nice screenshot!

I notice that you have “lost” the co-ordinate numerical data either by photoshopping or cropping. That’s the only downside to the cab view screenshot process, (apart from making sure that you use a loco with cab view functionality, without which it doesn’t work).

I have used that dodge before for screenshots by using a second loco and going “walkabout” from cab view, so I’m used to the controls.

Apart from the ones you mention there is also mouse movement/RMB so that you can look in any direction and in any plane. You can also get some different movements by using the four arrow keys and the PageUp/PageDown keys. For anyone who might be new to the trick it is important, as you say, to use a second loco to get a complete view of the loco you want to screenshot. You always get a dismembered view of the loco you have “departed” with missing bogies etc., although you can see everything else with no problem.

What has been very helpful, and a new discovery for me, is the ability to use the mouse wheel to roll from wide angle to telephoto. The range is quite substantial. Thanks for the great tip!

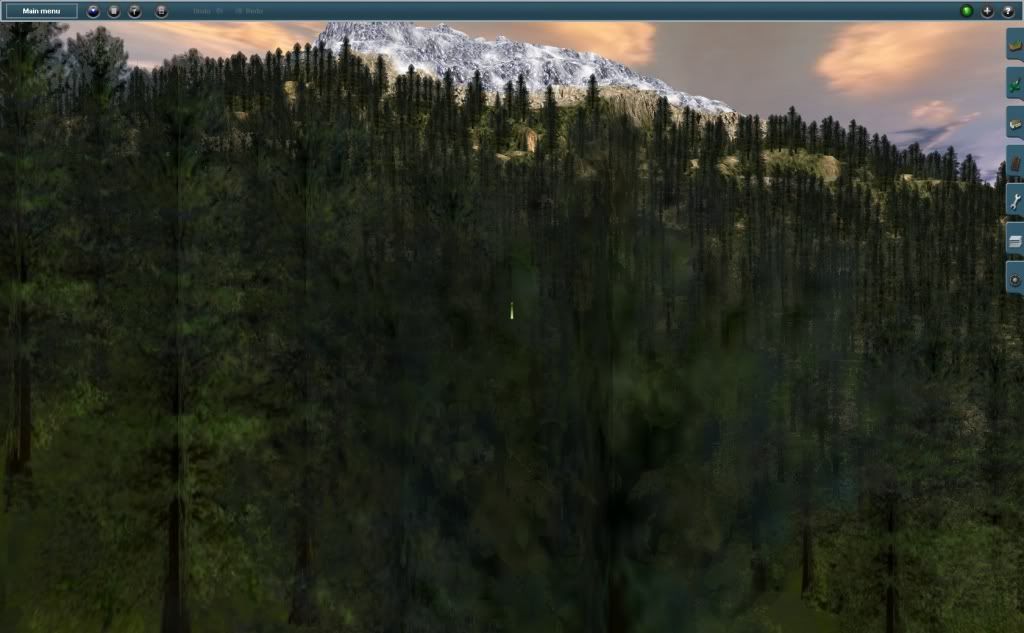
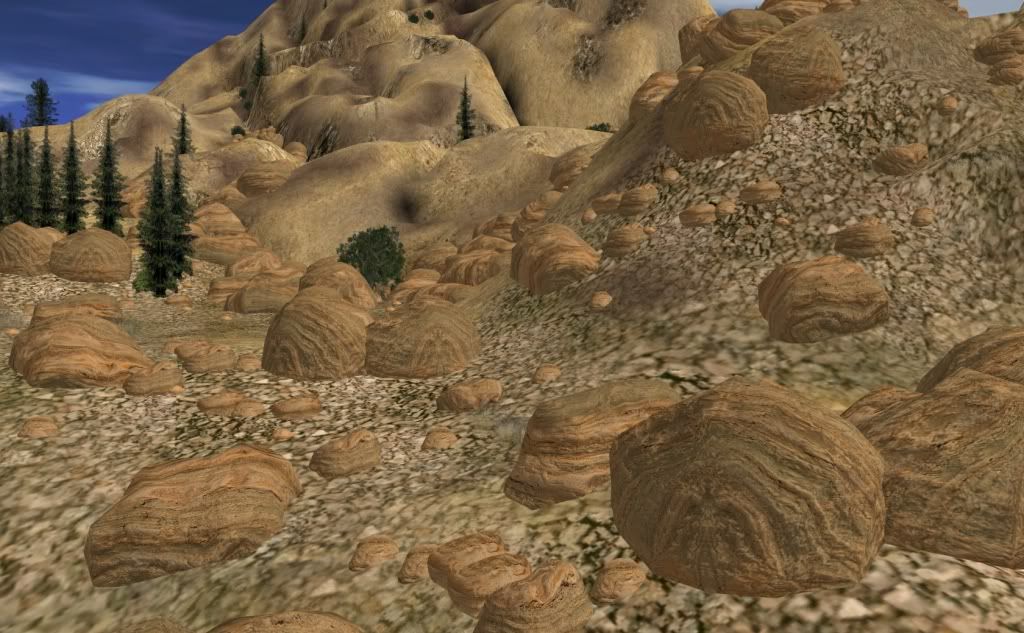
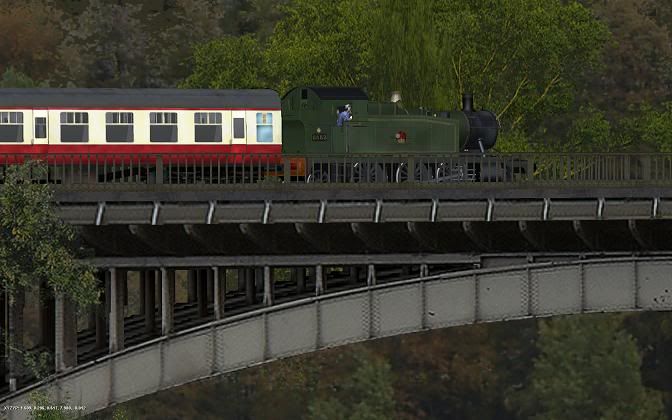
Here’s an example of the extremes, both taken from the same position. What a shame this cannot be done in Surveyor camera setting!

It’s not getting the scene copy much further forward, but it’s teaching me a few new tricks! This zoom “discovery” will bring a whole new dimension to screenshots.:Y:

Cheers
Casper
:)


7358291c.jpg~original


3a996e0a.jpg~original
 
Last edited:
Back
Top