Which comes first,chicken or egg?

Ian_Coleman

New member
I would be very interested to know what an experienced layout-builder does when starting a project.

Does he (or she) lay the tracks and then contour the land, or contour the land first, and then lay the tracks.

I have tried both methods, and I still cannot decide which is best, although I think I prefer to contour the land and then lay the track.

This means that, during the track-laying phase, I have to make continual use of the 'Smooth Spline Height' tool, and also some use of the 'Plateau' button and the Adjust Spline Height tool.

I am not particularly pleased with the result obtained in this way, as I find it very difficult to achieve a pefectly flat track!

I can see that laying track on a perfectly flat baseboard is easier, but there are still gradients to consider.

I would be glad if one or two experienced layout creators could say which method they find best.

Also, can someone please tell me what the 'Split Spline' button does?

Ian
 
...try all ways you find...

:cool: The Spilt Spline button allows you to divide a spline at the spline point to place one end elsewhere or remove a spline at a non moving object(industry, bridges, portals, etc.). eg: You split the spline away from the portal, raise or lower the portal then replace the track to the portal.

Using Digital Elevation Mapping routes from all over the world are being created that use actual landscape profiles to allow prototype operation. This means that when all content is accurately configured, your train operates in the same manor as the real thing.

Since your into starting with a blank baseboard to add practically every desired content, study DEM Mapping & keep this in mind for future use!
 
as I find it very difficult to achieve a pefectly flat track!
That's easy, just use the gradient tool with the percentage set to 0, or get the height of one of you spline points and then set the adjacent ones to the same height. In the real world though, track is rarely flat, usually having at least some gradient. Just make sure all your spline points have a height assigned to them, otherwise when you change the landscape grading you may change the track height too, without meaning to do so.

Personally, when I am doing fictional routes that I just make up as I go along, I always lay the track and set its grades before I do anything else. But everbody likes to work differently.
 
Here's my method:
1. Create the Displacement in Adobe Photoshop. Usually I make one long route, like 40 boards tall by 3-4 boards wide... So I start with a Photoshop size with one inch x one inch equalling one board--- so 40 inches tall (or long) x 3 or 4 inches wide. I start by painting the whole thing in 50% gray, then draw in my rivers, creeks, lakes, etc. with a brush set to about 54% gray. When I have all my water areas drawn, I use the magic wand and Select all my land ares. Then, I go in and paint in my hills and mountains. Here's one I did that is very similar to my "Valley River Railroad" (see screenies in Screenshots:
40x3.jpg


2. I open Surveyor, create my boards to exactly the size I made my displacement in Photoshop, find my created displacement, and drop it in.

3. Next, and I KNOW a lot of people won't agree with this, but I paint EVERYTHING with a dark green grass.

4. I add my water to all my rivers, lakes, streams, etc.

5. I paint in my river, lake, etc. bottoms with usually a sand color, or a tan/light brown rocky color. I usually extend the color along the edges of the water. Here's one example, but you can color to taste, depending on the area you are modelling:
Screen_287.jpg


6. Now I lay in the major lines of my track. JUST the major line, I add spurs and passing track later. I color in the ballast after my track is laid.

7. I lay in my roads and highways... not all, just major ones. I always add a lot of roads and highways as I continue my route creations. I also lay in gravel or side dirt along all roads and highways. It just looks better to me:
Colored.jpg


8. Now, I create my cities, towns, industries, forests, paint my cliff sides, crop fields, and whatever needs painting, etc... but not in any particular order. This is the part where I just get really creative and start the decorating phase.

Is a route EVER finished? In my experience, there is always something I see that I can make better... something I can add to make it more interesting, more functional, etc.

Well, this is the way I do it. You might find a better way.
 
Last edited:
Dave,

I like your method of creating the displacement maps. I've used them myself but not in the manner you have. I only fit them to a single baseboard. Your texturing process is similar to mine. I use a dark green base and then add other colors afterwards. With dark and light colors for the water area and I add some darker color around the trees to give them a little depth so they don't look like they're sticking out of a piece of foam.

I too add a lot of roads as well with a dirt edge along them. This seems to make them blend into with the surrounding area much better than ending abruptly at the grass.

My ballast consists of two parts. I put down a wider texture of dark coal first then put the narrower ballast along the track and let the two mix together. With this it looks like discarded ash along the ROW and it too is less of an abrupt change between the surrounding terrain and the ballasted ROW.

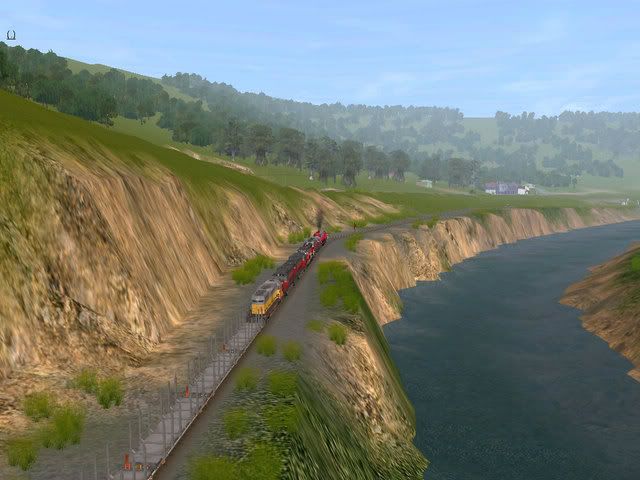
Another thing that I do is to seperate the rr grade from the surrounding landscape so that it sticks up a bit. I make a ditch along the ROW of about -4 to -6 meters along each side of the rr grade. This gives the landscape some profile and less like a trainset with the track placed directly on the plywood.

John
 
Back
Top