Install the app
How to install the app on iOS
Follow along with the video below to see how to install our site as a web app on your home screen.
Note: This feature may not be available in some browsers.
You are using an out of date browser. It may not display this or other websites correctly.
You should upgrade or use an alternative browser.
You should upgrade or use an alternative browser.
Scenery – let’s get real!
- Thread starter mezzoprezzo
- Start date

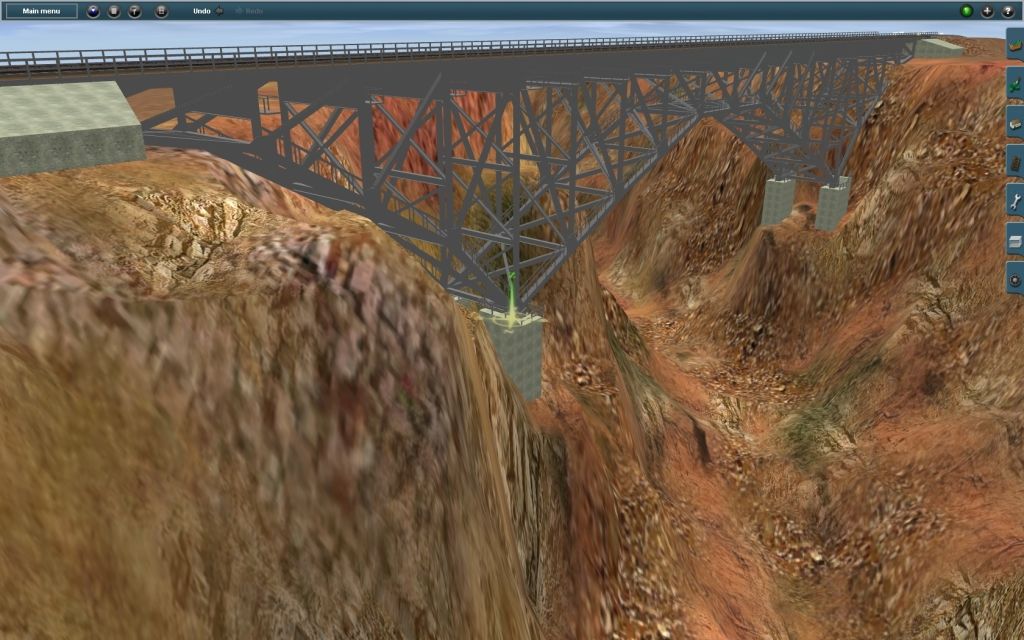
Bob, I think you usually make really nice looking scenery / landscape, but I think you should not have added the rocks in this example.
I think it would have even looked beter without these type of rocks, because rocks in stream / river are (in my experience) rarely if ever the collor these are. They should either be white (due to chalk set-off (not sure if thats the right translation)), green (due to moss / vegitation growing on the rock) or a grey shade (due to.. well... being rock and not sandstone).
And yes, I know, thats a comment from someone who himself has failed to produce anything close to life-like.
")
Great minds thinking alike:
http://forums.auran.com/trainz/showthread.php?84139-Northern-Arizona-Route&p=1007465#post1007465
http://forums.auran.com/trainz/showthread.php?84139-Northern-Arizona-Route&p=1007465#post1007465
misterchugg
Active member
very nice work
cheers
ron
cheers
ron
mezzoprezzo
Content appreciator
Here are two more examples of stuff I’ve done using the basic set of Trainz tools.
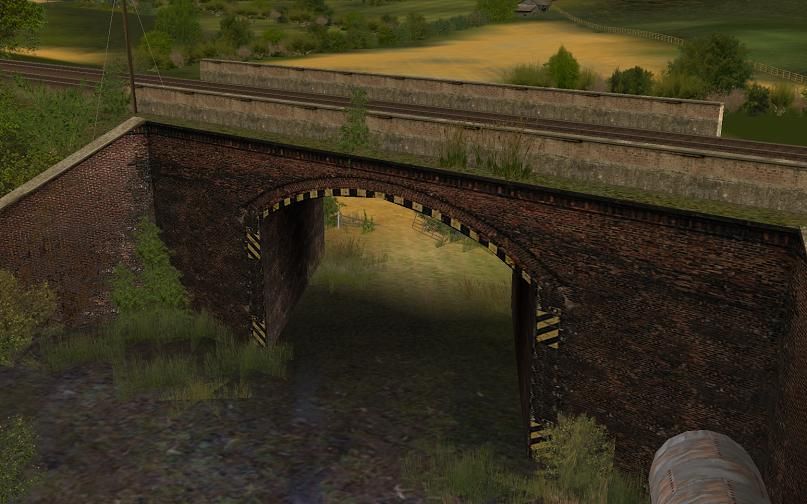
Bridge shadows
In post #26 I showed some examples of the texture paint spray patterns which will be different depending upon the position of the cursor within the grid square when the spray is applied.
Many of them have a V shaped edge. That little idiosyncrasy allows you to get shadows under a bridge.
First paint the coloured image of grass, dirt, plash etc. that you want under and around the bridge area. You can apply these as a single texture or, better still, in overlapping combinations to get your own completely unique result. Undo and rotate are useful tools if the first attempts don’t look quite right.
Finally, to get the angled shadow, set the radius to minimum and give a very (very!) quick squirt of a fairly plain dark texture, applying just enough to darken the scene without blotting out the underlying textures.
I rotate the angle and slightly alter the mouse position to find the best “shadow” angle for the scene. Use of the undo button is almost always necessary to get just the right amount of darkening and best shadow angle.
The “darkening” texture I’ve used here is DEAN carbon02 <kuid:236618:50041>. It’s on the DLS.
Using contrasting colours in the lighter areas of the countryside either side of the bridge also helps with the illusion.
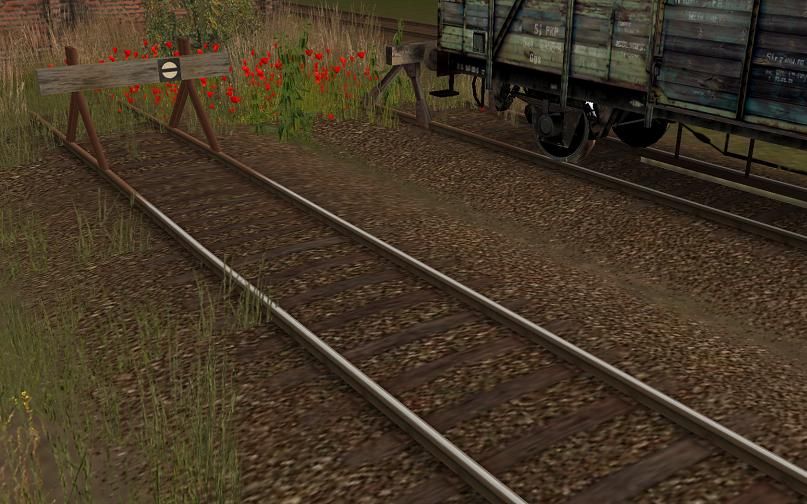
Rail transitions
At track ends, where there are buffers, the rails which bogies can never reach will be rustier than the active section of track.
Some series of tracks have shiny and rusty versions. However, when trying to emulate the real thing, these don’t look good when simply butt joined together.
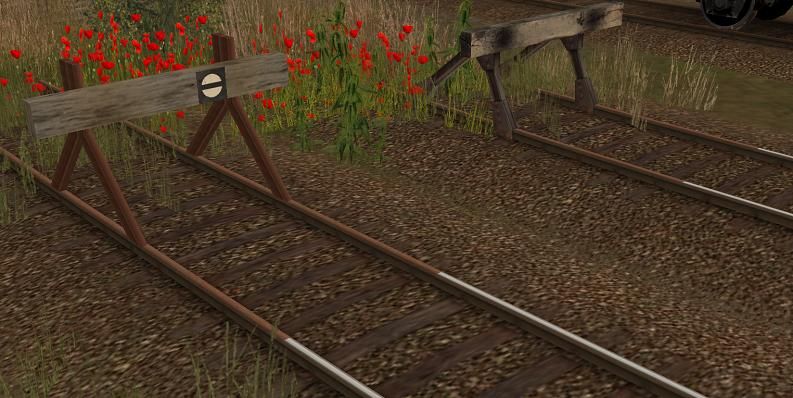
There are creators who provide nice transition pieces which give a gradual change from shiny to rusty. It’s well worth using these to get a realistic effect.
If the required asset does not exist then you could create your own transition piece by manipulating the original texture file of one of the track pieces, adding a small section of the rail of the second and blending the two together. I’ve done that here, but got the original creator’s permission prior to attempting any changes. I understand it’s not always necessary for “own use”, but I think it’s polite to do so.
That’s all for now.
Cheers
Casper
Bridge shadows
In post #26 I showed some examples of the texture paint spray patterns which will be different depending upon the position of the cursor within the grid square when the spray is applied.
Many of them have a V shaped edge. That little idiosyncrasy allows you to get shadows under a bridge.
First paint the coloured image of grass, dirt, plash etc. that you want under and around the bridge area. You can apply these as a single texture or, better still, in overlapping combinations to get your own completely unique result. Undo and rotate are useful tools if the first attempts don’t look quite right.
Finally, to get the angled shadow, set the radius to minimum and give a very (very!) quick squirt of a fairly plain dark texture, applying just enough to darken the scene without blotting out the underlying textures.
I rotate the angle and slightly alter the mouse position to find the best “shadow” angle for the scene. Use of the undo button is almost always necessary to get just the right amount of darkening and best shadow angle.
The “darkening” texture I’ve used here is DEAN carbon02 <kuid:236618:50041>. It’s on the DLS.
Using contrasting colours in the lighter areas of the countryside either side of the bridge also helps with the illusion.
Rail transitions
At track ends, where there are buffers, the rails which bogies can never reach will be rustier than the active section of track.
Some series of tracks have shiny and rusty versions. However, when trying to emulate the real thing, these don’t look good when simply butt joined together.
There are creators who provide nice transition pieces which give a gradual change from shiny to rusty. It’s well worth using these to get a realistic effect.
If the required asset does not exist then you could create your own transition piece by manipulating the original texture file of one of the track pieces, adding a small section of the rail of the second and blending the two together. I’ve done that here, but got the original creator’s permission prior to attempting any changes. I understand it’s not always necessary for “own use”, but I think it’s polite to do so.
That’s all for now.
Cheers
Casper
Last edited:
Retro00064
New member
Nice work Casper! Great to see that you've managed to get some custom content into Trainz.

mezzoprezzo
Content appreciator
@Isegrinns
@BobCass
Thanks guys.
It’s only taken this techno-numptie four years , but it’s becoming clearer.
I’ve created a number of skies as well. All of that has given me a much better understanding of how the whole asset package has to be put together.
In addition I've worked out how hop through/over all of the Vista hoops/hurdles to get everything into Trainz. The help and advice provided by yourself and many others over the years looks to be finally paying off.
I must revisit some of my early gmax models at some stage and see if I can package them properly and get them to finally work.
@BobCass
Thanks guys.
Thanks Zachary.~snip~ Great to see that you've managed to get some custom content into Trainz.
It’s only taken this techno-numptie four years
, but it’s becoming clearer.I’ve created a number of skies as well. All of that has given me a much better understanding of how the whole asset package has to be put together.
In addition I've worked out how hop through/over all of the Vista hoops/hurdles to get everything into Trainz. The help and advice provided by yourself and many others over the years looks to be finally paying off.
I must revisit some of my early gmax models at some stage and see if I can package them properly and get them to finally work.
Similar threads
- Replies
- 6
- Views
- 667
- Replies
- 11
- Views
- 467
- Replies
- 4
- Views
- 1K
- Replies
- 10
- Views
- 576