Tunnels can be very hard to work with. Most of them snap into directions you don't want them to go, and you have to work around that to make your trackwork straight with no kinks. Most of the tunnels have decent portals, but most are not electrified. This leaves us with the following tunnels:
Tunnel Beton 2t (KUID 64819:38002)
Tunnel Beton 2t E (KUID 64819:38003)
When applied to your route, photo 00 shows what you get:

Nicely-shaped portal, actually, but blindingly white and pretty unattractive.
To counter this, I've discovered a way to hide 90% of that white and make the portal pretty decent looking. To do that, you need the following:
FMA Complete Bridge Concrete w 8 (KUID2:52:37369:2)
Retaining Wall Dark Stone (KUID2:56199:37002:1)
And, as you'll see in photo 03, to cover a tiny white square, you will need:
Retaining Wall Greystone (KUID2:69518:37126:3)
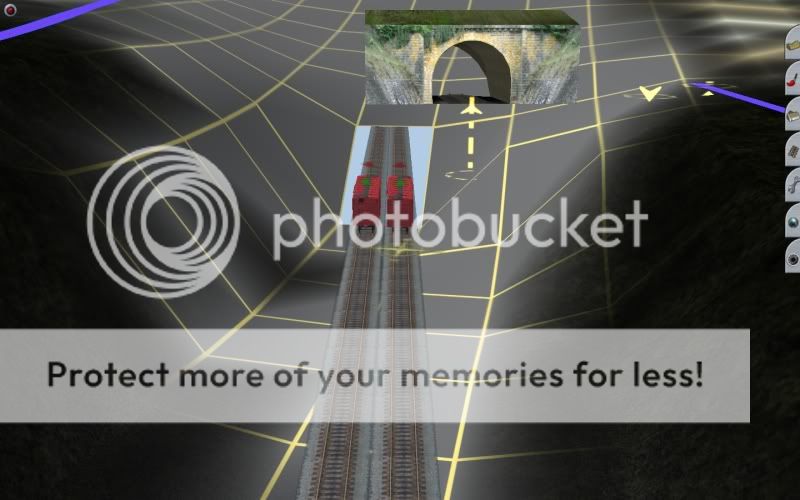
Photo 01 shows the FMA bridge in place across the portal. It is lowered down until the center of the bridge just touches the top of the portal arch. Don't worry about the rounded bulge that sticks up through the bridge. Move the bridge sidewalls in until they just hide the front of the portal arch.

Photo 02 is a closer look at how the bridge covers the portal arch.

Now, once all that is in place, it is time to cover the rest of the portal. I use Retaining Wall Dark Stone as I happen to like that particular texture, but you can use any other type of retaining wall as long as it has the same height as mine.
Once you get the retaining wall down to the point at which is just touches the bridge, you have picture 03. As I mentioned, if the retaining wall is adjusted downwards just right, there is a small pop-through of portal to cover. I circled it.

You might think that the terrain will cover the white square, but due to the nature of the portal, it will pull down any efforts at covering and keep "unhiding" that square. To cover that, I use a retaining wall with no railing named 'Retaining Wall Greystone'.
In place and adjusted to the same vertex height at the other retaining wall, it will cover the white square, as picture 04 shows,

Seen from ground level again, with the bridge and both retaining walls in place, you have picture 05.

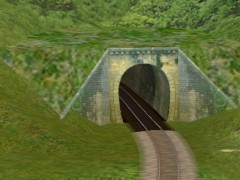
Turn on the terrain textures, and this is the completed portal modification. The little white triangles can be nearly hidden by catenary or signs, or just left alone as they don't really detract from the overall look.

And, there you have it.
Bill
Tunnel Beton 2t (KUID 64819:38002)
Tunnel Beton 2t E (KUID 64819:38003)
When applied to your route, photo 00 shows what you get:
Nicely-shaped portal, actually, but blindingly white and pretty unattractive.
To counter this, I've discovered a way to hide 90% of that white and make the portal pretty decent looking. To do that, you need the following:
FMA Complete Bridge Concrete w 8 (KUID2:52:37369:2)
Retaining Wall Dark Stone (KUID2:56199:37002:1)
And, as you'll see in photo 03, to cover a tiny white square, you will need:
Retaining Wall Greystone (KUID2:69518:37126:3)
Photo 01 shows the FMA bridge in place across the portal. It is lowered down until the center of the bridge just touches the top of the portal arch. Don't worry about the rounded bulge that sticks up through the bridge. Move the bridge sidewalls in until they just hide the front of the portal arch.
Photo 02 is a closer look at how the bridge covers the portal arch.
Now, once all that is in place, it is time to cover the rest of the portal. I use Retaining Wall Dark Stone as I happen to like that particular texture, but you can use any other type of retaining wall as long as it has the same height as mine.
Once you get the retaining wall down to the point at which is just touches the bridge, you have picture 03. As I mentioned, if the retaining wall is adjusted downwards just right, there is a small pop-through of portal to cover. I circled it.
You might think that the terrain will cover the white square, but due to the nature of the portal, it will pull down any efforts at covering and keep "unhiding" that square. To cover that, I use a retaining wall with no railing named 'Retaining Wall Greystone'.
In place and adjusted to the same vertex height at the other retaining wall, it will cover the white square, as picture 04 shows,
Seen from ground level again, with the bridge and both retaining walls in place, you have picture 05.
Turn on the terrain textures, and this is the completed portal modification. The little white triangles can be nearly hidden by catenary or signs, or just left alone as they don't really detract from the overall look.
And, there you have it.
Bill