Install the app
How to install the app on iOS
Follow along with the video below to see how to install our site as a web app on your home screen.
Note: This feature may not be available in some browsers.
You are using an out of date browser. It may not display this or other websites correctly.
You should upgrade or use an alternative browser.
You should upgrade or use an alternative browser.
Why is there an extra wheel floating on top of the train???
- Thread starter JJJAYJAY
- Start date
My guess would be that they are spares in case one of the driving wheels has a puncture? But I must admit it is a rather strange place to store the spare and must create havoc when going through tunnels and under bridges.
The locos are old, asset build number 1.3, which goes back to the original release of Trainz over 20 years ago.
This problem has been posted about in these forums before:-
https://forums.auran.com/threads/error-with-br-44-german-engine.146674/
There appears to be no solution. Other posts reveal that there seems to be no tenders available for these locos.
My recommendation, delete them and find something else.
Thing is though, I don't see that extra wheel in TS12.My guess would be that they are spares in case one of the driving wheels has a puncture? But I must admit it is a rather strange place to store the spare and must create havoc when going through tunnels and under bridges.
The locos are old, asset build number 1.3, which goes back to the original release of Trainz over 20 years ago.
This problem has been posted about in these forums before:-
https://forums.auran.com/threads/error-with-br-44-german-engine.146674/
There appears to be no solution. Other posts reveal that there seems to be no tenders available for these locos.
My recommendation, delete them and find something else.
RetroRails12
Well-known member
Find Something Else like Pware says to do....Thing is though, I don't see that extra wheel in TS12.
Alright alright, I was just wondering y there’s a wheel there. :/Find Something Else like Pware says to do....
Or maybe some sort of special pantograph? Lmao.3rd rail
That would clearly indicate that the locos do not meet the standard for TRS22. Another reason for deleting them.Thing is though, I don't see that extra wheel in TS12.
I might make something to give the wheel a purpose. Pdkoester gave me an idea.That would clearly indicate that the locos do not meet the standard for TRS22. Another reason for deleting them.
I wonder if this has something to do with wheel animation and this is supposed to be a hidden reference object that is attached to the visible instance object wheels. I've seen this done to control many machines in a room where only a single model was created and the others were clones of that but there were no meshes for them.That would clearly indicate that the locos do not meet the standard for TRS22. Another reason for deleting them.
To remove the flying wheel, the main bogies could be fixed using the IM Editor.
<kuid:48366:50003> fix the mesh br44_bogey.im
<kuid:48366:50006> fix the mesh br44_drg_bogey.im
<kuid:48366:50007> fix the mesh br44_drg_uekbogey.im
The fix is the same for all 3 bogeys:
- create a fully transparent file invisible.tga (alpha channel must be black)
- create the file invisible.texture.txt
- open the asset in explorer
- copy the 2 files to the opened folder
- open the .im file with the IM Editor
- at object 24 change the diffuse texture of the material to invisible.texture.txt
- change opacity to 0 (probably not required, but I did it)
- save the modified file, and exe IM Editor
- submit the changed asset.
Peter
<kuid:48366:50003> fix the mesh br44_bogey.im
<kuid:48366:50006> fix the mesh br44_drg_bogey.im
<kuid:48366:50007> fix the mesh br44_drg_uekbogey.im
The fix is the same for all 3 bogeys:
- create a fully transparent file invisible.tga (alpha channel must be black)
- create the file invisible.texture.txt
Code:
Primary=invisible.tga
Alpha=invisible.tga
- copy the 2 files to the opened folder
- open the .im file with the IM Editor
- at object 24 change the diffuse texture of the material to invisible.texture.txt
- change opacity to 0 (probably not required, but I did it)
- save the modified file, and exe IM Editor
- submit the changed asset.
Peter
Last edited:
zatovisualworks
Veteran but blossoming
Hi there,
Reasonably priced...

 slw.ibertrainz.eu
")
Reasonably priced...
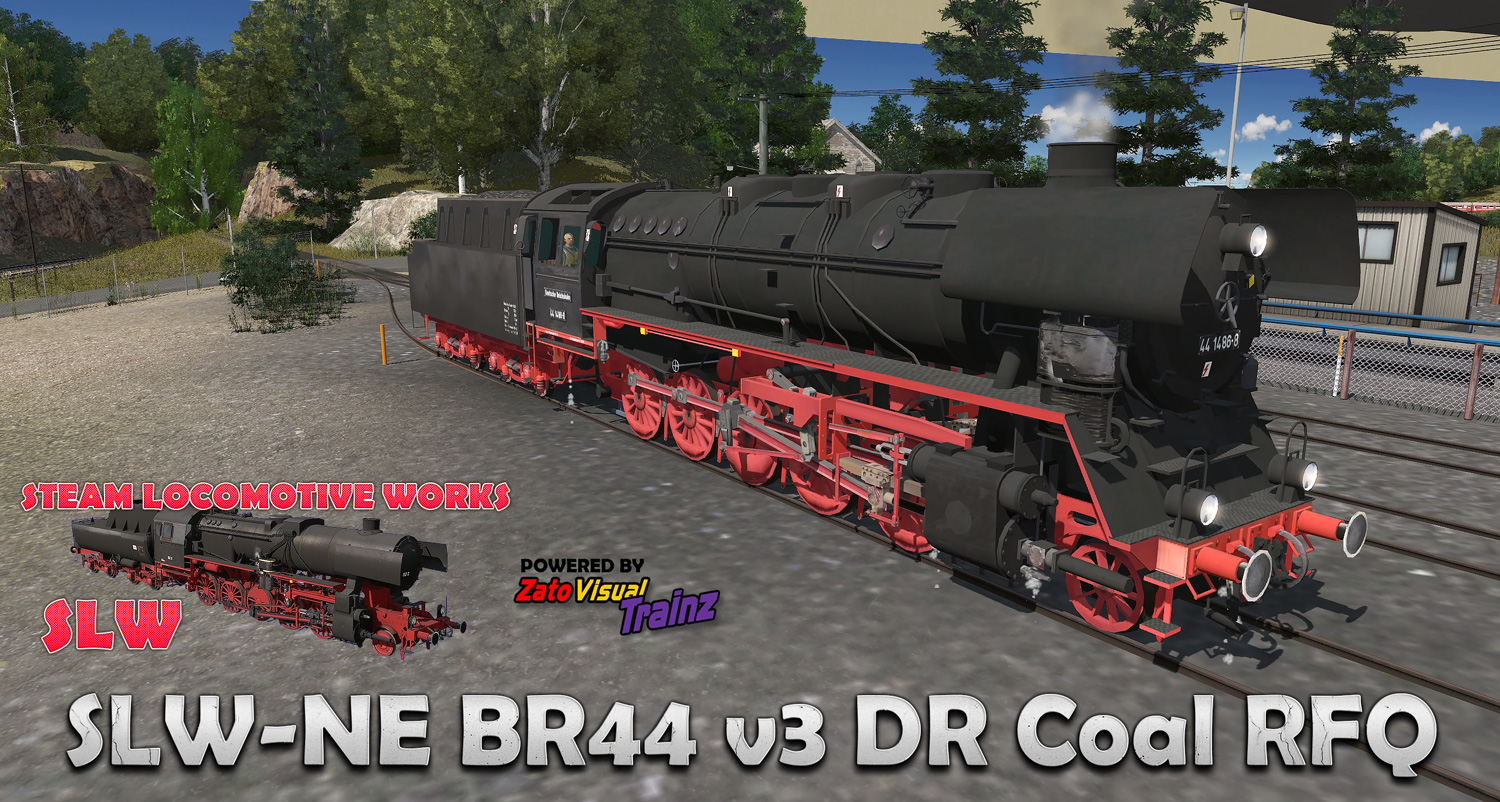
SLW-NE BR44 v3 DR Coal RFQ Series - Steam Locomotive Works
Another add-on to the Refurbished Quality (RFQ), SLW-NE shows up the iconic loco BR44 DR depicting the coaled version as always with fine modelling details and enhanced textures and tweaks for TRS22 & Plus – reasonably priced for a fine loco+tender set within this RFQ series. SLW team Full cab...
Frank_Dean
Well-known member
Some German steam locomotives can be found on trainz.de, no registration is required and they are free of charge.
Trainz.de general page: https://www.trainz.de/
Trainz.de download page: https://www.trainz.de/download/
Steam locomotive download page: https://www.trainz.de/tagged/1568-dampflok/?objectType=com.woltlab.filebase.file
Trainz.de general page: https://www.trainz.de/
Trainz.de download page: https://www.trainz.de/download/
Steam locomotive download page: https://www.trainz.de/tagged/1568-dampflok/?objectType=com.woltlab.filebase.file
Based upon the indicated fix and this being in a 1.3 build loco, I wonder if this is a byproduct of the technique discovered by someone in the community back then to get steam locos to track properly. Creators used an invisible bogie at the location of the drivers to keep them from swinging wide of the track in curves as only the leading truck and the trailing trucks were used as bogie attachment points and tracked around the curves. You didn't want the driver wheels to rotate to follow the track as that isn't realistic so an invisible bogie following the curve made the loco follow the curve in a more realistic manner.
What if it’s a pm instead of an im???To remove the flying wheel, the main bogies could be fixed using the IM Editor.
<kuid:48366:50003> fix the mesh br44_bogey.im
<kuid:48366:50006> fix the mesh br44_drg_bogey.im
<kuid:48366:50007> fix the mesh br44_drg_uekbogey.im
The fix is the same for all 3 bogeys:
- create a fully transparent file invisible.tga (alpha channel must be black)
- create the file invisible.texture.txt
- open the asset in explorerCode:Primary=invisible.tga Alpha=invisible.tga
- copy the 2 files to the opened folder
- open the .im file with the IM Editor
- at object 24 change the diffuse texture of the material to invisible.texture.txt
- change opacity to 0 (probably not required, but I did it)
- save the modified file, and exe IM Editor
- submit the changed asset.
Peter
You will need to convert the file to im using PEV's pm2im utility then update the config.txt file to reflect that change.What if it’s a pm instead of an im???
What way do I update the config.txt file?You will need to convert the file to im using PEV's pm2im utility then update the config.txt file to reflect that change.
You will need to open the asset for editing.What way do I update the config.txt file?
In Content Manager, right click on the asset and choose Open... Edit config file. This will open the config.txt file in Notepad or some other text editor. Never open up config.txt files in Word or some other word processor because that will corrupt it.
FYI: The asset will need to be opened before running pm2im anyway.
Yeah, but what do I edit in the notepad?You will need to open the asset for editing.
In Content Manager, right click on the asset and choose Open... Edit config file. This will open the config.txt file in Notepad or some other text editor. Never open up config.txt files in Word or some other word processor because that will corrupt it.
FYI: The asset will need to be opened before running pm2im anyway.
You'll need to find the .pm files and rename the .pm to .im.Yeah, but what do I edit in the notepad?
Now, it can be a bit complicated depending upon how old the asset is. If there is no mesh-table, you'll need to create one like this. This is just an example and doesn't reflect exactly that asset you are attempting to repair.
Code:
mesh-table
{
  default
  {
    mesh                                "gp9 high hood undec_body/gp9 high hood undec_body.im"
    auto-create                         1
  }

  shadow
  {
    mesh                                "gp9 high hood undec_body/shadow.im"
  }
}Similar threads
- Replies
- 5
- Views
- 1K
- Replies
- 10
- Views
- 1K
- Replies
- 2
- Views
- 1K
- Replies
- 0
- Views
- 275