You need to adjust your view so that your camera angle is right overhead. Once adjusted, you screen capture the area and adjust the size so that the image is 720 x 720. You repeat this for as many images you need. Once captures, you then use basemapz objects. These are scenery assets that will hold the image by replacing the stock image with one of your own named exactly the same.
To use these basemapz objects, you place them slightly under the ground-surface and lock them in place on a separate layer to prevent them from moving. Once in place, you then lay your track on top and build up your landscape as necessary. While this process is great for small projects, it's still, by far, a long process that will take many, many hours of to perfecting and implementation. Your best bet is to spend about $26-28 on TransDEM.
TransDEM (rolandziegler.de)
TransDEM will allow you to import DEM data, meaning the height information so you will have your hills, and allow you to import and place topographic maps, or orthographic images in place. Once placed, you can then export the package as a single rout ready for track-laying and road building. Using data from the National Server (USGS) you can access historical topographic maps, which will show abandoned ROW as well as current ones and ROW that are abandoned now, but weren't when the map was generated.
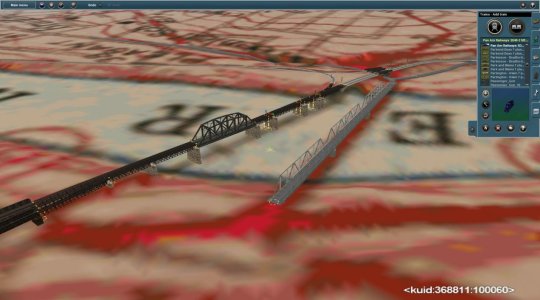
Here's Haverhill, MA Merrimack River bridge with a bit of artistic license using a TransDEM-generated map. I put in a scissors wye to connect the Georgetown branch from the north as well as the south from the actual connection. Looking at some historic maps, prior to 1910 when this bridge was put in, there was a wye there but that was removed when the grade separation was done. My wye takes into account the current alignment so the layout is different. The topographic map dates back to ca. 1944-45 and is superimposed over current DEM data.