How To Build a Dam

JonMyrlennBailey

Well-known member
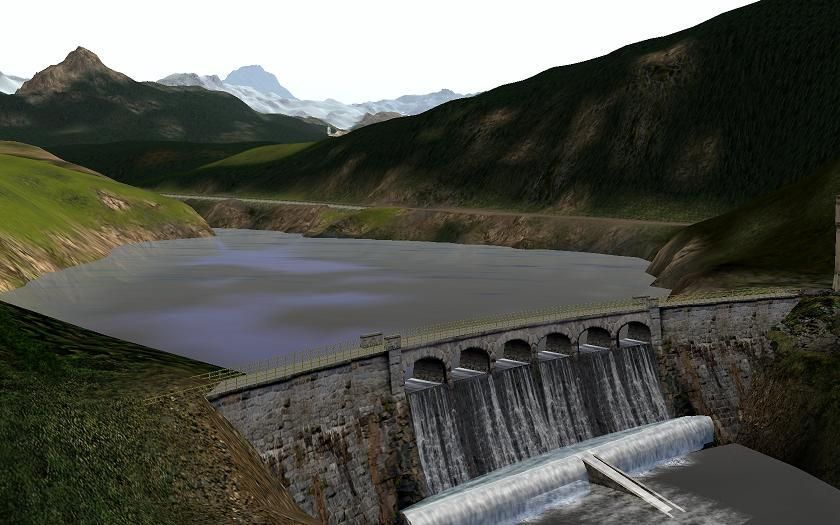
The dam should be an arched dam. That is a damn that is curved. The convex side should be the side water flows into. Water should be discharged from the spillway on the concave side. I have a dam on my reservoir whose spillway dumps into a river which is flowing toward a lower ground elevation on my Trainz map. The trouble with Topology water chips is that they can only be square and level with no option to slope them downward. There are river water splines that can be made to cant downhill but they look phony and have no ripple animation. For this reason the water level is the same on both sides of my dam as the dam wall is thin and the large water chips would protrude through the dam wall from the lake side and parts of their edges and corners would be exposed in mid air on the river side if the water lever on the river side were lower than that on the reservoir or lake side of the dam. The water pressure is greater on the convex side because when water presses against it, it actually compresses the dam material making the dam, ironically, tougher. The pictures below show the engineering logic of dam construction. My dam prevents my lake from flooding its shores while holding my reservoir (man-made lake) with boats, marina, day-use recreational park, boat ramps, sportsman's access road, private lakeside homes, dock
dam%20spillway%20side_zpsmunazr5c.jpg

dam%20opposite%20spillway%20side_zpsba1bboqj.jpg
s, train and road bridge over it, Vulcan's train vehicle float plane and fishing scenes to maximum capacity.
 
Who gives a ...

You have to apply water at a higher elevation on the lake side of the dam ... and cut the river side water squares away, so they do not meet a separation, as at least 1 empty water square is needed in the cut ... like it or not, that is a fact ... if the water meets, all water will be at the same elevation ... if they touch ... raise one, the other raises too.

You may be able to overlap water, by cutting the two water layers, and crank it down under the top layer, then add squares to the lower water level ... But IDK the results
 
Last edited:
You have to apply water at a higher elevation on the lake side of the dam ... and cut the river side water squares away, so they do not meet a separation, as at least 1 empty water square is needed in the cut ... like it or not, that is a fact ... if the water meets, all water will be at the same elevation ... if they touch ... raise one, the other raises too.

You may be able to overlap water, and crank it down under the top layer ... But IDK the results
Not true. (My emphasis in red).

You can set water tiles next to each other at different levels.

Just lay them at their different levels at a distance and bring them towards each other. The final, adjacent, water tile can be a bit tricky. Just minimise the radius and gradually creep closer to the adjoining edge as you lay the final pieces and they shouldn’t join together at the same height.

The straight edge is a bit of a hindrance with a curved dam wall, but provided the base is wide and deep enough it’s never been a problem for me. It just might be sometimes necessary to move the dam asset slightly to ensure a good fit.

Here one laid on one of my routes.

Cheers
Casper
:)


dam%20water%20levels%201_zpsopids0kp.jpg~original
 
If you change from 10m grid to 5m grid and leave yourself 2 grids between the water levels to work in, you can still give a curved effect for your dam.
Cheers,
Roy3b3
 
How does one change grids?

Very carefully!

In TS12 there is a bug that can lead to texture and elevation errors (the dreaded "spikes" and "cavities" along baseboard boundaries) when you use both 5m and 10m grid settings in the same layout. Best to use the same grid size setting throughout the whole layout. The same bug may still be present in T:ANE.

In TS12 right-mouse-click on the "Add Ground" button in the Topology tool and select the desired grid size.

In TANE the grid size setting appears directly in the Topology tool.

In either case, clicking on a empty area (outside the existing baseboards) will create the new baseboard with the new grid setting. Clicking on an existing baseboard will generate a warning about the impossibility of "undoing" the change, clicking Ok will reset the grid on that baseboard to the new setting.

The setting you choose is applied to the selected (current) or new baseboard only. There is no way that I am aware of to change the setting in an entire layout at once. You have to do it baseboard by baseboard.
 
Last edited:
I will add that if you make the grid change after texturing, you will end up with textures aligned in blocks like bricks rather than blended and it's a difficult job fixing this mess once you get into it. It's not like I didn't discover this one the hard way, which I did when the 5m grid was first introduced!

John
 
... to which I will add that correcting these errors (a very time consuming task) will not solve the problem. After saving the corrected layout and later reloading it, they will reappear.
 
I would think that the 5m grid is yet another somewhat worthless design ... as with using a 10m grid, using walls and splines, you can achieve vertical terrain and curves in Trainz, like on Model RR Trainz platform routes
 
Last edited:
I am just going to leave the water on both sides of my curved dam at the same level to make things headache-free and look fairly neat. In the real word, a landslide down river could conceivably back it up so it is at the same level as the lake on the other side of the dam up river at the spillway overflow level. Some clever, resourceful and enterprising asset maker has not YET come out with reduced-size water chips to make the water seamless along thin-walled dams and levees.
 
Last edited:
I've really had only one attempt at a damn, it was in TS12, so results aren't the greatest. TANE is nicer to deal with water, you can "stitch" 2 levels together which I like for water falls etc, much nicer than TS12.
Pic. Dam attempt in TS12 (now imported into TANE but I haven't looked at tidying it up yet)

dam.jpg


Pic2. Water level stitching in TANE. (work in progress area and unfinished - waterfall bottom plume asset on the upper fall)

water.jpg


And yeah, 5m grids are a royal pain in the butt, I can see their usages and I'm mixing 5 and 10s in this layout where it requires it, but to get things smooth in very time consuming. TANE seems to have no trouble using both - so far so good anyway.
 
Back
Top