At the time of writing this some 40 of us have downloaded all or some of timsergey's templates.
I'm wondering if anyone has sorted out how they work.
I've spent almost all my allocated "Trainz Time" on them today - without success.
I've assumed they work pretty much the same as previous templates, using the connection points to join the rails to the template and then delete the template.
Doesn't want to do that for me, even though the connection points all seem to be there.
They look like they will be a good quick way to get turnouts looking right, so I'm wondering if anyone has had any success attaching tracks.
Appreciate your comments.
Stay Safe
Cheers
NickE
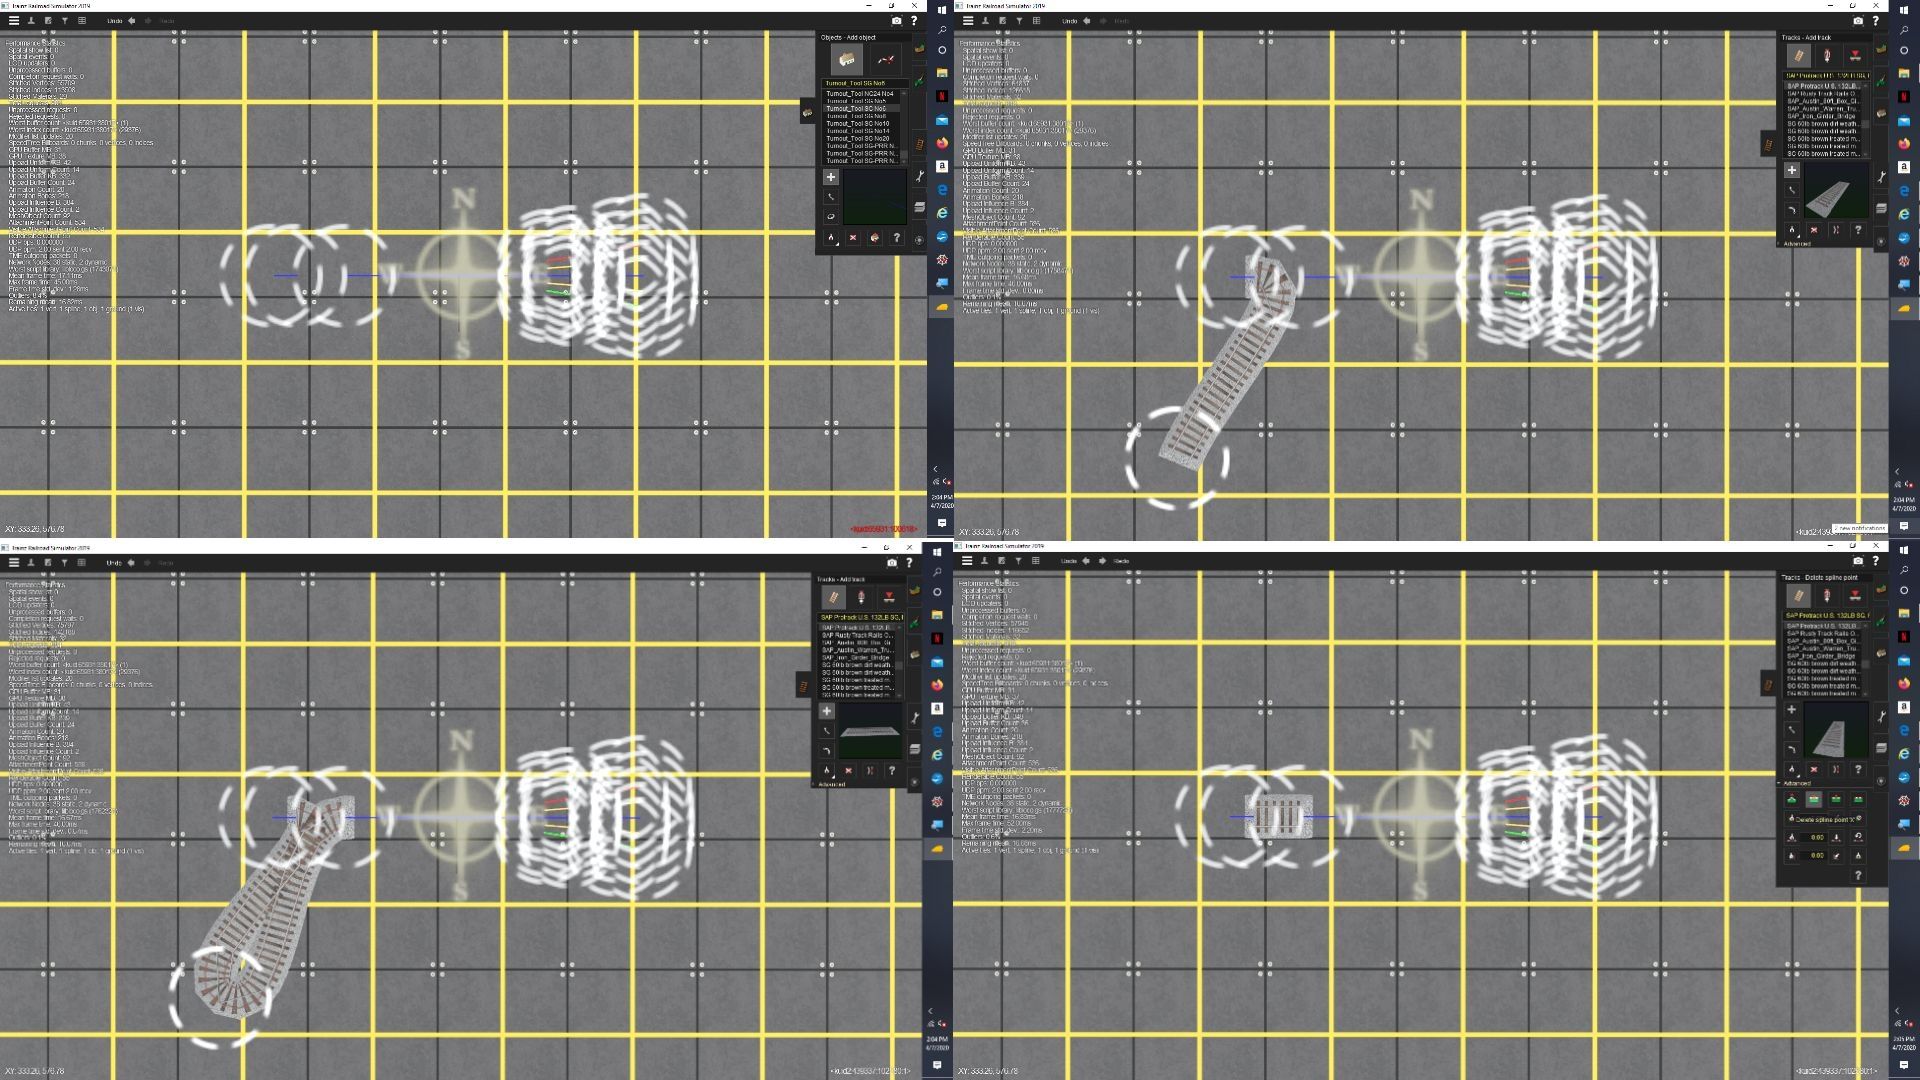
I'm not entirely sure about timsergey's templates. They are fixed track assets but I think they work pretty much like a set of templates that I'm making for my own use. The pics are from an older version of one of my templates that can be used to make either a right, left or wye turnout from a single template. Each template represents a single frog number (a numeral based on the tangent of the half frog angle). Since the turnout is a function of track gauge there is a series of templates based on track gauge. Also there are several other factors such as length of switch blades, heel and point offset and length of tangent sections built into the turnout - all based on which design agency or railroad specified the design. So separate series of templates based on RR or design agency are also possible.
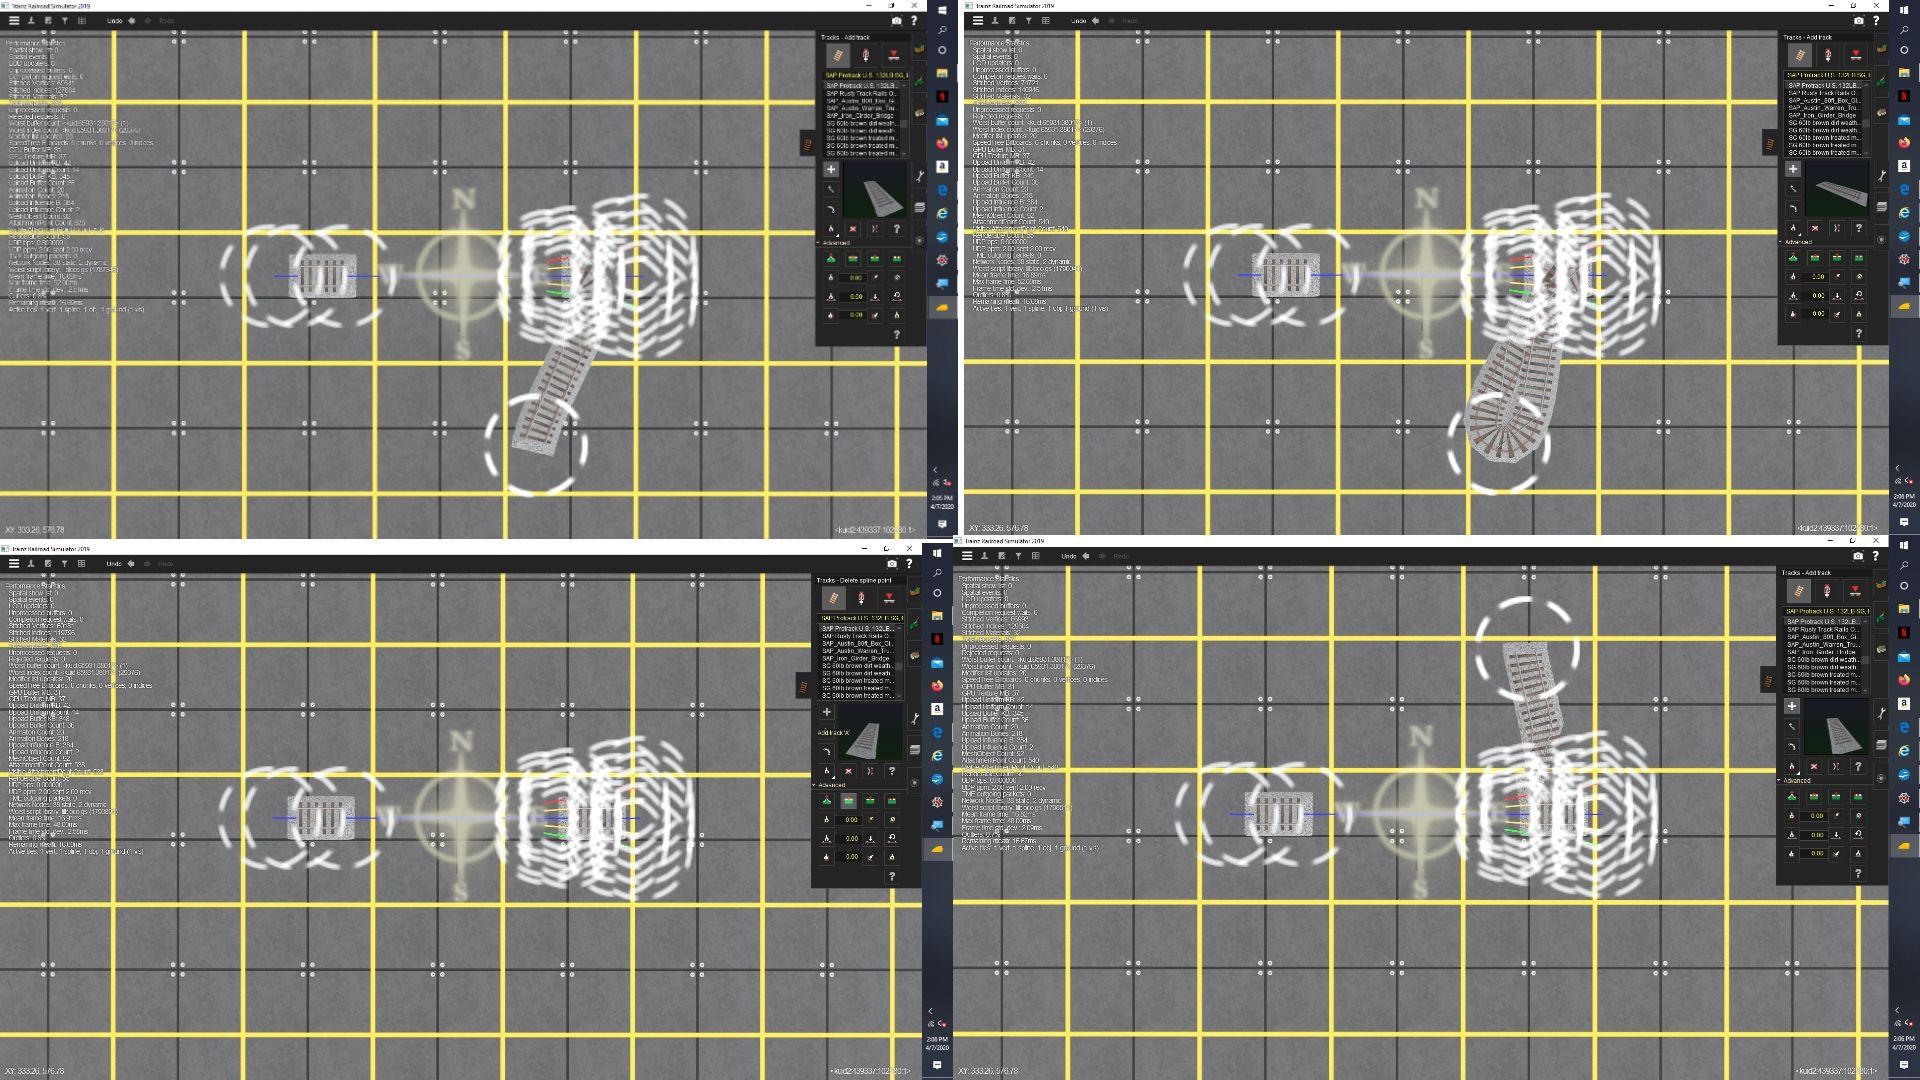
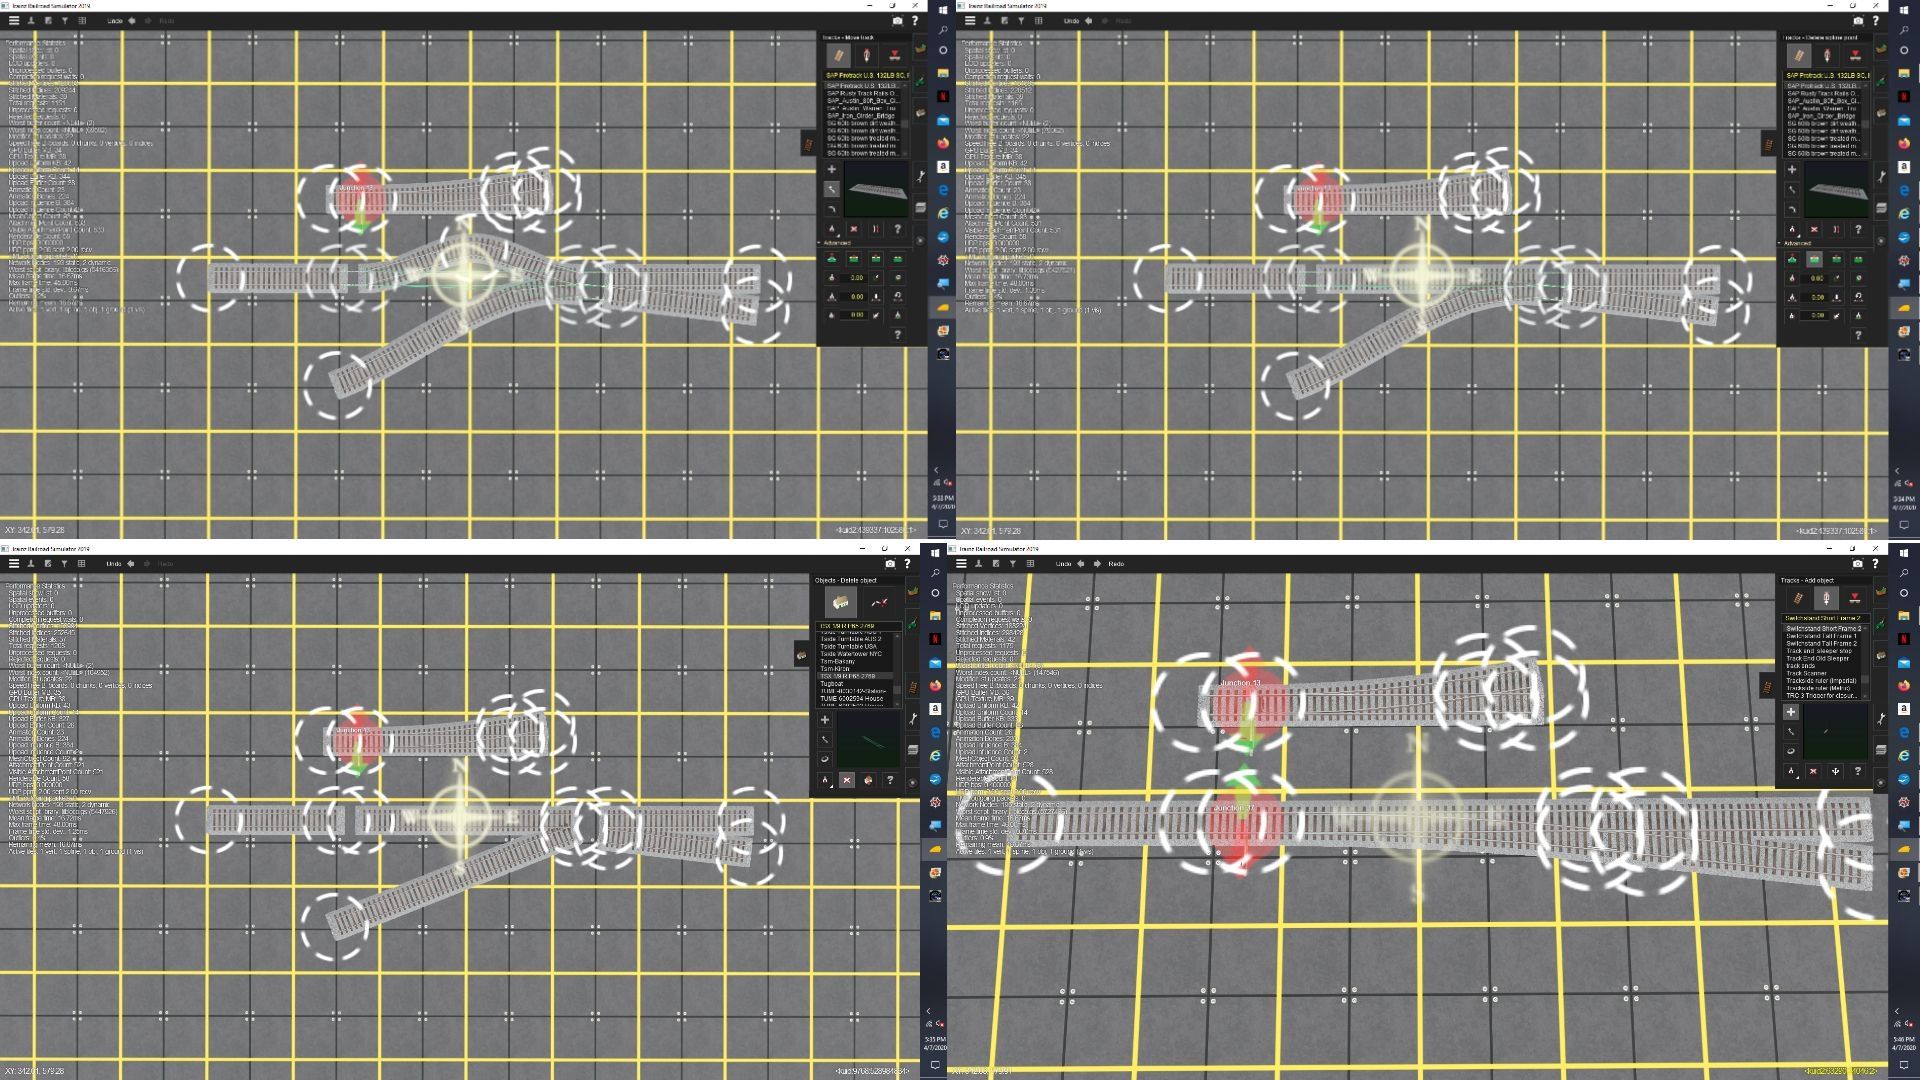
I can see some difference but the following pics show how mine work. I place a scenery asset (it's a kind buildable which is a scenery with track asset) in this case a SG #6 frog template and move and rotate it into position. I then "wire" up spline track sections to form 3 stub section of track. I use the straighten track tool on the 3 stub sections then I delete the scenery asset, connect up 2 sections of spline track, add a turnout lever and then connect the turnout up to the rest of the route.
In the following pics I use a procedural track to "wire" and connect up the turnout but standard spline track could be used and decorated with track-side frogs but they wouldn't have movable switch blades like the procedural track.
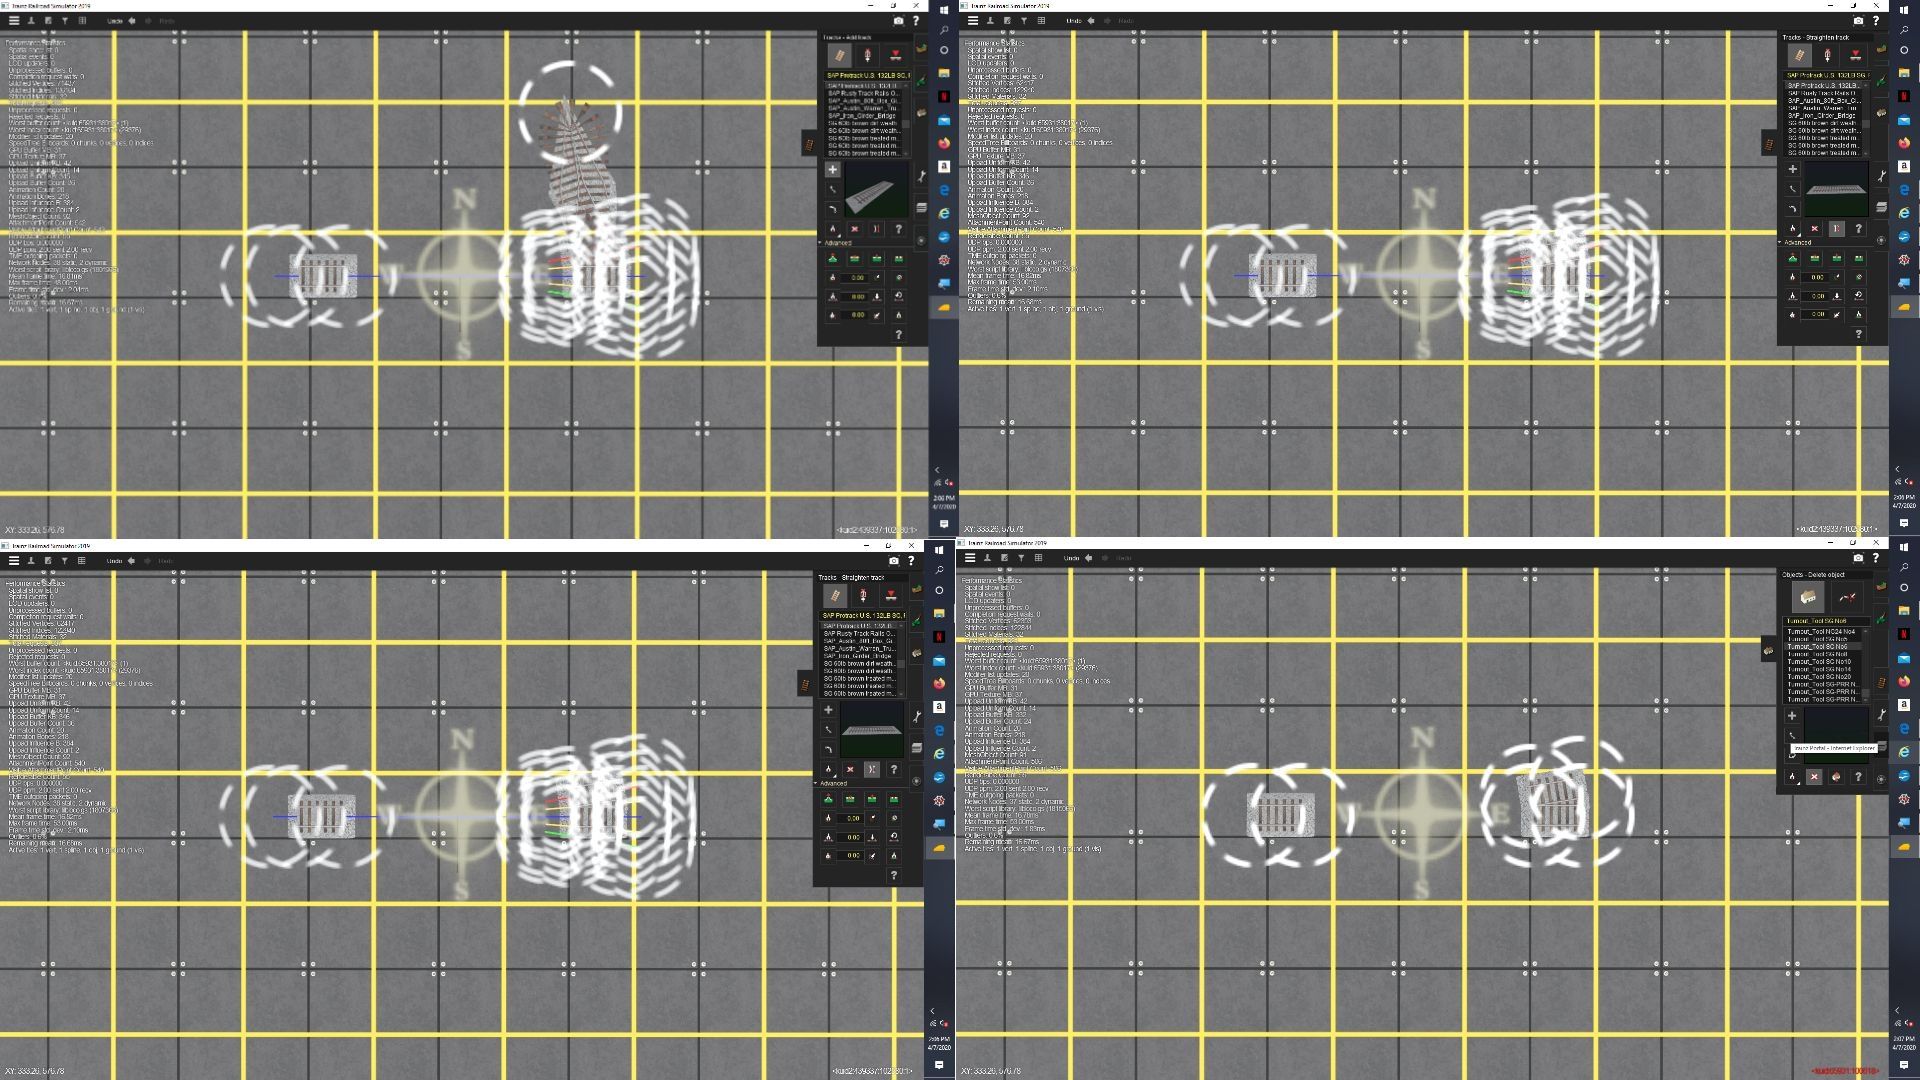
The important thing to recognize in the following pics is you
can't "wire" up a single section of track between 2 vertices in a fixed track template or the buildable type template I use. It has to be done in 3 steps:
1) Connect 1 section of track from a vertex on the template to some point away from the template.
2) Connect a 2nd section from the end of the 1st track section to the 2nd vertex on the template.
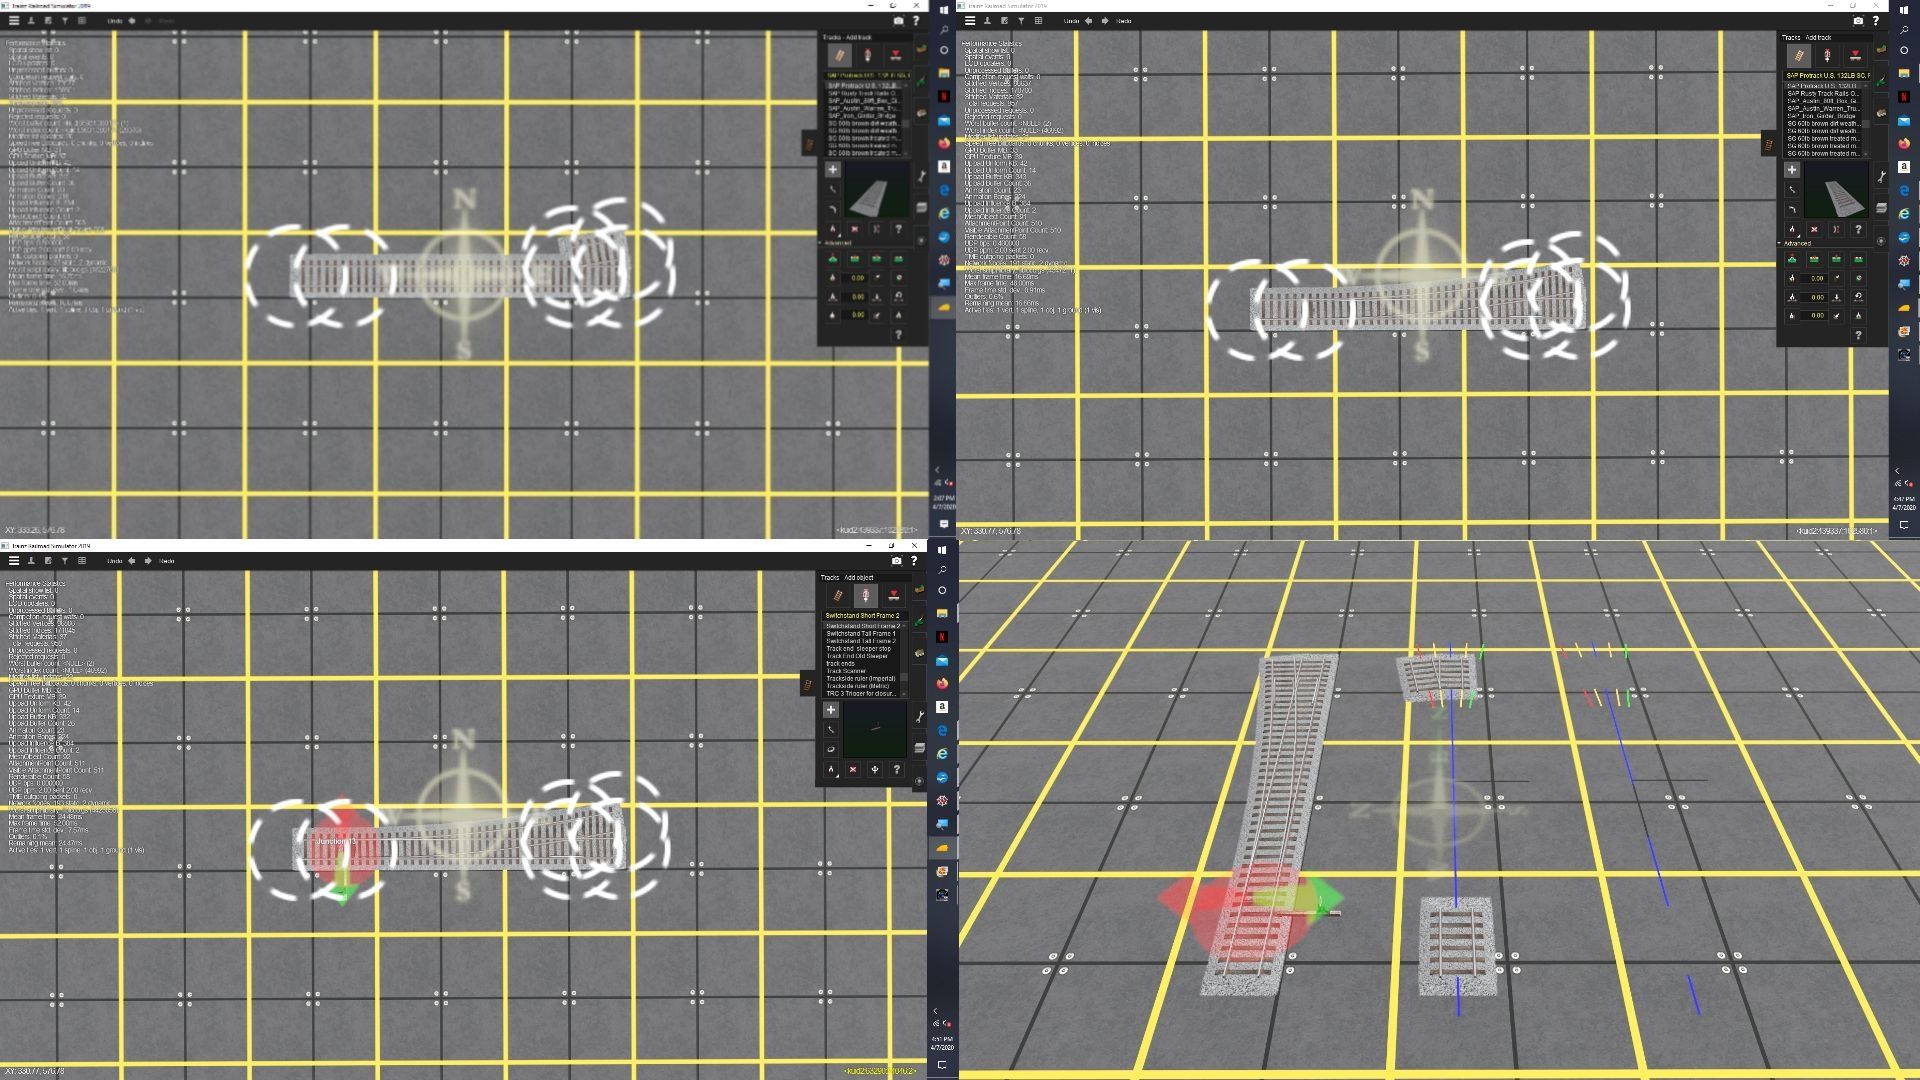
3) Delete the intermediate spline vertex you just made and you end up with 1 section of track between the 2 vertices on the template.
Why all this extra work - only N3V knows so ask them - I don't have a clue.
[NOTE: The template with the straightened track stubs attached (bottom left above) can be copied and pasted anywhere on the route. You can wire up a set of frog numbers (angles) you want to use from the series and then copy and past anyone of them as needed close to where you need it. You can then move the template with attached track around and rotate it into position or copy and paste a rotated one if several are needed and move into position and finish as described above.]
Maybe that gives you some ideas on how to use timsergey's templates.
Bob Pearson