Unless I am going to make a map that only has flat terrain, I always create my hills, valleys, rivers, lakes, etc. in Photoshop as a Surveyor Displacement.
I will try and make a tutorial to help those unfamiliar with this process. I am using Photoshop 5.5 and TRS 2006.
The first thing you need to do is create a new file in Photoshop. Make sure you create the file in the size of the map you will be working on. I use 1 inch equals 1 square board. And keep this in mind when you are designing your terrain. You will be "drawing" your landscape from several miles up! I realize that if some of you want to create really BIG maps, say 50 boards by 70, the photoshop file will end up being really large, but we will size it down later.
For this tutorial, I am making an Island, but you can see as we progress how you could use the method here to make just rivers, valleys and hills.
Start by creating a new file. Since I am making an island, I am making it 20 x 20 inches, with a resolution of 72. Also, I will be sizing it down a bit later, but it's always easier to work in a large window. Here is how the new file window should look:
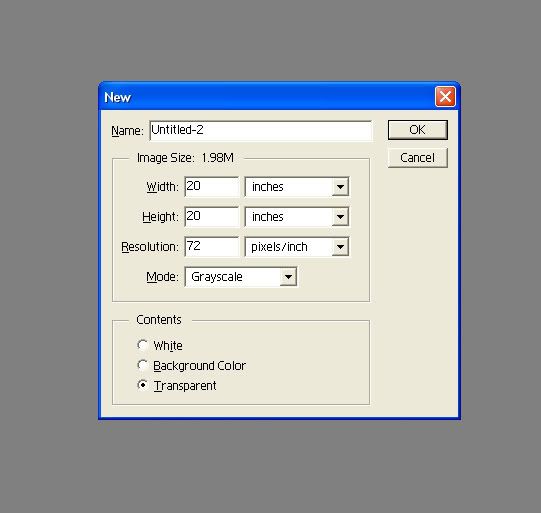
NOTE! Make sure you create this file in GRAYSCALE.
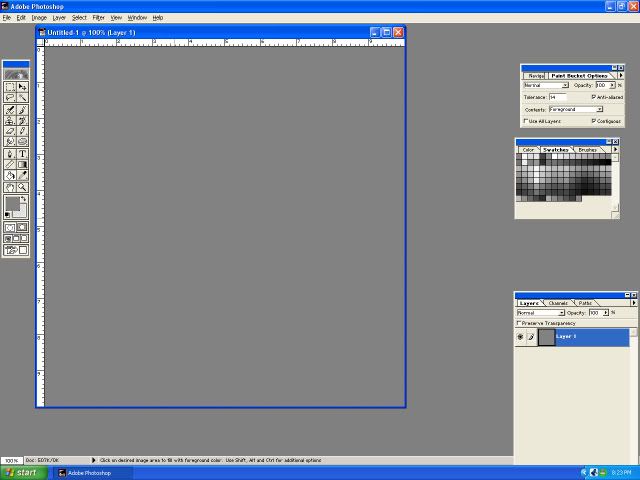
Now, when you have your new window open, we are going to start by filling it with a neutral gray shade. This will represent the ocean floor. If you intend to just do terrain with mountains and valleys, this will represent mid-range land.
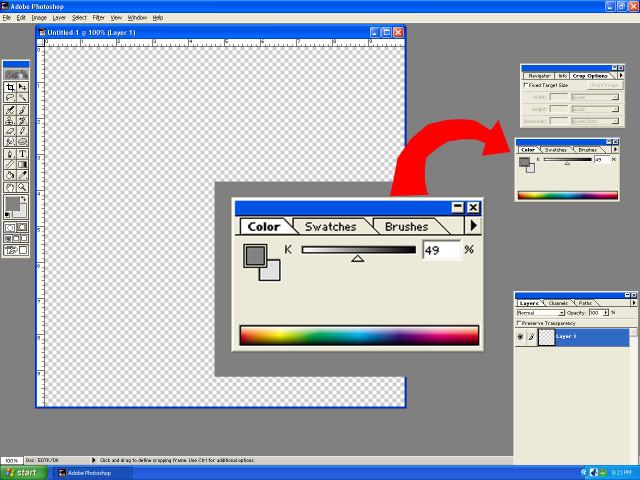
Make the Gray Shade around 50. I used 49. Fill your box with this shade. It should look like this:
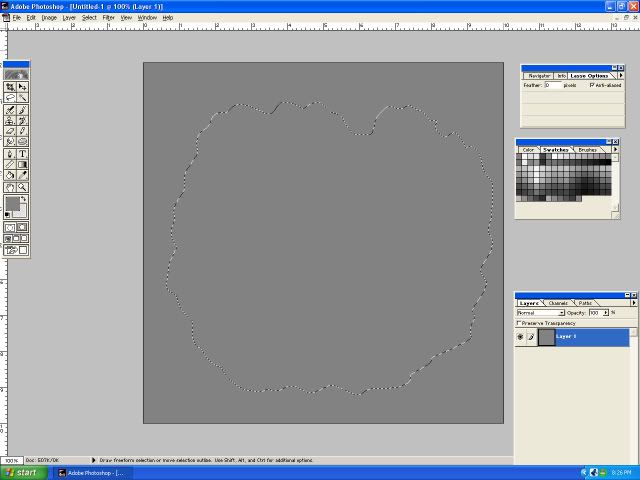
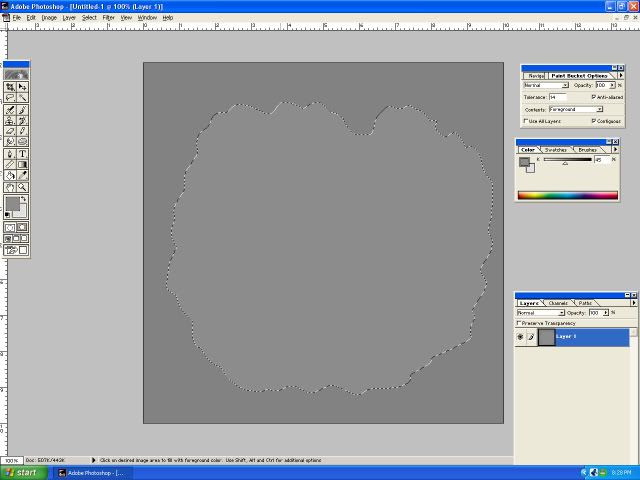
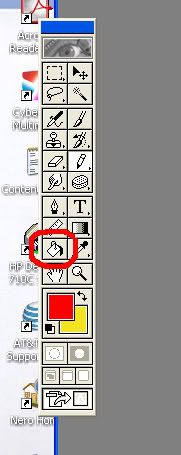
Next, we are going to draw the outline of our Big Island. Here's where you use your creative mind! Use the "Lasso Tool" and draw the shape of your Island. I just drew a simple slightly jagged coast, but you might want to add peninsulas, bays, inlets, etc.
Now we want to fill the interior of our island with a slightly lighter shade of Gray... NOT TOO MUCH! You want a gradual beach when you finish, so just use a few shades lighter. I used 54.
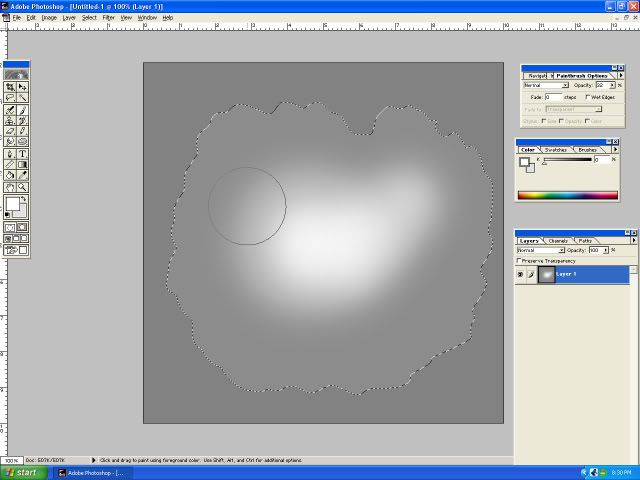
Okay! We have our island. However, right now it's just a totally FLAT island. We need to add some hills. Since this island is basically round, I am going to put a broad hill right in the center. You'll need to leave the "marching ants" of your lasso still marching so you won't get any hill in the ocean. Select your BRUSH TOOL and select the white color from the pallet. Set the brush opacity to about 35, or you'll make a plateau. Color inside the island where you want your hill. You'll notice if you let up on your mouse button then begin coloring more, the hill will get whiter. The whiter the color, the higher the hill.
Okay, here's how I colored my hill inside my Island:
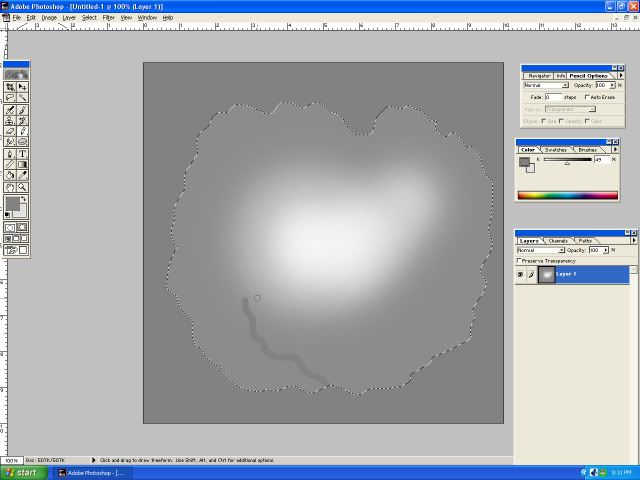
If you want to make a river entering into your island, just use the pencil tool and re-select the same color as the ocean (the area surrounding the island) and draw in a small river like so:
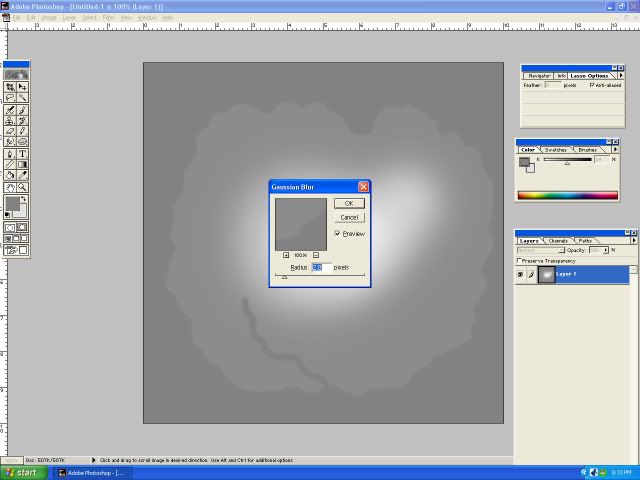
Now comes an important part... we want our island to be smooth from the top of the mountain, all the way down to the beach and into the ocean. Go to the Filter, select "Blur" and "Gaussian Blur." Set it about 2.o pixels and let Photoshop blur your terrain.
When you're completely satisfied with the colors, go to the "Image"-- "Image Size" and save it down about half of what you originally started with. I started with 20 x 20--- so I saved it 10 x 10. And check to MAKE DOUBLE SURE THE FILE SIZE IS ONLY 72 RESOLUTION!!! Any more, and your Surveyor will lock up! Believe me I know, it's happened to me!
Now you must save your file into the Auran Displacement Folder. Make sure you FLATTEN the terrain, then save it to the Auran Displacement folder. It's located in the "World" "Custom" folder. And don't forget what file name you used! You're all set!
Go to Trainz, Surveyor, and start a new map. Extend your blocks to the size you want. I did mine 10 x 10, but for this example, I used 5 x 5.
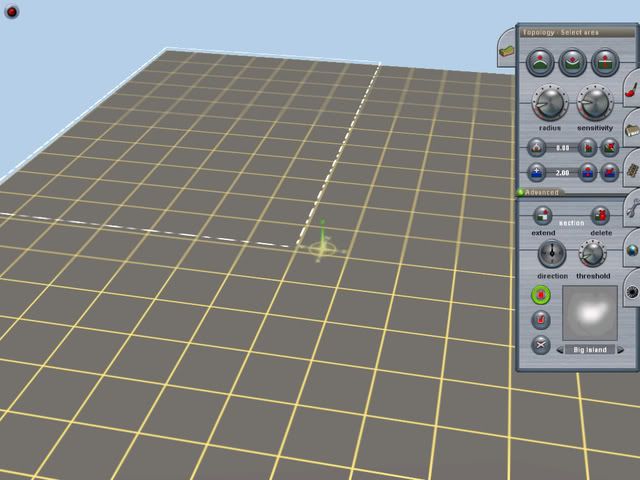
Go to Topology--- select the "Advanced" tab. Check to make sure your Terrain file is there! Yep! There's my "Big Island" file! Start at the Northwest corner and select the whole 5 x 5 map... then, make sure the Direction is pointing straight up, and Threshold is about straight up. Now select FILL and your terrain will begin to take shape. If your file is large, you may have time to take a 10 minute break while Surveyor creates your terrain!
And when it's finished, check your hills:
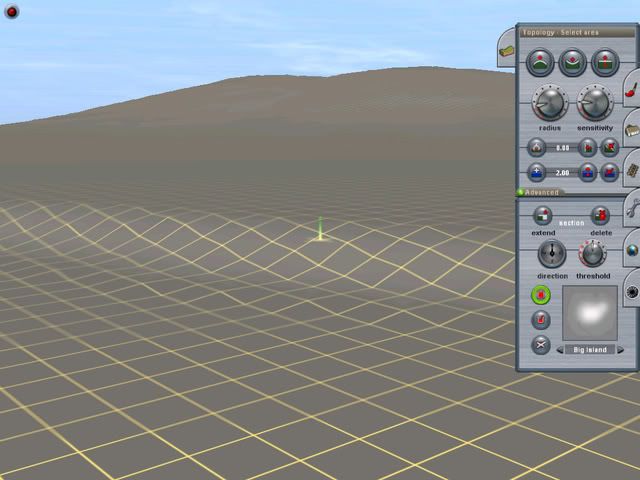
If they're not tall enough, push the Threshold a little more and try again.
I liked mine so I began coloring:
(I had some more pix, but I'm limited to 10!)
I hope I didn't leave anything out. If I did, just ask and I'll try to help.
---- David Snow
I will try and make a tutorial to help those unfamiliar with this process. I am using Photoshop 5.5 and TRS 2006.
The first thing you need to do is create a new file in Photoshop. Make sure you create the file in the size of the map you will be working on. I use 1 inch equals 1 square board. And keep this in mind when you are designing your terrain. You will be "drawing" your landscape from several miles up! I realize that if some of you want to create really BIG maps, say 50 boards by 70, the photoshop file will end up being really large, but we will size it down later.
For this tutorial, I am making an Island, but you can see as we progress how you could use the method here to make just rivers, valleys and hills.
Start by creating a new file. Since I am making an island, I am making it 20 x 20 inches, with a resolution of 72. Also, I will be sizing it down a bit later, but it's always easier to work in a large window. Here is how the new file window should look:
NOTE! Make sure you create this file in GRAYSCALE.
Now, when you have your new window open, we are going to start by filling it with a neutral gray shade. This will represent the ocean floor. If you intend to just do terrain with mountains and valleys, this will represent mid-range land.
Make the Gray Shade around 50. I used 49. Fill your box with this shade. It should look like this:
Next, we are going to draw the outline of our Big Island. Here's where you use your creative mind! Use the "Lasso Tool" and draw the shape of your Island. I just drew a simple slightly jagged coast, but you might want to add peninsulas, bays, inlets, etc.
Now we want to fill the interior of our island with a slightly lighter shade of Gray... NOT TOO MUCH! You want a gradual beach when you finish, so just use a few shades lighter. I used 54.
Okay! We have our island. However, right now it's just a totally FLAT island. We need to add some hills. Since this island is basically round, I am going to put a broad hill right in the center. You'll need to leave the "marching ants" of your lasso still marching so you won't get any hill in the ocean. Select your BRUSH TOOL and select the white color from the pallet. Set the brush opacity to about 35, or you'll make a plateau. Color inside the island where you want your hill. You'll notice if you let up on your mouse button then begin coloring more, the hill will get whiter. The whiter the color, the higher the hill.
Okay, here's how I colored my hill inside my Island:
If you want to make a river entering into your island, just use the pencil tool and re-select the same color as the ocean (the area surrounding the island) and draw in a small river like so:
Now comes an important part... we want our island to be smooth from the top of the mountain, all the way down to the beach and into the ocean. Go to the Filter, select "Blur" and "Gaussian Blur." Set it about 2.o pixels and let Photoshop blur your terrain.
When you're completely satisfied with the colors, go to the "Image"-- "Image Size" and save it down about half of what you originally started with. I started with 20 x 20--- so I saved it 10 x 10. And check to MAKE DOUBLE SURE THE FILE SIZE IS ONLY 72 RESOLUTION!!! Any more, and your Surveyor will lock up! Believe me I know, it's happened to me!
Now you must save your file into the Auran Displacement Folder. Make sure you FLATTEN the terrain, then save it to the Auran Displacement folder. It's located in the "World" "Custom" folder. And don't forget what file name you used! You're all set!
Go to Trainz, Surveyor, and start a new map. Extend your blocks to the size you want. I did mine 10 x 10, but for this example, I used 5 x 5.
Go to Topology--- select the "Advanced" tab. Check to make sure your Terrain file is there! Yep! There's my "Big Island" file! Start at the Northwest corner and select the whole 5 x 5 map... then, make sure the Direction is pointing straight up, and Threshold is about straight up. Now select FILL and your terrain will begin to take shape. If your file is large, you may have time to take a 10 minute break while Surveyor creates your terrain!
And when it's finished, check your hills:
If they're not tall enough, push the Threshold a little more and try again.
I liked mine so I began coloring:
(I had some more pix, but I'm limited to 10!)
I hope I didn't leave anything out. If I did, just ask and I'll try to help.
---- David Snow


") .
.
 Guess I need to upgrade! Lol!