Increasing height when merging baseboards??

ex-railwayman

New member
Hello all, can some kind soul please explain to me in layman's terms, when you merge 2 routes together, or, add an extra baseboard onto an existing layout, how do I get the whole baseboard to rise up flush with the other map. I've read the manual, but, I still can't grasp which buttons to press, and I was wondering with all the ground levitations and the river, if that stopped me from getting the baseboards to fit snuggly together......I've put a screenie up to show you what I mean. I'm using TRS2004 at the moment, but, I suppose it's the same principle for all versions of Trainz, I hope.....:p

Cheerz. ex.

trainz2009-01-1312-37-12-70.jpg
 
Last edited:
G'day ex-railwayman,

Without having created this 'route' in TransDEM, the only way I can see you doing that which you desire is to do things manually using the 'Plateau' function...

1. Depending upon which 'height' of the existing terrain you wish to 'retain', place the 'cursor' (the compass) at a point where it "sits" at that height (if you were to want to make the new board the same height as the highest visible point in the existing route, for example, the location at which it can be seen would suffice nicely).

2. Press the 'get height' button. This is the 'grey' coloured button with the inverted magnet icon on it located on the left hand side of the visible pop out in the second row up from the 'advanced' button. When you do this, the actual height of the cursor is translated into the currently white coloured text (showing 0.00) in your image.

3. Adjust the radius of the area over which you wish to have the 'adjustment' take effect (I would recommend the maximum setting to minimise the amount of work but that is something that only you can decide).

4. Press the 'Plateau' button ( the rightmost grey button of the same row).

5. Left mouse click on the map in the vicinity of the cursor and without releasing the mouse, move the cursor around the map, particularly over the lower portion of the terrain that you want to raise. This should raise the height of the new board to match the existing terrain levels.

Adjusting the radius of the cursor, will, of course, allow you to raise the terrain with much greater accuracy (over any given area) and there is nothing to stop you from relocating the cursor and resetting the 'get height' value to match other areas of the existing terrain to more closely match the existing terrain.

...have fun...

Jerker {:)}
 
Last edited:
Ex,

While Jerker's method will work there is a quicker way using the copy and paste tools. Go to the tools panel. At the bottom are the copy and paste tools. Here are the basics:

You use the Select Area tool to draw a box around the area you want to copy then you click on the Paste tool to freeze the size of the box. Then as you move the mouse around the selected area moves with the mouse. To paste you just left click the selection over the empty baseboard.

Here are the details:

You can choose to copy the ground shape or the texturing or the objects within the selected area or do any combination of the three. By default all three are enabled. Click the small icons to turn them on and off. I would recommend you just do ground shape and textures and turn objects off.

There are two modes, absolute and relative. Absolute makes the pasted area the same exact height as the original area. This is what you want and it is the default mode. Relative mode adds the copied area to the height of the existing ground height. This is useful for adding bumpy terrain to an area which already has terrain.

Here is what you can try:

Go to the tools panel. Choose the Select Area tool. You want to draw a box on the old baseboard with the edge closest to the new baseboard running along the squares before the big drop off and make it about 6 grid squares wide going away from the seam. I normally make a long rectangle the length of the old baseboard. Once you have the area the size you want click the paste button to freeze the selection area's size. Move the mouse and the dotted lined area will move with it. See the compass between the Absolute mode button and the Relative mode button? Use it to rotate the selection 180 degrees. Now you can align the selection over the new baseboard with the edge at same edge of the grid squares as it was when you copied. This will make the pasted terrain flow seamlessly into the new terrain. Just click the left mouse button over the selection to paste the terrain.

Once you have the seam done you can continue to copy and paste over the rest of the new baseboard using different sizes of selections and from different areas of the old baseboard. If you start to get a recognizable pattern then try the relative mode over the top of an earlier paste.

Practice using these tools and you will get very fast at the process.

William
 
G'day ex-railwayman,

...well, there you go, as always, there is more than one way to "skin a cat"...

Jerker {:)}
 
Thanks Jerker, but, I'm still having difficulties. I got as far as step 4. If you look at the screenshot again, I pressed the "get height" button and it read 43.00, I pressed the plateau button, increased the radius to the full amount and moved my cursor off the map and onto the bare baseboard and clicked the mouse and the "get height" reverted back to 0.00........:'(
Incidentally, the radius cursor even on maximum only covers about 1/5th of the baseboard anyway, am I supposed to drag it across the baseboard to get it to rise???

More assistance required please.....

Cheerz. ex.
 
Hi Ex-railwayman,
If you use the 'get height' button you then use the 'use height' button which is locked to the height value. ( You can also type in the height you want )
The 'Plateau' button uses what ever height is under the cursor when you press the mouse button, you hold down the mouse button and move the cursor over the area to raise. And don't forget to adjust the sensitivity slider.

Now if you want a smooth slope instead of a flat area lay a piece of track on the base board then in the advanced track tab use 'Smooth spline height' on your track and you now have a slope.
Use the move track tool to shift your track sideways about 2 grid squares and smooth again. By inserting extra spline points and adjusting the height you can get some nice curved slopes.
If you have a large area to do, after you have moved the track four or five times go to the tools Tab and use the area copy tools down the bottom.

I suggest you start a new map and experiment with the tools ( or save the map you are working on under a different file name so auto save dosn't ( TRS2006 > ) save unwanted changes to the original map. )

Hope this helps
Lindsay
 
Hi Ex-railwayman,
The 'Plateau' button uses what ever height is under the cursor when you press the mouse button, you hold down the mouse button and move the cursor over the area to raise. And don't forget to adjust the sensitivity slider.

Hope this helps
Lindsay

Hello Lindsay, yes, I understand about the Plateau button, it's just that I want the complete baseboard to rise to the same height. Do I have to move my cursor all over the baseboard to get it to rise sufficiently, it seems an odd way to get the damn thing to move upwards. And, I'm only using a single blank baseboard, what if you're merging another route onto it with hundreds of baseboards, and you need to adjust the height, what happens then....I haven't touched the sensitivity dial at all, I've left it as it is, do I need to turn that to maximum as well, would you know please????
Sorry, I'm getting old and tired these days and to do seemingly simple tasks is taking up too much of my patience and valuable Trainz playing time......:(

Many thanks for your help anyway......Thanks to William also, your method was a little too much for my old brainbox, but, I'm sure someone reading this thread in the future may find it useful.

Cheerz. ex.
 
I found that the older I get the more time I have to work on the details. It's the big things that get away from me.:D

The plateau tool doesn't actually raise the baseboard, it just raises the piece of terrain inside the circle. To raise the surface of a new baseboard you have to go over the whole surface, then use the terrain tools to contour the baseboard to blend in with the original route.
If you're merging two routes and you want to match the heights, you need to add a few baseboards to the edge of one of the routes before you merge them. The new baseboards give you the room to bring the track up or down to meet in the middle. Just run track from one finished section to the other, use the straighten track tool (or height adjust) and then smooth it to bring the new baseboards up to a clean slope, then shape and texture.

:cool:Claude
 
Hi Exrailwayman,

I like the scenery in the screeny that you first put up at the beginning of this thread. Did you do that yourself, or is it from an existing layout?

Jerker's method works well and is quite simple once you've done it a couple of times!

I'm 76, and I know how you feel when trying to deal with some of the more obscure aspects of Surveyor!

Ian
 
Oooops....

G'day ex-railwayman,

Twodorgs is, of course, quite correct in pointing out the 'minor' error in my method (thank you, Sire) but you do need to keep 'pressure' on the mouse button once you click it (I believe Windows refers to the 'action' as "Click & Drag"). Unfortunately, there is no way to raise the height of an added baseboard once the height of any original 'boards' has been 'manipulated', except to anticipate the need for more room in advance before any major work is started...

... for some reason the good people at Auran failed to consider that users would want to do this sort of thing (despite the more than 10 chances they have had of including such a possibilty since the first version of the program)...

...once again, I reitierate, that had the 'route' been created with TransDEM, the task you wish to complete would be a "doddle"...

Jerker {:)}
 
Hi Exrailwayman,

I like the scenery in the screeny that you first put up at the beginning of this thread. Did you do that yourself, or is it from an existing layout?

Jerker's method works well and is quite simple once you've done it a couple of times!

I'm 76, and I know how you feel when trying to deal with some of the more obscure aspects of Surveyor!

Ian

Thanks for the responses guys, I will try again and see what happens, Surveyor is very temperamental when you're challenged with something you haven't done before, so it's learning curve which is getting the better of me at present, I'll keep you posted.

@Ian, the route is from 2005 off the DLS called Yorkshire Pt 3, KUID:156702:514 if you're interested, it was a collection of modules by Peter Dickeson depicting the ECML route from York up to Newcastle and beyond, all of them are superbly designed and textured from that day, but I wanted to merge a couple of the sections to make a bigger map, with a view to updating the buildings, trees, etc, and it's got me beat at the moment, but I'll persevere.

Cheerz. ex-railwayman.
 
Terrain adjustments

I merge routes all the time and have run into this problem frequently.
I don't think that your routes need to have been created using the "Tranzdem" program for it to be used to change the elevation.

I don't think that using the surveyor tools will do what you are trying to do without consuming much excess time.

The "Get height" tool in surveyor will measure the height at the point at which the "compass" is positioned at the moment you click "get height". It will, of course indicate the elevation in the space between the "get height" button and the "use height " button. I assume you know this...

The problem is you want the entire route elevation to match...with the terrain features left intact, correct ?

Tranzdem will do this instantly (almost) for the whole route in question, at one time.
Lets say, for example, route 1 is at "0" elevation. Route 2 that you are merging with is at + 500 meters or -240 meters or whatever the difference is.

If you download and install Tranzdem, you can open the route you need to raise /lower the elevation on by clicking on the "Trainz" tab. In the drop down menu you will find an option for "adjust elevation in an entire route" listed.
If you select that option a warning will appear stating that you are getting ready to change things in a big way. If you answer "OK", another window will appear giving you the option to change the elevation ( in meters) either by adding or subtracting the difference. YOu select the route you would like to raise/lower, fill in the box called "elevation difference" and hit OK. the elevation will then be changed by the amount you entered. You will probably need to save the route with a different name i.e., route 2 modified or whatever you want to call it. It will then be easy to find. You can then merge the "new" route. It is very easy to do and works like a charm.
The only thing to remember is to input your change in meters, not feet.

If you aren't familiar with Tranzdem, and use only this one feature it is worth taking a look at. It has many other uses also...
Hope this helps.
 
Last edited:
Hello Hot Box Detector,

I have found the website, but, do I need to download the TransDEM Standard Edition, based on Zusi CD Version 13: or theTransDEM Trainz Edition: please ???

Cheerz. ex.
 
The clue is in the name...you'll need TransDEM Trainz Edition if you want to be able to export the baseboards.

It takes a little while to get the hang of it, but once you do it seems reasonably straightforward -
after a few days experimentation I was able to generate and export the terrain and routes for the whole of the Bishop Auckland/Weardale Railway area (30 or so baseboards IIRC - and believe me that's a lot of scenery - I really didn't realise what I was letting myself in for!).
 
Thank you very much durhamlass, having been playing Trainz for so long, I've found that the usually straightforward conclusions aren't always the correct answer, so, I thought I'd better check, before I downloaded the wrong one......:hehe:

Thanks again and welcome to the forum.....

Cheerz. ex-railwayman. :wave:
 
Hello ex-railywayman

The way I adjusted the height when I merged Glasgow-Oban with Glasgow-Falkirk, which had a height differential of over a hundred feet, was to insert three baseboards in between and gradually raise the height over the three boards. It meant the area around Cowlairs wasn't very realistic, but it had the desired effect!
 
Thank you very much durhamlass, having been playing Trainz for so long, I've found that the usually straightforward conclusions aren't always the correct answer, so, I thought I'd better check, before I downloaded the wrong one......:hehe:

Thanks again and welcome to the forum.....

Cheerz. ex-railwayman. :wave:

Anytime, and thanks!
 
Okey Dokey, success, and I didn't even bother downloading the TrainzDem after all......:hehe:
So, for all you newbies, and everyone else who wants to know, here's what you do, and it's so simple now, I could kick myself for not doing it properly in the first place.

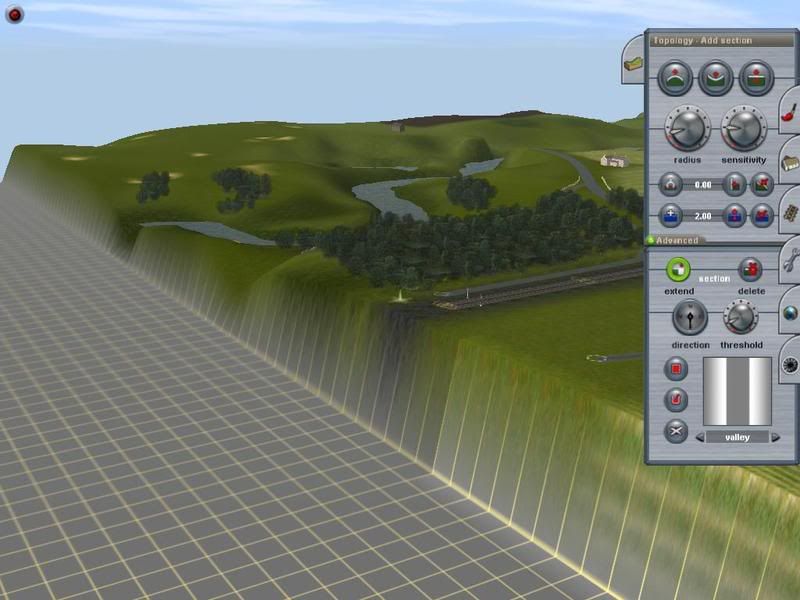
Following on from my first screenshot posted, add a blank baseboard onto your layout, put the compass at the highest point on the edge of the map, which is not necessarily where the track finishes, or, at the track end. Click on the "get height" button and the meter will change to whatever the height is - in this case around about 43.00, now put your cursor on the blank baseboard and increase the radius circumference to maximum, then click on "use height" button which automatically locks onto the figure entered, or, you can manually enter the figure yourself, and holding the cursor and right click together, swoosh around the blank baseboard and it will rise to the height that you have entered. Now when you have gone round the whole board and it has risen accordingly, decrease the circumference of the cursor and run along the seam edge that joins the boards together and voila, it's a snug fit.....Even though I didn't time myself, I guess with practice this can be done in 30 seconds easily.......


Now, I also practiced decreasing the height of a baseboard if that is above the map when you merge it, and that is to put a minus figure against the "get height" button and when you hit the baseboard it sinks and levels off flush with the layout.

A huge thanks to you all for the kind assistance, I could not have done this without you, and hopefully an easy lesson to be learned by the community........

Cheerz. ex-railwayman. :wave:

 
Last edited:
Back
Top