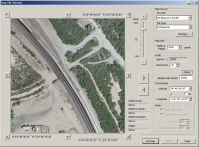
Tutorial for Using Google Earth & TransDEM for route creation

yeah that's the version I'm running TD is still being ornery though I'll do some more stuff with it to see if I can get it to go
 
Hang in there. Things will become easier once you get the basics down pat. Sudden thought: I don't want to insult you, but when you are in GE putting the placemark down, while the dialog box is open you can move the mark itself around on the map. Could it be that if you do this, you're "jogging" the map itself somehow and making the heading or the angle change?

Bill
 
if I understand you correctly, no. When I place the marker (ctrl+shift+p) I immediately type the name and enter :/ for whatever reason when I hit the N and U buttons it still (but only sometimes) zooms in the screen instead of just resetting north and tilt :/ I'm beginning to suspect its an issue with GE :/
EDIT: After relaunching GE it appears to have resolved the issue for now, I'll try and replicate it to see if that is a consistent error and if its always fixable by just relaunching the program.
 
Last edited:
Ah. I think I see what's happening. The order you need to do things in GE is:

1. position the map by holding down the left mouse button and dragging the map wherever you want it. You can also use the arrow keys to do this.

2. once in position hit the "N" and the "U" keys to reset to North and Vertical. (apparently, you can use the "R" key to do both.)

3. set the placemark on the map using with the hotkeys or click the pushpin icon at the top.

4. use the mouse to drag the placemark down to the lower-left (SouthWest) corner and release (you can also move the dialogue box out of the way for clarity.) make sure that you move just the placemark and not the map. You can tell this because the mouse pointer will turn from a "hand" into a "pointing finger hand".

5. type the name of the placemark in the field and click the OK button.

If you do it in this order, then the N and U have been performed BEFORE you put down the placemark marker. Done in that order, without touching the mouse wheel should make sure that the altitude will stay the same throughout. If you use the N and U after closing the placemark dialogue, the placemark info won't have the right orientation.

Bill
 
4. use the mouse to drag the placemark down to the lower-left (SouthWest) corner and release (you can also move the dialogue box out of the way for clarity.)
Why that? The placemark would then no longer point to the center of the image and butcher geo-referencing. You can easily verify this by loading a second map source via any of the other tools that support automatic geo-referencing.
 
I am really confused myself now, Roland. Earlier in this thread, and several other threads, you've told me that the reference point has to be in the southwest quadrant to work properly. So now it has to be in the middle of the image? When I said "move the placemanrk" I meant JUST the placemark and not the entire image.

Bill
 
With the Google Earth placemark method, that placemark must be in the center of the image, the default when you create it. It would be very difficult for a user to precisely reposition it to a corner. Unfortunately, TransDEM has no control over the relative placemark location. If it has been moved, albeit accidentally, geo-referencing will be incorrect.

Therefore, I always recommend to go via the Map Tile Client instead. It's far less error-prone and also much more efficient. With the latest addition of the Google Static Maps API in TransDEM 2.6.1 (for which you will need that Google key), you should have access to same aerial images as with Google Earth again, but without the worries about placemarks going astray.

About a reference point near or at the south-west corner: That applies to manual georeferencing. In the 3+1 point method, it should be near the SW corner, same for the SE and the NE points, for a maximum size area spanned and minimum error. For the 2 point diagonal georeferencing method, the 2 points have to be exactly at the SW and NE corners.
 
I must have misread or misinterpreted the initial instructions then. I'll have to amend my tutorial to reflect placing the mark at the default (center) of the image. Thanks for dropping in here and correcting me.

I'll go get 2.6.1 right now.

EDIT: downloaded and installed (patched, actually). Now using 2.6.0.1. It didn't ask me for licensing info though.

Bill
 
Last edited:
NOTE TO ALL:

I have updated my tutorial. You can use the same link in the first post to download the updated version.

Bill
 
EDIT: downloaded and installed (patched, actually). Now using 2.6.0.1. It didn't ask me for licensing info though.
Should read 2.6.1.0, I think. You should also install the latest "Sample Settings" package from my download page. It contains the configuration for the new access to Google Maps. See the TransDEM forum, tutorial section, for instructions to obtain a key.
 
Well, I downloaded what I think is the correct XML file (WMS Sample Settings Oct 2016.xml), but I can't seem to find what key you are talking about -- and where to insert it when I do find it. There are 2 "How to obtain..." entries, and neither one seems to be the right one. In both threads you are having us look for "Map Tile Client" and when I hover over that particular icon you circle in red, I get the tooltip "Web Map Tile Servers". Are they the same?

Bill
 
Well, I downloaded what I think is the correct XML file (WMS Sample Settings Oct 2016.xml), but I can't seem to find what key you are talking about -- and where to insert it when I do find it. There are 2 "How to obtain..." entries, and neither one seems to be the right one. In both threads you are having us look for "Map Tile Client" and when I hover over that particular icon you circle in red, I get the tooltip "Web Map Tile Servers". Are they the same?
There are WMS (Web Mapping Services) and Map Tile settings. The technologies are related, but different. Accordingly, TransDEM has two separate clients for these. The one circled in those two tutorials is the Map Tile Client. And the map tile client will accept "Map Tile Sample Settings Oct 2016.xml" for import.

If you have not worked with Map Tiles in TransDEM before, I recommend to go through tutorial #7 in the TransDEM main manual. It will give you the idea and will open up a new world of map (and orthoimage) resources.

The settings basically contain the rules to build an URL, a web server address with all its details, to identify and access specific tiles. Most settings will work out of the box, once imported. The only exceptions are the two new interfaces to Google Maps and Microsoft Bing Maps (aka Microsoft Virtual Earth). There is one tutorial for each provider.

The counterpart with map tiles for Google Earth would be Google Maps. There used to be an unofficial interface for Google Maps with direct tile access, but that stopped working for orthoimages a couple of weeks ago. I decided to add access to the official interface, called Google Static Maps. But this interface needs an additional personal key which you get from Google.

Together, the preconfigured settings you import form the XML file and that additional key you obtain from Google, will enable TransDEM to compose valid URLs to access orthoimages again.

Here is more background:
On the latest TransDEM update: http://forums.auran.com/trainz/show...nsDEM-2-6-now-available&p=1548187#post1548187
On the the new methods to access map tiles by key: http://forums.auran.com/trainz/show...Microsoft-web-map-services-with-access-by-key
 
Okay, I think I understand your post. I've just been using the GE images to map tiles functionality of TransDEM so far. My major problem is I don't have enough contiguous free time to really sit down and go through any tutorials for any meaningful length of time. Once I can do that, I'll use the two threads you gave me. I've bookmarked them. Thanks, Roland.

Bill
 
I can assure you, it's worth spending a bit of time - once you find that - on the map tiles tutorial. After that, you will not go back to Google Earth, I promise. :wave:
 
Oh, yeah, tedious is the right word. At 1.15km off the surface I'm at well over a hundred tiles for something like 25 sq miles (yes I meant miles there) of industrial trackage, with more to go... I want the detailing so I can get yard placement right more than anything, 2km is too far out to see details for me. I'm wondering if I can go up to 1.5/1.75 to get the right amount but still keep the placemarker amount low. :/
 
Oh, yeah, tedious is the right word. At 1.15km off the surface I'm at well over a hundred tiles for something like 25 sq miles (yes I meant miles there) of industrial trackage, with more to go.../
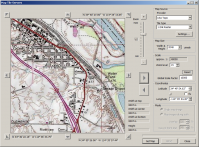
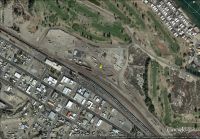
Again, Map Tiles will make it much easier. It's an investment of half an hour to do tutorial #7 in the TransDEM main manual. And if you are happy with what Microsoft Bing (aka Virtual Earth) provides aerial image-wise, you don't have to upgrade TransDEM.

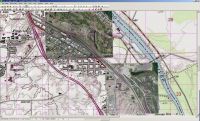
Here is an example for Needles, Ca.

I started with a map tile for the public domain historic 1:24,000 USGS topo map, hosted by ESRI these days. Zoom level is 15, still good for Trainz ground texturing with the 5m terrain grid.


Then I added one Google Earth image, the tedious way, at an eye altitude of around 1.15km.


Finally I went for another map tile, this time a Microsoft orthoimage, at zoom level 18, which more or less equals the scale of the previous GE image.


All three together produce this:


Getting the GE image took the most time, more than one minute.
 
I'm going to have to try that, I just finished up my small section I was gonna screw around with in TANE but I plan on doing a bigger project that is gonna take a lot more time so hopefully that method is faster
 
Back
Top