Tinkering with TRS2019 Lighting Settings (Walkthrough - 1920x1080 Screenshots)

ericmp

Well-known member
Introductory note: Environmental lighting settings in Trainz are a matter of preference - what looks good to some may look bad to others. With that said, the settings presented here are merely suggestions for one possible way to counteract what I perceive to be a "harshness" in TRS2019's default lighting. There are probably better (more realistic-looking?) settings that could be achieved with additional fine-tuning for any given route, but perhaps these could serve as a potential starting point. The default settings may also be just fine. It's up to you to decide what looks best for you!

For reference, here are the TRS2019 performance settings I'm using:

DEYU3Od.png


Let's begin:

BAnECj7.png


ZScmxMG.png


z35iMaV.png


s6ETWnF.png


n8lp5Tw.png


64NpsEr.png


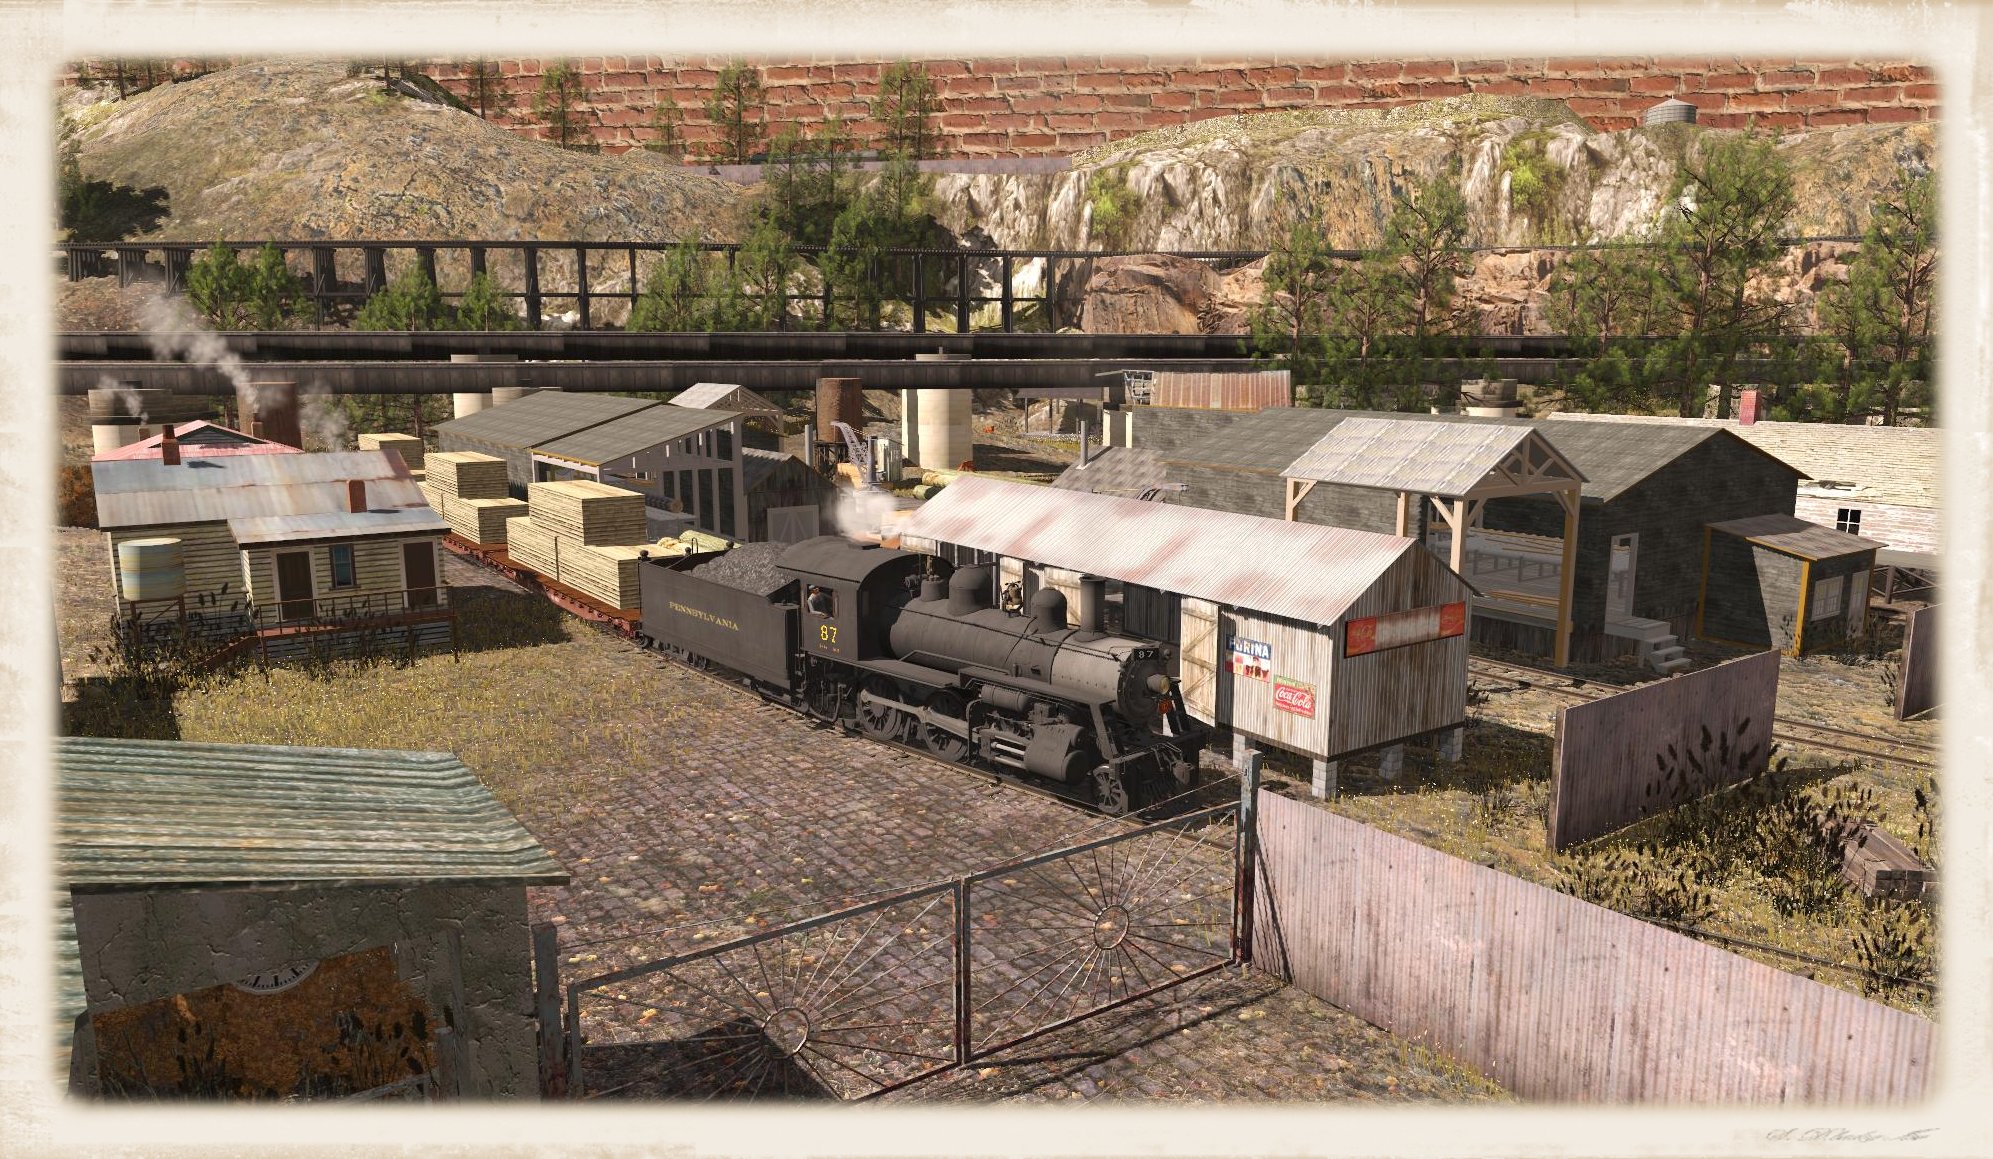
Done! Here's the comparison:

a) = before adjustment, b) = after adjustment

3cFhxiJ.png


KEX7HeL.png


cuc7lzs.png


Note that the mysterious "shadow line" crossing the tracks is just the shadow produced by the invisible track floating in the sky above (and shouldn't be visible in Driver mode).

Thoughts?

(Note to mods: My apologies in advance if this thread is in the wrong place! Please do move it if there's a better spot for it. I thought about putting this in the main TRS2019 discussion forum, but with the greater number of hi-res screenshots in this post I thought the screenshots forum might be a better fit.)
 
Thanks. The settings you use are very similar to the ones I've settled on.

A couple of comments:

The process has to be repeated for each of the dot points on the time dial.

Those three dials are just so damn fiddly and imprecise. One request several of us made some time ago was to replace them with something with a digital scale - making it both easier to adjust and easier to share the exact settings with others.

Phil
 
One tip I learned from PC_Ace in another thread on environment settings was that you can hold down the Shift key while adjusting an R, G or B dial and all 3 dials will rotate together. It's very handy for setting grey (gray) levels.

Wouldn't it be great of you could set the RGB's for one clock point and copy/paste them to any other selected clock points? I think it would be a useful time-saver to set the starting conditions for further tweaks at individual clock points.


.
 
Last edited:
Thanks for your comments and feedback guys! I didn't know that holding the shift key allows you to rotate the R/G/B dials together - very useful trick! :Y:

The process has to be repeated for each of the dot points on the time dial.

Wouldn't it be great of you could set the RGB's for one clock point and copy/paste them to any other selected clock points? I think it would be a useful time-saver to set the starting conditions for further tweaks at individual clock points.

I believe this may be possible (somewhat). It took some trial and error but I found that you can "copy" the dots to other locations on the dial by clicking and dragging them using the "add colour control point to clock" button.

Hopefully these screenshots will explain things a bit better:

uYIcHVa.png


LlFkpEG.png


vUUohlu.png


I realize that this is not exactly copying and pasting the R/G/B settings to the other dots, but the next best option could be to replace the old dots/settings with new ones using this technique. Thoughts?
 
Last edited:
Unless these TRS2019 images aren't particularly good, I don't see a lot difference from T:ANE as far as I can see. Certainly wouldn't encourage me to buy TRS2019! What's the point of TRS2019? Please, someone enlighten me.

Rob.
 
Hate to say it, but I agree with Robd. It really has me vacillating on making the jump. Philskene's Model layouts look great, but anything outdoors seems to be either too dark, too foggy, or washed out. I will say the Whitepass Yukon route seems to look great for the most part, so it has me wondering just what it takes to make it look realistic. I think Claus does better with T:ANE, but I'll be darned if I can figure out how he makes his screenshots so awesomely real-life....
 
Unless these TRS2019 images aren't particularly good, I don't see a lot difference from T:ANE as far as I can see. Certainly wouldn't encourage me to buy TRS2019! What's the point of TRS2019? Please, someone enlighten me.

Rob.

Yep, those look like TANE. Just like below.

ek3a10.jpg


Harold
 
Hate to say it, but I agree with Robd. It really has me vacillating on making the jump. Philskene's Model layouts look great, but anything outdoors seems to be either too dark, too foggy, or washed out. I will say the Whitepass Yukon route seems to look great for the most part, so it has me wondering just what it takes to make it look realistic. I think Claus does better with T:ANE, but I'll be darned if I can figure out how he makes his screenshots so awesomely real-life....

Could be messing with the shaders ;o)
 
robd --

"Unless these TRS2019 images aren't particularly good, I don't see a lot difference from T:ANE as far as I can see. Certainly wouldn't encourage me to buy TRS2019! What's the point of TRS2019? Please, someone enlighten me."

Well, there are a goodly number of us who think:

a) TRS19 is significantly better than any previous version; and
b) Having gone to TRS19 it's impossible to go back to T:ANE.

I've posted numerous images in many threads, but maybe just one, from a layout of mine on the Download Station, will suffice:

TRS19_Phootnote%26Fourword_0016.jpg


And one video (watch full screen / 1080p):


You could never ever get these effects in T:ANE. In fact, when I do revisit routes in T:ANE they look flat and lifeless.

There are several other TRS19 videos of mine on youtube. Search with "philskene".

Forester1 --


"Hate to say it, but I agree with Robd. It really has me vacillating on making the jump. Philskene's Model layouts look great, but anything outdoors seems to be either too dark, too foggy, or washed out."

I'm not fully convinced it's just because they are model railroads.

It might be more because I've experimented with lighting effects, which did take some time to figure out, and toyed for a while with the new features that TRS19 offers. So when I did the layouts of mine that you can find on the Download Station I went "The Fully Monty":

a) The new PBR track;
b) All 3D PBR textures;
c) TurfFX grass effects; and
d) All SpeedTrees.

Phil
 
Last edited:
I have to agree with Philskene. It's not just because it's a model railroad. If a bit of time is taken to learn all of the new things in TRS19 some amazing effects can be had. I'm yet to see anyone mention the new abilities of manual post processing, such as heat haze, fxaa, gamma, contrast, vibrancy, saturation etc. Environment settings have been expanded to include a brightness control, so the overall control of lighting is almost limitless. Anyone building in TRS19 utilising the new textures, clutter and TurfFX is going through a learning curve to discover how to get the best out of it and will hopefully pass on their experiences to the rest of us. So far I've found TRS19 to be far more capable than T:ANE, better looking, better performing and with far more scope for improvement and it's already far more mature than T:ANE at the same point in it's lifespan.
I've found a great way to experiment with the new assets, is to download an old pre speedtree route from the DLS and update it to TRS19 standard much as Phil has done with his own routes. I downloaded George Fishers Morristown & Erie route from the DLS and with the update/replace tool, I replaced all of the textures, track and billboard trees and then began experimenting with turffx and clutter. It's gone from looking very ordinary when I first tested it in T:ANE to looking spectacular in TRS19.
I've found 19 so good, it's now all I use.
Oh, and one more thing. If you don't like the lighting in a TRS19 session, just clone it and adjust to your tastes. :p
cheers
Graeme
 
Last edited:
Trainz 2019 is the best version of Trainz. I am not disagreeing with that. But the visual presentation is abysmal.

Here is my North East USA.

Morning

trs19_61.jpg


Noon

trs19_59.jpg


Evening

trs19_60.jpg


The dials are at 1200 and the light slider is in the middle of the "sun box" in all the day light times.

trs19_62.jpg


Harold
 
Harold

If by abysmal you mean it’s too dark, then pull the Light Brightness slider further downwards (it’s a stupid inverse scale where up means darker, down means brighter). Also, to make the shadows less stark or softer, the Sun box needs to be a darker gray (try setting the RGB dials to the “9 o’clock” direction - sounds counter-intuitive at first, but a less intense Sun casts a weaker, less opaque shadow).

Get it right at the noon clock position and repeat at the other daytime positions.

Deane
 
Last edited:
Harold

If by abysmal you mean it’s too dark, then pull the Light Brightness slider further downwards (it’s a stupid inverse scale where up means darker, down means brighter). Also, to make the shadows less stark or softer, the Sun box needs to be a darker gray (try setting the RGB dials to the “9 o’clock” direction - sounds counter-intuitive at first, but a less intense Sun casts a weaker, less opaque shadow).

Get it right at the noon clock position and repeat at the other daytime positions.

Deane
Adust the sliders for a realistic shadow.

Then adjust the sun for locale and season.

Great plains in the summer.

trs19_63.jpg


Harold
 
I'm yet to see anyone mention the new abilities of manual post processing, such as heat haze, fxaa, gamma, contrast, vibrancy, saturation etc.

Thanks so much for mentioning this! I didn't realize that manual post-processing (accessible by checking "Enable advanced debug options" under the "Dev" tab of the main settings window and then restarting the game) was possible in TRS2019.

By using similar environmental lighting settings as in the OP and tweaking the post-processing settings, I managed to come up with these numbers:

GTwtcAY.png


Which resulted in the following look on the ECML:

2vgBdxh.png


LM4FH51.png


yb4XtFy.png


4wlS5pR.png


When using these settings with other routes/rolling stock, I find that I have to further adjust the HSV contrast (1.45 - 1.8 seems okay), HSV saturation multiplier (1.0 - 1.2, any higher than 1.2 looks too colourful to me), and nvBloom Blur Width (0.5 - 0.75 seems okay) to find a look that doesn't hurt my eyes.

In general, I really like how customizable the post-processing settings are. However, I wish the GUI included slider elements to make experimenting with the settings easier because the current GUI does not appear to indicate the maximum/minimum values for each setting (unless I'm missing something). Not sure how easy this would be to change though. Another odd issue I've found is that when switching from an exterior view to the cab view (or vice versa), the view doesn't change unless you re-select the "Manual" option from the mode drop-down menu, otherwise the view appears to be frozen on whichever view you're switching from.
 
Shouldn't have to spend an hour or so to get a realistic look to the game.

The sun in surveyor is brighter than that in driver.

The out-of-box settings are truly dreadful. Looks good when adjusted.

trs19_64.jpg


The Beta Environment "reset" looked like that.

Harold
 
Last edited:
Back
Top