Install the app
How to install the app on iOS
Follow along with the video below to see how to install our site as a web app on your home screen.
Note: This feature may not be available in some browsers.
You are using an out of date browser. It may not display this or other websites correctly.
You should upgrade or use an alternative browser.
You should upgrade or use an alternative browser.
GMax and 3DSMax (And any other modeling program) screenies/renders
- Thread starter Mr.Kamikaze
- Start date

iceman2117
EskreuztkeinWegdenanderen

iceman2117
EskreuztkeinWegdenanderen
hi, ...
")
greets ice
Two in One

greets ice
Two in One
Dinorius_Redundicus
kuid 68213
Hyster E50 forklift
For once, something other than a request!
Just a rough model of a propane-powered forklift I saw at work.

For once, something other than a request!
Just a rough model of a propane-powered forklift I saw at work.
motorbreath
Earth Rocker
As usual, it looks great, Deane. That will definitely be very useful on any route. Thankee sai.
iceman2117
EskreuztkeinWegdenanderen
hi, ...
greets ice


greets ice
motorbreath
Earth Rocker
That's amazing, Ice.
G'day iceman2117,
I agree, superb work but I do have to ask, have you scaled those bricks correctly? According to the overall size of the structure and the usual dimensions for human use used by builders, I conclude that the bricks are 'scaled' so as to be about 8 or 10 inches (200 or 250 mm) high by 32 or 40 inches (800 or 1000 mm) wide (they're BIG bricks). In my experience, most 'house bricks' of the type depicted here, are only 3"x 9" (75mm x 225mm), which would mean that there should be about 10 courses between the top of the foundation and the base of the window, rather than the five that are currently visible...
...incidentally, if the 'view' in the second image is to be regularly achievable, I would leave the underside polygons of the chimney stack 'tops' intact, as their 'omission' (as is the case at the moment), just looks utterly wrong...
Jerker {:}
HawkeyeFultz
Cumbres and Toltec
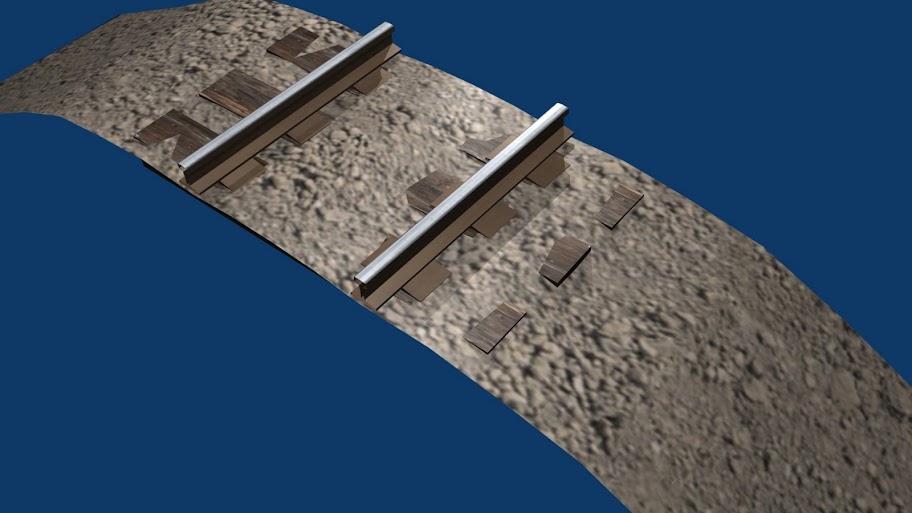
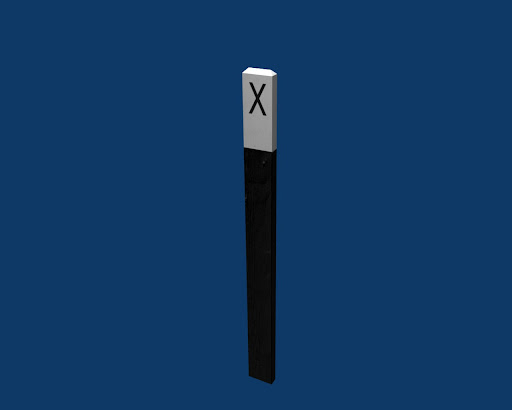
Here are a couple of my latest creations in Blender.
Click on images for full resolution
Crossing signpost from the Cumbres & Toltec.

3'gauge track section.
Timothy
Click on images for full resolution
Crossing signpost from the Cumbres & Toltec.
3'gauge track section.

Timothy
Last edited:
iceman2117
EskreuztkeinWegdenanderen
G'day iceman2117,
I agree, superb work but I do have to ask, have you scaled those bricks correctly? According to the overall size of the structure and the usual dimensions for human use used by builders, I conclude that the bricks are 'scaled' so as to be about 8 or 10 inches (200 or 250 mm) high by 32 or 40 inches (800 or 1000 mm) wide (they're BIG bricks). In my experience, most 'house bricks' of the type depicted here, are only 3"x 9" (75mm x 225mm), which would mean that there should be about 10 courses between the top of the foundation and the base of the window, rather than the five that are currently visible...
...incidentally, if the 'view' in the second image is to be regularly achievable, I would leave the underside polygons of the chimney stack 'tops' intact, as their 'omission' (as is the case at the moment), just looks utterly wrong...
Jerker {:}
The bricks, I can gladly check again.
This is a first preview rendering of the house.
The missing areas are created in the painting program at the insertion of the sky with Cut and Copy.
That's not a sky rendered certainly have you recognized immediately.
Unfortunately, exactly the two areas were not selected.
But they are available and the normals are correct.
The whole model plus texturing is so well developed in less than an hour.
As one can sometimes overlook something quickly.
greets ice

G'day iceman2117,
You wrote...
...which, I guess, is fair enough but I must ask why you would do it this way? I would simply substitute a sky background for the 'black' one during the rendering process (there is an option in 3ds Max - assuming that's the program you're using - that allows for this) and doing it that way will 'overcome' any issues like the one under discussion. I could understand the need not to have a sky in the first image but it doesn't take all that much effort (actually less than it would to do it the way you do now), to 'add' the sky background into the render for the second image - the only 'penalty' might be a slightly longer render time.
Incidentally, it didn't occur to me that you had used "cut & paste" to add the sky in the second image, I just naturally presumed it was part of the original render, given that is the way I would do it...
...also, I have just noticed that the tiles on the roof of the 'attic' windows appear to be 'out of scale' relative to the ones on the roof proper - you might want to "look into that" as well...
Jerker {") }
}
You wrote...
..."...The missing areas are created in the painting program at the insertion of the sky with Cut and Copy.
That's not a sky rendered certainly have you recognized immediately..."..
That's not a sky rendered certainly have you recognized immediately..."..
...which, I guess, is fair enough but I must ask why you would do it this way? I would simply substitute a sky background for the 'black' one during the rendering process (there is an option in 3ds Max - assuming that's the program you're using - that allows for this) and doing it that way will 'overcome' any issues like the one under discussion. I could understand the need not to have a sky in the first image but it doesn't take all that much effort (actually less than it would to do it the way you do now), to 'add' the sky background into the render for the second image - the only 'penalty' might be a slightly longer render time.
Incidentally, it didn't occur to me that you had used "cut & paste" to add the sky in the second image, I just naturally presumed it was part of the original render, given that is the way I would do it...
...also, I have just noticed that the tiles on the roof of the 'attic' windows appear to be 'out of scale' relative to the ones on the roof proper - you might want to "look into that" as well...
Jerker {
}
Last edited:
iceman2117
EskreuztkeinWegdenanderen
G'day iceman2117,
You wrote...
..."...The missing areas are created in the painting program at the insertion of the sky with Cut and Copy.
That's not a sky rendered certainly have you recognized immediately..."..
...which, I guess, is fair enough but I must ask why you would do it this way? I would simply substitute a sky background for the 'black' one during the rendering process (there is an option in 3ds Max - assuming that's the program you're using - that allows for this) and doing it that way will 'overcome' any issues like the one under discussion. I could understand the need not to have a sky in the first image but it doesn't take all that much effort (actually less than it would to do it the way you do now), to 'add' the sky background into the render for the second image - the only 'penalty' might be a slightly longer render time.
Incidentally, it didn't occur to me that you had used "cut & paste" to add the sky in the second image, I just naturally presumed it was part of the original render, given that is the way I would do it...
...also, I have just noticed that the tiles on the roof of the 'attic' windows appear to be 'out of scale' relative to the ones on the roof proper - you might want to "look into that" as well...
Jerker {
@ Jerker
I do not know what they believe me now to want to tell here.

How intregiert in Max, Maya & Co and a Heaven I know itself best.
The Idea of heaven is come to me afterwards render.
I hope, is not hard to understand it?
pans to the roof, ...
getilt are aware that small. .... And not, as they say here mistakenly "Out of Scale".
If we had better here are some pictures to operate purely as speculation.
ice


SBB Re 6/6 with "facelift"
As part of a Midlife upgrade the SBB redid the front of the Re 6/6; the old round headlights were replaced by "Mercedes" lights and a stepladder for the shunting crew was added to the right puffer. Later on the traditional SBB green gave way to the current red colour and during the last 6 years all units have been equipped with airconditioning systems (not installed here) and following their transfer to the SBB Cargo division the characteristic blue and red Cargo livery (upcoming)


As part of a Midlife upgrade the SBB redid the front of the Re 6/6; the old round headlights were replaced by "Mercedes" lights and a stepladder for the shunting crew was added to the right puffer. Later on the traditional SBB green gave way to the current red colour and during the last 6 years all units have been equipped with airconditioning systems (not installed here) and following their transfer to the SBB Cargo division the characteristic blue and red Cargo livery (upcoming)
Last edited:
hi, ...
greets ice
Just wish I could create something HALF as good as this. I for one think it's great Ice. Knocked out in ONE HOUR. WOW. Bricks not to scale, pieces missing, with due respect Jerker but sorry I don't really care. Criticism could have been directed off thread.
For what its worth just my.02c
Regards
Glen (lenice)
Actually my sig below in this case I think expresses it perfectly.
Last edited:
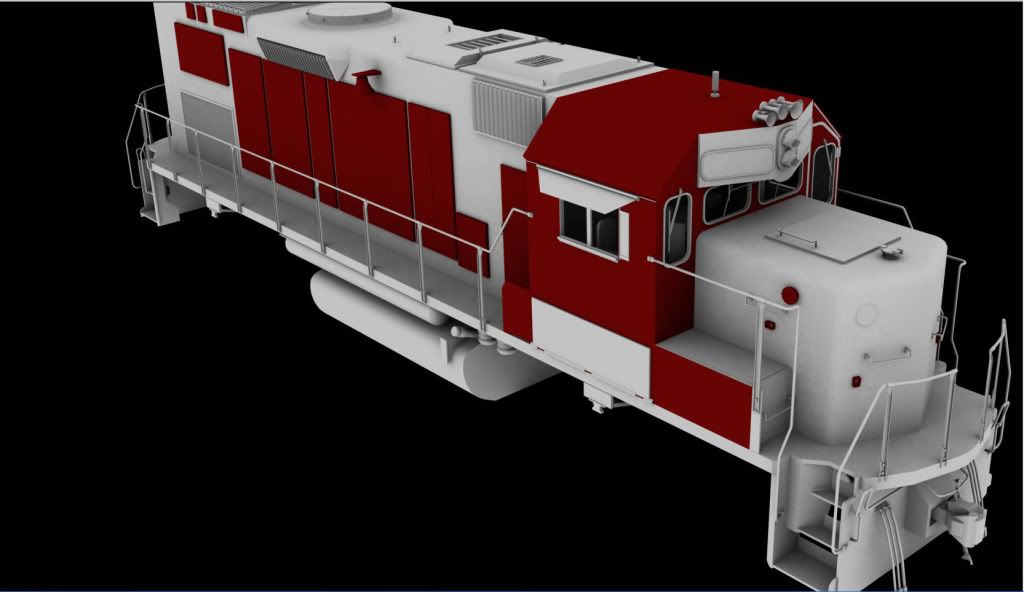
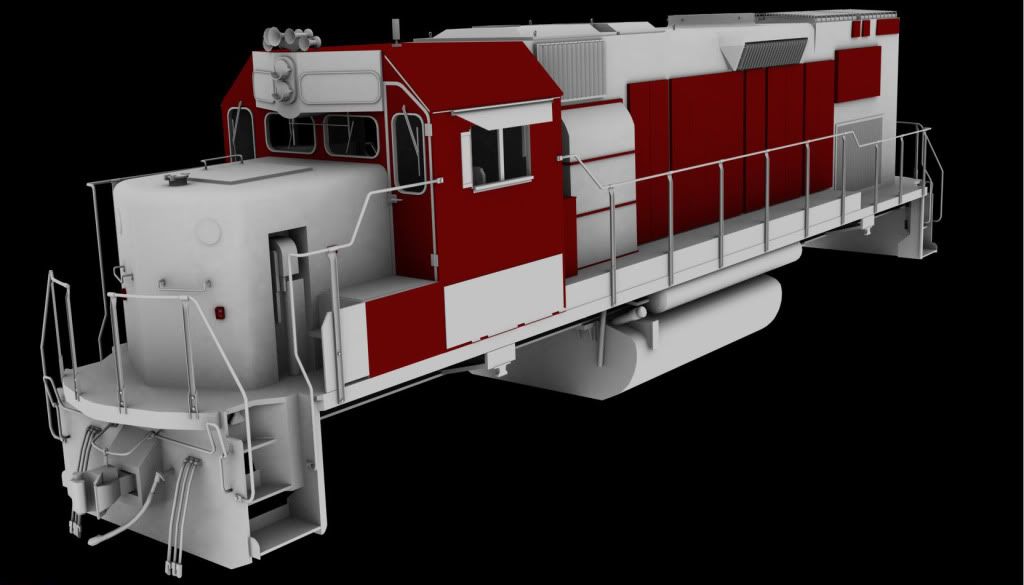
Wow Amazing stuff there Yojimbo,If i can get my loco's to look half as good as yours do then i'll have learnt sumthing.Well done mate.
Cheers Mick.
Thanks for the roses there Mick. Believe me it has been a painful process of trial and error to get to where I am at the moment, and I still have a few projects that threatens to make me go bald before time.
I usually pick them out of the mothballs when I am feeling too cocky - nothing like a little despair to set you straight. :hehe:
Last edited:
The first swiss bogies-only locomotive

This is the first true bogies-only mainline locomotive of Switzerland the Ae 4/4 of the Bern Lötschberg Simplon (BLS)
the Ae 4/4 is a WWII design and has a number of firsts incorporated in the design and functions. But mostly it is known for being part of the Ae 8/8 monster locomotive - which in reality is two Ae 4/4's short coupled with one cab removed (already in the works)
At the moment the project is at a halt pending the arrival of some documentation. The BLS made eight of the Ae 4/4 and they were all different except for the overall look, so creating an Ae 4/4 package takes a little more documentation than the average "standard" locomotive.
PS! If you are a Facebook user; try clicking the blue signature sign.
Last edited:
Similar threads
- Replies
- 0
- Views
- 15K
- Replies
- 22
- Views
- 10K