Building a mountain railroad

horacefithers

New member
I'm in my first week with Trainz. I set out to build a mountain railroad.

Now I'm discovering I don't have a clue how to:

  • build a long constant grade with multiple splines in the grade?
  • build fills under the track and make cuts in solid rock for the track to pass through?
  • control the RMB navigation when the view is close to the ground (zooming all over the place)?
  • why the "set terrain elevation" button only takes terrain from under the RMB "tower" instead of letting the use point/click at a location on the route's existing terrain?
  • control when/how the track/roads/splines either follow the terrain or are divorced from the terrain
  • mutli-select a bunch of track splines then use a "copy parallel" feature to make perfectly aligned double track or siding
  • lean out the cab window when driving a train to see better?
  • switch between sitting in the fireman's seat in a loco to see the other side of things?

The graphics look nice, but I'm having a nasty time with the surveyor tools

Are all of these things possible/easy but I haven't climbed the program's learning cliff far enough yet?

Are mountain railroads just something to be avoided with Trainz because contending with grades is way too much work?

Enquiring minds need to know...

HF
 
I love surveyor ... I could help you greatly using Forum PM ... Using Free Skype I could teach everyone much, one on one ... in real time .. instant help, and instant answers (if I am online)

Skype UN: cascaderailroad
 
Hi HF --

Your first week in Trainz? You really do want to run before you can even crawl? Serve your apprenticeship first. Be less ambitious.

I've been using Trainz ever since TRS2004 so that's, what, more than a dozen years ago. In the first week or even the first year I probably would not have contemplated doing what you intend.

Now? Well, this took maybe a week and a half of work:

https://forums.auran.com/trainz/showthread.php?148885-New-TRS19-layout-the-Phootnote-amp-Fourword

So to your question -- "Are mountain railroads just something to be avoided with Trainz because contending with grades is way too much work?" The layout above shows that it can be done but you need to develop the skills base first.

Welcome aboard and enjoy the trip,
Phil
 
I'm in my first week with Trainz. I set out to build a mountain railroad.

Now I'm discovering I don't have a clue how to:

  • build a long constant grade with multiple splines in the grade?
  • build fills under the track and make cuts in solid rock for the track to pass through?
  • control the RMB navigation when the view is close to the ground (zooming all over the place)?
  • why the "set terrain elevation" button only takes terrain from under the RMB "tower" instead of letting the use point/click at a location on the route's existing terrain?
  • control when/how the track/roads/splines either follow the terrain or are divorced from the terrain
  • mutli-select a bunch of track splines then use a "copy parallel" feature to make perfectly aligned double track or siding
  • lean out the cab window when driving a train to see better?
  • switch between sitting in the fireman's seat in a loco to see the other side of things?

The graphics look nice, but I'm having a nasty time with the surveyor tools

Are all of these things possible/easy but I haven't climbed the program's learning cliff far enough yet?

Are mountain railroads just something to be avoided with Trainz because contending with grades is way too much work?

Enquiring minds need to know...

HF

My opinion here is don't get overloaded. Just pretend you just enrolled in collage. It will take many days/weeks/years to master this. Every day you will pick up another 'thing' that you will learn. In the 70's they made the space shuttle with this new thing they called a 'CAD/CAM' program. This Trainz program is about 100 time more powerful than that. It will take time to 'Learn' it. Have fun and good luck. And ask a lot of questions here. The people here are great and they will help you.
 
  • build a long constant grade with multiple splines in the grade?
    You can't, unless you keep it perfectly straight. Set the height difference between splines to the average grade you want, and accept that the actual grade will go up and down according to the curves.
  • build fills under the track and make cuts in solid rock for the track to pass through?
    Smooth Spline Height "S" in Track Advanced.
  • control the RMB navigation when the view is close to the ground (zooming all over the place)?
    You can't. Eye level will not go below ground level. If you force it to ground level then it adjusts according to the height of the ground at the view point, which changes when you zoom.
  • why the "set terrain elevation" button only takes terrain from under the RMB "tower" instead of letting the use point/click at a location on the route's existing terrain?
    More detail needed. Do you mean Use Height "H", Adjust Height "A" or something else?
  • control when/how the track/roads/splines either follow the terrain or are divorced from the terrain
    As laid, they follow the terrain. Adjust a spline height and it will be 'divorced'.
  • mutli-select a bunch of track splines then use a "copy parallel" feature to make perfectly aligned double track or siding
    Select / Paste in the Tools tab. Deselect the other buttons to copy only the track.
  • lean out the cab window when driving a train to see better?
    Depends on the cab. Use '[' and ']'.
  • switch between sitting in the fireman's seat in a loco to see the other side of things?
    Cab view is not driver or fireman view. Use '[' and ']'.
 
Thanks, y'all

Thanks for all the replies so far.

I've been building a large HO scale layout in my basement (started in Jan '04 with portions of it imported from a previous layout). But no matter how large the basement, the layout is still tiny compared to just about every prototype railroad.

The following photo was shot in the Oakhill area of my layout (the whole layout doesn't look this finished!):

20101001-photo-03_a.jpg


I've been extremely dissatisfied with the graphics quality of most train simulators. I've been playing some 1st person shooters on my PC that have really raised the bar for excellent graphics: Kingdom Come - Deliverance (which uses Cry-Engine 3) and Battlefield V. Train Sim can't keep up, they're not even close. Railway Empire's graphics are toy-like. Then I saw some pix from Trainz 2019 and thought that finally my dream had come true. So after a bunch of investigation (including some of your videos Phil) I splurged on a gold membership.

I try to hold monthly op sessions where up to 20 guys are in my basement running trains (I'm one of those crusty prototype ops guys - we use a DS and separate station/agent operators to make TT&TO work). What if I could implement the layout in Trainz 2019 and manage to get enough crew online simultaneously to run a "prototype-size" op session?

The layout traverses the Oregon Cascades, hence my need for learning to model mountainous terrain. I'm retired so I have quite a bit of time to fling into such an endeavor.

Regarding CAD, I'm very experienced in 3rd Planit (model railroad CAD). I'm just frustrated that some of the things that are so easy to do with it seem to be so difficult in Trainz. Of course, 3pi does do much in the way finished image rendering! I'm hoping there's a much better (more efficient) way to build track on grades with cuts and fills.

Thanks again for your help.

HF
 
You ask many things, and it demands many explanations with various levels of complexity. You get the answers with experience and years of banging your head. Here is just one:

Grades.

Start with two baseboards (empty to make it easier). Now select any piece of track you like. Go to one of the base boards and start the spline near the border and lay it to about 10 or 20 squares. You should have a track with two white spline circles at each end. With the spline elevation tool, rise the last one you made up a little. Now you have a tilted track as in a grade. If you click on the "filling tool", the terrain under the tilted track is filled forming sort of an embankment. Now go to the first spline circle you made, click the "get gradient" tool and click a little into the track away from the spline circle. In the little window you will see the number of grade percentage of what you did. Now go to the other end of the track and lay another piece of track continuing or extending the first one for another 10-20 squares. It lays horizontal. You can fill the terrain as you did in the first one or wait for this: To make this last track to have the same gradient as the first one, select the "set gradient" tool, and click a little away of the middle spline into the horizontal track. It should change to the same gradient as the first one. Now you have two sections with the same gradient and can fill the terrain under. Proceed ahead with all the sections you will make in the mountain route. By now you can figure that you can edit a number in the little window of gradients and apply it to whatever section-s you want. If you click at the end spline of the example, you get the gradient but in negative percentage. You can do this to go up or down. Now in the middle of the two sections you created, go to terrain tool, and elevate the terrain so that you create a mountain that covers the tracks in the middle. Because you changed track elevation, the splines are yellow, indicating they are set, and terrain will not change them, so the section of track covered by the "mountain" is underground. Use the same tool you used to fill terrain under track, to "cut" the mountain so the track is visible. We have made a single straight track, but the basis of all this are the same with curves, spiral tunnels and all the topographic situations you may want. I can go on and on with all this..

This procedures are very basic and I am sure you knew most of it. Imagine: You made a long list of "how to do this and that", and it has taken a good chunk of space to explain very basic things related to only one. Most of what you ask is depicted in the manual that come with the program. Take some time to experiment. Trainz is an amazing program capable of doing very complicated routes, mostly limited by you imagination.
 
Well, he's a suggestion, just to see if you can get it to all work. Download a route that you think has plenty of operational potential and (and this is the most important part) uses only built-in or Download Station dependencies.

Convince you friends to also purchase and install TRS19, you all install the route you decided was best, and you all have a multiplayer operating session. One person, for example, can be the Dispatcher. Another the main line crew. The Yard Switcher crew, ... .

Then if you think it's worthwhile, start your making your own route.
 
Thanks llebrez

You ask many things, and it demands many explanations with various levels of complexity. You get the answers with experience and years of banging your head. Here is just one:

Grades.

Start with two baseboards (empty to make it easier). Now select any piece of track you like. Go to one of the base boards and start the spline near the border and lay it to about 10 or 20 squares. You should have a track with two white spline circles at each end. With the spline elevation tool, rise the last one you made up a little. Now you have a tilted track as in a grade. If you click on the "filling tool", the terrain under the tilted track is filled forming sort of an embankment. Now go to the first spline circle you made, click the "get gradient" tool and click a little into the track away from the spline circle. In the little window you will see the number of grade percentage of what you did. Now go to the other end of the track and lay another piece of track continuing or extending the first one for another 10-20 squares. It lays horizontal. You can fill the terrain as you did in the first one or wait for this: To make this last track to have the same gradient as the first one, select the "set gradient" tool, and click a little away of the middle spline into the horizontal track. It should change to the same gradient as the first one. Now you have two sections with the same gradient and can fill the terrain under. Proceed ahead with all the sections you will make in the mountain route. By now you can figure that you can edit a number in the little window of gradients and apply it to whatever section-s you want. If you click at the end spline of the example, you get the gradient but in negative percentage. You can do this to go up or down. Now in the middle of the two sections you created, go to terrain tool, and elevate the terrain so that you create a mountain that covers the tracks in the middle. Because you changed track elevation, the splines are yellow, indicating they are set, and terrain will not change them, so the section of track covered by the "mountain" is underground. Use the same tool you used to fill terrain under track, to "cut" the mountain so the track is visible. We have made a single straight track, but the basis of all this are the same with curves, spiral tunnels and all the topographic situations you may want. I can go on and on with all this..

Thanks for your help:). I was able to figure out how to do this (albeit without using the "filling tool" - at least on Trainz 2019 the smooth spline height button performs the earth moving function while in track laying mode.

Regards,
HFithers
 
I'm in my first week with Trainz. I set out to build a mountain railroad.

Now I'm discovering I don't have a clue how to:

  • build a long constant grade with multiple splines in the grade?
  • build fills under the track and make cuts in solid rock for the track to pass through?
  • control the RMB navigation when the view is close to the ground (zooming all over the place)?
  • why the "set terrain elevation" button only takes terrain from under the RMB "tower" instead of letting the use point/click at a location on the route's existing terrain?
  • control when/how the track/roads/splines either follow the terrain or are divorced from the terrain
  • mutli-select a bunch of track splines then use a "copy parallel" feature to make perfectly aligned double track or siding
  • lean out the cab window when driving a train to see better?
  • switch between sitting in the fireman's seat in a loco to see the other side of things?

The graphics look nice, but I'm having a nasty time with the surveyor tools

Are all of these things possible/easy but I haven't climbed the program's learning cliff far enough yet?

Are mountain railroads just something to be avoided with Trainz because contending with grades is way too much work?

Enquiring minds need to know...

HF

Just my 2 cents worth. Learn some of the basics before taking on any huge layout. There are plenty of video tutorials available here or here

Good luck,
Roy
 
Video tutorials

Sound advice Roy.

I've about worn out my 'outer (and my wife's patience) watching youtube videos!

One that that's helped a bit. I spent a lot of time in Planet Coaster building rollercoaster theme parks. A number of concepts appear to be similar between the PC and TSR19.

HF
 
Use the arrow keys to move left and right or forward or backward. You can also use the mouse wheel to move back and forward

The arrow keys rotate, not move, and it's up and down, not forward and back. To change the viewing position (eg, lean out the cab window) it needs to be configured for the cab and accessed with '[' and ']'.
 
The arrow keys rotate, not move, and it's up and down, not forward and back. To change the viewing position (eg, lean out the cab window) it needs to be configured for the cab and accessed with '[' and ']'.


If you go into your in game settings, on the general settings Tab, 3rd from the bottom, enable "Free Internal Camera" - the arrow keys will move left/right and forward/back, rather than rotate or up/down. This makes it very easy to move in and out of the driver side windows :)

With this setting enabled, you can still use the right mouse button to rotate, move up/down.
 
I'm in my first week with Trainz. I set out to build a mountain railroad.

Now I'm discovering I don't have a clue how to:

  • build a long constant grade with multiple splines in the grade?
  • build fills under the track and make cuts in solid rock for the track to pass through?
  • control the RMB navigation when the view is close to the ground (zooming all over the place)?
  • why the "set terrain elevation" button only takes terrain from under the RMB "tower" instead of letting the use point/click at a location on the route's existing terrain?
  • control when/how the track/roads/splines either follow the terrain or are divorced from the terrain
  • mutli-select a bunch of track splines then use a "copy parallel" feature to make perfectly aligned double track or siding
  • lean out the cab window when driving a train to see better?
  • switch between sitting in the fireman's seat in a loco to see the other side of things?

The graphics look nice, but I'm having a nasty time with the surveyor tools

Are all of these things possible/easy but I haven't climbed the program's learning cliff far enough yet?

Are mountain railroads just something to be avoided with Trainz because contending with grades is way too much work?

Enquiring minds need to know...

HF

About mountains on model layouts. It is impossible to scale them down. A typical small real-world mountain is 5,000 feet to the summit. In HO scale that translates to 57.4 actual feet in height! How high is your basement ceiling?

On my Trainz G-scale layout, my mountain is a scant 300 scale feet to the peak from the tabletop level. This is in a building that is 300 feet long by 315 feet wide. The ceiling is about 20 feet high. A molehill with a graded tunnel going through it on a large curve. This hill would translate to a mere 13.3 actual feet in height, the height of some road overpass bridges.

For a G scale mountain to be accurately scaled down from a realistic 5,000 feet it would have to be 222.20 actual feet tall, think of the height of a large hotel building!!
 
Last edited:
Building a mountain railroad - the adventure continues...

I'm in my first week with Trainz. I set out to build a mountain railroad.

Now I'm discovering I don't have a clue how to:

  • build a long constant grade with multiple splines in the grade?
  • build fills under the track and make cuts in solid rock for the track to pass through?
  • control the RMB navigation when the view is close to the ground (zooming all over the place)?
  • why the "set terrain elevation" button only takes terrain from under the RMB "tower" instead of letting the use point/click at a location on the route's existing terrain?
  • control when/how the track/roads/splines either follow the terrain or are divorced from the terrain
  • mutli-select a bunch of track splines then use a "copy parallel" feature to make perfectly aligned double track or siding
  • lean out the cab window when driving a train to see better?
  • switch between sitting in the fireman's seat in a loco to see the other side of things?

HF

Last week when I sat down to climb the learning cliff for Trainz 2019 I listed the items above. With help from people on list (and some youtube videos) I've figured out:
  1. How to build a long continuous grade with fills and cuts (ridiculously easy once I started using the smooth track/spline tool which automatically adjusts terrain under the smoothed track...) I also learned how to control whether track is attached to terrain or if it floats free.
  2. How to build a curve to a constant radius (curve templates)...
  3. I've gotten a lot better at navigating in Surveyor, but I still have troubles when navigating in an area with hills and valleys. This seems to require ascending far above the hills to navigate well. Most awkward when trying to detail in valleys.
  4. Setting a preferences option to allow moving around in the cab while in driving mode.

There are still some items that I don't have answers for (DEVS are you looking at this?):
I haven't found a way to multi-select multiple track (or other splines) at a time.
I still haven't found a tool to make a copy parallel to a track path (consisting of multiple splines). Very handy for building yard ladders or sidings, especially when said items are on a curve. 3rd Planet makes this easy. NOTE TO DEVS: this feature sure would be handy when laying out yards with parallel tracks or sidings if it's not already present and I just haven't found it yet.
And I discovered that when creating a track junction (turnout), the existing track seems to get warped out of shape necessitating use of the "straighten" tool. PLEASE DEVS - if there's not already a means to keep the original track shape intact, can you program it so that holding the Ctrl key while connecting the diverging track will keep the original track's shape intact????? Using the straighten tool is painful, and it doesn't work for making curved turnouts as all their legs are curved, not straight!

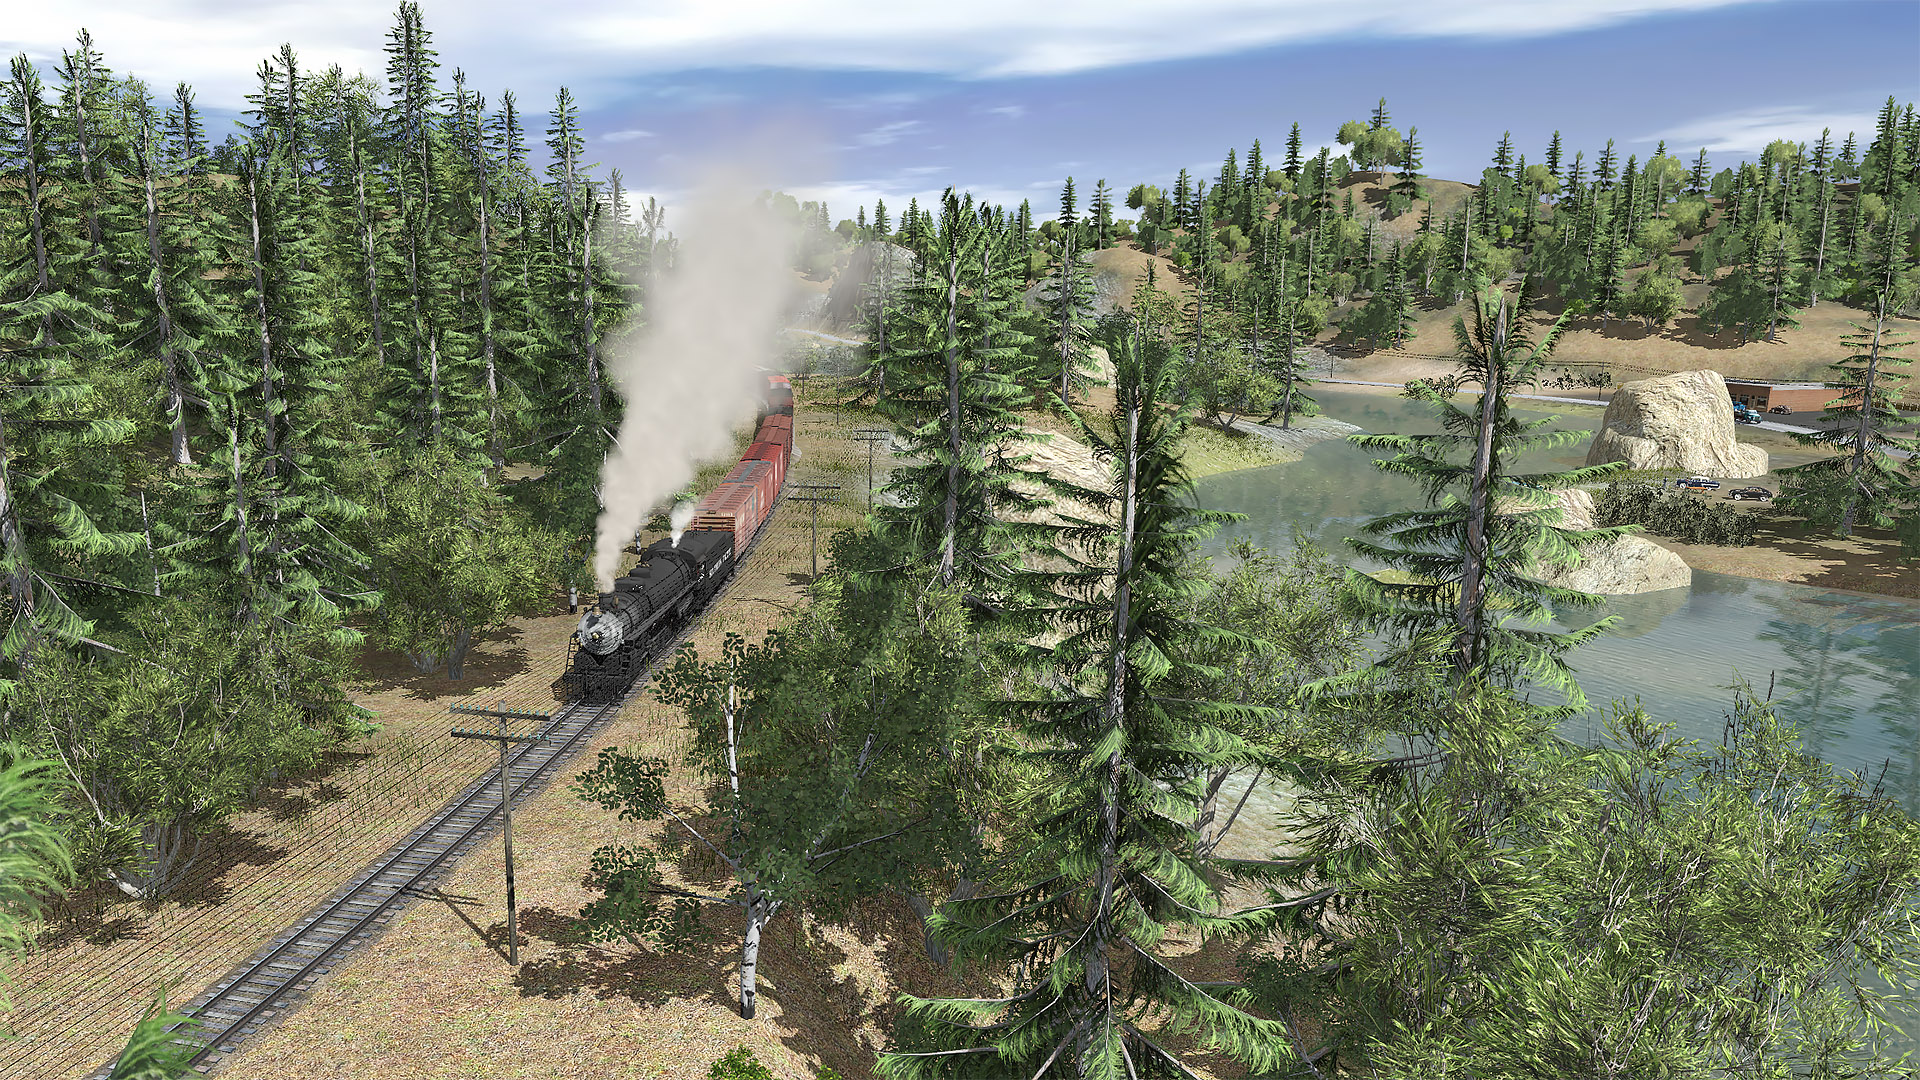
Progress on the Trainz-style BC&SJ is being made as I'm now on the second week train Trainz.

I decided to start at the flatter end of the railroad. So far it occupies 15 decorated base boards with many more to come...

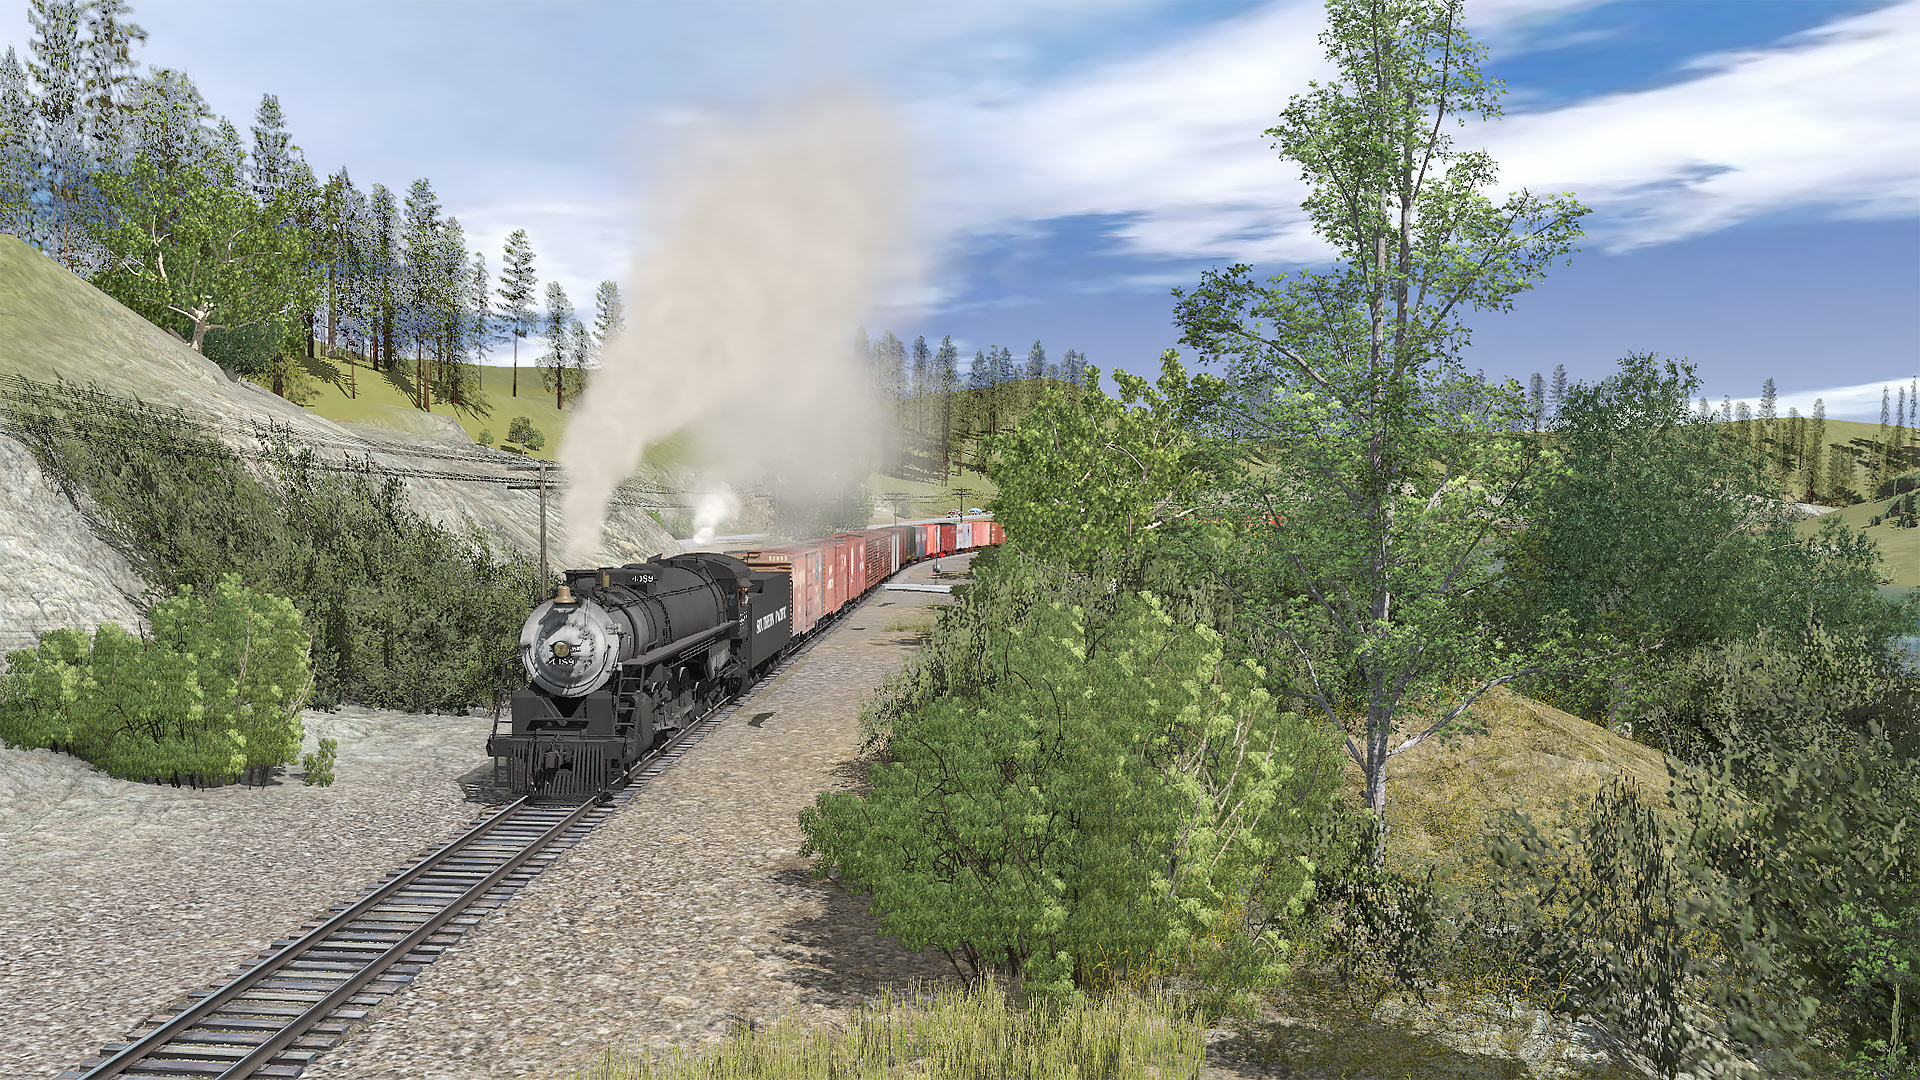
Yesterday I was running an SD70 loco and noticed how sharp some of the curves feel. Today I replaced a whole bunch of track with 150m curves with 300+m curves. Now it doesn't look nearly as sharp.
(by comparison I used a 200" radius for one curve on my HO model railroad. This translates to around 450m full size. Even passenger trains look good on that curve.

Another issue I have with curves is trying to maintain a constant radius. I downloaded some curve templates and used them when replace the too-tight curves I found while driving the SD70. Not the least painful thing in the world to do, but feasible. DEVS NOTE - can we please get a way to lock a track spline to a particular curve radius? Maybe holding down the Ctrl key while creating a line will make any spline curvature constant - and show the radius as part of the cursor so we can see what size radius we are using? And maybe add a radius field and set-radius button down near the fields for setting gradient and elevation so we don't need to make a curve, then look at it, then remake the curve if it wasn't correct.

I've been exploring the Download Station looking for useful tidbits. Sometimes though, when I attempt to download them, they don't show up in the list of available stuff in Surveyor.

Today I watched the videos on using the TurfFX grass generation tool. Neato, and now I can make patches of grass. The grass really does make the right of way look much better.

Even with tons of trees present and now TurfFX grass, my 'outer seems to be keeping Frame rates high enough that I'm not seeing stepiness (is that a word?) - it looks pretty nice on my 21:9 monitor.

I had a phone conversation with my model railroad's primary TTTO dispatcher this afternoon. He's intrigued by the possibilities of dispatching a "full size" layout using TTTO - all too often, the DS spends a model railroad OP session madly thrashing to get orders out and trains cleared because stuff happens so quickly on our too-small model railroads. Guess I'll need to be looking multiple user Sessions with Trainz.

And thanks to all of you who are posting help and Trainz route porn videos on YouTube.

For the most part the graphics are GREAT! I don't suppose there are any plans to add ray tracing (RTX) to the program? (as if the Devs don't already have too much to do already...)

I'll try to get a video uploaded to youtube sometime soon.

Lots of fun, but VERY time consuming.

Thanks again everyone for your help.

Regards,
H.Fithers
 
You have a lot of stuff which I will have to look at later, but this might help you. The information is a decade old now, even after the update, but it's still mostly pertinent today as it was back then. There is one thing I need to mention, though. Ignore the statement about track direction. This has been proven only to be an urban legend, and the only things that track direction help with is placing track objects so you don't have to keep flipping them around, and when laying double track so that the track splines flow easily with each other.

http://trains.0catch.com/tutorial.html

There is unfortunately no way to grab multiple tracks in the sense you want to. Oh we've asked for that before, but it seemed to disappear through the cracks. Maybe this should be brought up again so I recommend you post something about it in the Suggestion Boxcar forum.

There are multiple track assets available, but they don't perform well. For best performance use single tracks. Pressing the shift-key while laying tracks and other splines for that matter, will allow you to place parallel tracks. I find that if I line up the track spline points, it helps keep the tracks "together". There are also some track spaces that maybe helpful that can be left in place to hold the track splines at a fixed space. They are found under scenery items.

Regarding stuff downloaded from the DLS:

First while in Content Manager, setup your columns. Right-click on the bar and add in every one of them. You can then resize them to fit. I find if I put the columns with category and status, followed by other things like name, size, etc., in that order helpful. You can rearrange them to suit your preferences. Clicking on a column will sort the content. There's a possibility that the stuff you downloaded is faulty, and it it's faulty it will not appear in-game. To find the faulty assets, change the filter from Download Station to Faulty. You can then sort status and search for missing dependencies, etc.

And one more thing regarding assets on the DLS. There's a program in the works setup by N3V in conjunction with some community members to clean up the DLS and bring the assets up-to-date so they work error free. With well over 6000 assets needing repairs, the process is ongoing but is going to take some time.

For real mountain building, I recommend you take a look at TransDEM. http://www.rolandziegler.de/StreckeUndLandschaft/startseiteTransDEMEngl.htm

For about $35 US, you can import National Geologic Server data including topographic maps, trim down the area, and export the ready-made landscape all ready for track laying and asset placing. The program does have a learning curve and there is a plethora of options of which you may only use a handful. Once you head down this road for route building, there's no turning back. With Trainz being Trainz, you can modify these landscapes in any way shape or form, and even create fictional lines on the same terrain, or better yet, bring back lines that have been long abandoned, freelance them into a modern operation, or keep them as they were.

Trainz as you're discovering is both fun and addicting. Heck I've been at it 15 years now.
 
There are multiple track assets available, but they don't perform well. For best performance use single tracks.

This is no longer correct for multi-track created correctly to current standards. The net overhead is less than for multiple separate tracks and there are no problems with performance. Track direction is controlled within the asset.
See, for example: https://1drv.ms/u/s!AjgXq5nze6hEgatvm3l9icFSe7VjoQ
The ability to create efficient multi-track assets makes the multi-track copy largely irrelevant. For OP they have the added advantage that they don't straighten track sections when junctions are created, although that isn't really a valid concern.

Thanks for the update on the multi-track assets.

But still there is going to be a plethora of really bad one still out there so the warning is still valid.
 
Screen shots of the route in progress

Hey...

Well, I've been making progress on building my virtual layout.

I got started at the end where things are flatter and have finally progressed up to the mountain areas.

The BCSJ (Bear Creek & South Jackson) is a virtual version of what I might have built if I'd had unlimited time and $$ and a train room the size of the super dome. The model version of the BCSJ is online at www.bcsjrr.com.

The BCSJ is affiliated with the SP. That (and there being no Trainz locos skinned for the BC&SJ) explain SP locomotives are in the following pix and BC&SJ locos are not.

This shot is of one of the earlier areas in the route. The area is largely flat with a river running through it.
20190125-bcsj-v-20-1080p.jpg

20190125-bcsj-v-020-1080p.jpg


A few miles railroad east of this location we find an SP GS-8 (from K&L). This area was the first hilly section of the route.
20190125-bcsj-v-018-1080p.jpg


A mile beyond that location a pair of SP SD-45s are pulling train 200 through a grove of trees. Yes, there's a bit of rubber-eraing happening here. The HO scale BCSJ is set in 1952.
20190125-bcsj-v-016-1080p.jpg


A different day and a trio of SP tunnel motors are pulling No. 200 though Jefferson.
20190125-bcsj-v-015-1080p.jpg


Another day (years previous) and a pair of Black Widow GP-9s take the siding while No. 203 passes at Jefferson.
20190125-bcsj-v-014-1080p.jpg


A wig wag guard a grade crossing between Jefferson and Browning. For some reason I can't get the wig wags to wig-waggle when a train approaches.
20190125-bcsj-v-013-1080p.jpg


An SP GS-8 Northern (4-8-4) leaves the pass for the flat lands about 1/2 mile east of the the previous photo.
20190125-bcsj-v-012-1080p.jpg


To be continued in another post...

H. Fithers


Farther up the pass between Jefferson and Browning heading westward.
20190125-bcsj-v-010-1080p.jpg


Crossing above the reservoir on a trio of Warren truss bridges heading eastward.
20190125-bcsj-v-009-1080p.jpg


To be continued in my next post...

H. Fithers
 
Back
Top