The Mojave & Panamint Railroad

Thanks my friend, I'll check it out, will work with what we have, which is more than what we started with!

LOL

The Winter Scenery sounds very interesting too.

Hmmm, hearing about a Rollins Pass winter route sounds pretty intriguing! And perhaps I'll make a winter version of the Mojave & Panamint also once this version is complete! After all, the Owens Valley and the SPNG sees snow on occasion in Winter! Too bad there wasn't a way to mimic flash flooding in Trainz, that would be a neat session for the M&P, given the harsh environment. Which would be even more hair-raising in a stormy weather or even a cloud burst!
 
Flash Flooding in the Desert, that would be something,

I've seen what it did once on the Grape Vine 5 FWY north, We had a super Cell Cumulonimbus and Also in Palmdale California, it took out a large section of 4 Lane highway along with Trapping some cars some years back.

Folks had no Clue that the Desert could get to much like a river with no boundaries!
 
Hey all, it's been a little while and sadly I haven't been able to work on the route much this week. Or look up those recommended assets, however that is on my To-Do list. What I do have here for you are some more screen shots! However I'm afraid we'll have to tag along on a more modern mixed train this go-round.

mp_mixed_by_gunslinger87-da41qhk.jpg


First up we'll pick up where we left off with our previous northbound. This shot is taken not far from the last deep cut from the previous update. In fact you can see it in the background towards the center right of the screenshot.

drifting_along_by_gunslinger87-da41qij.jpg


And then the train crosses a fill and then passes through yet another rocky cut along the Right-of-Way.

rocky_cut_by_gunslinger87-da41qgc.jpg


Now I want to back-track a bit and show an image from within Tunnel No.2. It is the longest tunnel on the whole railroad and this will help add some perspective as to its length.

the_long_tunnel_by_gunslinger87-da41qfk.jpg


Now moving forward to the past the rocky cut we see the end to the sharp curves that has navigated the railroad over the rugged slopes of the Slate Range Mountains. Although the grade here is still an arduous 4%, the line pretty much straitens out here with only broad and gentle curves from this point onward. Not long after that last cut the train crosses a trestle. As you can see, even with the mountainous terrain this is still and arid, lonely route. Perfect for those, like myself, who have an affinity for the "Old West"! :p

arid_foothills_by_gunslinger87-da41qic.jpg


And to wrap up this post I present to you some current images of Pananmint Junction. Again, this is where the narrow gauge Mojave & Panamint interchanges with the standard gauge Los Angeles & Independence railroad. I'm pretty satisfied with the narrow gauge side of things when it comes the the yard and facilities. However I feel the standard gauge is still lacking.

panamint_jct_overview_1_by_gunslinger87-dagl8tf.jpg

panamint_jct__overview_2_by_gunslinger87-dagl8t4.jpg


Given when the M&P was first constructed, in Craig Tice's cannon, in the late 1890s both standard gauge and narrow gauge locomotives would have used the same turntable. However even as early as 1905 we see locomotives evolve to be pretty large. So I think it would be appropriate to have a turning wye somewhere for the larger standard gauge locomotives to turn. Anyway, here are two more shots of Panamint Jct.

panamint_jct__sg_tank_and_platform_by_gunslinger87-dagl8sm.jpg

panamint_transfer__trestle_by_gunslinger87-dagl8sf.jpg


Craig Tice, the man who originally envisioned this charming fictional desert crawler, had an early modeling interest in the Nevada-California-Oregon railroad as well as the Southern Pacific Narrow Gauge. And as such a lot of the features of the M&P take after those prototype roads. The M&P's primary income is from mineral traffic, varying from Gold, Silver, Iron, and Borax. To expedite the trans-loading of product from one gauge to another a transfer trestle is used. Narrow Gauge ore cars are pushed up onto the trestle where they literally drop their contents into waiting standard gauge gondolas or open hopper cars. Regular freight and goods still has to be transferred by hand via a loading platform, which can be seen in the second to last pic in center left.

I don't plan on developing this area very much given that it is mostly a transfer point between the two railroads. So only small and minor shacks and cabins will be scattered about here and some railroad affiliated buildings. Section sheds and ect... I want this to be a small bit of civilization among the harsh heat of the open desert.

Well that's about it for this addition! Hope you all like it so far! Up next is Ballarat, CA!
 
Alright all, hopping aboard yet another train (this time being the Mojave Cannonball) we're about a mile away from Ballarat and you can JUST make out the roundhouse in the distance. Sadly I don't have many pics of the line between the northern foothills of the Slate Range and Ballarat, but I'll try an take some this week.

a_mile_away_by_gunslinger87-da2fbni.jpg


And here is the north end of Ballarat, CA. This town has been created mostly be referring to Mr. Tice's model railroad, which he based his town on a single photo of Ballarat's main street he found in a book. Which book he failed to mention. But keeping in mind the general layout of the town structures (and using Google images and earth as a guide) I've tried to recreate Ballarat as it may have looked in it's glory days! Plus a thing here or there since they have a railroad in this alternative history.

ballarat_looking_south_by_gunslinger87-dagl8vo.jpg


Up next is an early shot of the Ballarat depot before I added the main street and town structures. It is a reskin of a depot created by Fitz505. Although it isn't an exact match to Craig's depot on his HOn3 model railroad, it's pretty darn close! The reskin was made by a friend of mine who did a wonderful job with it!

ballarat_depot_by_gunslinger87-da2fbmt.jpg


This next view is from the south looking north.

new_ballarat_1_by_gunslinger87-dagl8tm.jpg


And a view of the town crossroads.

ballarat_street_corner_by_gunslinger87-dagl8u9.jpg


Unfortunately there is only one true active industry here at Ballarat, but thankfully it is the primary industry in town. But I'll go more into that in the next post. Up next are a pair of industries which are purely cosmetic, and in this instance I'm okay with that! First up is the oh so humble stock yard. Nothing more than a glorified pen with a shack.

ballarat_stock_yard_by_gunslinger87-dagl8un.jpg


The next "industry" is a lumber spur, where lumber used for mine tunnels and growing communities in the area, are off loaded.

lumber_spur_by_gunslinger87-dagl8tw.jpg


And to wrap up this post I'll leave you with a view of the Ballarat roundhouse and engine facilites. The Roundhouse was one made by Elvenor and was originally 42" gauge. I replaced all the rail with Pencil42's 3ft gauge rail only track and now it makes a wonderful engine terminal for the Mojave & Panamint Railroad!

ballarat_engine_facilities_by_gunslinger87-dagl8vy.jpg
 
What is the name and kuid of the non-stacked lumber and the adobe building near the engine facility?

I, unfortunately, do not off hand. However, I do know the username of they guy who put them on the DLS. It's Frank_Dean and it's all TRS04 content. And as for the adobe building I don't know it's Kuid, but it's by "steamdrivre". It's one of two with similar names. "The Dwelling" either one or two is what I think it's called. He doesn't have a while lot of content, so searching his username on the DLS shoult let you find it
 
Last edited:
Well it's been another week and sadly a few real life obligations have kept me from making any real progress. I wanted to take some more current screenshots of another odd feature the the Mojave & Panamint railroad has, which is a rather treacherous industrial spur leading to the Whitaker iron mine. Now before I continue I want to state there was in fact a real Whitaker Iron Mine here. At first I thought the mine was something Mr. Tice created to add some operation interest to is HOn3 layout. And he built it as a Borax mine rather than an Iron mine. I happened to literally stumble across the mine's historical location while looking at some period maps of the region online. Sadly there are NO photos of this mine and the information for it is pretty much nonexistent. So my depiction of the operation is purely freelance and likely differs greatly from the prototype.

This first image was taken just below the spur and interchange to the Whitaker mine. The track in the foreground is the M&P mainline north to Ballarat.


up_to_whitaker_by_gunslinger87-da4nlq2.jpg


Next is a switchback that helps the small Heisler climb up an incredibly steep grade to reach the mine and its community.

whitaker_switchback_by_gunslinger87-da4nloi.jpg


In this next pic we look back downgrade and see the M&P mainline in the background. The trestle spanning a small gulch is the Mojave & Panamint ROW.

up_the_grade_by_gunslinger87-da4nlnw.jpg


And now we look ahead as the heisler and its lone gondola struggle up grade towards the mine.

i_think____we____can____________by_gunslinger87-da4nlnd.jpg


and just to give you an idea how steep the grade is... here's another shot. The grade maxes out at an insane 13%! his wasn't my call as Mr. Tice was quite clear about how steep the grade was on the industrial spur.

13__by_gunslinger87-da4nlh0.jpg


And to make things worse, this part of the line just CLINGS to the mountain side...

mountain_clinging_by_gunslinger87-da4nlma.jpg


Then as we round the curve Whitaker comes into view.

first_look_of_the_whitaker_mine_by_gunslinger87-da4nll4.jpg


And here is the most current look at the Whitaker mine and community. It still needs a lot of work, but I'll get to it eventually.

whitaker_wip_by_gunslinger87-da4z5ah.jpg


Well, it's not much of an update, but I hope you all enjoy it regardless. Stay tunes as there's more to come!
 
Hey all! It's been a while once again, but I do have a few more small updates. Well, so to speak. Another milestone has been achieved, which is the completion of ALL TRACK!! And now with that done I can get to work with the more scenic elements of the route, placing structures, vegetation (where applicable) ect... I have a friend who will help with the ground textures and I'll send you updates as I get them there. But for now I'll be showing off a portion of the Jawbone branch heading east towards Searles Jct.

Now in this "reality" this section of the line is the Los Angeles & Independence RR. Historically the line never went that far even though its goal was to reach Independence, CA. They did have plans with the intent to reach Independence, but for several reasons this never came to fruition. However in this case it did. Unfortunately I've been unable to find any of the proposed route maps or even written text of the proposed stops heading towards Independence. So I'm looking to the Southern Pacific's Jawbone Branch as a plausible substitute. I believe the LA&I would have pushed past Lone Pine, continuing towards and terminating at Independence. Sadly though the route I'm building doesn't include Lone Pine, but I have set up an Iportal to serve as a destination and train generation point for operating sessions.

As for the portion of the line heading to Mojave it ends at the Map's edge a few miles west of Rand, CA as a point of reference. I'll provide a more accurate measurement when I have the chance. Anyway, here are some screenshots of the Standard Gauge heading to Searles. I don't have very many, but I'll add some more soon.

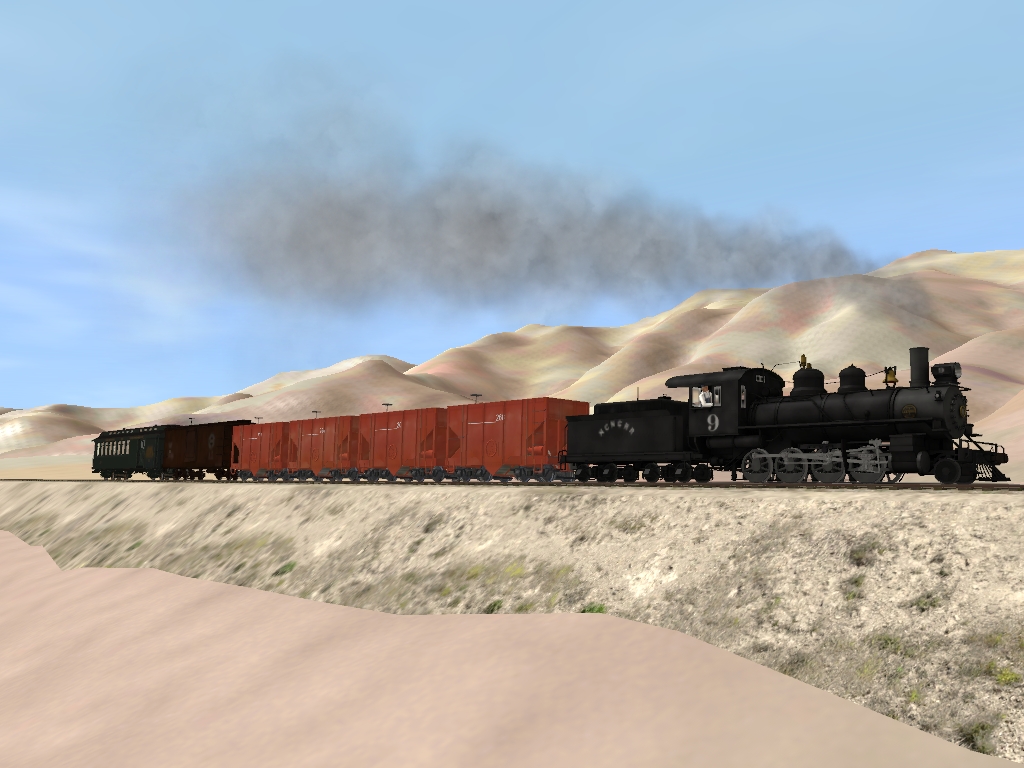
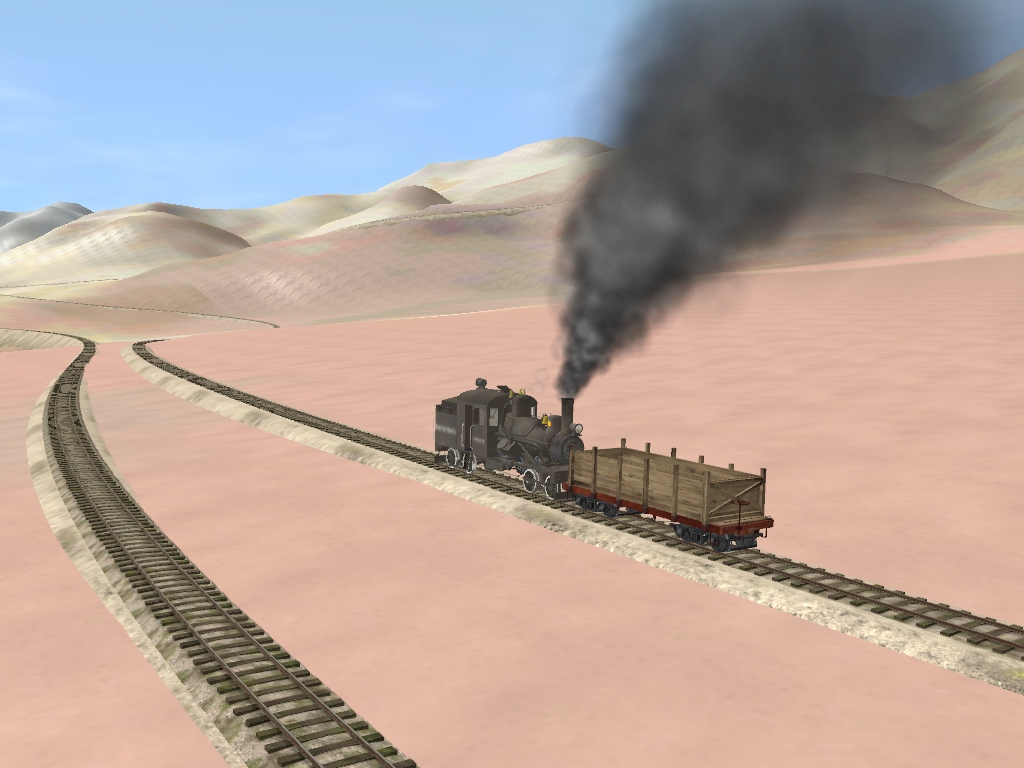
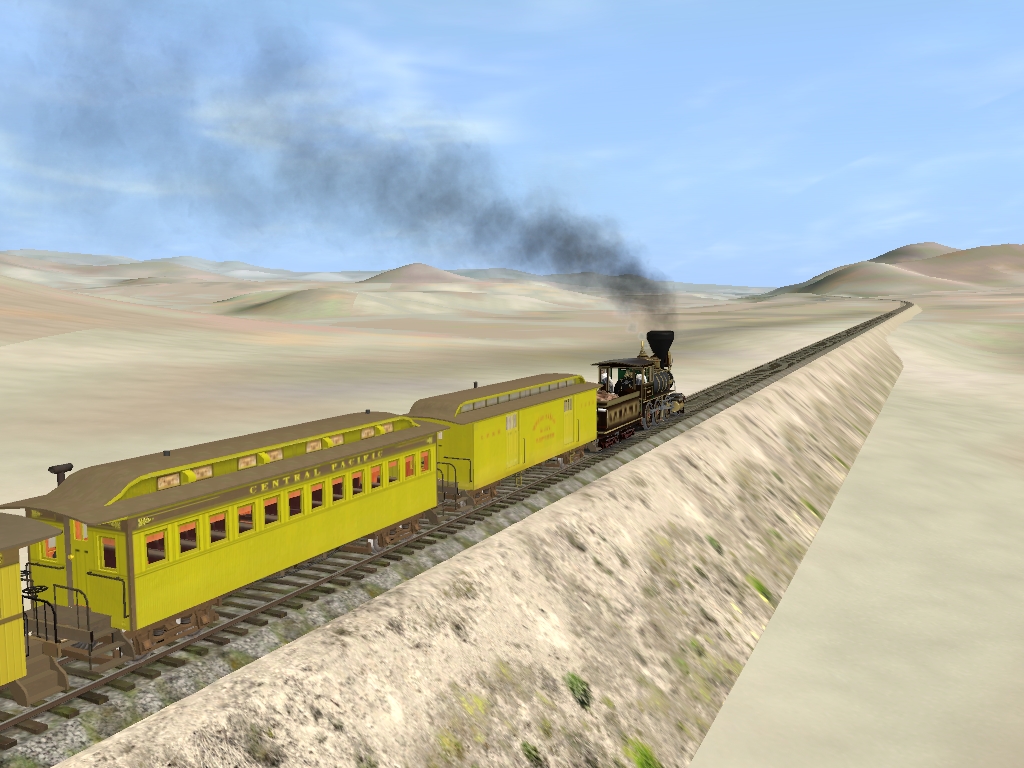
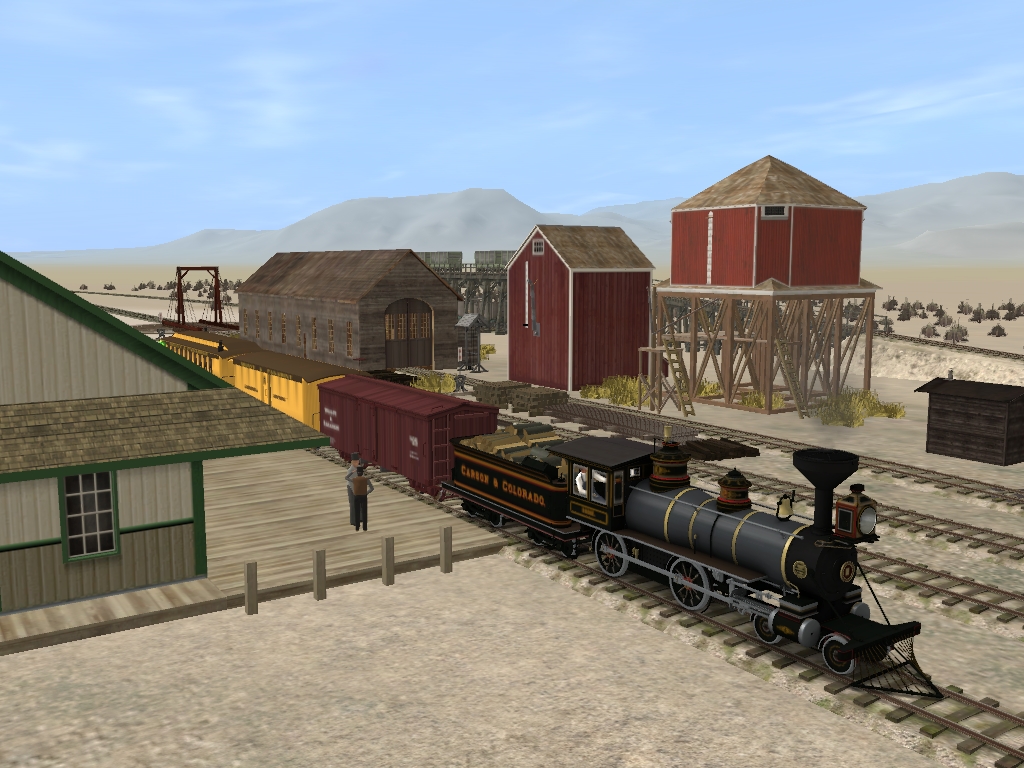
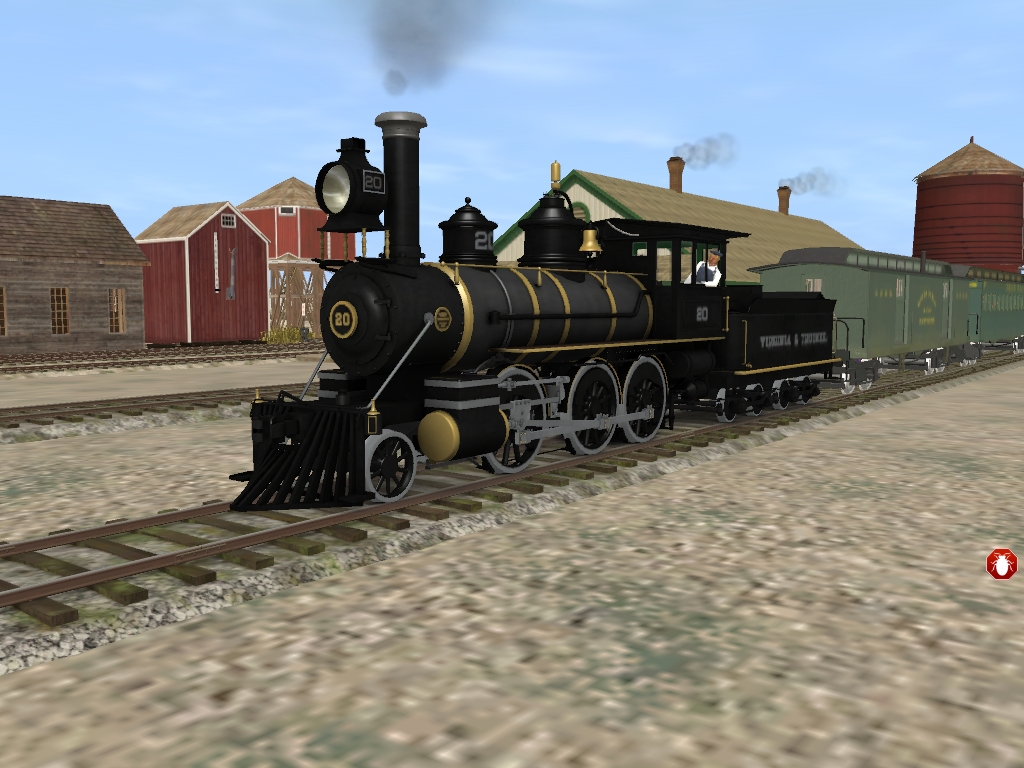
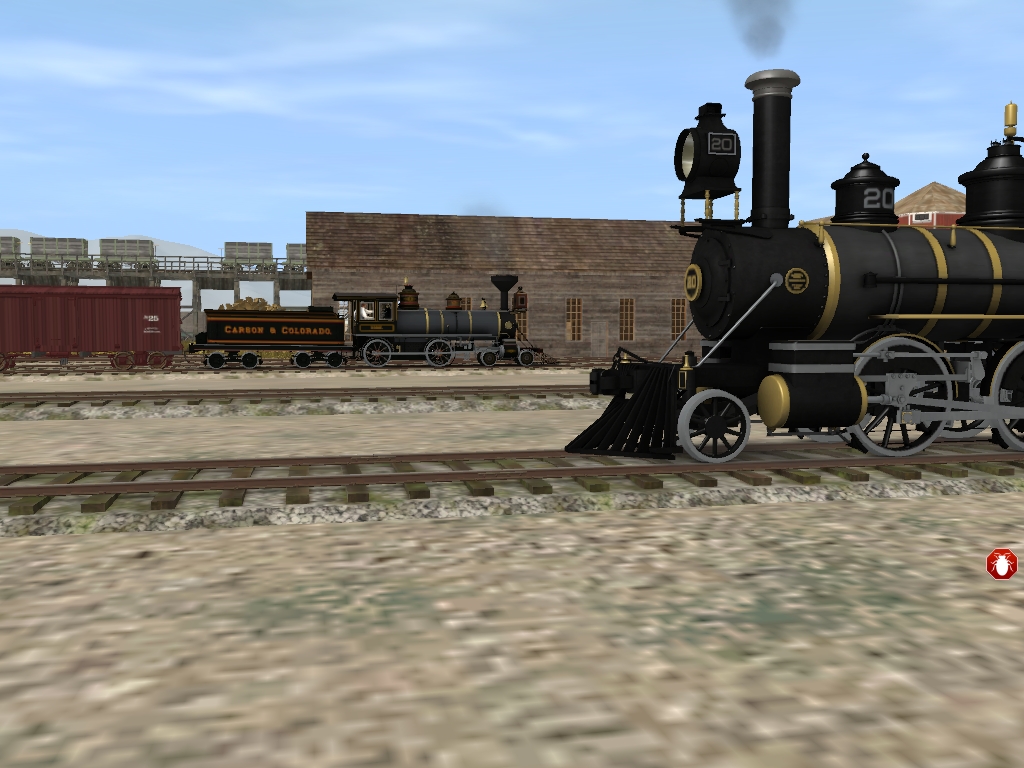
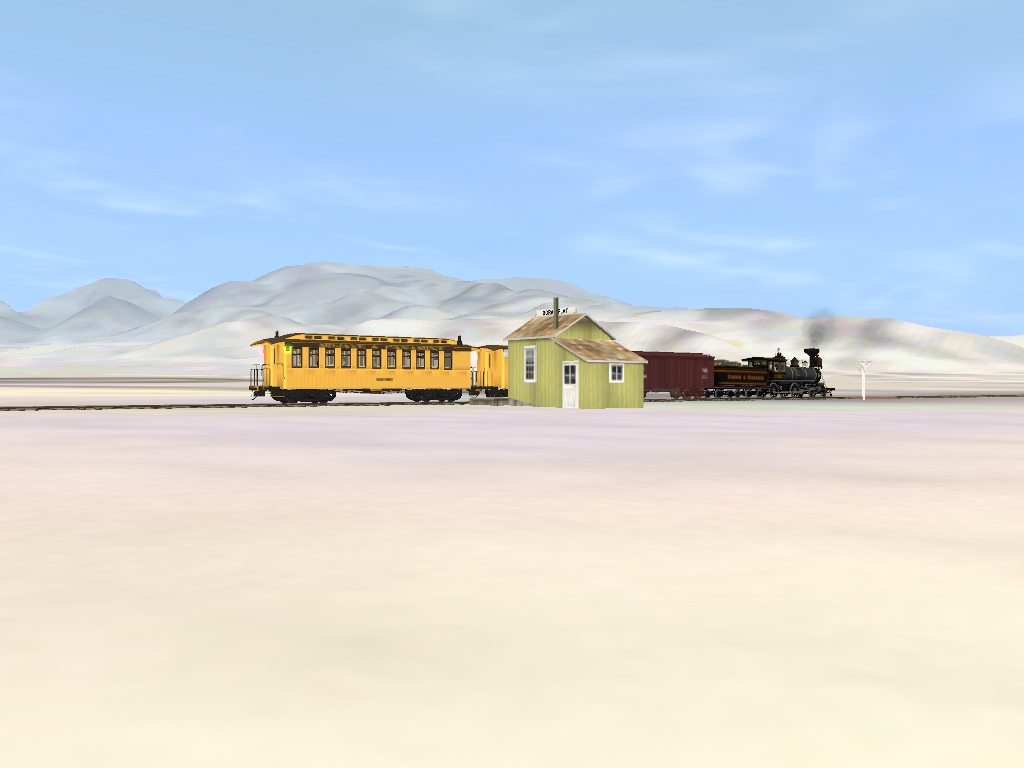
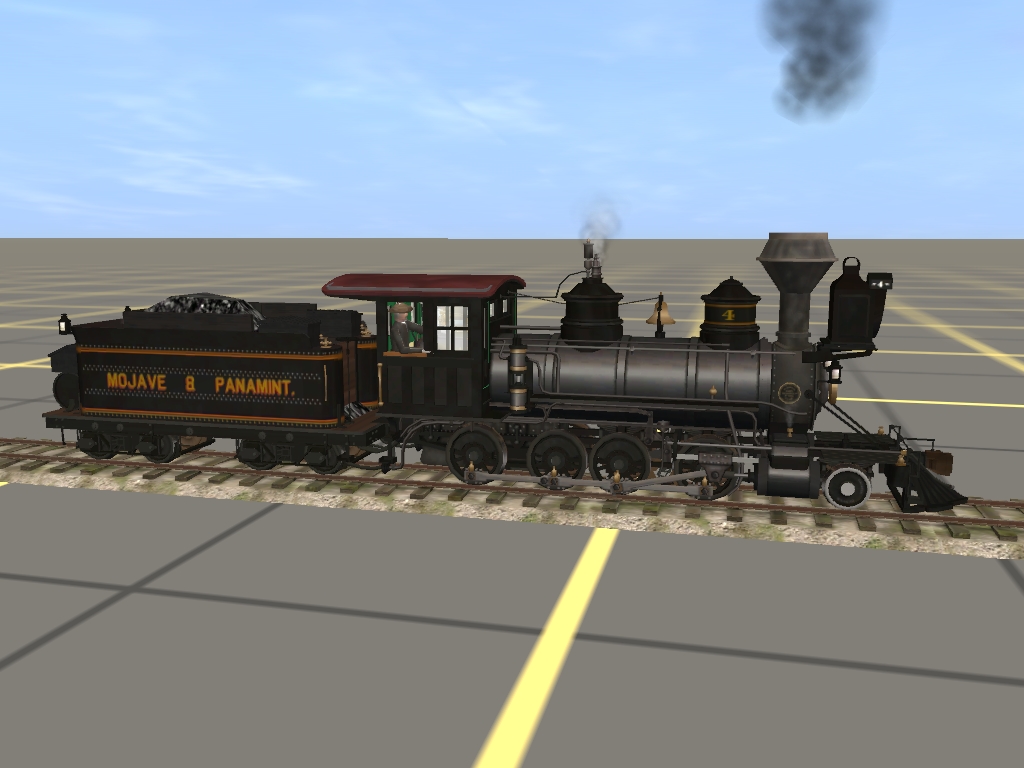
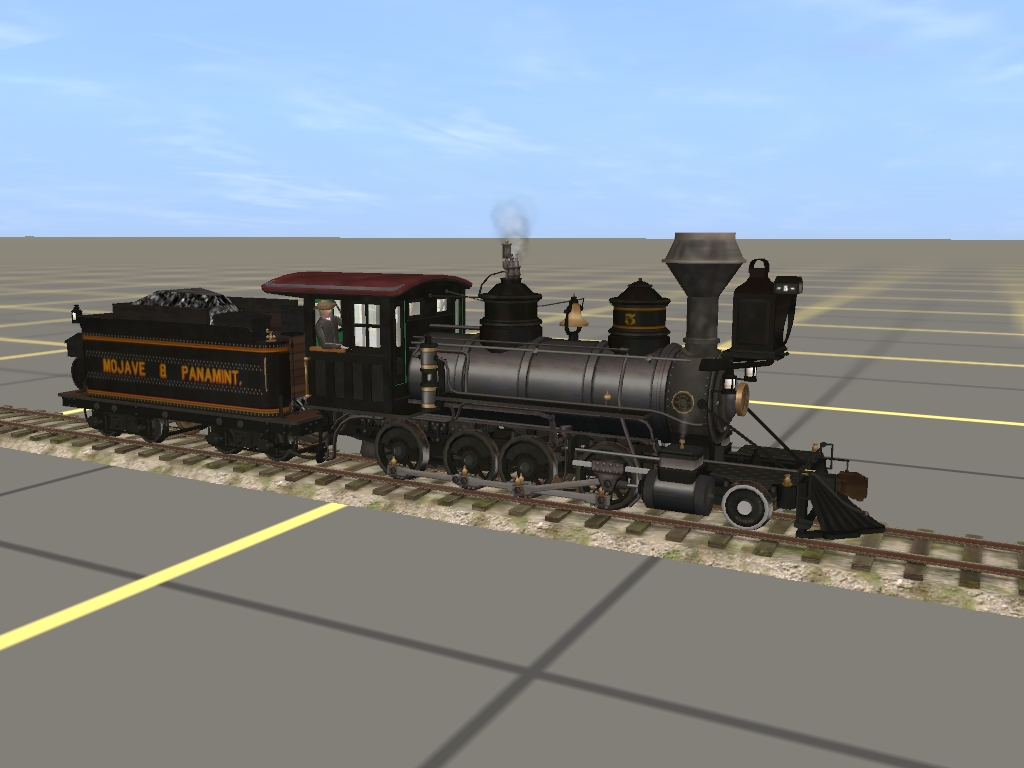
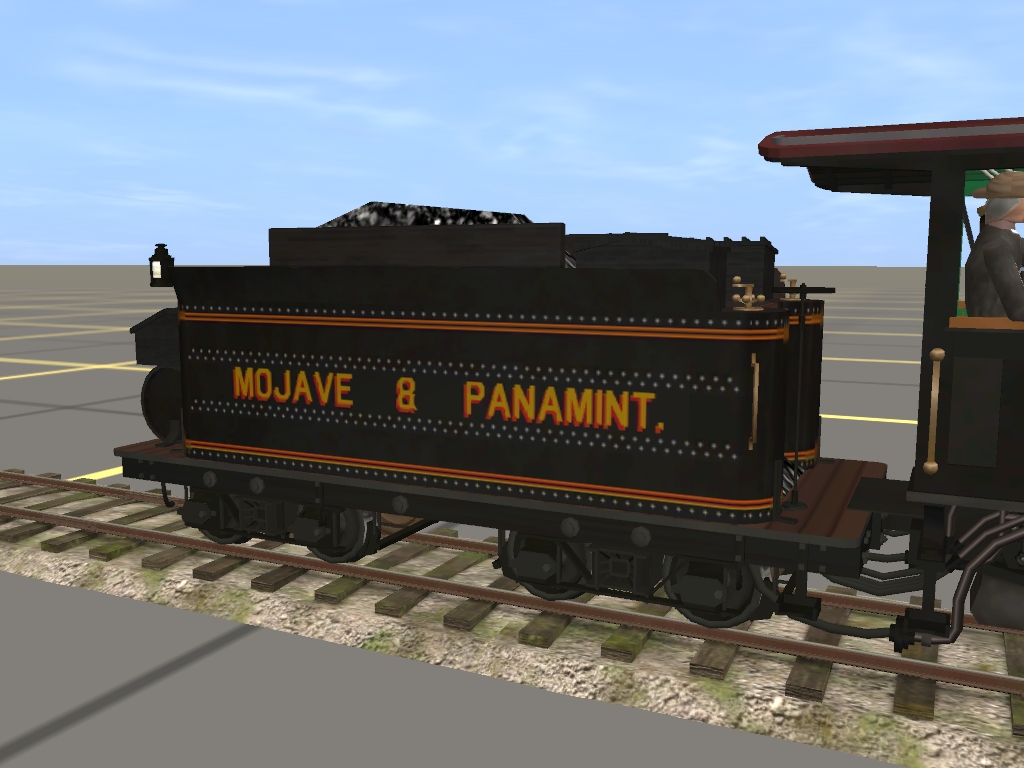
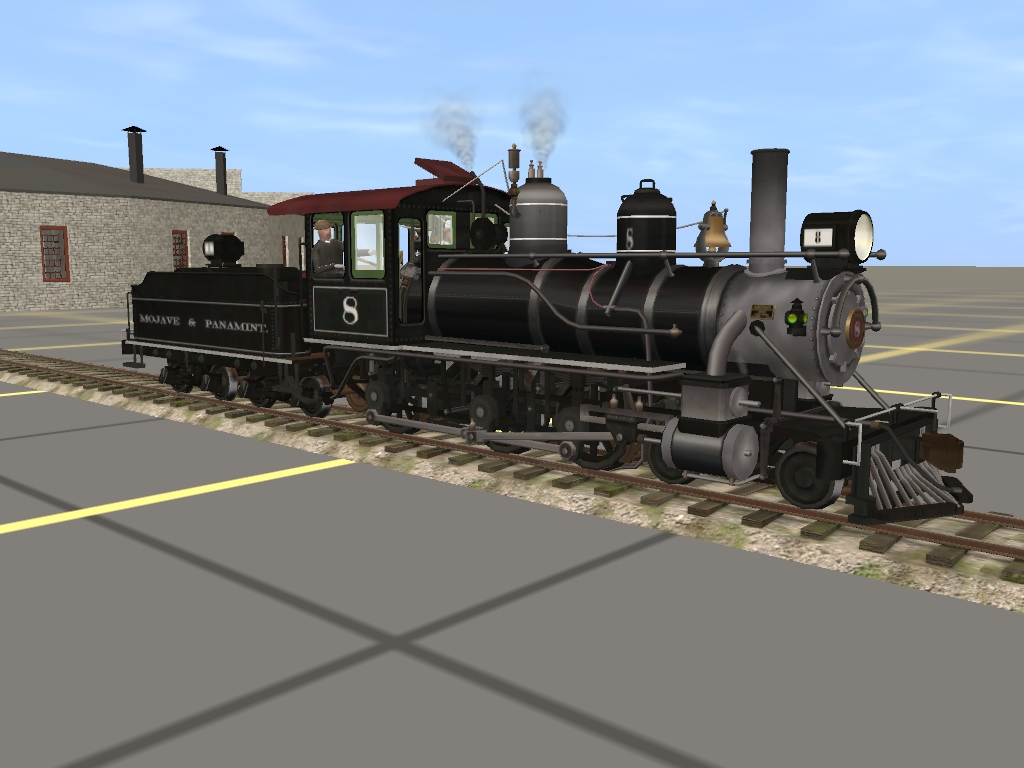
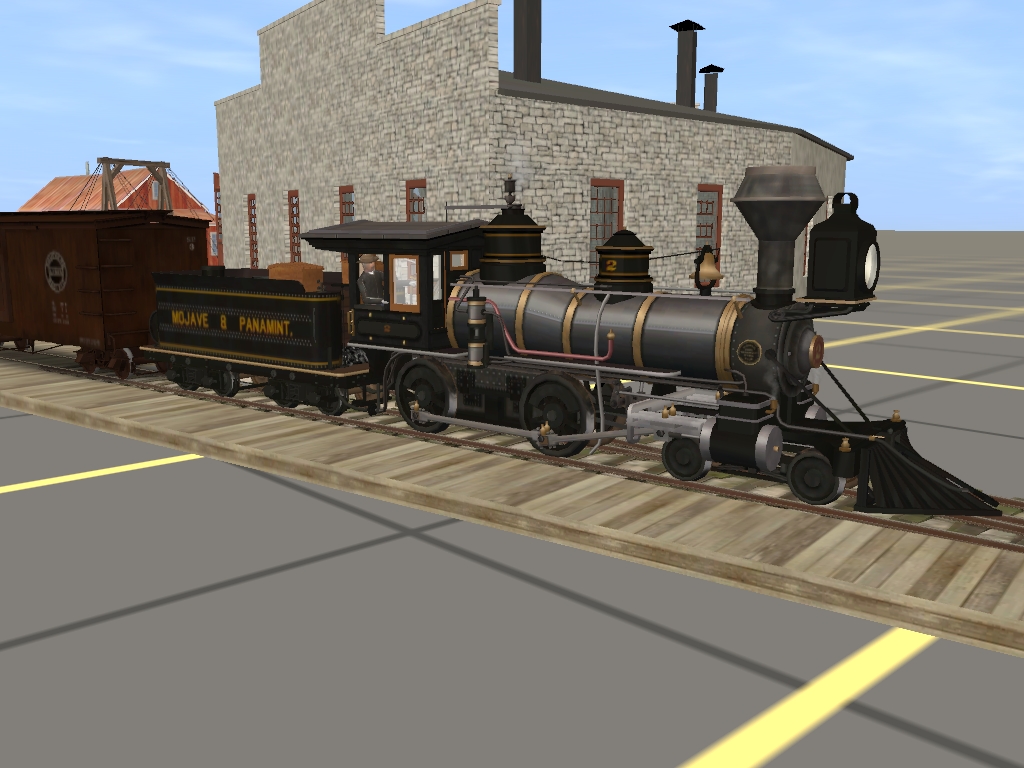
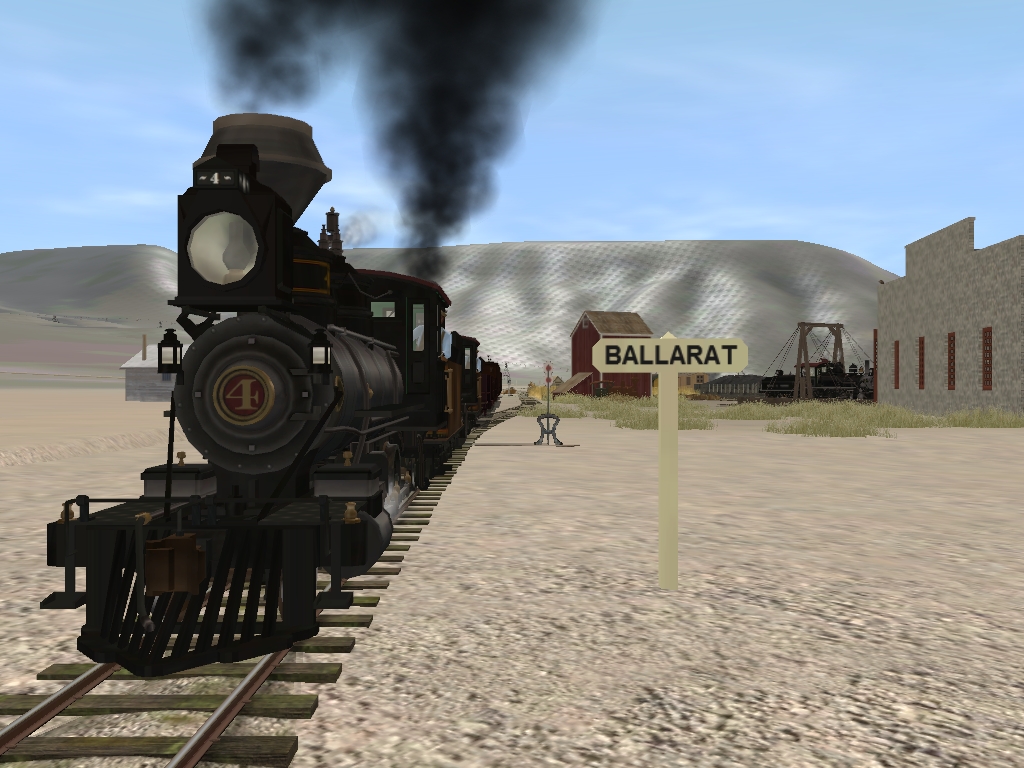
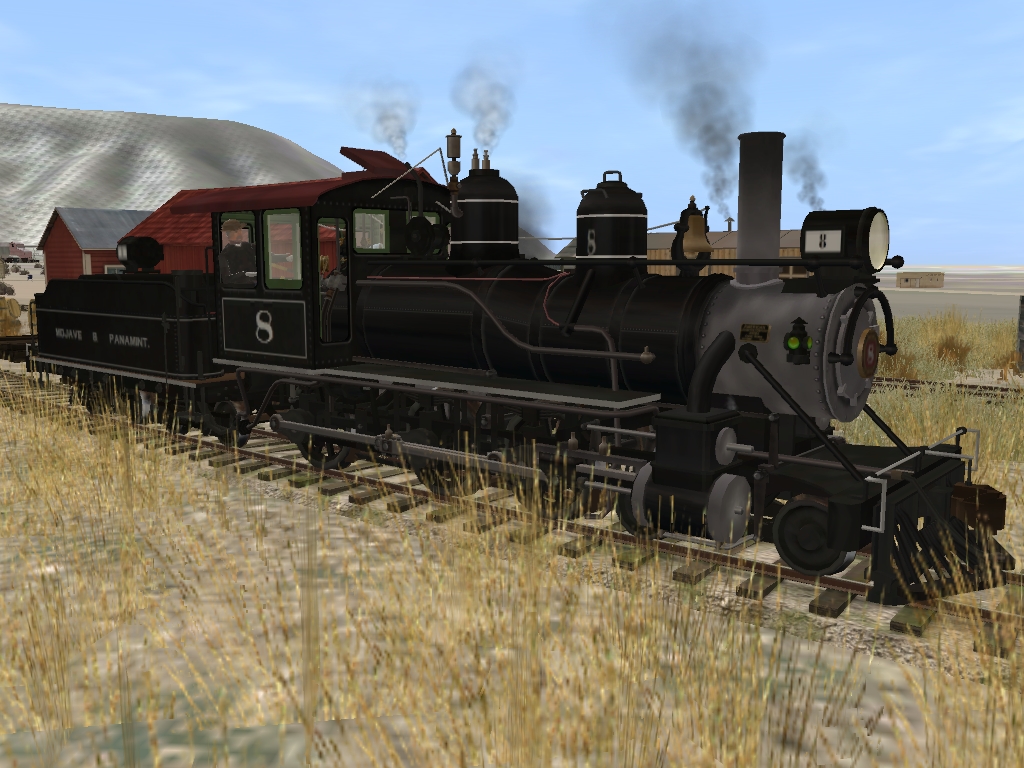
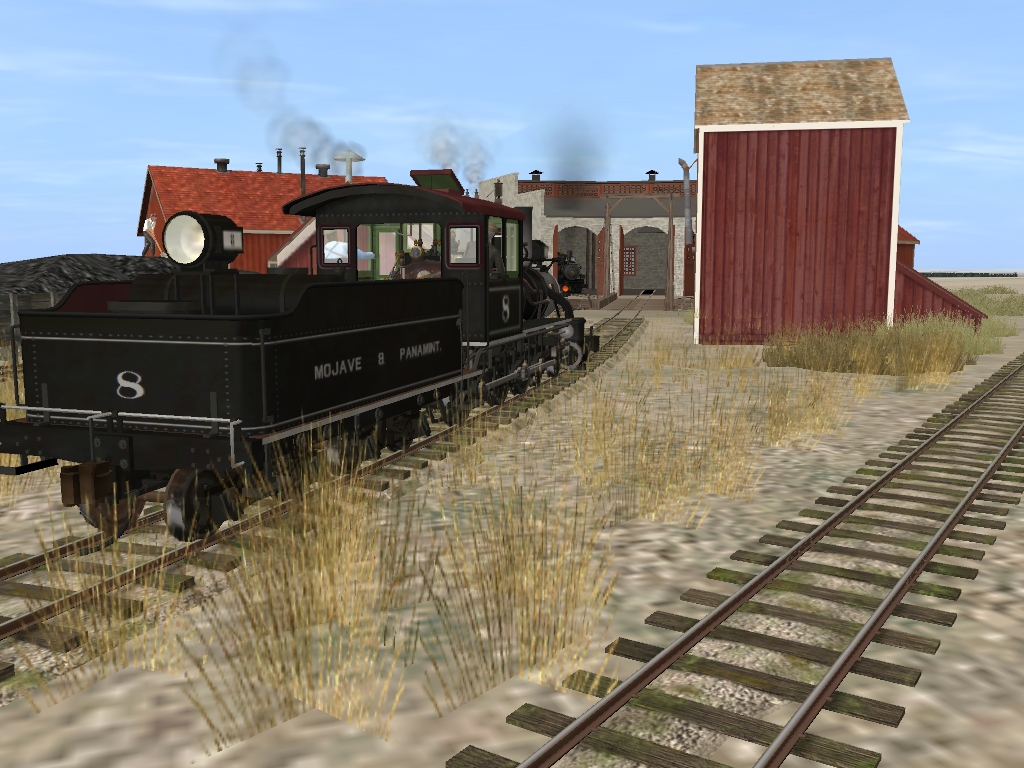
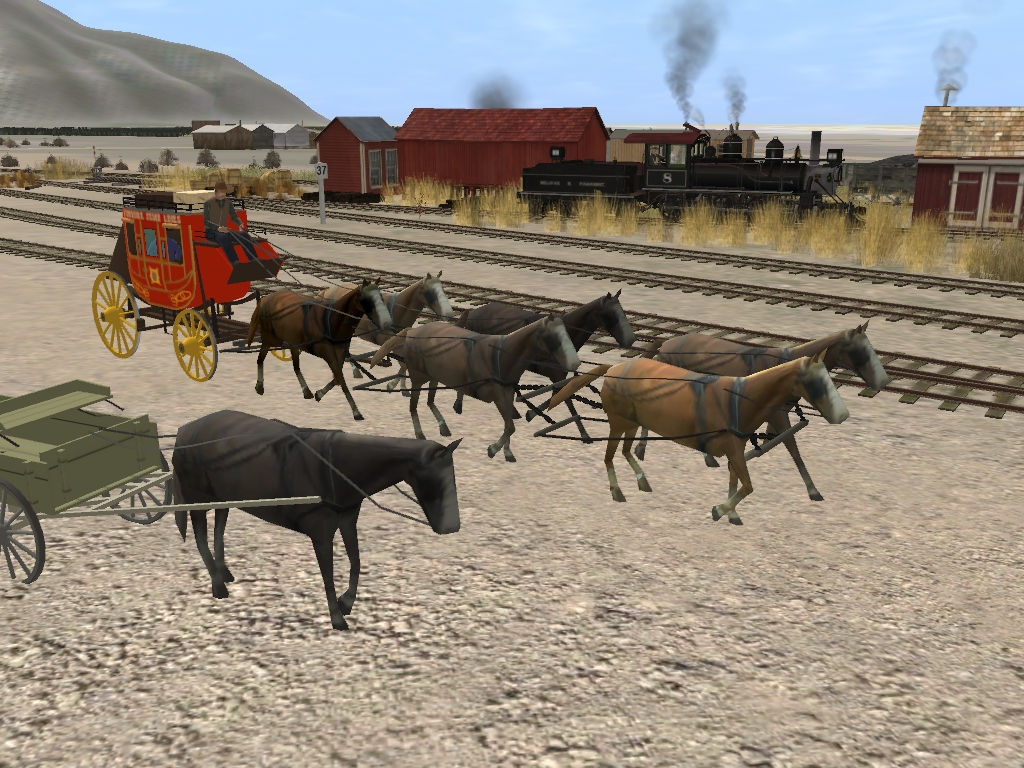
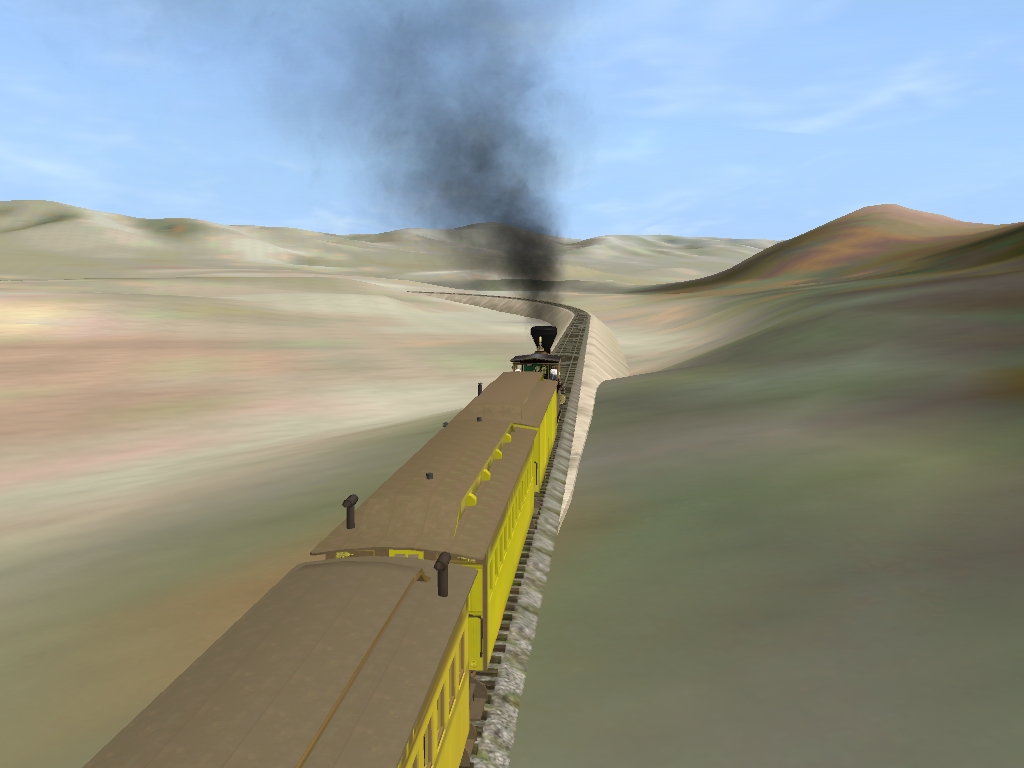
I still need to get some info on the paint and color schemes of LA&I rolling stock and equipment. However the real LA&I was leased to the Central Pacific and later absorbed into the Southern Pacific system. So for fun I put together a mock CP passenger train for taking screenshots of the route. Here we're somewhere around Rand, CA.

near_rand_by_gunslinger87-dalywxj.jpg


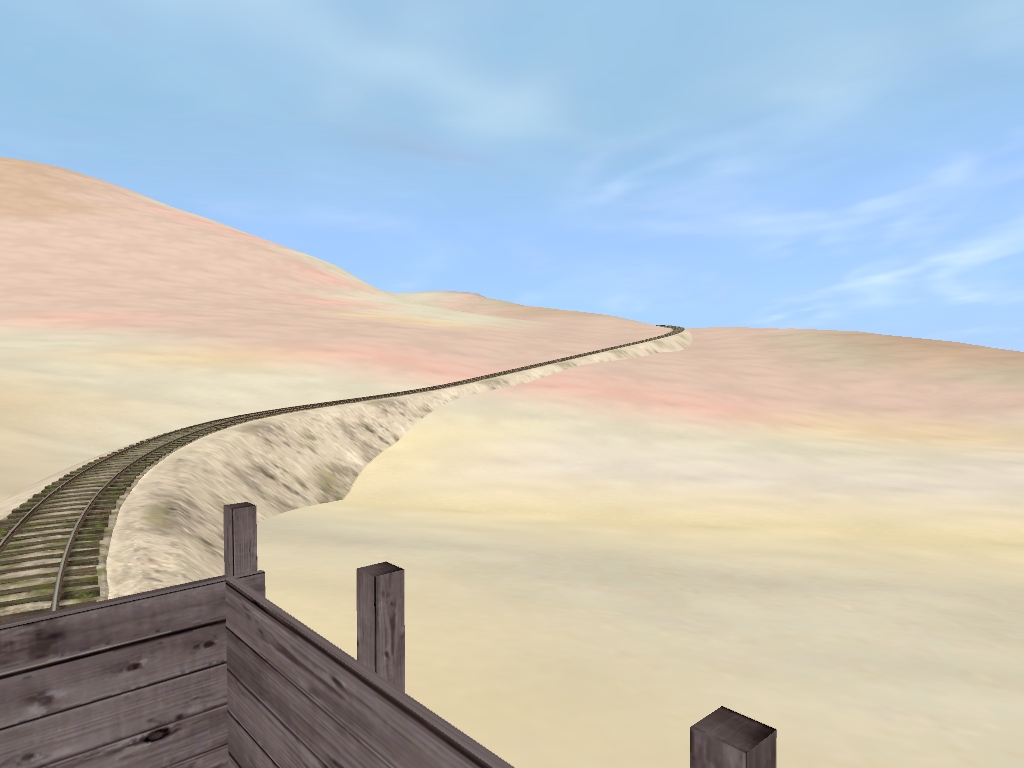
A little further along is a small cut.

small_cut_ii_by_gunslinger87-dalywvm.jpg


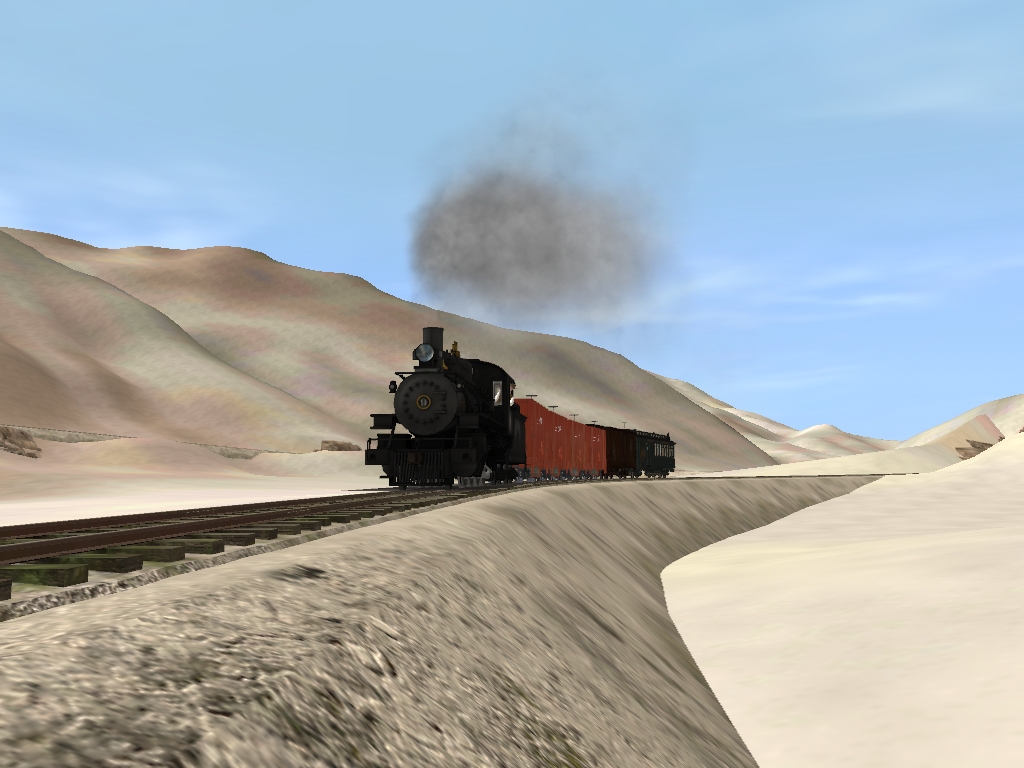
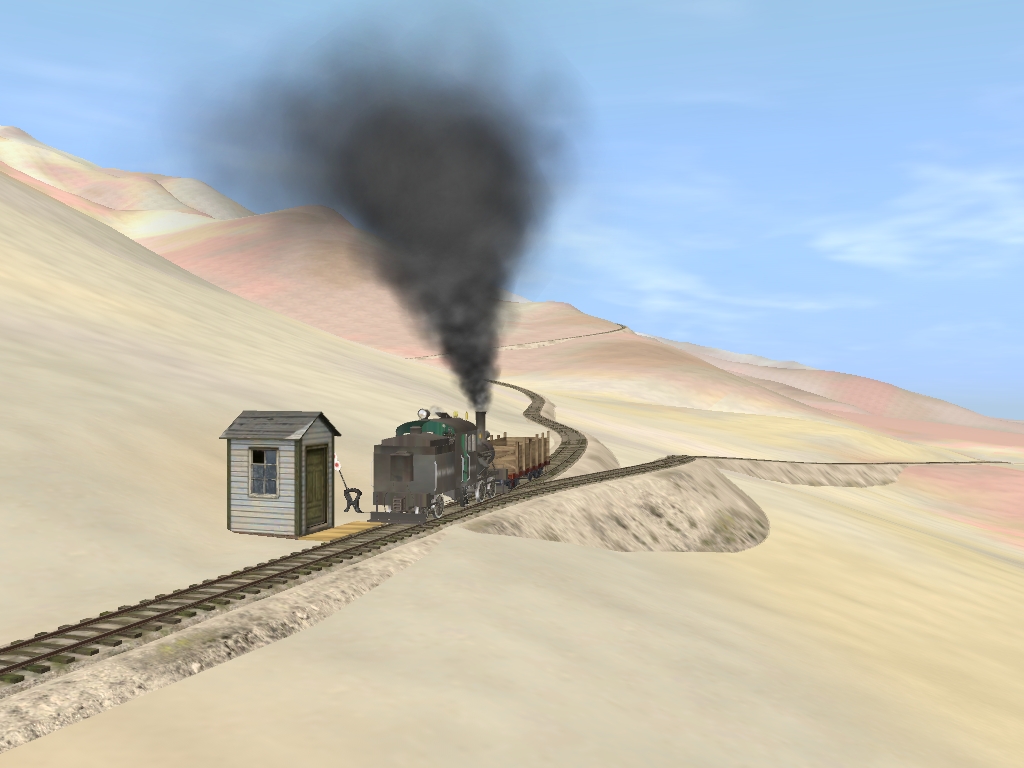
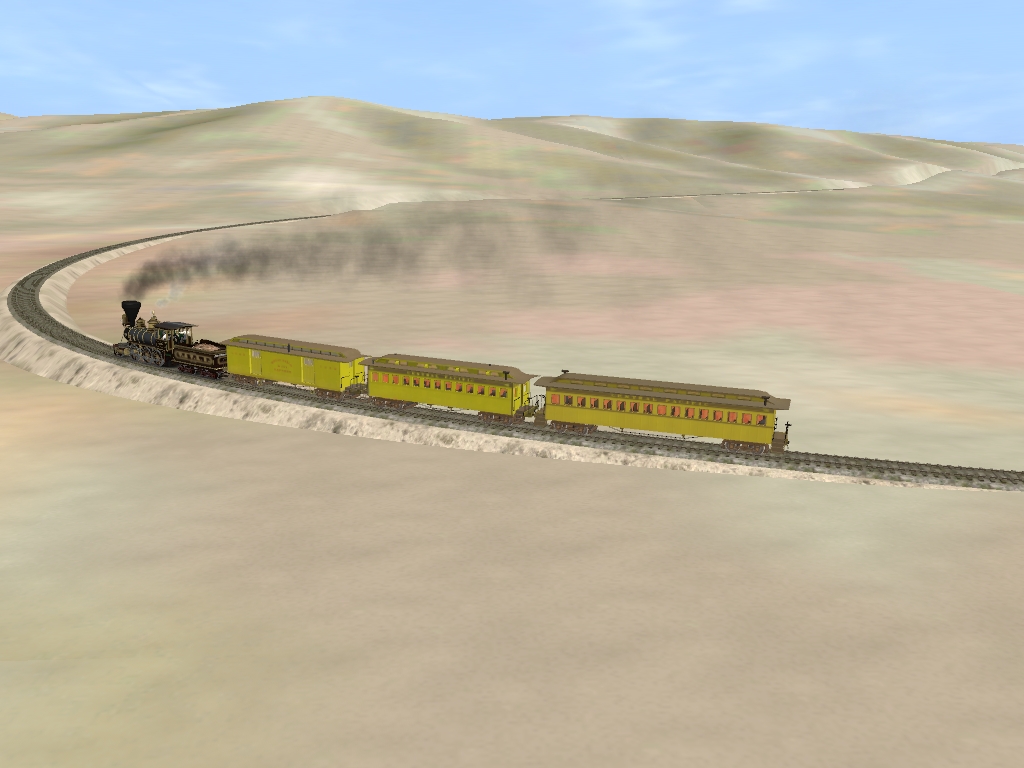
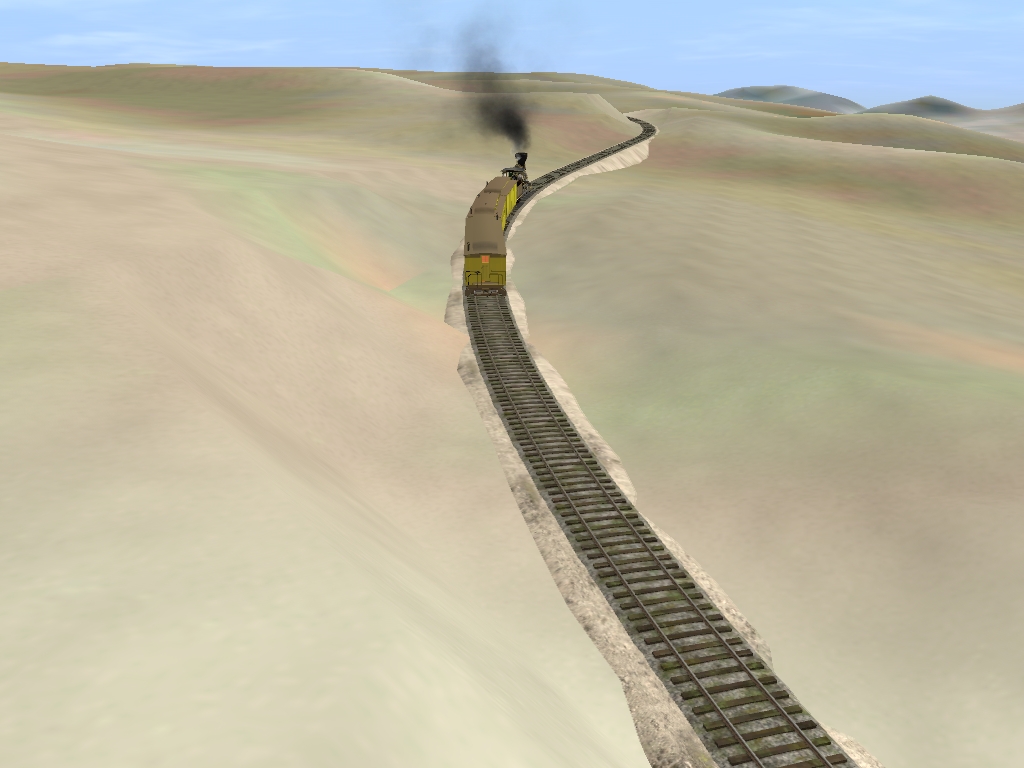
Okay, sadly I've skipped over a bit of line here, but a lot of it looks the same with the topography and landscape. However in this next shot is where I've taken a bit of creative liberty. When this portion of the line was built it included a long tunnel. And as some of you know there was a collapse and a Shoofly was built to allow trains to continue running while this tunnel was repaired. When researching this part of the line I assumed (a mistake on my part) that the Shoofly WAS the old Right-of-Way and the tunnel was built at a later date... So I therefor elected to not build the tunnel anyway and say that in this alternate history the shoofly was, indeed, the LA&I's ROW. The main reason is that I didn't want to do all the hard work Terra-forming for nothing... but there is a logical reason to. From what I've read the LA&I did struggle financially, so in order to continue the line to Independence on the cheap I could see them laying track over the mountain rather than through it. So in this alternate skew in history the Shoofly is the mainline. So the line would have continued strait on a bit further before curving left as we see below. The dark patch you see in the textures is where the real life cut and tunnel are today. In the shot the track follows the grade of the shoofly.

nearing_the_shoofly_by_gunslinger87-dalywxe.jpg


After curving left there is a mild strait section before a broad right hand curve crosses over the small valley and climbs up over the ridge.

shoofly_curve_by_gunslinger87-dalywx1.jpg


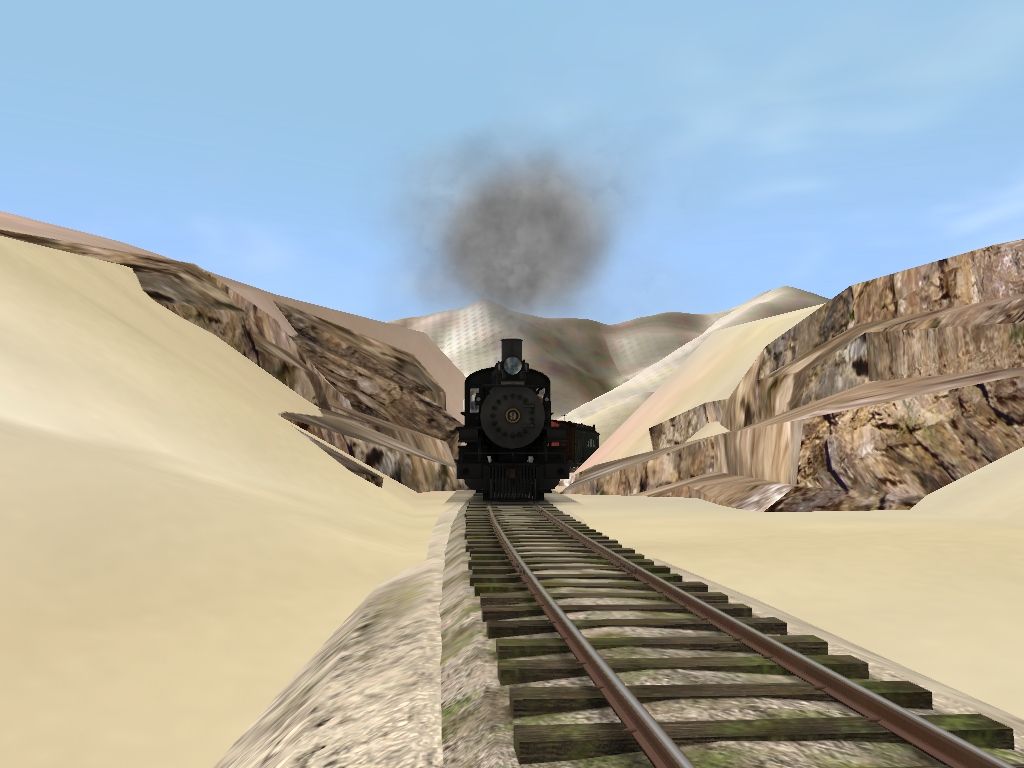
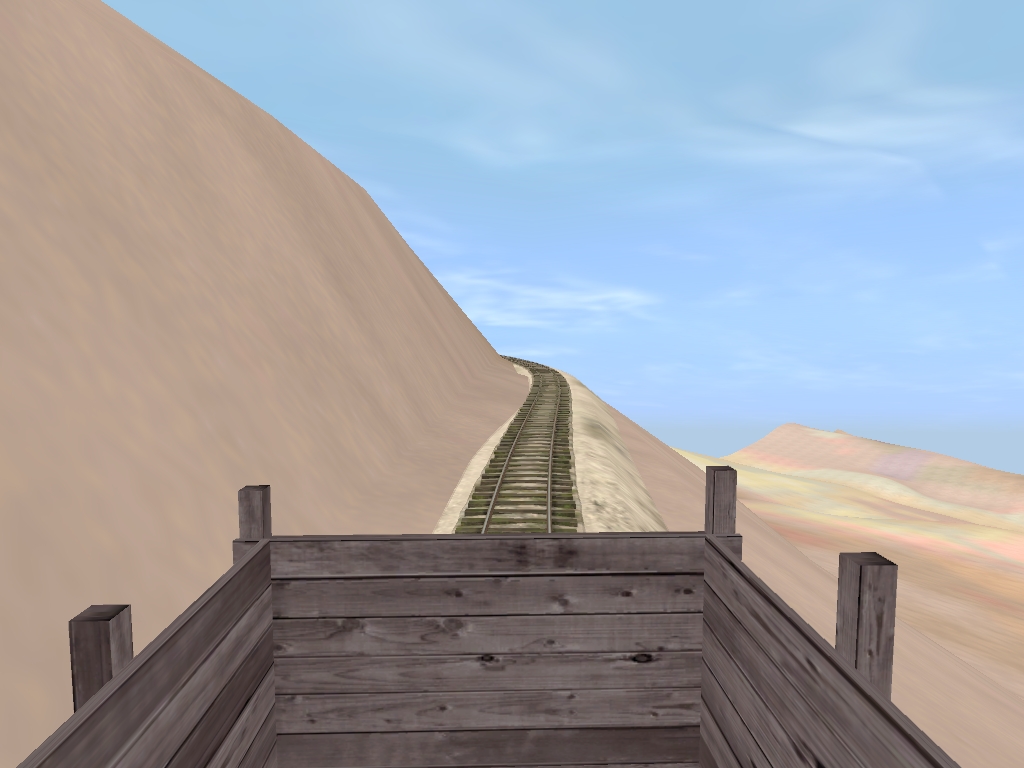
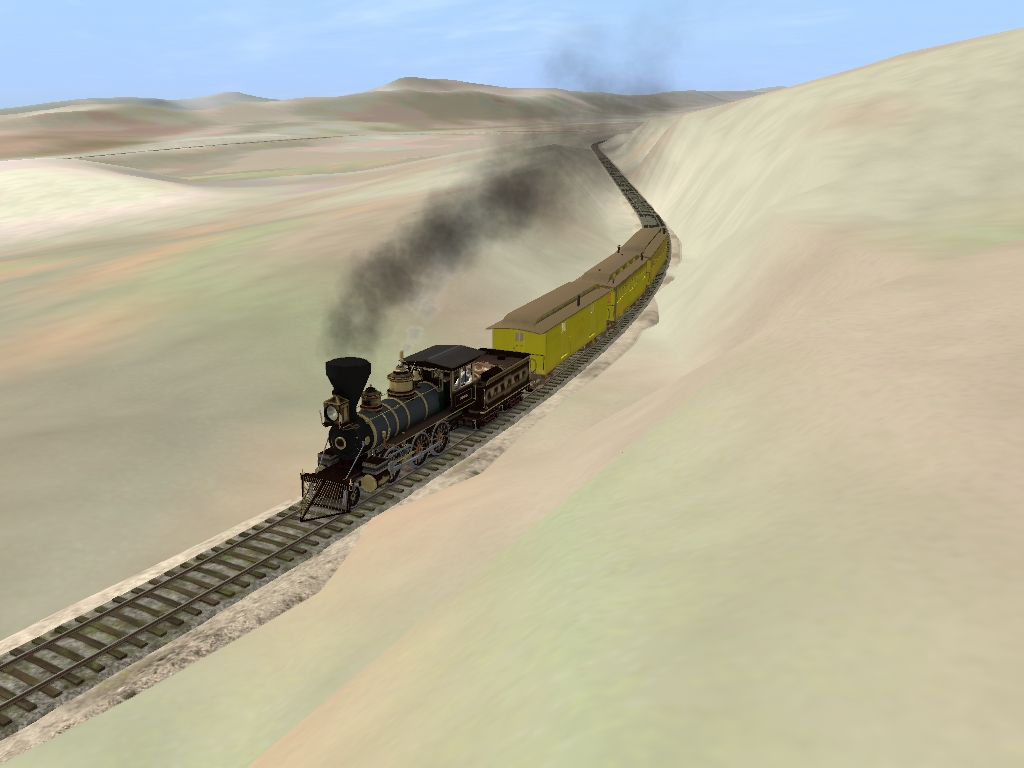
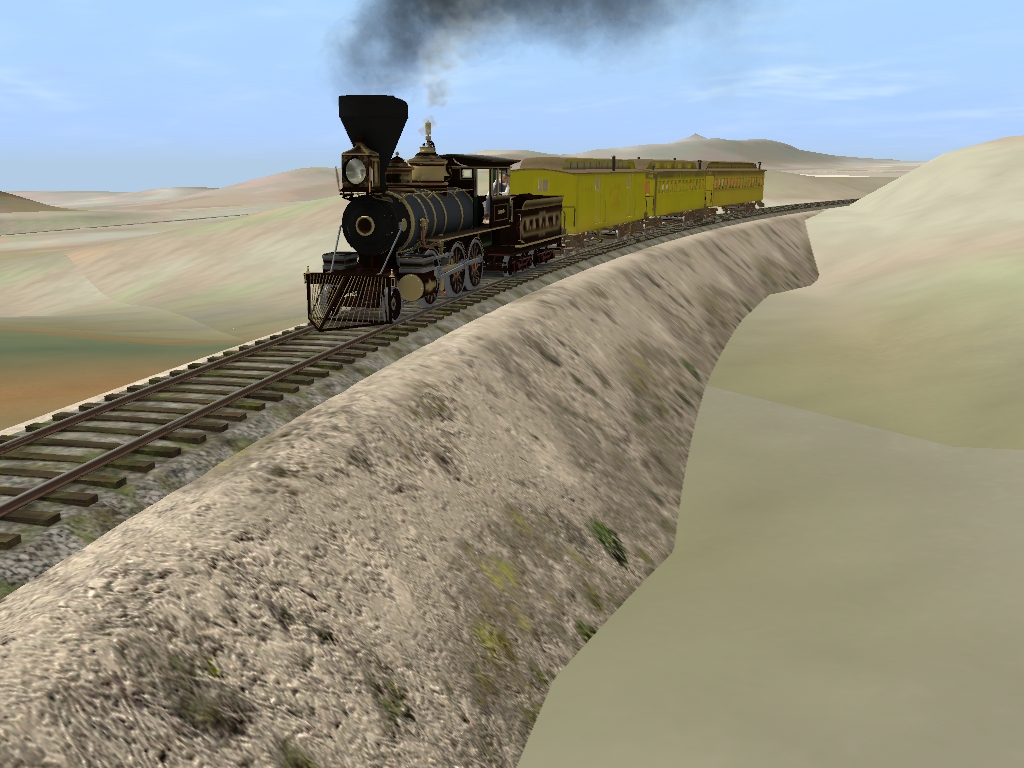
The line then passes through several cuts along its way towards the "summit" of the shoofly.

shoofly_up_grade_by_gunslinger87-dalywvr.jpg

shoofly_cut_by_gunslinger87-dalywwu.jpg

climbing_the_shoofly_by_gunslinger87-dalywy7.jpg


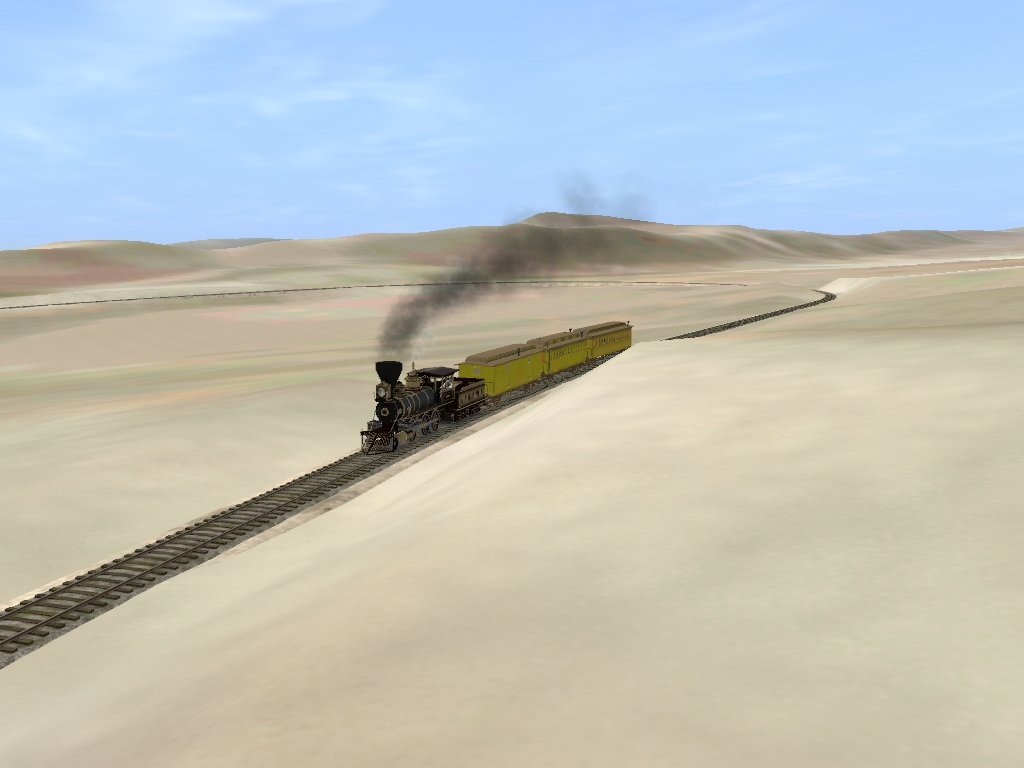
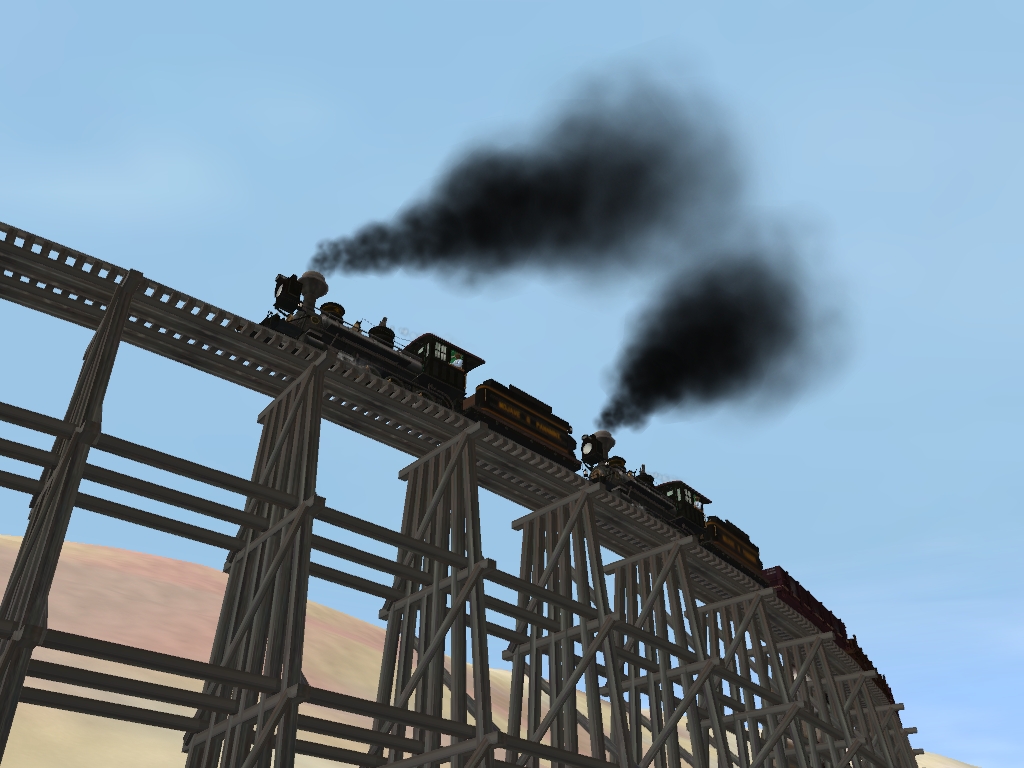
The line now approaches the shoofly summit, but first the train has to cross a large fill.

shoofly_fill_by_gunslinger87-dalywwc.jpg


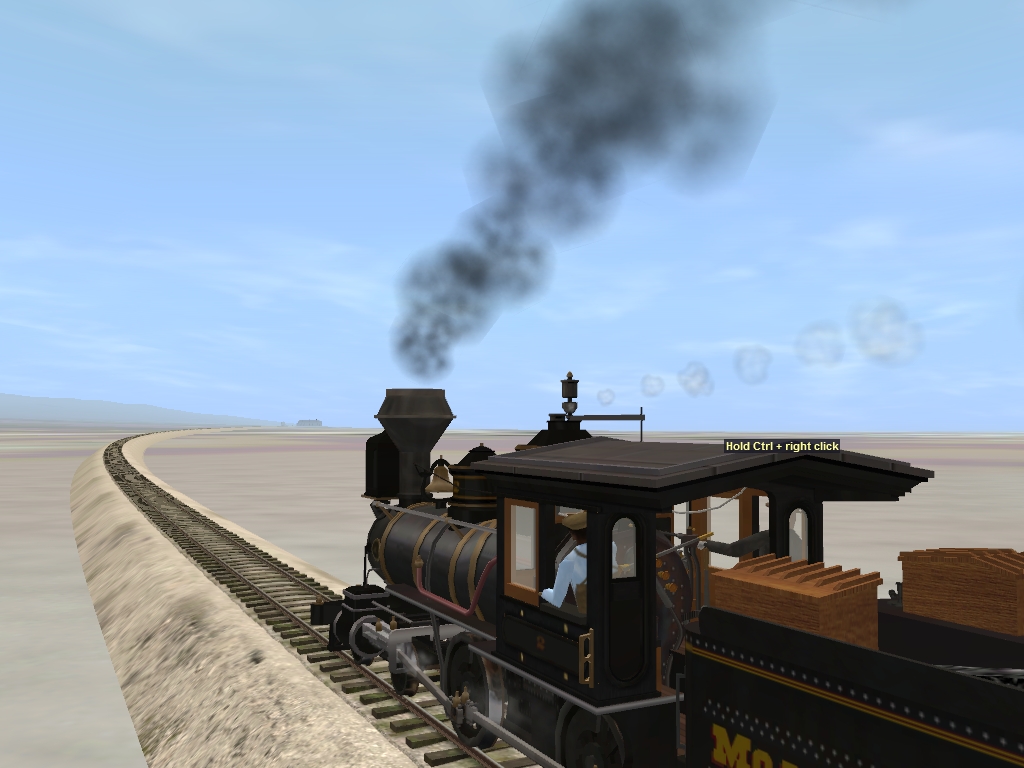
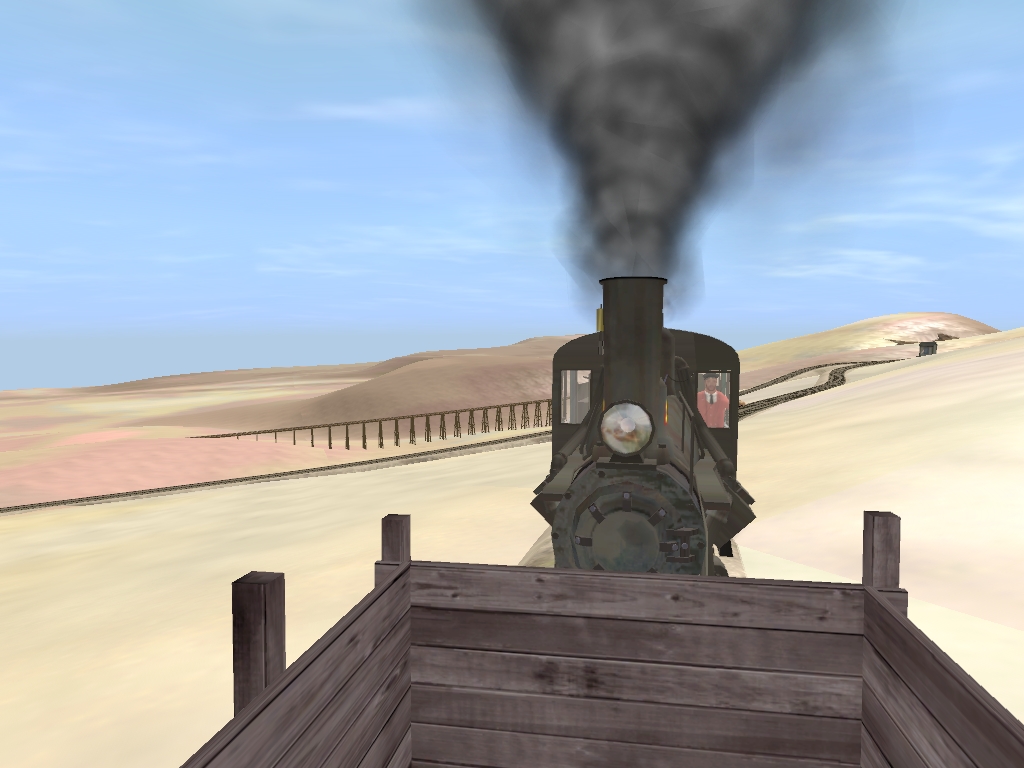
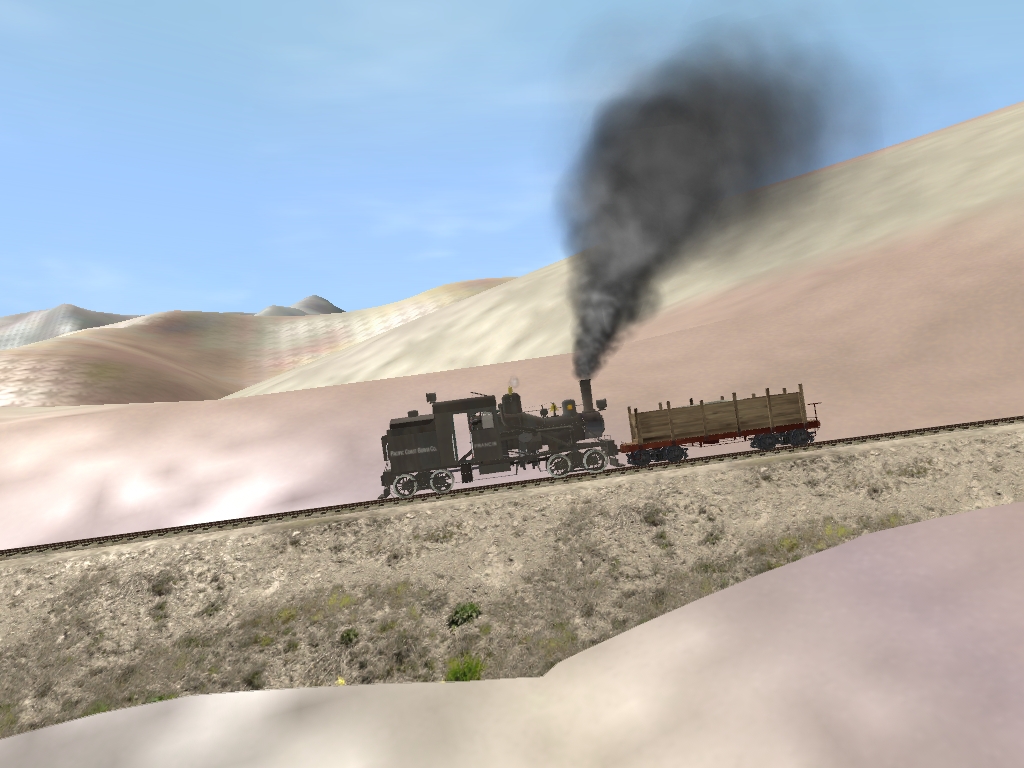
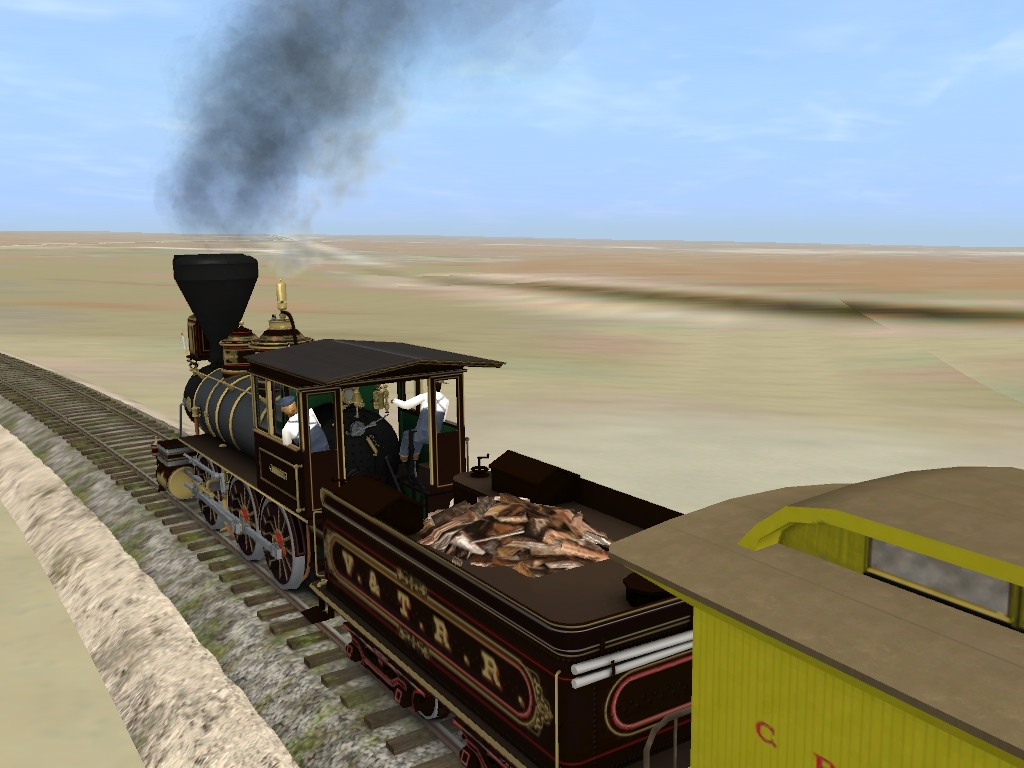
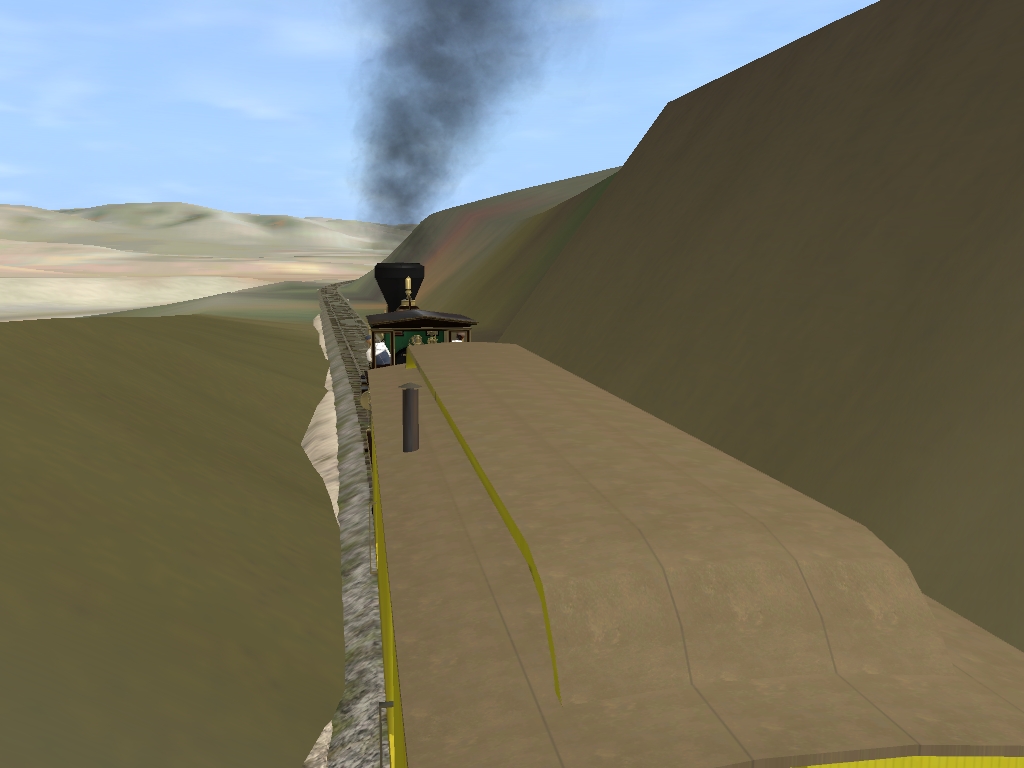
And here we can see the crest of the grade before descending to Searles, CA.

cresting_the_shoofly_by_gunslinger87-dalywxs.jpg


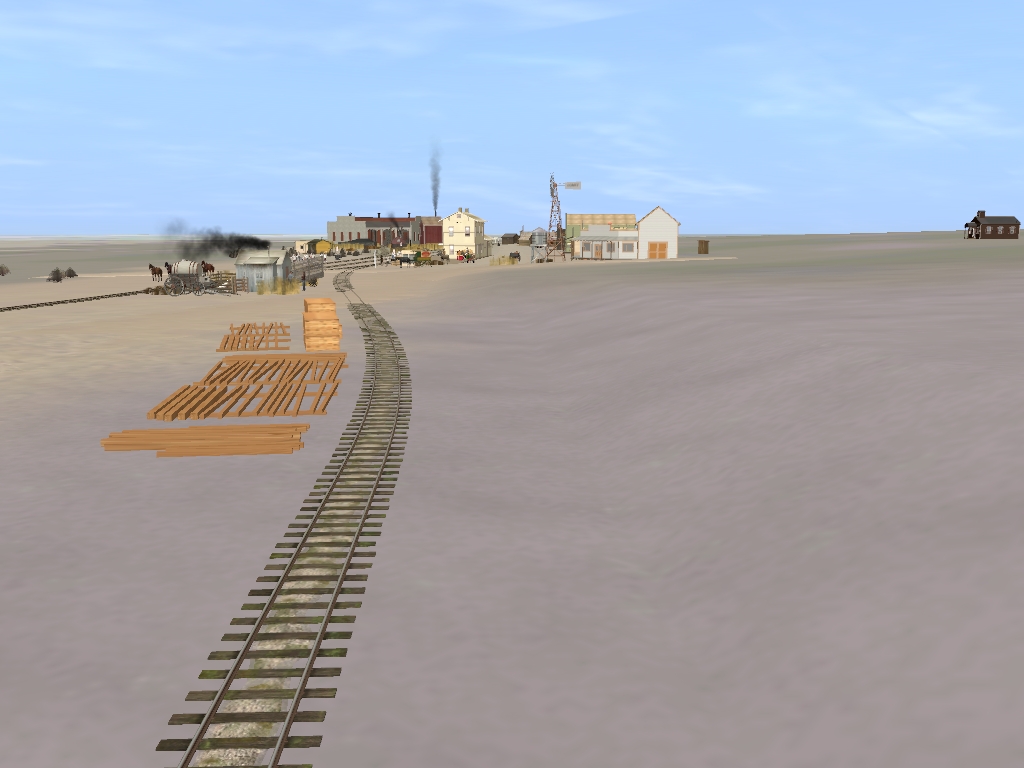
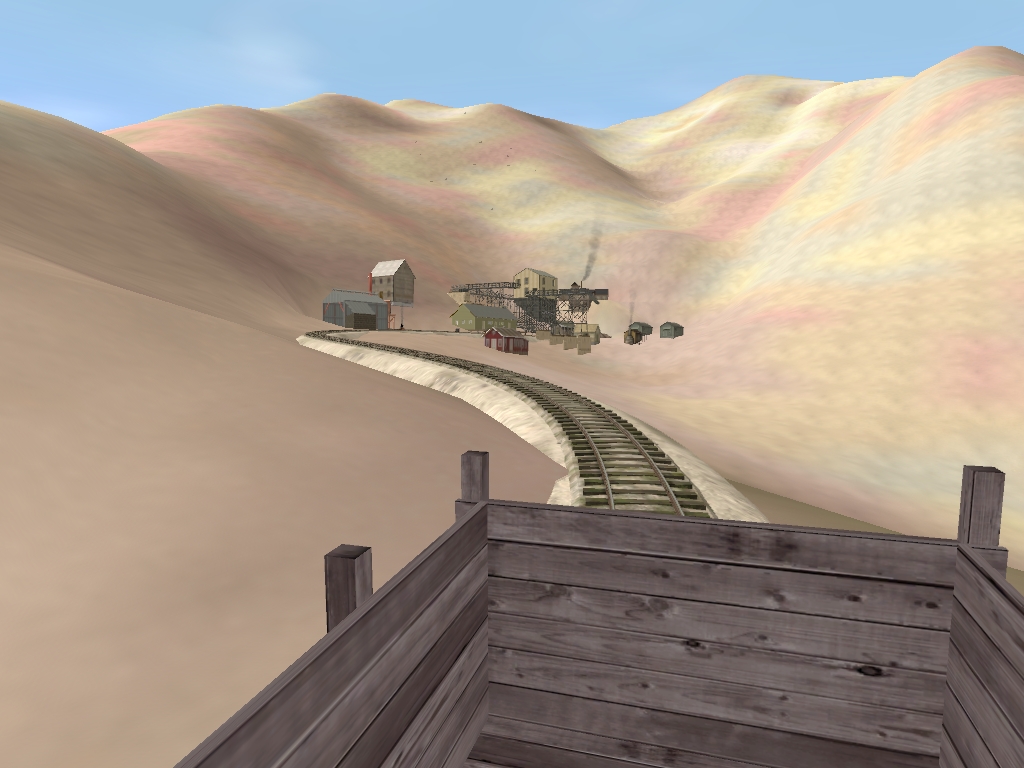
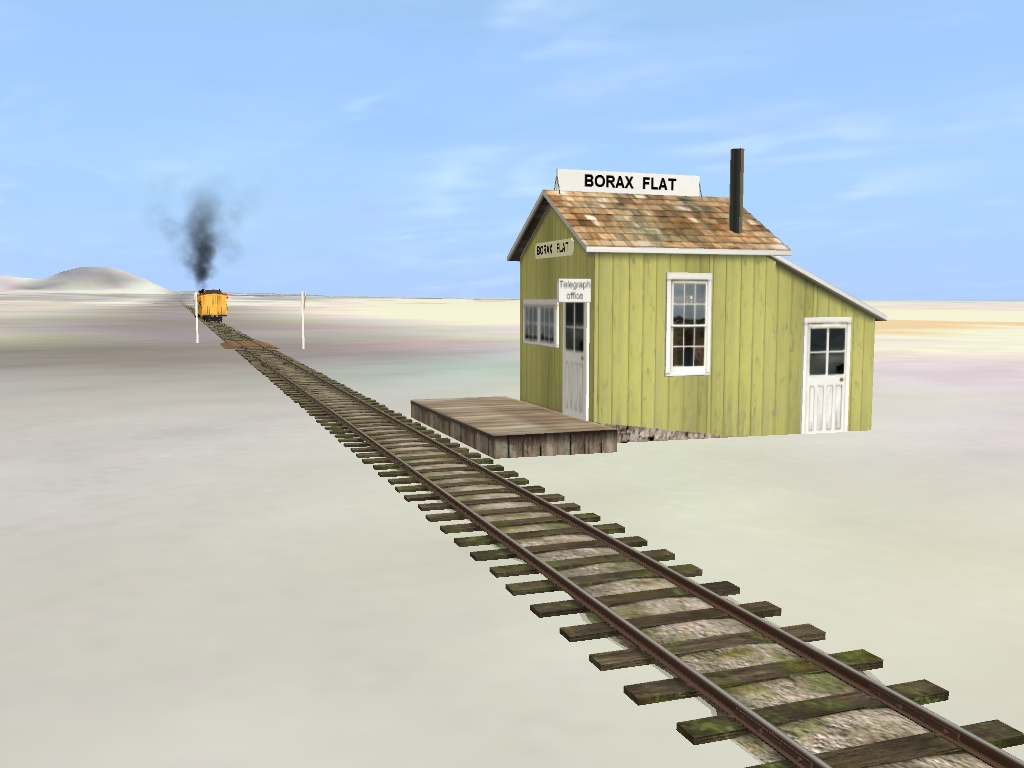
And in this next shot we can finally see Searles in the distance. If you look closely just above the locomotive's stack and to the right a smidge you can just make out Searles. Again, the dark patch in the temporary ground textures is where the real life tunnel exit and cut would be located.

shoofly_down_grade_by_gunslinger87-dalywwh.jpg


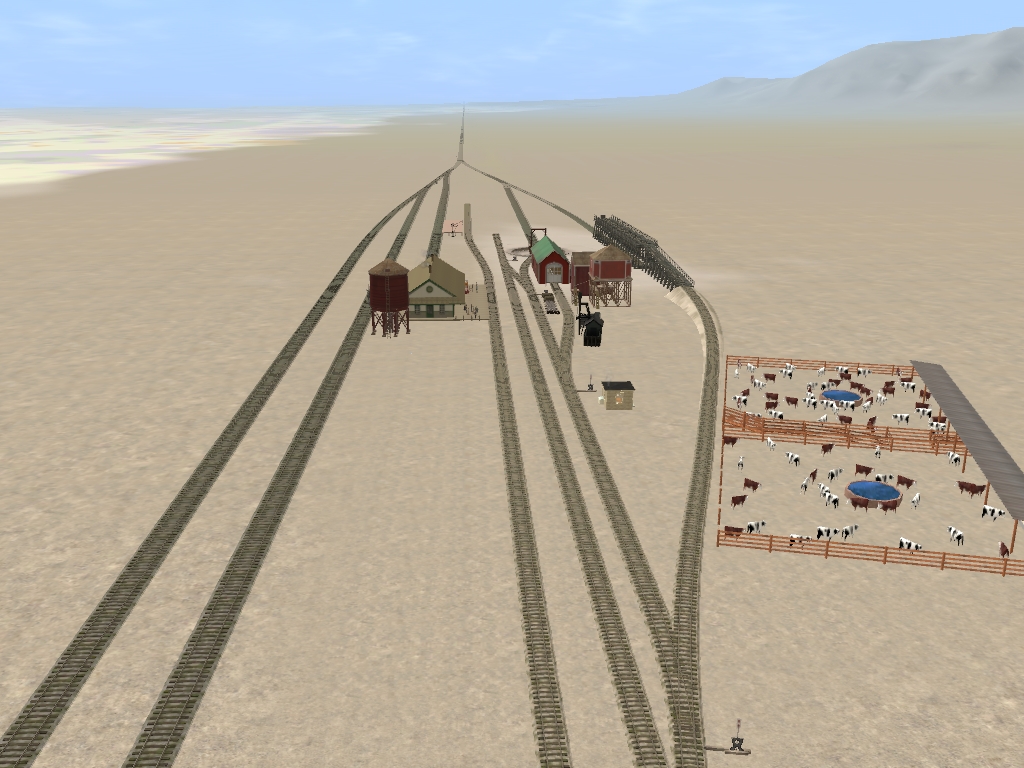
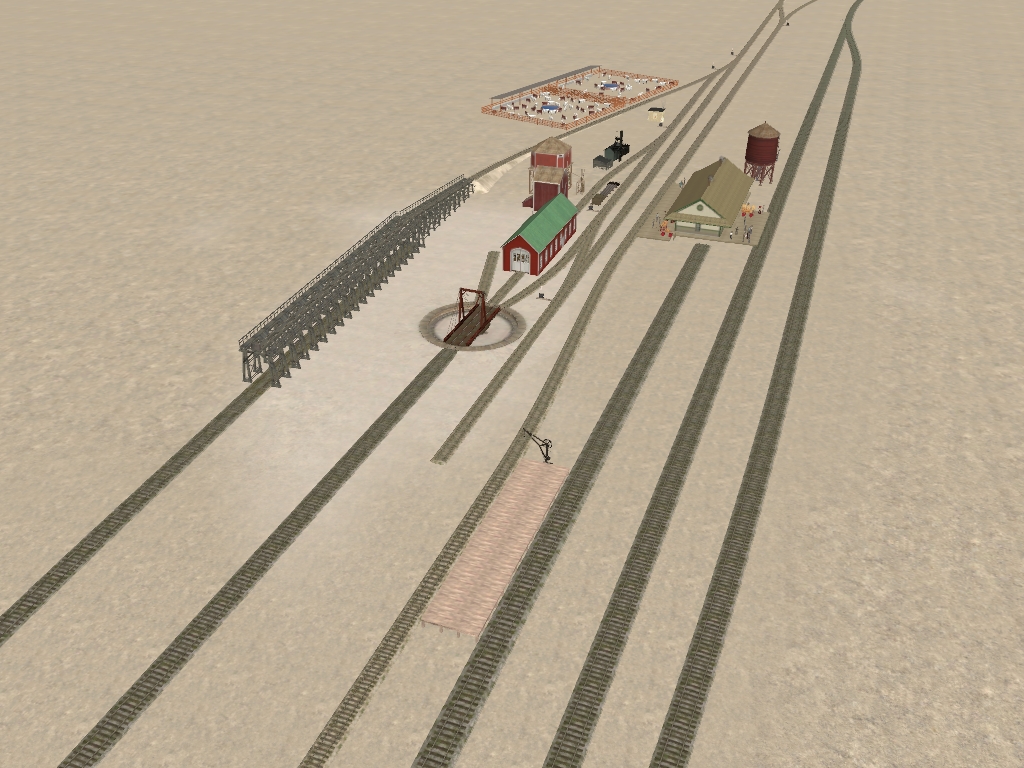
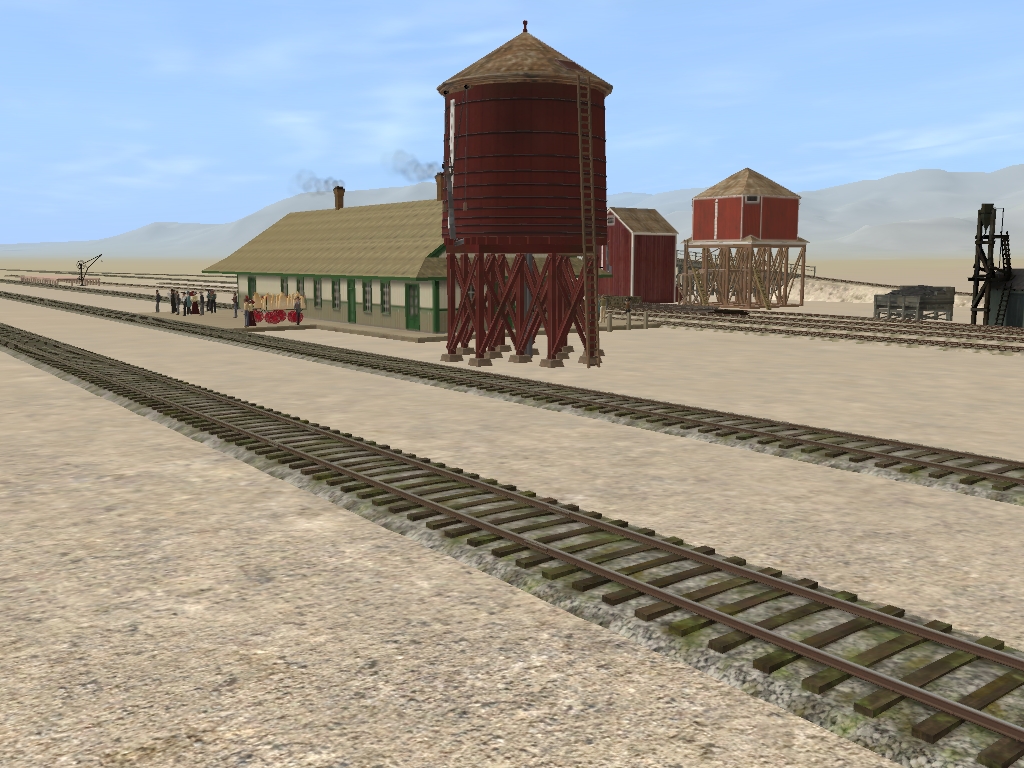
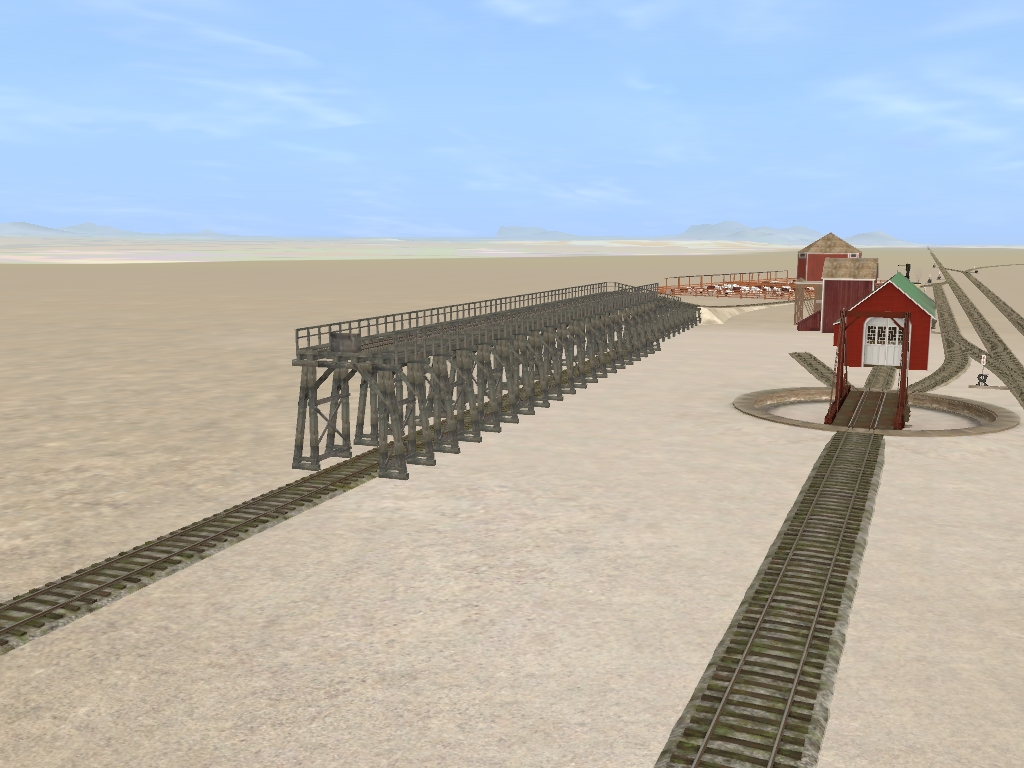
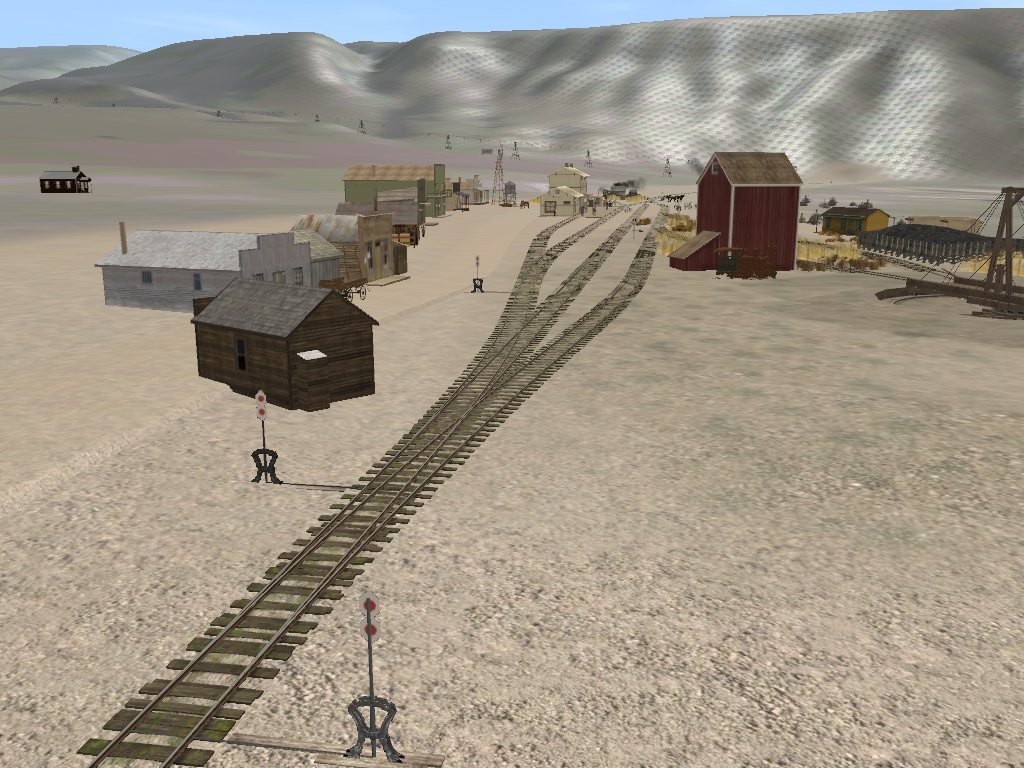
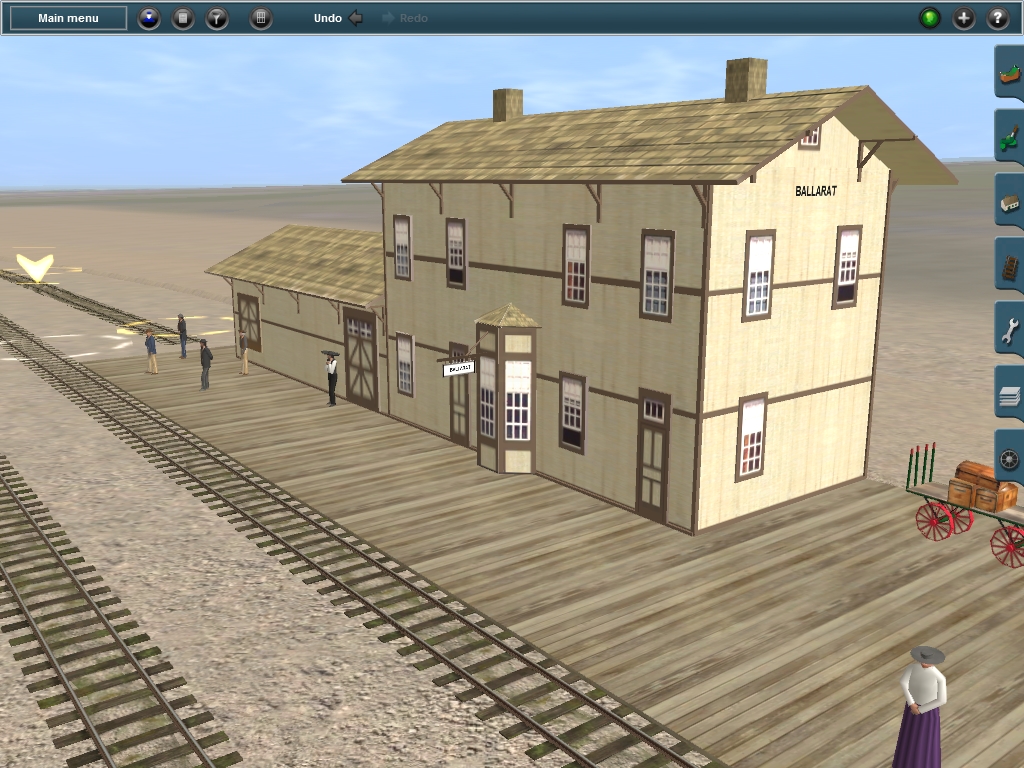
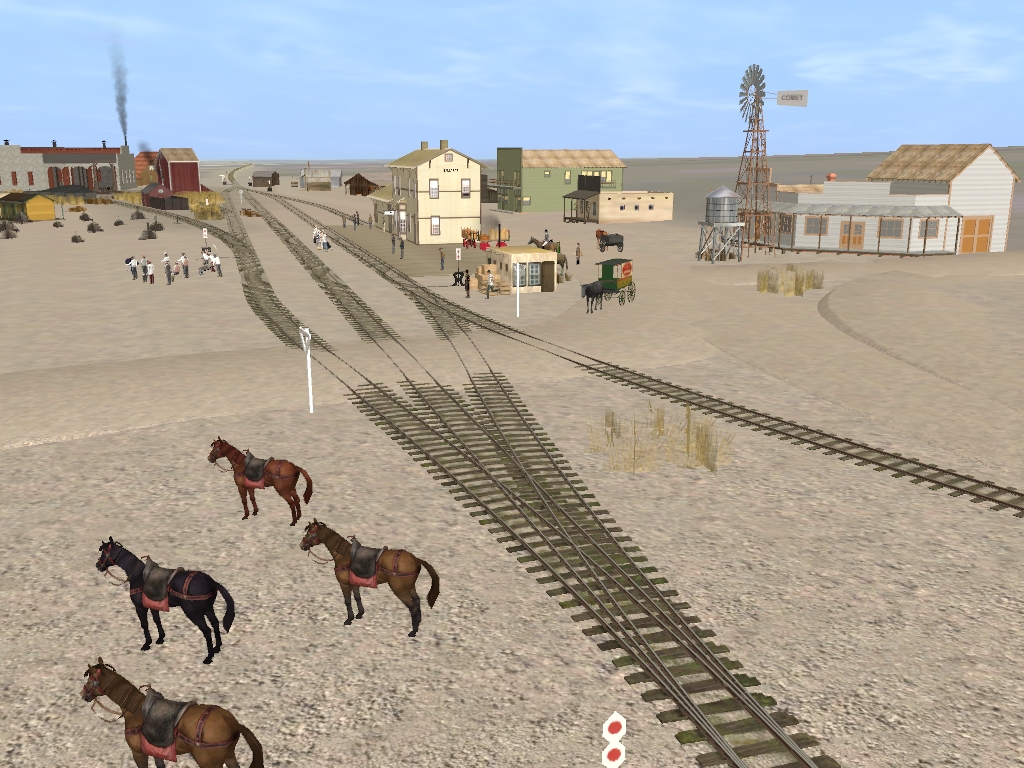
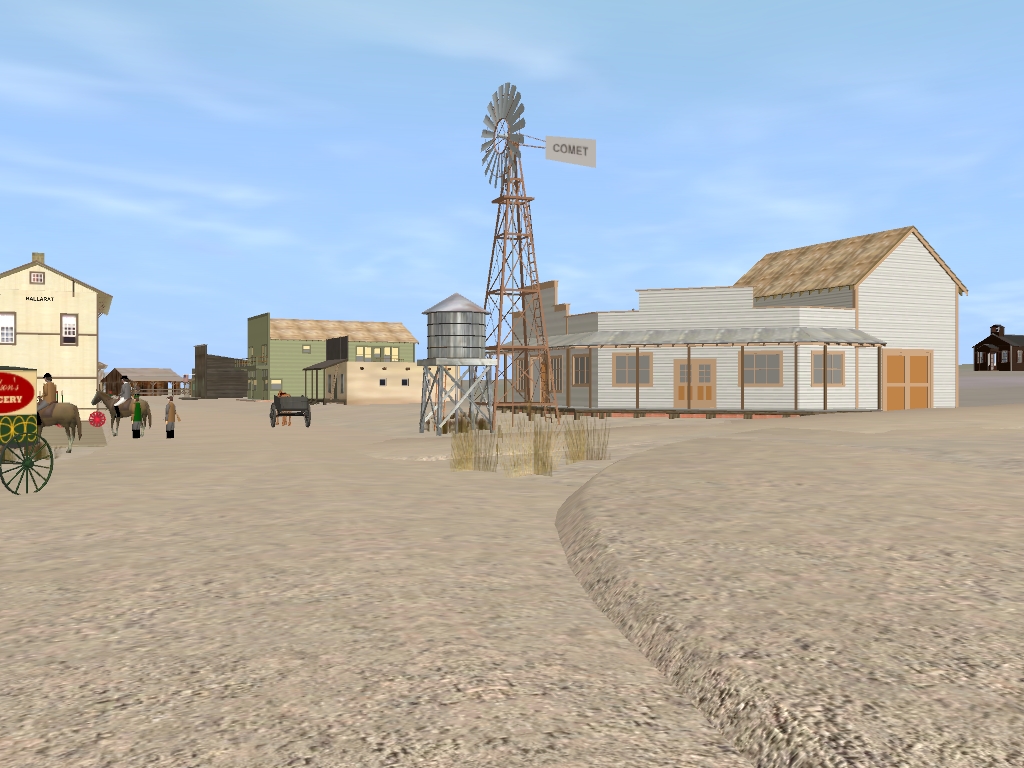
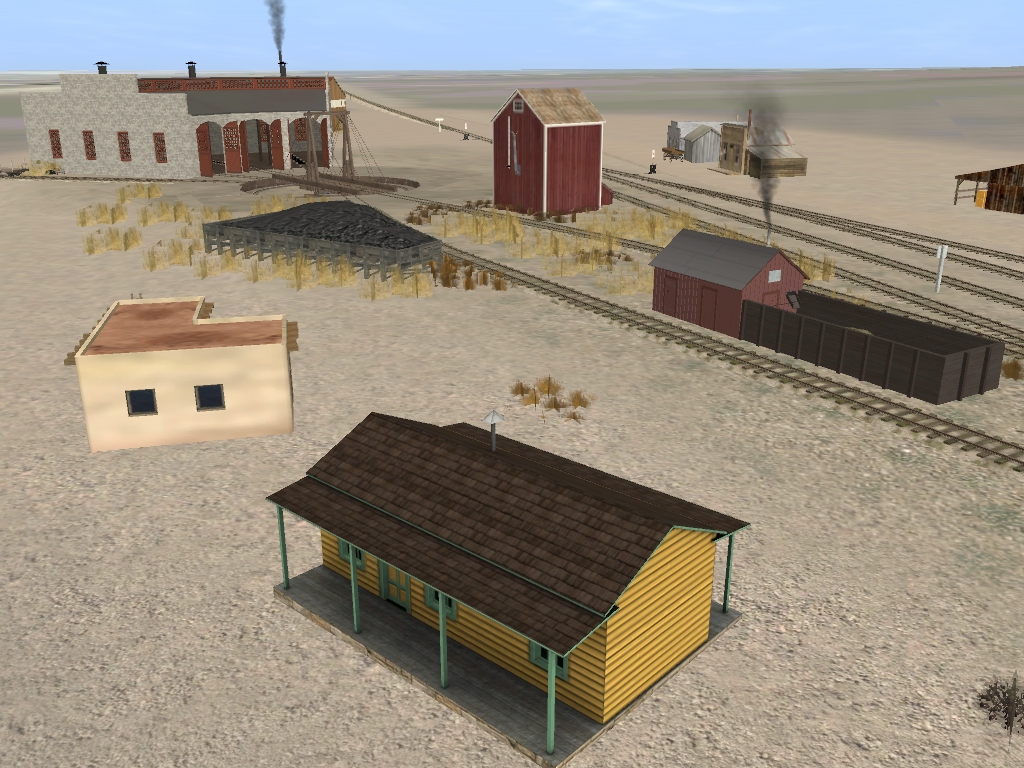
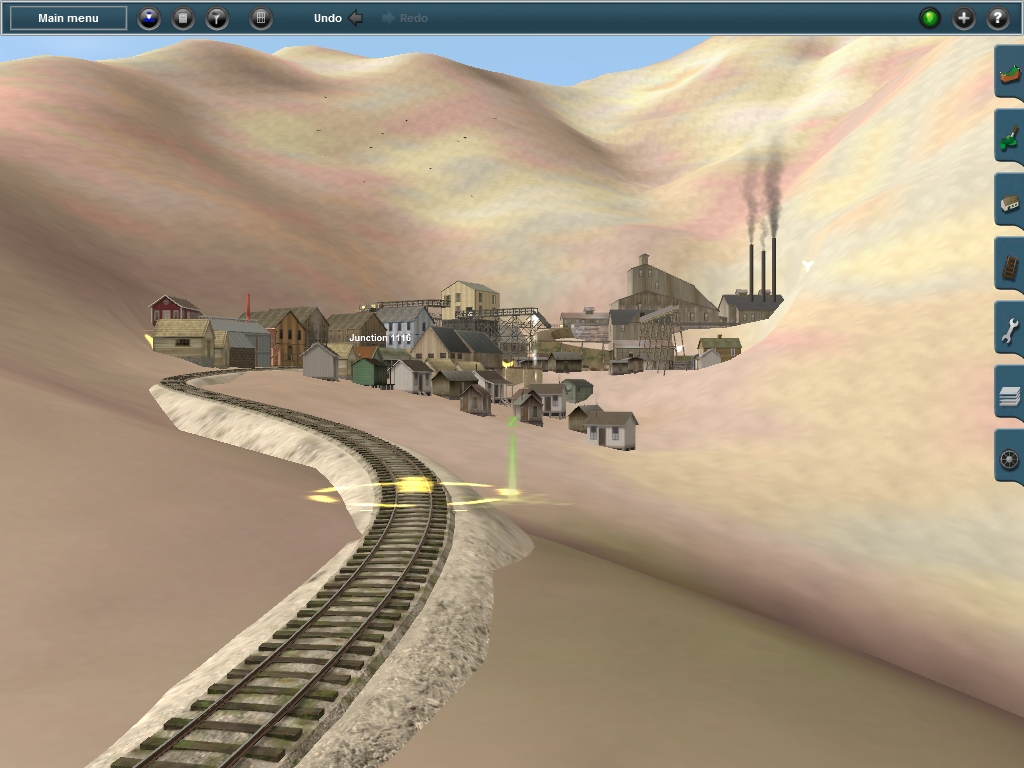
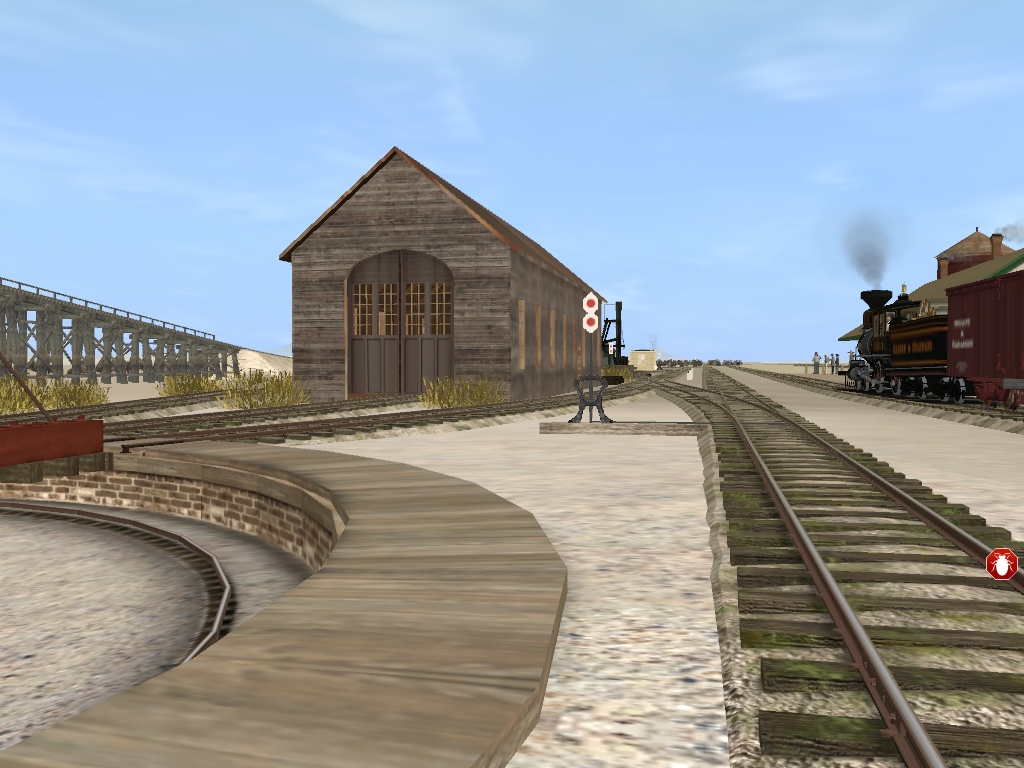
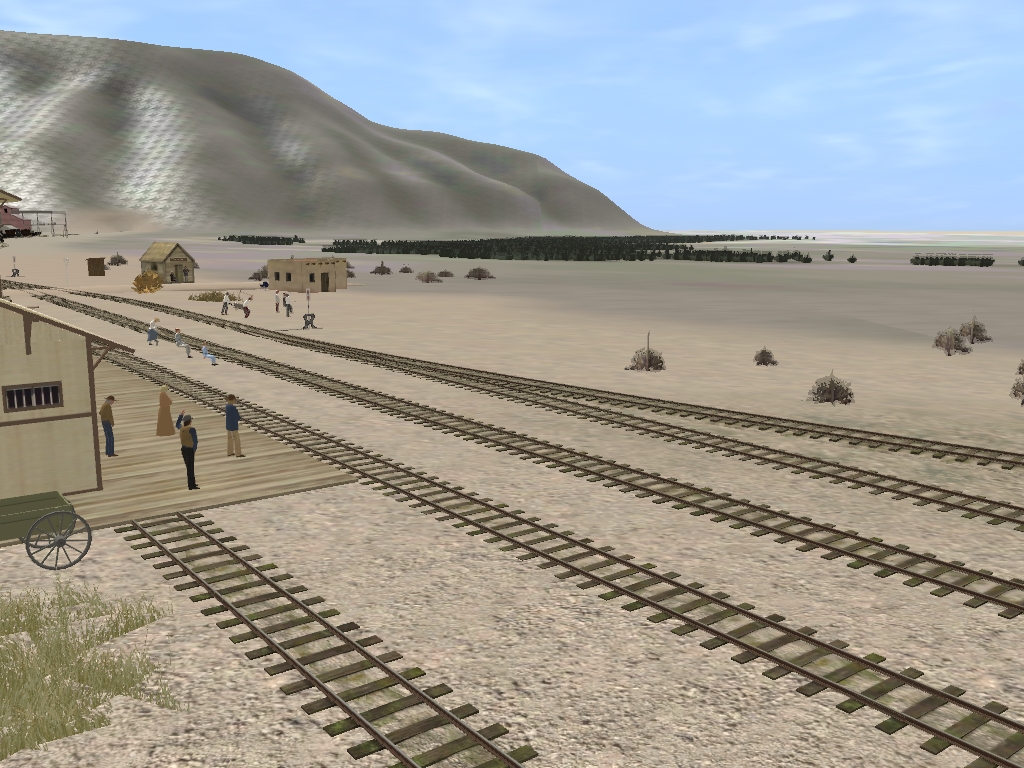
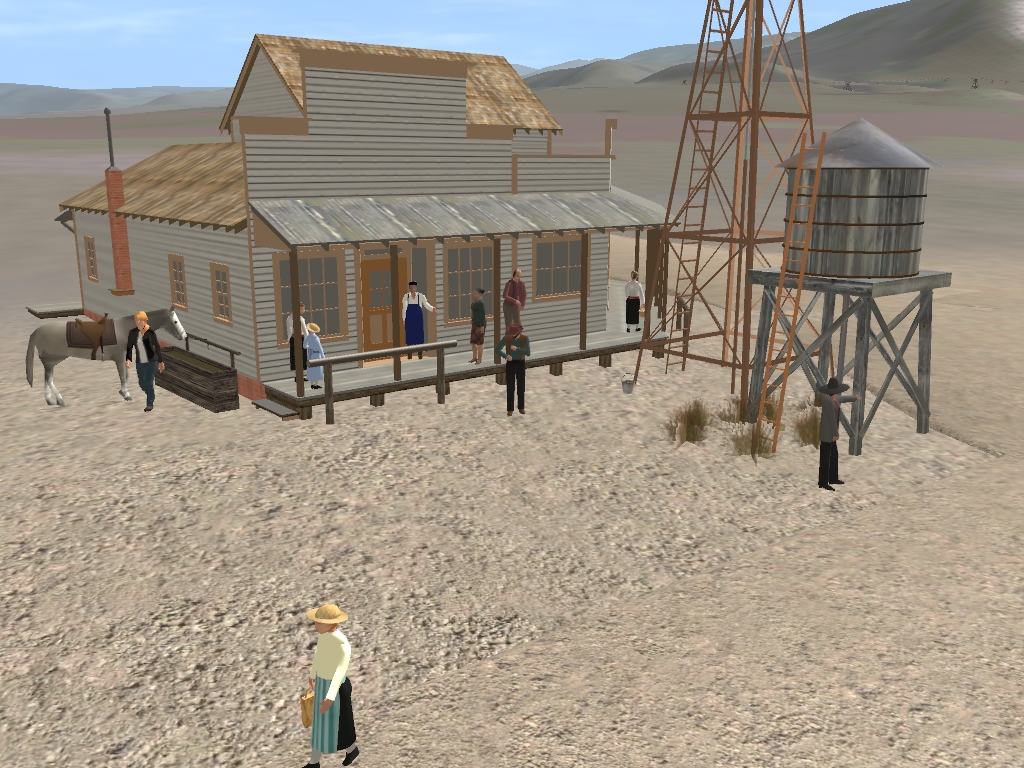
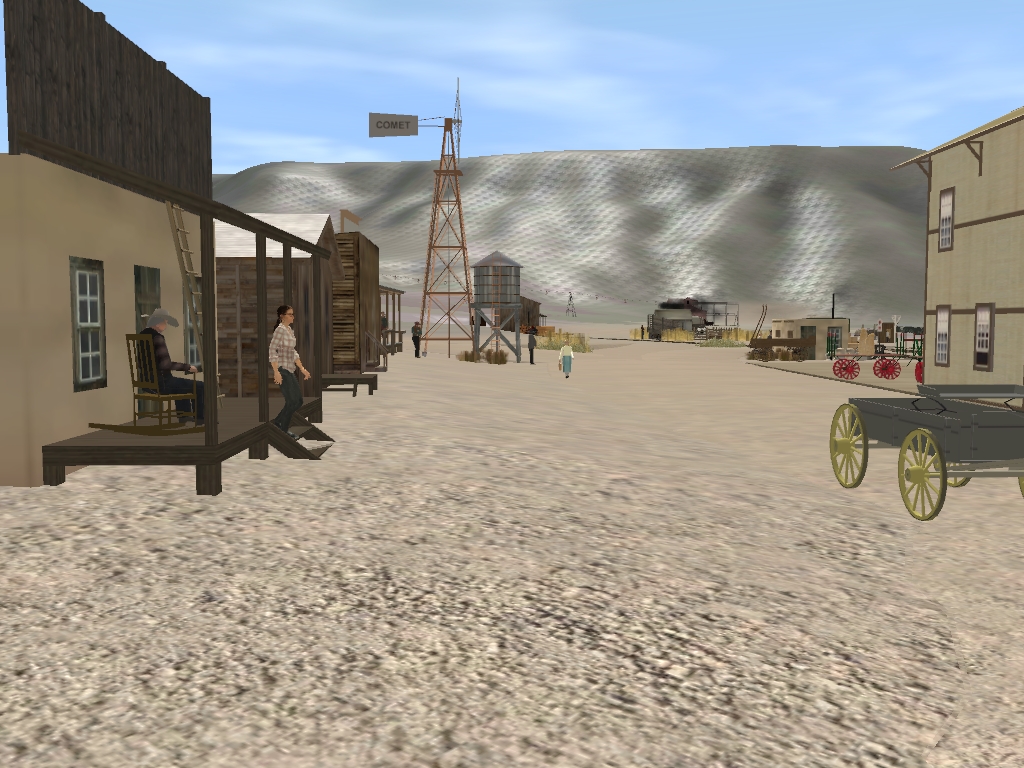
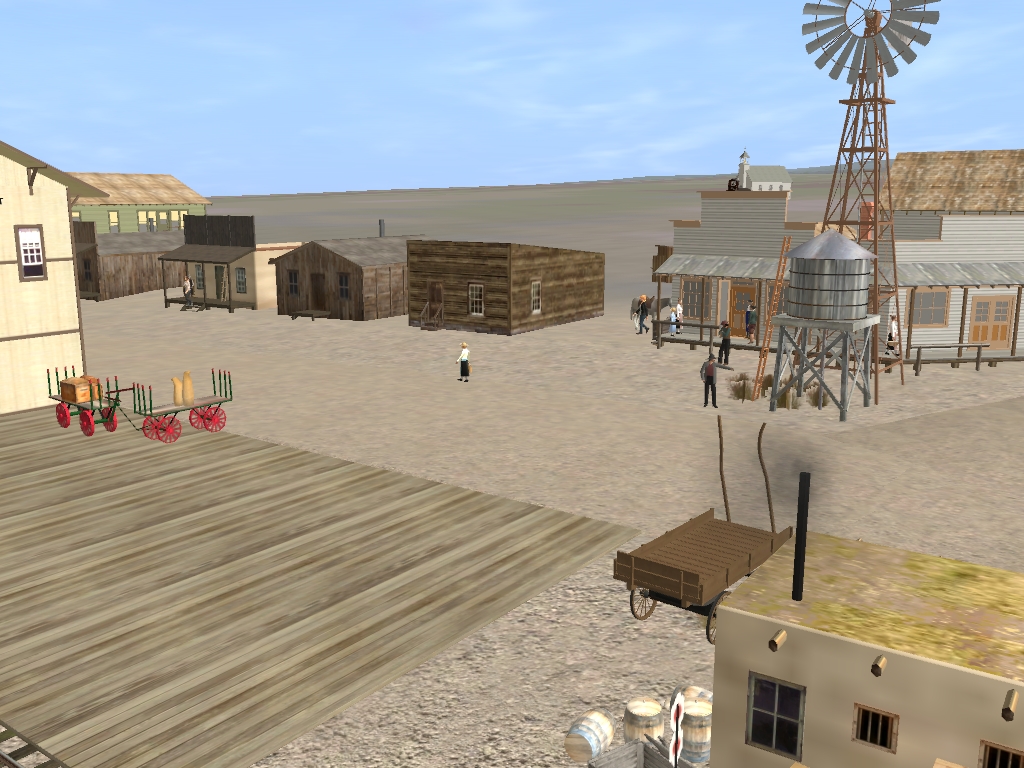
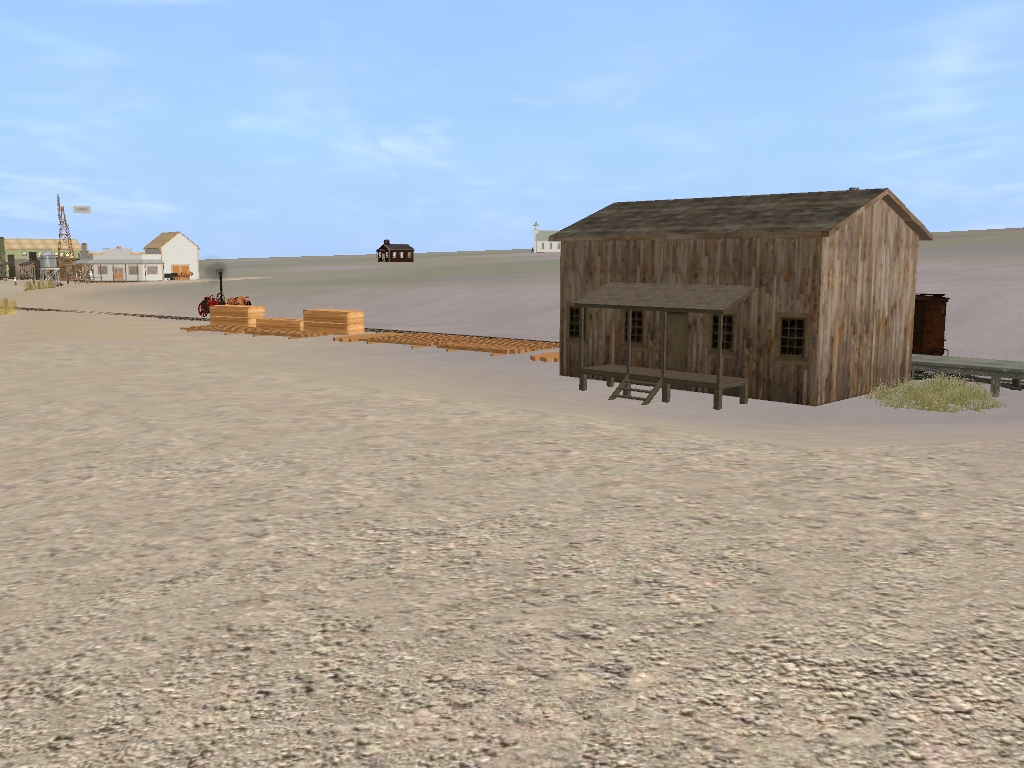
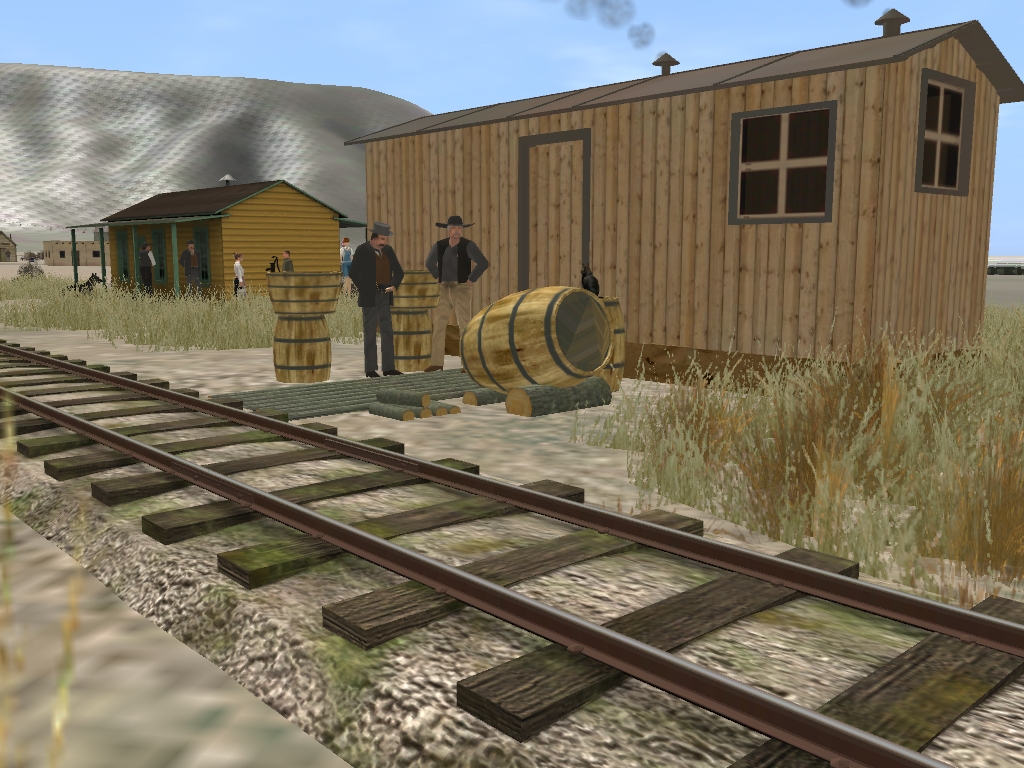
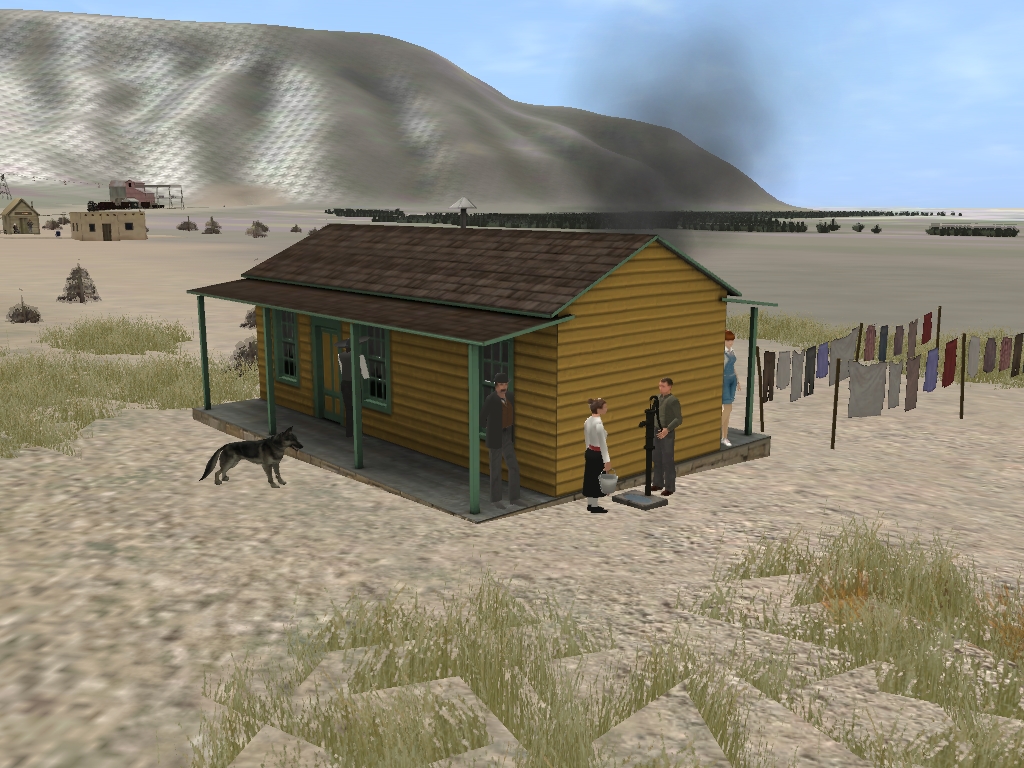
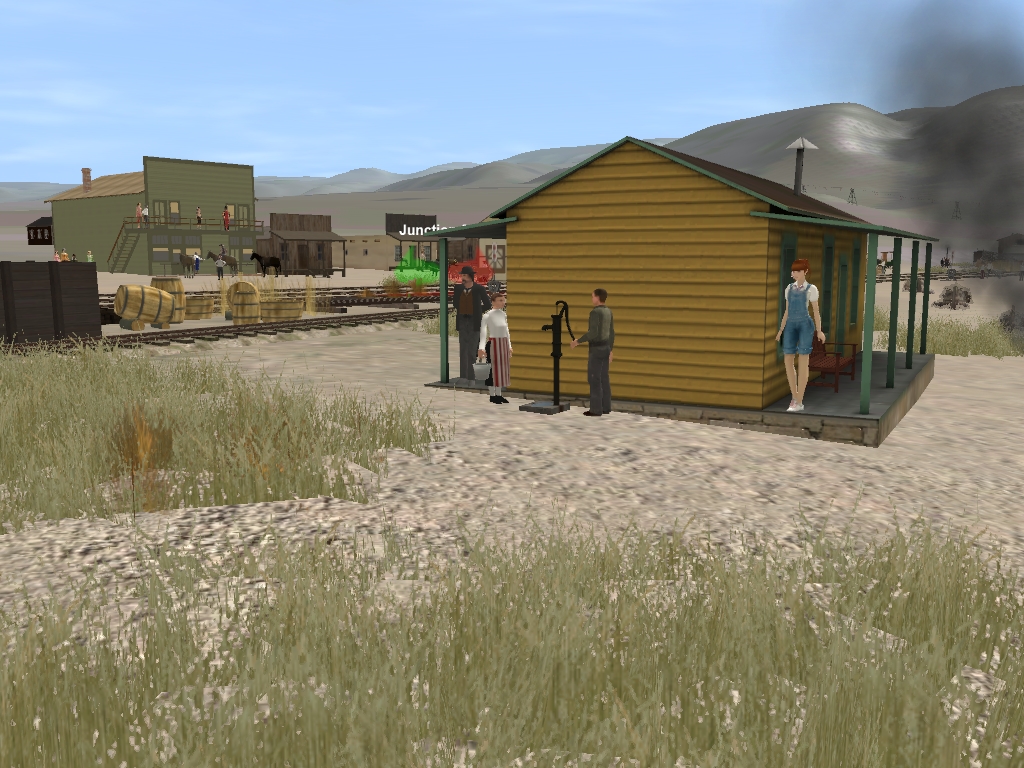
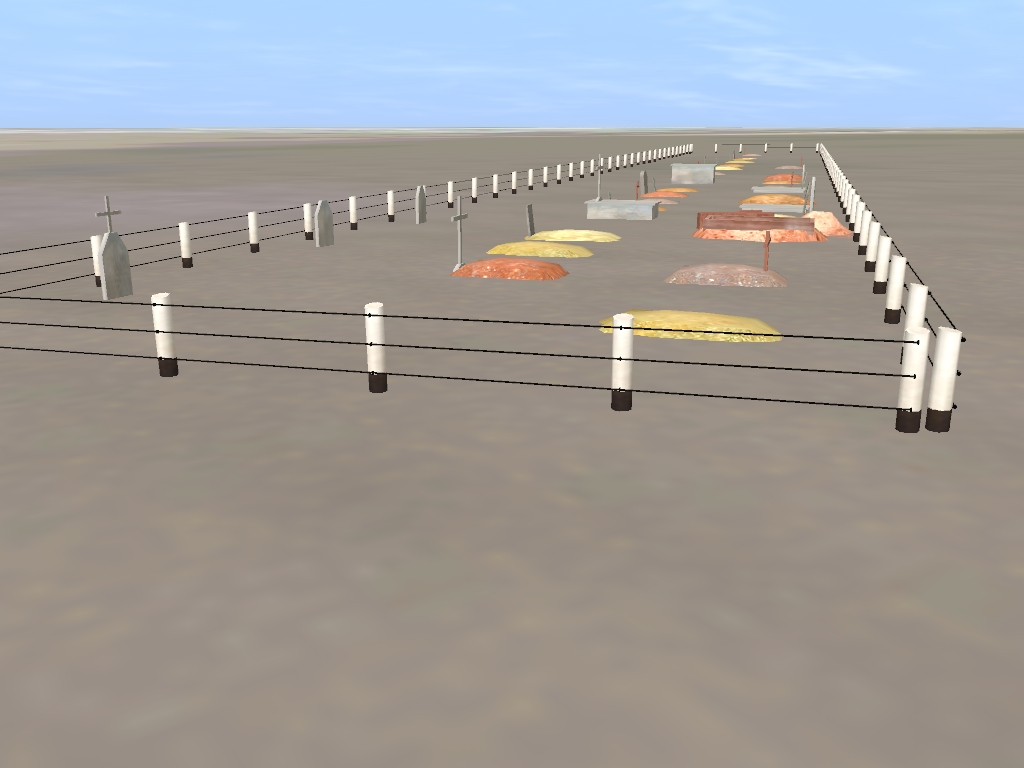
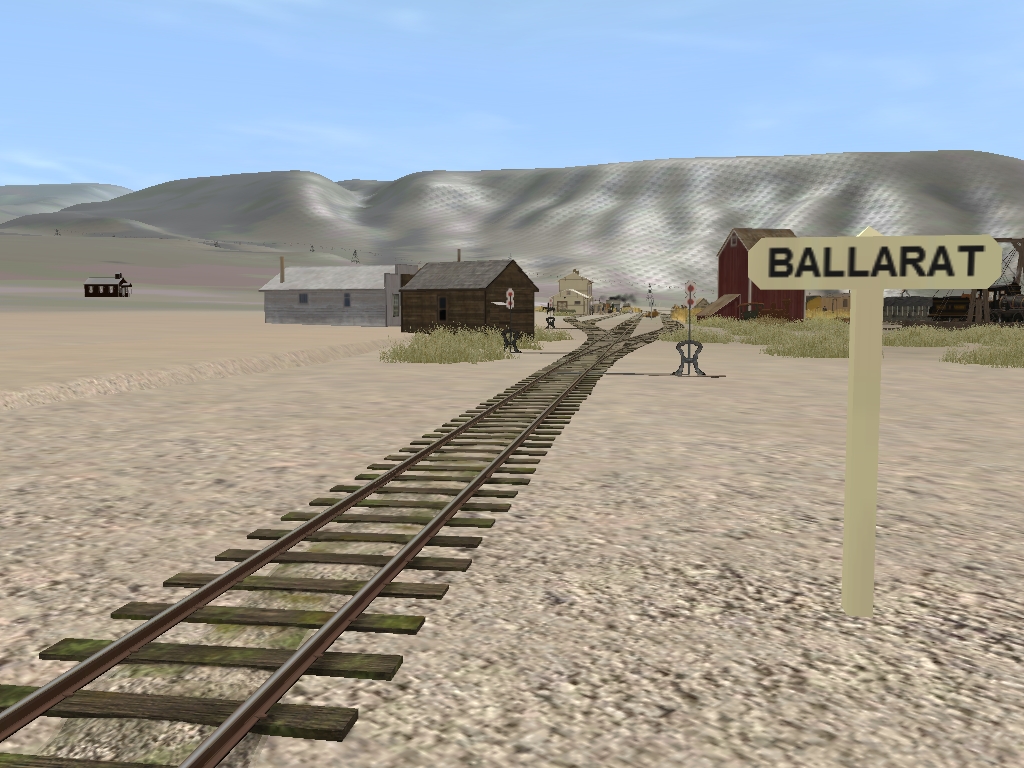
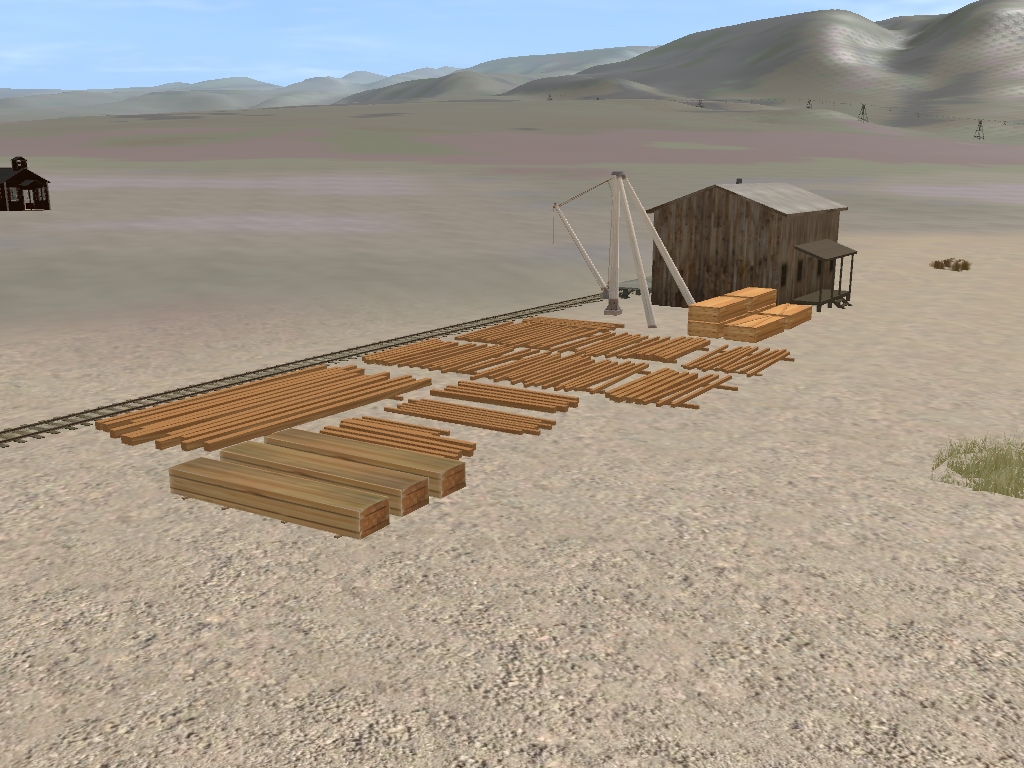
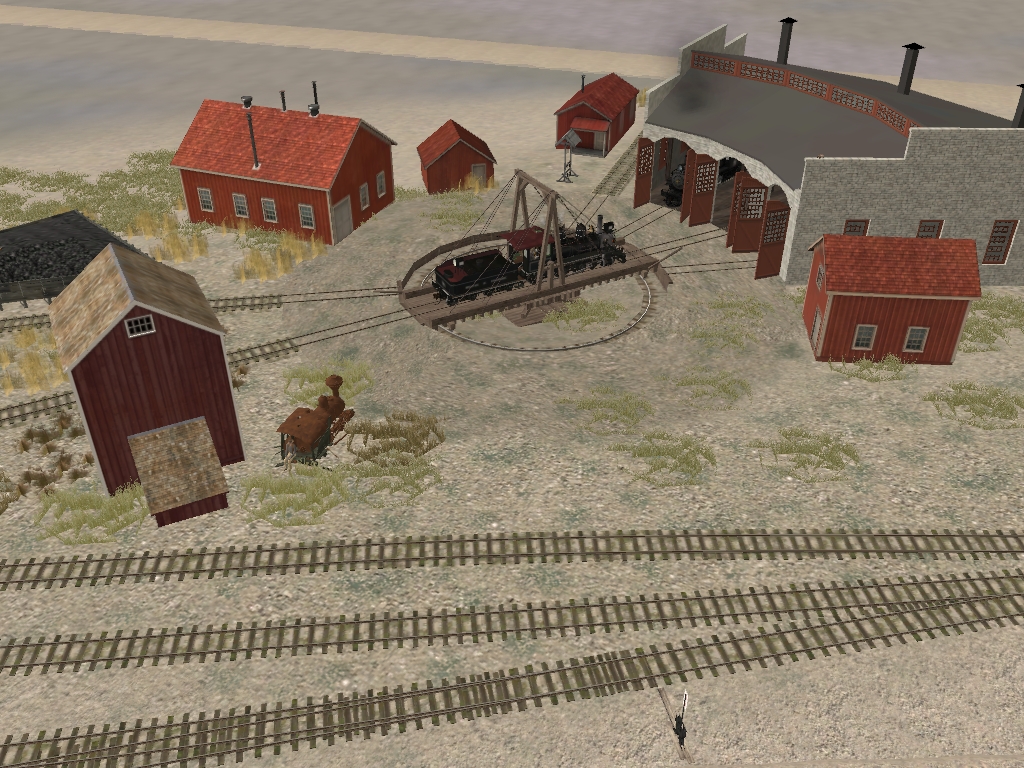
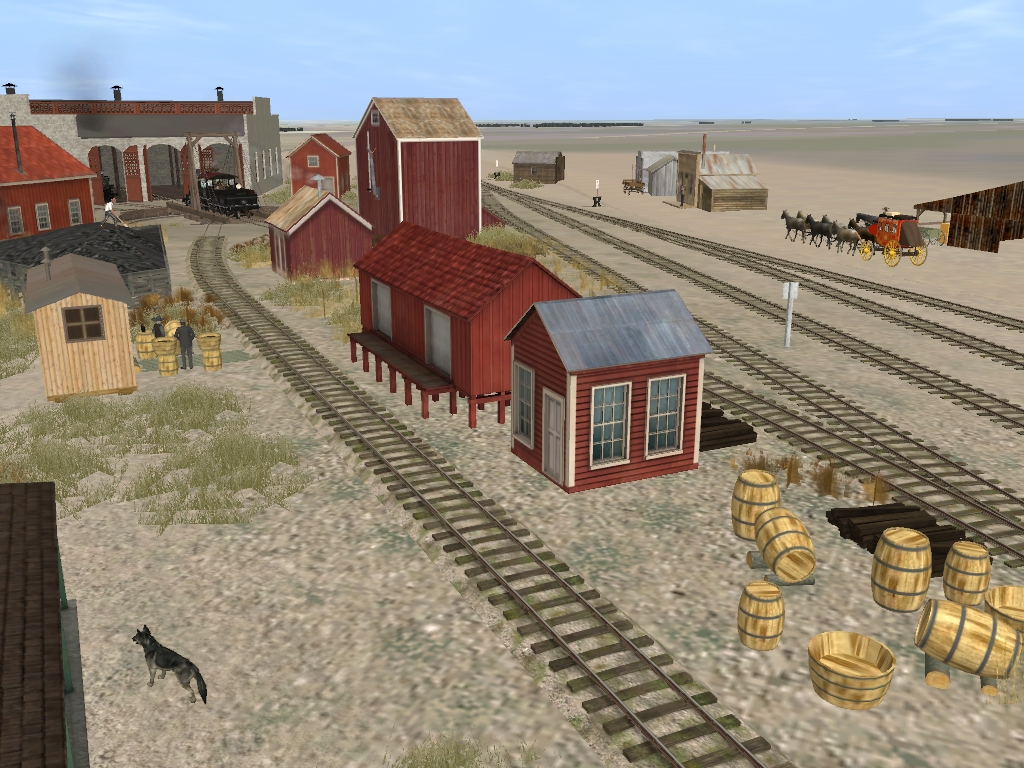
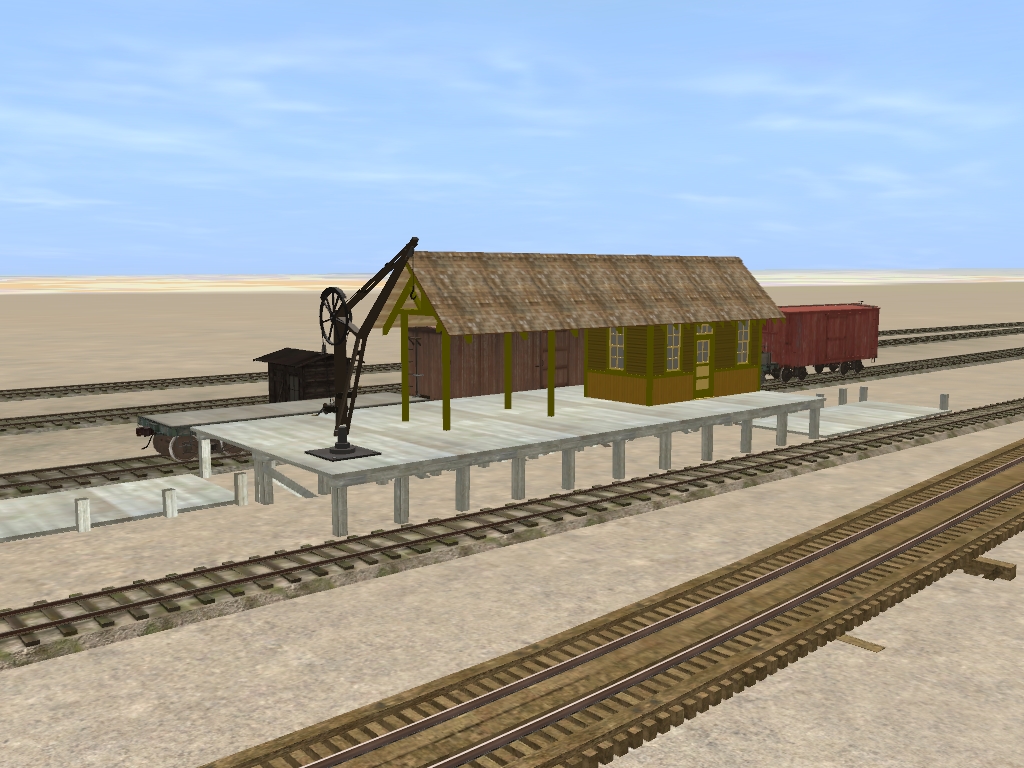
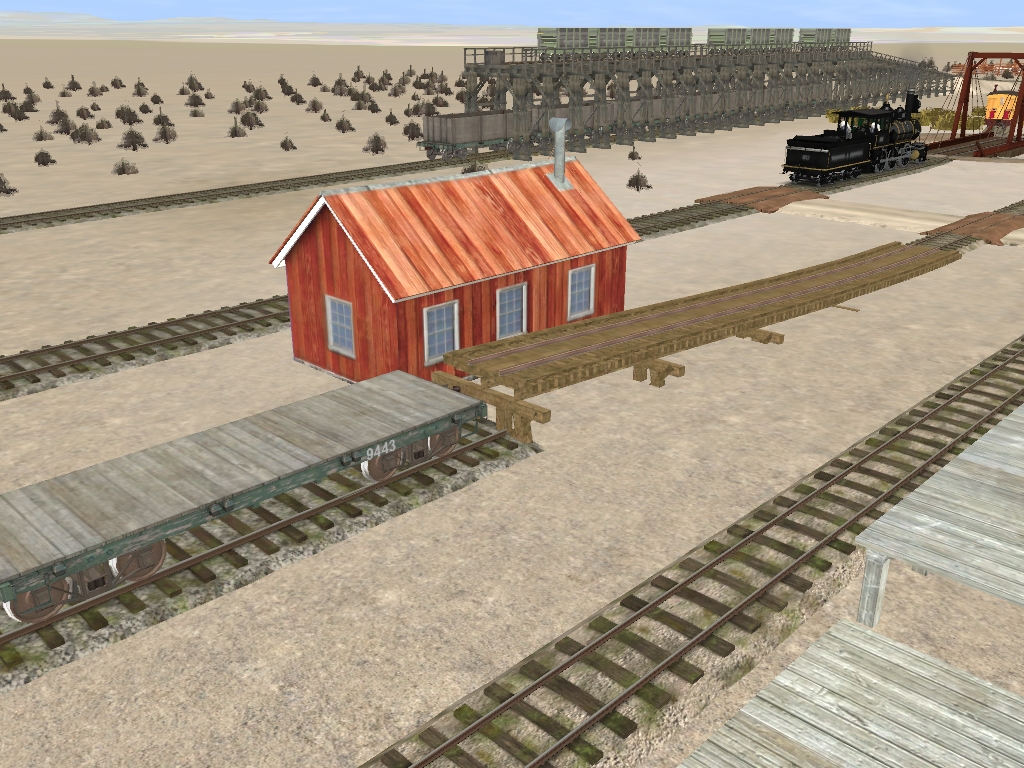
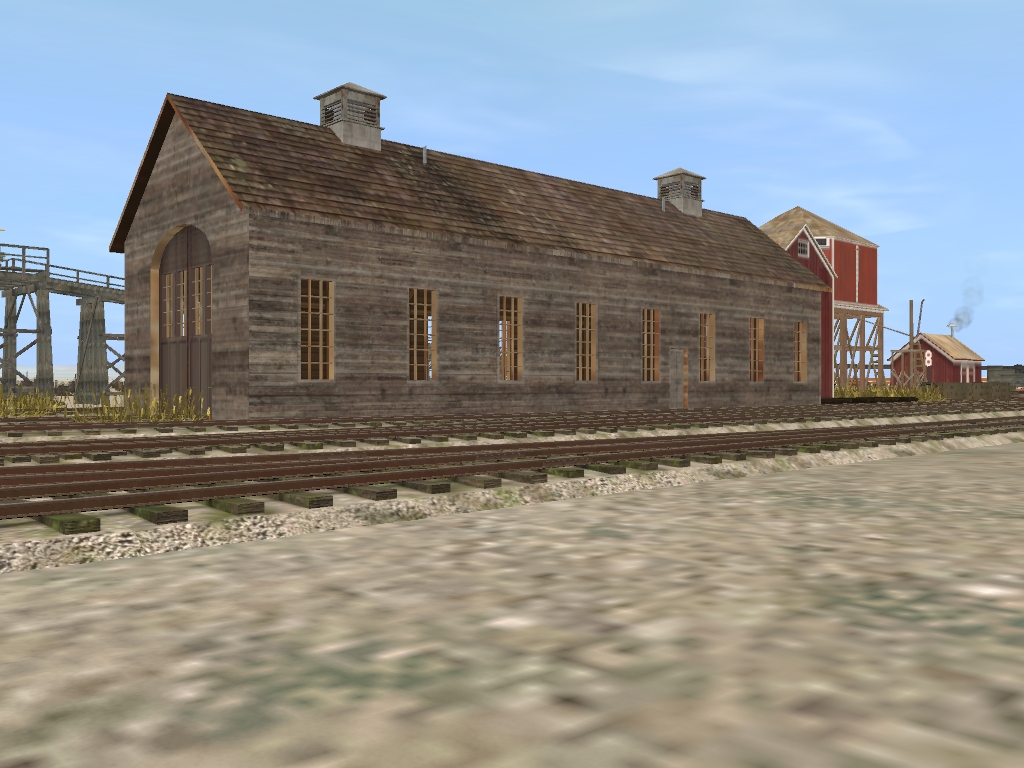
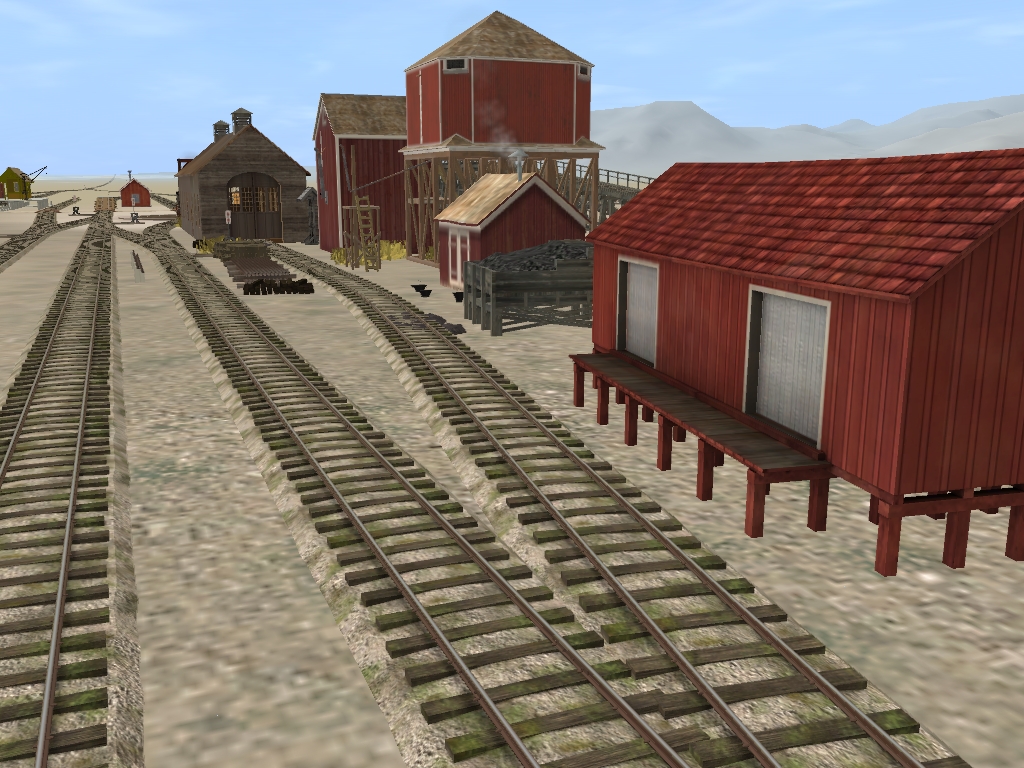
I don't have a lot of shots of Searles itself quite yet. Though I have placed a depot approximately near it's historical location. And although not an exact match for the original depot it's pretty close. The yard is also a lot smaller given that the tunnel wasn't constructed and allowed a longer yard, but given that it's 1905-ish I think it's acceptable for now. Sadly, I also have no shots of the line further north towards Lone Pine, at least not yet anyway.

So to me it's not much of an update, but the route is still in progress. There's still a lot to do, obviously. Mostly with ground textures and vegetation to really bring the route to life! But I hope you've enjoyed it regardless and more is still to come, so stay tuned!
 
Bought time you showed up, thought I was going to have to send the Trainz Posse after you, that desert can be scary, you be careful out there!

Ok all kidding aside, good to see ya, and the Route looks fantastic, really like the Tracks Texture, it blends in nice with the Desert Theme you have going on.

I like your Idea of Portal, that will work out really nice for filling in the missing link to Lone Pine etc.
 
... there was in fact a real Whitaker Iron Mine here. At first I thought the mine was something Mr. Tice created to add some operation interest to is HOn3 layout. And he built it as a Borax mine rather than an Iron mine. I happened to literally stumble across the mine's historical location while looking at some period maps of the region online. Sadly there are NO photos of this mine and the information for it is pretty much nonexistent. So my depiction of the operation is purely freelance and likely differs greatly from the prototype.
...
The grade maxes out at an insane 13%! his wasn't my call as Mr. Tice was quite clear about how steep the grade was on the industrial spur.
Kegg_Works, I like your layout - a lot. While the iron mine probably was located there I have to say 13% grade for any ore traffic is stretching things a bit. You're approaching the limit for most friction wheel on rail locos. I really think Craig used artistic license to add some interest or more likely real challenge to model operations on this spur. The RMC article on his layout seems to support that - see quote below. If your aim is to duplicate his layout then 13% is the number. :cool: Otherwise I'd suggest using something more realistic like 7-8% max which would still be an operational challenge in cab control.

I model the 3'ng EBT rr. On it's steepest branch a short 4% grade up to a ganister rock quarry it used a single 2-8-2 mikado pushing 4 mty hoppers up and 4 loads down. The loco was always on the down side of the consist and the front coupler coupled to the hoppers.

From the RMC article:
The mine at Whittaker was built and connected to the M&P after the layout had been constructed. While Whittaker was a real mining location, Craig has not yet visited the site nor found any source of what the mine might have looked like. Rather, it was his desire to incorporate a Heisler into the operating scheme that was the motivation to remove two feet of scenery already in place. Craig shoehorned a freelanced structure served by a switchback into place under the existing mainline route, resulting in a very steep grade with only room for a loco and one car on the tail track. The grade was adjusted to 13% so that Heisler No. 3 could just climb out of the mine with a loaded ore car. It is a spectacular operation requiring a skilled hand on the throttle to coax the Heisler and its load up the grade without stalling.
 
Last edited:
Kegg_Works, I like your layout - a lot. While the iron mine probably was located there I have to say 13% grade for any ore traffic is stretching things a bit. You're approaching the limit for most friction wheel on rail locos. I really think Craig used artistic license to add some interest or more likely real challenge to model operations on this spur. The RMC article on his layout seems to support that - see quote below. If your aim is to duplicate his layout then 13% is the number. :cool: Otherwise I'd suggest using something more realistic like 7-8% max which would still be an operational challenge in cab control.

I model the 3'ng EBT rr. On it's steepest branch a short 4% grade up to a ganister rock quarry it used a single 2-8-2 mikado pushing 4 mty hoppers up and 4 loads down. The loco was always on the down side of the consist and the front coupler coupled to the hoppers.

From the RMC article:

Hey there! I am trying to replicate the route as described in the RMC article as described by Mr. Tice. Indeed 13% is, for lack of a better word, insane... However I thought it would be a unique aspect and challenge for operations on the mining spur. I'm pretty sure it was a creative liberty on Craig's layout, not to mention the lack of space to get the spur to fit onto his layout. Although I may go back later and regrade the line to be within more realistic parameters. At the moment the Whitaker spur has taken a backseat to the rest of the route. There are still several areas that need tweaking such as Panamint Jct., Valley Wells, and Ballarat. Not including other points along the standard gauge. Right now the biggest factors are ground texturing and other details. Thanks a lot for your interest though! I'll be sure to continue posting progress updates as they come along!
 
Hey all, sorry for dropping off the face of the interwebs again... A lot had happened in my personal, morse so than usual. I relocated to another part of the state, which has obviously hampered my ability to develope the Mojave & Panamint railroad. Sadly my PC and most of my worldy posessions are still at my previous residence and fortunately I will be able to get them next week after Christmas.

However, I made a FEW bits of minor progress on the M&P. This includes a new inactive whistle stop, "Borax Flat". And a friend who has also been a partner in helping make the M&P a reality as a Trainz route has helped reskin another structure for me, the Engine House in Panamint Junction. I've also been able to secure some screenshots before the move, my only lament is not having posted them sooner.

panamint_jct_engine_ched_by_gunslinger87-daomtdr.jpg


boarding_now_by_gunslinger87-daomtgc.jpg


Is it obvious that I love Trainboi1's C&C 4-4-0s? How can I not? They look so completely at home here! At least to me they do. Although I am fond of just about everything he releases, including something quite recent. A "Modernized" Virginia & Truckee #20!

favorite_sg_locomotive_in_trainz_by_gunslinger87-daomtc4.jpg


In all honesty I think this is my favorite standard gauge locomotive for the game, ever! As much as I enjoy box headlamps, balloon, and diamond stack... I am a sucker for TOC steamers with oil lamps and capped stacks. Perhaps with some tweaking #20 here can be a possible freight loco for the Los Angeles & Independence?

preparing_to_board_by_gunslinger87-daomtcv.jpg


A picture of some of Trainboi's fine locomotives, posing for a photo with the reskinned engine shed in the background.
Up next is the aformentioned whistle stop, Borax Flat. A lonely, desolate place not far from a grade crossing.

borax_flat_milepost_8_8_by_gunslinger87-daomtg1.jpg


lonely_whistlestop_by_gunslinger87-daomtfc.jpg


Borax Flat sits at milepost 8.8 on the M&P's right of way. It's a lonely place and I suspect that it would be either a request stop or a transfer/meeting piont for local stage coaches.

Anyway, I have some other screen shots, but I will save those for later. Again, not much of an update but at least it's something after my long silence. And once all the detailing is in place with structures, people, ect... I can FINALLY get around to ground texturing!!
 
Sorry for the late replay and lack of activity on the thread recently. And Mr. Tice, it's an absolute honor to actually hear from you! I hope that what I've managed to create lives up to the railroad you envisioned.

So anywho... the lact of progress and activity is due mostly because of a recent relocation. I moved to a more central part of the state (near Athens, GA) and it took me a while to get everything in order. That also included the move of all my personal belongings, which I had to make on a separate, later time than the initial move. But, now with everything settling in I have been able to go back to work on developing the Mojave & Panamint!

My recent efforts have focused on Ballarat and updating the reskins on some of the locomotives. I have FINALLY found the right file to swap out and replace the boiler jacket texture and make it Russian Iron! I was very pleased as the engine looks even better in my opinion, not to mention looks closer to Tice's interpretation. I also managed to swap the roof skin to give it a red color, as per Tice's design on his early 2-8-0s.

number_4_by_gunslinger87-daumxf5.jpg

m_and_p_no__5_by_gunslinger87-daumxx4.jpg


The previous two pictures show the updated color schemes. I still have yet to locate the right file for the Steam Domes so I can add the decorative lining to them, other than that they're just about done. I've also updated the lettering on the locomotive tenders to look a little more period appropriate. Here's a close up of the new tender lettering.

new_tender_livery_by_gunslinger87-daumx1g.jpg


Personally I find that it looks MUCH better than the previous font I used! I have to give a shout out to Trainboi as it was his font suggestion, so thanks again for the recommendation. I've also added another locomotive to the M&P roster, No. 8! The line's one and only 4-6-0. I will also say I made a minor goof with one of the texture files, which added grey to a number of other areas on the locomotive which are redundant. However that good has since been rectified.

m_and_p_no__8_by_gunslinger87-daumyc6.jpg


Yes, it is a reskin of Togog's Oahu Railway & Land Co. #64, but it's about the only decent and/or suitable 4-6-0 for TRS12. Now given that Tice was inspired by the Nevada-California-Oregon and the the SPNG railroad(s) I suspect that he imagined No. 8 as an SPNG style Ten-Wheeler. I had a theory about swapping out the drive bogie on Trainboi's NCNG 2-8-0 with the drive bogie from Prowler's RGS #20, though I'm not sure how well that would look... let alone function. So for now, M&P No. 8 is a small, outside framed little Ten-Wheeler. Oh, and I updated No. 2's tender also!

number_2_new_livery_by_gunslinger87-daumzj3.jpg


And now for some of the updates in Ballarat. First up, I added one of the historical structures which is the town jail. Although not and exact match, it's still a pretty darn good representation of the original. Which amazingly is still standing there today!

ballarat_jail_house_by_gunslinger87-dav97tz.jpg


I also started adding vegetation to the area. More specifically Post Office Spring. It's pretty easy to spot as it is where the most green plants are. I tried to match as closely as possible what you see in real life. I'm also not sure where the spring's name originated from, and I don't know if a post office was actually there or not. I'll assume it was and I may add a post office later, unless you have any info on that, Mr. Tice.
icon_wink.gif


post_office_spring_by_gunslinger87-dav98sw.jpg


I've also started finding places for all the people and figures I've accumulated, adding life to the town as it were.

adding_life_by_gunslinger87-dav99rv.jpg

main_street_by_gunslinger87-dav9ak0.jpg
 
Hey all! Continuing from where I left off on my previous post, here are more shots of Ballarat. First up is more of the main street. One goal I have with this route is keeping it as "true" to Craig's original HOn3 layout. Of course in model railroading you often have to condense scenes, buildings, and sometimes you have to pick and choose which buildings you can have and which ones you can't. Not to mention having to "condense" a structure all together. With that in mind I'm digitally modeling a "Full Scale" railroad, so I've taken some creative license and made a few educated guesses when adding life and body to Ballarat. So with this next shot I've added some more buildings which look right at home here in the desert.

more_buildings_by_gunslinger87-dav9bg3.jpg


They are made by a guy called Cayden on the DLS and I've used several peices of his content on this route and others. He makes some really cool stuff that looks right at home in the old west or the Turn of the Century, like the M&P! This next shot is of the lumber spur, where the railroad delivers and unloads lumber for the local mines to pick up and use as timbers, or whatever else they need to use it for. Unfortunately I never could get a good look at this part of Craig's layout in his RMC (Railroad Model Craftsman) article so, again, I took some creative license. At the moment it is not industry active. I've added a large "office" towards the end of the spur with a loading dock. I plan on adding a stiff leg derrick here to help offload lumber from arriving trains.

lumber_office_by_gunslinger87-dav9c3c.jpg


The M&P is a GIGANTIC route, in terms of it's map size! Though that is honestly because when this route it exported to T:ANE I want one of it's "selling points" to be its vistas. That's one of the awesome things about the desert, you can see across them for MILES!! Though that said, most of the fine detailing is going to stay focused around the railroad and drivable roads. So expect a lot of details added in, such as this.
icon_wink.gif


all_in_the_details_by_gunslinger87-dav9ce0.jpg


Moving on a bit we head over to the engine facilities. Here is a some sort of shack or shed, perhaps it's the yard office. But here we see some of railroad's officials discussing and observing the day's operations.

railroad_officials_by_gunslinger87-dav9cq5.jpg


And next up we have the railroad bunkhouse, where the crews for overnight and layover trains can get some rest.

crew_quarters_by_gunslinger87-dav9cw0.jpg

crew_quaters_2_by_gunslinger87-dav9d7m.jpg


Next up is another part of town that is often overlooked or neglected entirely on a lot of Trainz routes. And that is the town cemetery. This was interesting to do, and a bit of a challenge, to fine the right location. I set up my laptop along side my PC so I could use Google Earth to find it and then used a similar view while in Surveyor to approximately place the cemetery. Now the "fence" was temporary as I wanted to use a wrought iron fence, but couldn't locate it at the time.

town_cemetery_by_gunslinger87-dav9dfw.jpg

town_cemetery_2_by_gunslinger87-dav9dvr.jpg


And now I leave you with one final view looking south-ish where the railroad enters town. I've also added some trackside signage, taking inspiration from the SPNG.

ballarat_city_limit_by_gunslinger87-dav9e52.jpg


Well after all of that, I did manage to make one rather critical mistake. The entire town, rail yard, engine facilities, everything... was shifted too far southeast by about 100 or so yards, perhaps more. So I used the copy-paste tool to move everything. I don't have any shots of that just yet, but now all the roads and structures match up to actual roadways and landmarks. It was a minor annoyance, but a relatively easy fix. Anyway, that's all for the moment, I'll catch you guys later!
 
Hello Kegg_Works that OLD Railroad (pun intended) is looking really good :clap::clap:

I think it's fascinating how you have everything laid out in the Desert. Keep up the good work and btw Happy New Year, I don't think I talked to you since last year LOL.
 
Hello Kegg_Works that OLD Railroad (pun intended) is looking really good :clap::clap:

I think it's fascinating how you have everything laid out in the Desert. Keep up the good work and btw Happy New Year, I don't think I talked to you since last year LOL.

Yes, it certainly has been a while! Good to hear from you again. And I have some more to show everyone it they're ready.

First up are a pair of shots showing a southbound double header with the line's first pair of 2-8-0s, number 4 and 5.

southbound_double_header_by_gunslinger87-dawwg81.jpg

double_header_on_the_high_bridge_by_gunslinger87-dawwgt6.jpg


I've also replaced the steel high bridge with this wooden trestle, which better matches Craig's inception of the M&P. The only reason I used a steel one before was because my original location for the Whitaker mine was below the bridge and a steep spur (with a switchback) had to pass below it. So I used the spindly steel bridge for better clearance. But now that I managed to locate the actual Whitaker mine location the steel bridge became unnecessary.

However I managed to come across a major blunder with Ballarat, I had the whole town located too far south! I discovered this as I was laying out the town roads and streets and noticed that the main road leading out of Ballarat went through part of Post Office Spring. Which the road is further away to the west side of the spring. So I have managed to relocate the town successfully. I had to make a few minor changes, but otherwise no one would have known if I had kept my mouth shut.

And on that note, here is the new Lumber Yard and office area for when trains bring in lumber to be used with the local mines in the area.

new_ballarat_lumber_yard_by_gunslinger87-daxa26s.jpg


And with Pencil42's recent release of yard buildings I added a little more creative liberty to the main engine facility at Ballarat. Considering this is the place where locomotive repairs and maintenance are carried out it would make sense to show that. I think the yard looks absolutely fantastic with these wonderful new additions!

ballarat_engine_facilities_by_gunslinger87-daxa2qd.jpg


I've also swapped out the old sand house, which was of an RGS prototype for one of Pencil's new sand houses. I think it has a much greater "family" appearance if you ask me! It looks much more at home than the previous. I only which Pencil would allow a working version of his "Closed" sand house with the steel roof. I think it would look better here, but trains do need their sand after all, especially for the southbound climb up to the summit at Slate Range Pass.

new_ballarat_sand_house_by_gunslinger87-daxa3ab.jpg


And I've also finally finished Mojave & Panamint No.8!! The line's only 4-6-0! Again, with Craig drawing inspiration from the N-C-O and SPNG roads, I suspect that his envisioning of #8 would be more along the lines of one of the Southern Pacific Narrow Gauge Ten-Wheelers. However, since this was the only viable 3ft gauge 4-6-0 for Trainz at present, I made due with what I have. And I have to say I don't think it looks half bad!! I have to give a shout out to Trainboi1 again for the suggesting the letter font. But anyway, here's #8 idling on the engine house lead.

finished_no_8_by_gunslinger87-daxa3qp.jpg

hedin_to_the_barn_by_gunslinger87-daxa47g.jpg


And here is one I did just for the fun of it, an "action" shot of the local stage passing by the engine yard at Ballarat enroute to Panamint City to the north. And yes, there WILL be drivable wagon roads! Well, I'll only be making the main roads drivable as well as the road to Surprise Canyon and Panamint City.

the_local_stage_by_gunslinger87-daxa4ha.jpg


Well that's about all the recent updates for Ballarat. I made some more in Panamint Jct at the southern end of the line so stay tuned!
 
Well as mentioned with the closing of my last post, I made a few changes to the southern terminus of Panamint Jct. First up is the new freight transfer station. I used a pair of Pencil's Yard Platforms with attachable track points. I turned them so each side opposed the other so one side would be standard gauge with the other was narrow. I added a small station structure created by Hobbyman350 to serve as the office. Sadly these platforms are inactive, but they are a better improvement over the Lumber transfer station I was originally using.

panamint_freight_transfer_by_gunslinger87-daxa5tk.jpg


Next we have a different sort of transfer trestle. This is used more so for shipping out or bringing in narrow gauge equipment if they need major repairs or replacement.

loading_trestle_by_gunslinger87-daxa6fg.jpg


Next were some details added the the "engine house" in Panamint Jct. The structure is actually a reskin of Pencil's Carshop as I was in need of an engine house that was open on both ends. Sadly there was no way to vent locomotive exhaust, so I added some! It's a relatively small detail, but man does it add a whole lot of character!! The structure was reskinned by a very good friend of mine and very well done I might add!

the_panamint_jct__engine_house_by_gunslinger87-daxa6uz.jpg


And finally a view looking south at the engine facilities here. I added one of Pencil's sand houses here to as even on this section of the line, which is pretty flat, you would still need to services southbound and northbound locomotives. And seeing as this is set to be 1905, I have included an oil tank for refueling oil burners, such as engines 6, 7, 8, and 9.

panamint_engine_facilities_updated_by_gunslinger87-daxa764.jpg


Well that's about all of the recent updates so far. However I do have one more little tid-bit of info, I have managed to snag a copy of T:ANE!! And with it's improved draw distance I think we'll really get to see the scenic potential of this route! I still have to find a means of transferring everything over to T:ANE, so stay tuned!
 
Back
Top