jayholland
Content Creator
I have had a number of requests for assistance with building tunnels from scratch, rather than using pre-made ones, so I have put together this brief tutorial on how to do it.
Start by laying your track on the baseboard, ignoring the hill and curving the track if you want a curved tunnel. Even if your tunnel is to be straight, make sure there is at least one spline point on the track which is to be inside it. There are special dark tunnel tracks available, but I have used plain track for this example.

Still ignoring the hill, select the tunnel lining of your choice and lay that to the same curve as the track. I usually lay it slightly to one side of the track, then move it into place afterwards. Again, make sure it has a spline point 'inside' the tunnel.

Now you need to make holes in the baseboard so your tunnel can pass through the hill. Use a 'dighole' to remove the grid square at each end of the tunnel. I use Andi06's 'AJS Dighole' KUID 122285:1010:1 It helps when laying the track to position it so that it enters and exits the hill in the centre of a grid square, so only one square each end needs to be removed.

Now switch to wireframe view and open the tracks menu. Use the 'Get Vertex Height' tool to select the vertex height of the track spline closest to the entrance to the tunnel (but outside it). Then select the 'Apply Vertex Height' tool and click on each of the track spline points inside the tunnel. This levels the track, passing it through your digholes. If your tunnel is on a gradient, do the same thing, but using the gradient tools instead.

Now switch to the splined objects menu and do the same to the tunnel lining. Then make any necessary fine adjustments to the track and lining.

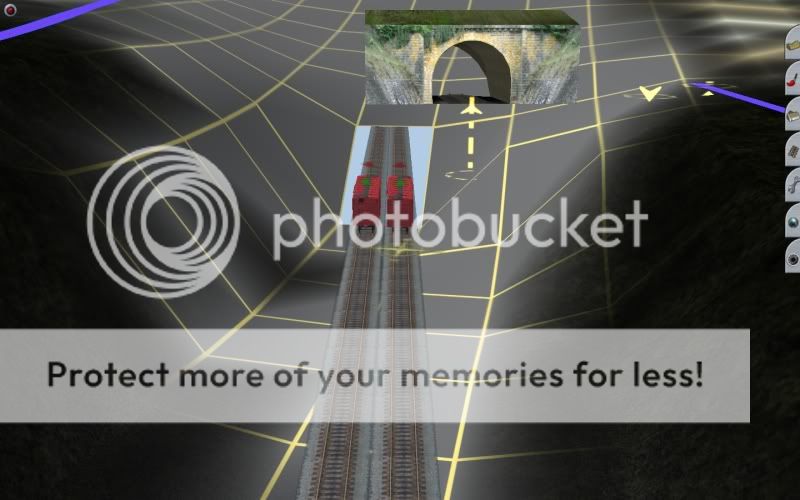
Now switch back to normal view, select the portal of your choice and place it. Adjust the portal and lining for a snug fit.

Now you need to fill in or disguise the gaps. Tweak the terrain (you may have to adust portal and lining again). The main gap over the top of the portal can be covered with a grass or asphalt spline plane. Cliff splines can also be used at the sides.

Fill any remaining gaps with bushes or other scenery items. Job done.

Start by laying your track on the baseboard, ignoring the hill and curving the track if you want a curved tunnel. Even if your tunnel is to be straight, make sure there is at least one spline point on the track which is to be inside it. There are special dark tunnel tracks available, but I have used plain track for this example.
Still ignoring the hill, select the tunnel lining of your choice and lay that to the same curve as the track. I usually lay it slightly to one side of the track, then move it into place afterwards. Again, make sure it has a spline point 'inside' the tunnel.
Now you need to make holes in the baseboard so your tunnel can pass through the hill. Use a 'dighole' to remove the grid square at each end of the tunnel. I use Andi06's 'AJS Dighole' KUID 122285:1010:1 It helps when laying the track to position it so that it enters and exits the hill in the centre of a grid square, so only one square each end needs to be removed.
Now switch to wireframe view and open the tracks menu. Use the 'Get Vertex Height' tool to select the vertex height of the track spline closest to the entrance to the tunnel (but outside it). Then select the 'Apply Vertex Height' tool and click on each of the track spline points inside the tunnel. This levels the track, passing it through your digholes. If your tunnel is on a gradient, do the same thing, but using the gradient tools instead.
Now switch to the splined objects menu and do the same to the tunnel lining. Then make any necessary fine adjustments to the track and lining.
Now switch back to normal view, select the portal of your choice and place it. Adjust the portal and lining for a snug fit.
Now you need to fill in or disguise the gaps. Tweak the terrain (you may have to adust portal and lining again). The main gap over the top of the portal can be covered with a grass or asphalt spline plane. Cliff splines can also be used at the sides.
Fill any remaining gaps with bushes or other scenery items. Job done.
Last edited: