PBR textures floating

Thai1On

Slave to my route
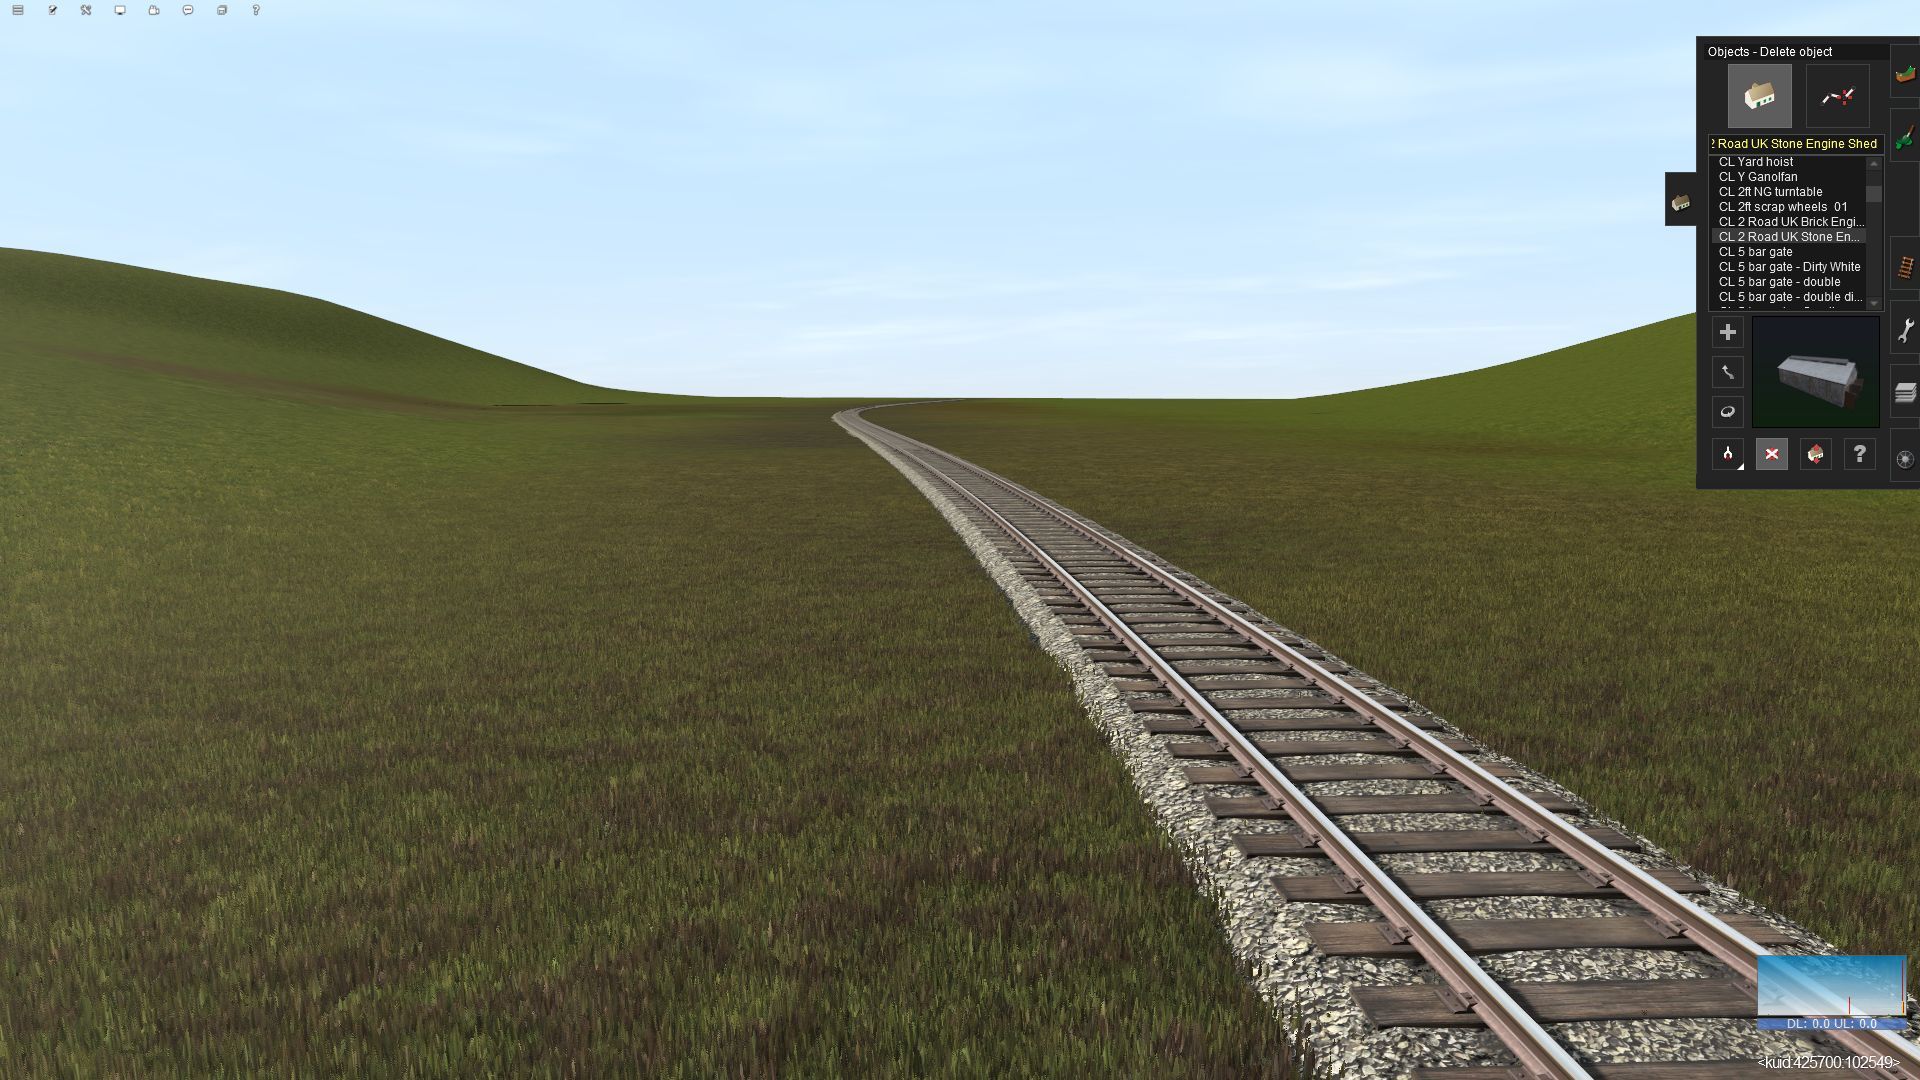
Hi everybody, sorry if this has been covered. I'm still updating the L&A and adding PBR textures. The texture I'm using is PBR City Dirt 06 and it appears after close inspection the texture seems to be floating above the ground level. In general, this isn't a problem until I start to litter the ground with scrap locomotive parts and either they sink below the PBR texture or float on the PBR texture.

Is it possible to adjust the PBR level or is this a new wrinkle I need to learn on how to use?

Dave
 
Change 'Shader Quality' to 'standard' in Settings > Performance, you are probably on 'ultra'...
 
Is it possible to adjust the PBR level or is this a new wrinkle I need to learn on how to use?

I am currently replacing all my standard (non-PBR) textures with PBR and can confirm that it is an issue with PBR, and not just in Trainz but in all games/sims that use PBR (according to several reports by others here in the forums).

I have not tried the suggestion from Dermmy to lower the shader quality level.

My solution has been to reapply the same PBR texture that is showing in the "floating" section but further out from the affected area - i.e. sweep the brush over a wider area. This also solves the other PBR problem of "tunneling" which is the opposite of "floating", where a tunnel or depression appears below an object (most noticeable along tracks and splines). Both issues are caused by the PBR raising or lowering the terrain by a few centimetres - a small change but enough to be noticeable in some places.

Making minor height adjustments to the terrain can also help eliminate these "wrinkles". Sometimes both (brush and height adjustments) need to be used.

Despite these "issues", I am impressed enough with the benefits of using PBR textures over the older non-PBR that I will continue to use them exclusively.

My experiences.
 
I just tried Dermmy's suggested solution and it does work. My problem with this, confirmed by observation, is if you create a route using PBR textures with your shader quality set on Normal and then upload the route to the DLS. Anyone who installs your route but has their shader quality set to Ultra (and I have a high end GPU so why wouldn't I use this setting) will then see lots of floating and tunneling textures particularly under tracks and road splines.
 
Best you can do with the IMO badly made pbr textures is to only use them on the minimum setting so it doesn't bury things, you can actually create PBR textures that do not bury stuff and still look OK.
However I'm not convinced that we need PBR ground textures, especially the ones that move around when you change the view.

I've been working on making PBR versions of my Ground Textures that don't bury the track etc and can be used close to tack roads and such, very much still in experimental mode however screenshot of a test.


I would not argue with Malc, except to say that I would not willingly go back to using the old non-PBR textures so I, at least, cannot do without them. I certainly agree with trying to avoid, where possible, those PBR textures that "move around" when you change your viewing angle (or "jellyfish guts" as some posters have referred to them) but this seems, from my observations so far, to occur on terrain that is not flat (which I admit can be a lot of terrain).

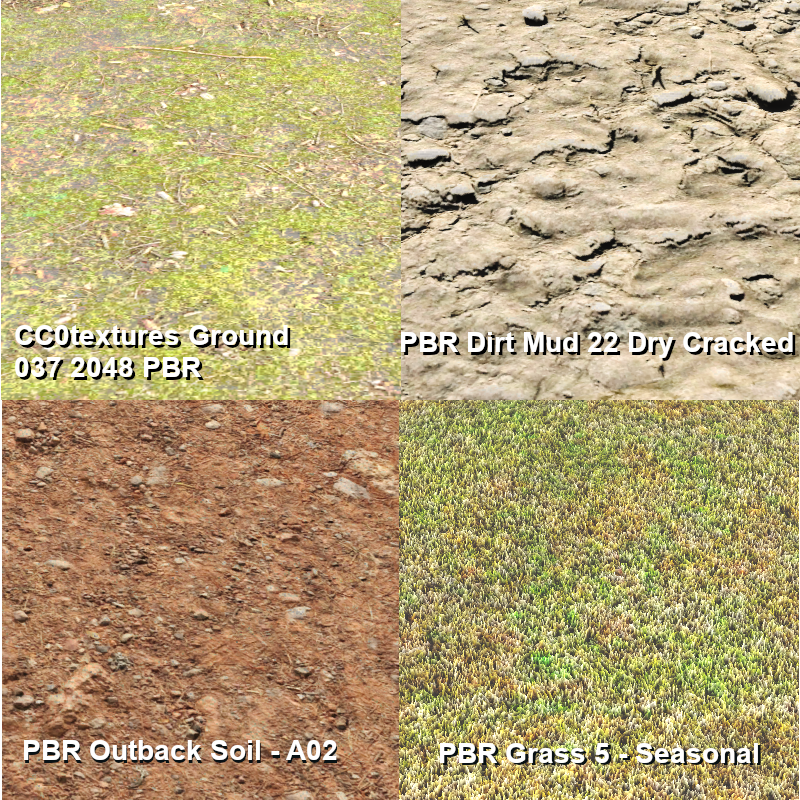
Four of the PBR textures I am using in my current project are shown below. The detail they contain is not matched by any of the older (non-PBR) equivalent textures that I have used in all my previous projects.


PBR-Textures.png
 
I find that the most convincing - and more photorealistic - results appear when I reduce the 'Scale' of the PBR textures before application, using the dial control.
Few PBR textures benefit from higher scaling settings, except those that will be viewed far from the camera in order to mimic distant scrub or tussock-covered hills, for example.
This also allows you to retain the 'Ultra' shader quality setting for optimal PBR appearance/ performance in game.
pware's image above includes a couple of my favourite built-ins, as they also exhibit low tiling effects over large areas of application and great up-close detail when zoomed in.
 
I find that the most convincing - and more photorealistic - results appear when I reduce the 'Scale' of the PBR textures before application, using the dial control.
Few PBR textures benefit from higher scaling settings, except those that will be viewed far from the camera in order to mimic distant scrub or tussock-covered hills, for example.
This also allows you to retain the 'Ultra' shader quality setting for optimal PBR appearance/ performance in game.

Agree. By and under tracks plus a little further out, I have the texture scale dial turned far left. If flora, fauna etc are also dotted nearby, the dial is at far left too. This helps to prevent the 'floating' look. For myself, it also greatly reduces the jelly like wave effect which gives a feeling of motion sickness when watching from a moving vehicle.
 
Having done some more experimentation I have decided that changing the Shader Quality to Standard is the easier option. Leaving it set to Ultra forces me to spend a lot of time, on a route of over 400kms, removing the texture overlaps and tunneling effects on track and roads. I will simply add the text "uses PBR textures (set Shader Quality to Standard)" on the route description.

As a side benefit, I am able to use other textures closer to the track and roads - this would normally create the overlaps and tunneling when using Ultra but not when using Standard.

Trainz, a lifelong learning experience which is one of the many reasons I love it!
 
Using PBR textures can mean a bit of a change for how you paint textures.

The first step is that blending PBR and non PBR textures is not recommended; but at this point there are a lot of PBR textures available so that should hopefully be a little easier.

The second is to not use texture rotation unless you specifically need to. Apart from the performance cost (each angle of rotation is essentially like loading another ground texture), it will also cause issues with the parallax effect. You can 'align' textures where necessary (so for example wheat fields you'll choose a specific angle to paint it), but you want to avoid 'rotation spamming' (holding rotation keys when painting).

The third is, as a few have mentioned, to play with the scale. Most ground textures tend to work best with the scale at or around minimum, unless you specifically want the 'larger' effect.

One addition is that there are a few creators (I can't remember usernames offhand, sorry) that are making PBR ground textures with the heightmap set to RGB=128,128,128 (this is essentially the same height as non PBR ground textures, and is flat); this results in a flat texture that should work at least somewhat well with legacy textures and works fairly well with full PBR/heightmapped textures.

As to the 'jellyfish' effect, this is unfortunately a side effect of parallax effects, due to the way that games render them. As noted by pware this effect is seen in a lot of other games (I've actually had a bit of fun the last few years playing 'spot the parallax artifacts' in games lol ); most games work around this by using flat textures on terrain that is not actually flat. This is where having flat versions of textures that also have parallax could work, but it might be difficult to blend them well depending on the textures. The other option is to avoid very sharp changes to terrain, or to cover them with other objects.

Regards
Zec
 
Zec, thank you for that info.

You introduced a few points that I was not aware of. I just used the Bulk Update and Replace tool to reset most of the PBR textures in my current route to remove the texture rotations. I found a scale setting that worked well in each before doing the bulk replace and, as a result, that one change has saved about 4MB of space in the route, about 2.5% of the total - small but probably useful. There were a few textures where rotation was visually needed so I have left those untouched.
 
Back
Top