fant_autentico
Well-known member
Good afternoon
Perhaps you have ever wanted to make a small module or a real route but the difficulty has made you give up. Use the programs to do the
Orography is complicated and what I propose you will not avoid doing it by hand, but it will be with a solid base. There will be someone who
knows something better but this is for rookies (or not).
You need to install Google Earth (free) and have an image editor (gimp, adobe, etc).
I will explain how to do it.
The sections or tiles of Trainz measure 720 x 720 meters invariably and to that extent we base ourselves.
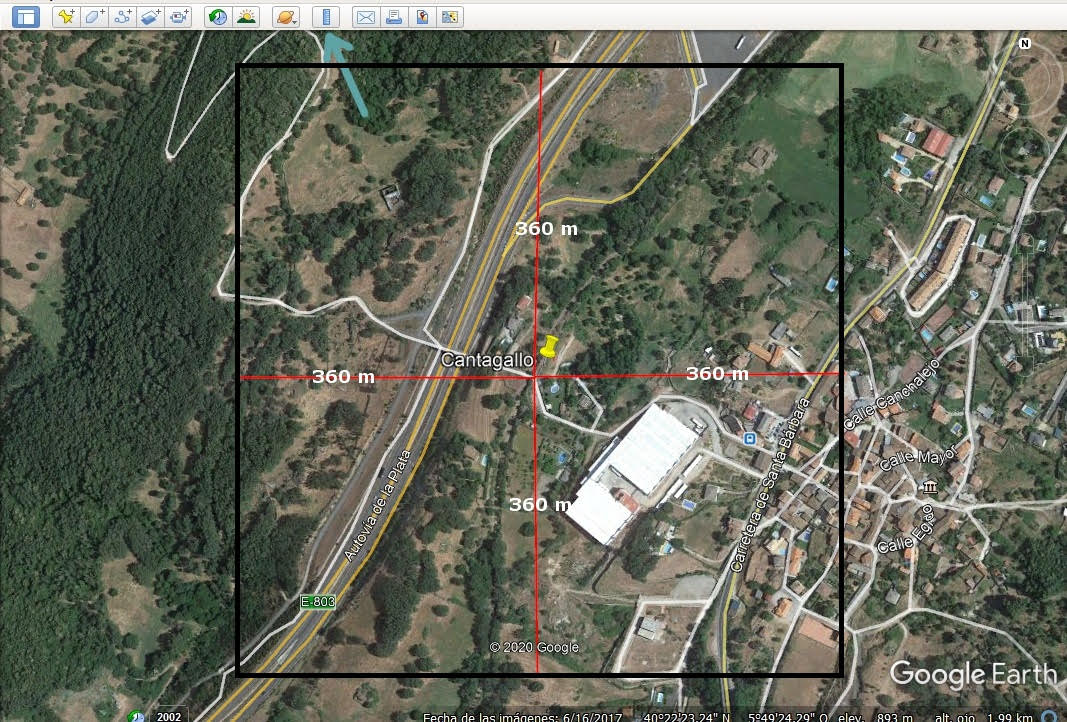
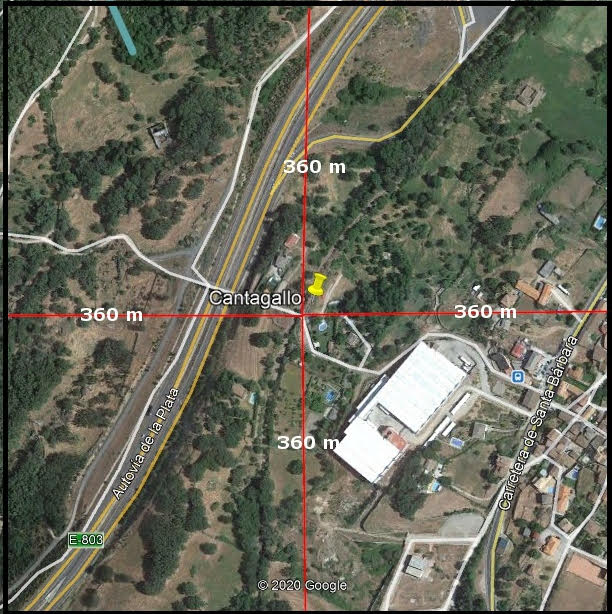
You open google earth and go to point 0 of what will be your route, the start, mark the point and open the ruler tool at the top,
Orient the image well to the north and with that tool place a line of 320 m towards each cardinal point, save the image.
With an image editing program make a square as in the images below and cut out; right now you have the full-scale image for Trainz.

I have a scenery object that I call " surveyor tile" and that measures 720x720 meters, I am going to upload it to the DLS now when I finish the post.
Kuid 876391: 22222222
Suppose that you already have it, since you edit it and replace the image that it bears with the one that you have made adjusting yours to the original, you validate it; now you go to surveyor mode and you can put it like a tree or a house. To continue making tiles you have to change the number of kuid with each one new you install, as many as necessary.
And that's it, you have permission to modify the image of the original object but it will have to have a kuid number of yours.
I hope it serves you in these times of isolation.
Greetings, Javier
Perhaps you have ever wanted to make a small module or a real route but the difficulty has made you give up. Use the programs to do the
Orography is complicated and what I propose you will not avoid doing it by hand, but it will be with a solid base. There will be someone who
knows something better but this is for rookies (or not).
You need to install Google Earth (free) and have an image editor (gimp, adobe, etc).
I will explain how to do it.
The sections or tiles of Trainz measure 720 x 720 meters invariably and to that extent we base ourselves.
You open google earth and go to point 0 of what will be your route, the start, mark the point and open the ruler tool at the top,
Orient the image well to the north and with that tool place a line of 320 m towards each cardinal point, save the image.
With an image editing program make a square as in the images below and cut out; right now you have the full-scale image for Trainz.
I have a scenery object that I call " surveyor tile" and that measures 720x720 meters, I am going to upload it to the DLS now when I finish the post.
Kuid 876391: 22222222
Suppose that you already have it, since you edit it and replace the image that it bears with the one that you have made adjusting yours to the original, you validate it; now you go to surveyor mode and you can put it like a tree or a house. To continue making tiles you have to change the number of kuid with each one new you install, as many as necessary.
And that's it, you have permission to modify the image of the original object but it will have to have a kuid number of yours.
I hope it serves you in these times of isolation.
Greetings, Javier