Install the app
How to install the app on iOS
Follow along with the video below to see how to install our site as a web app on your home screen.
Note: This feature may not be available in some browsers.
You are using an out of date browser. It may not display this or other websites correctly.
You should upgrade or use an alternative browser.
You should upgrade or use an alternative browser.
What sorcery is this!?
- Thread starter SHOPlanB
- Start date
Dinorius_Redundicus
kuid 68213
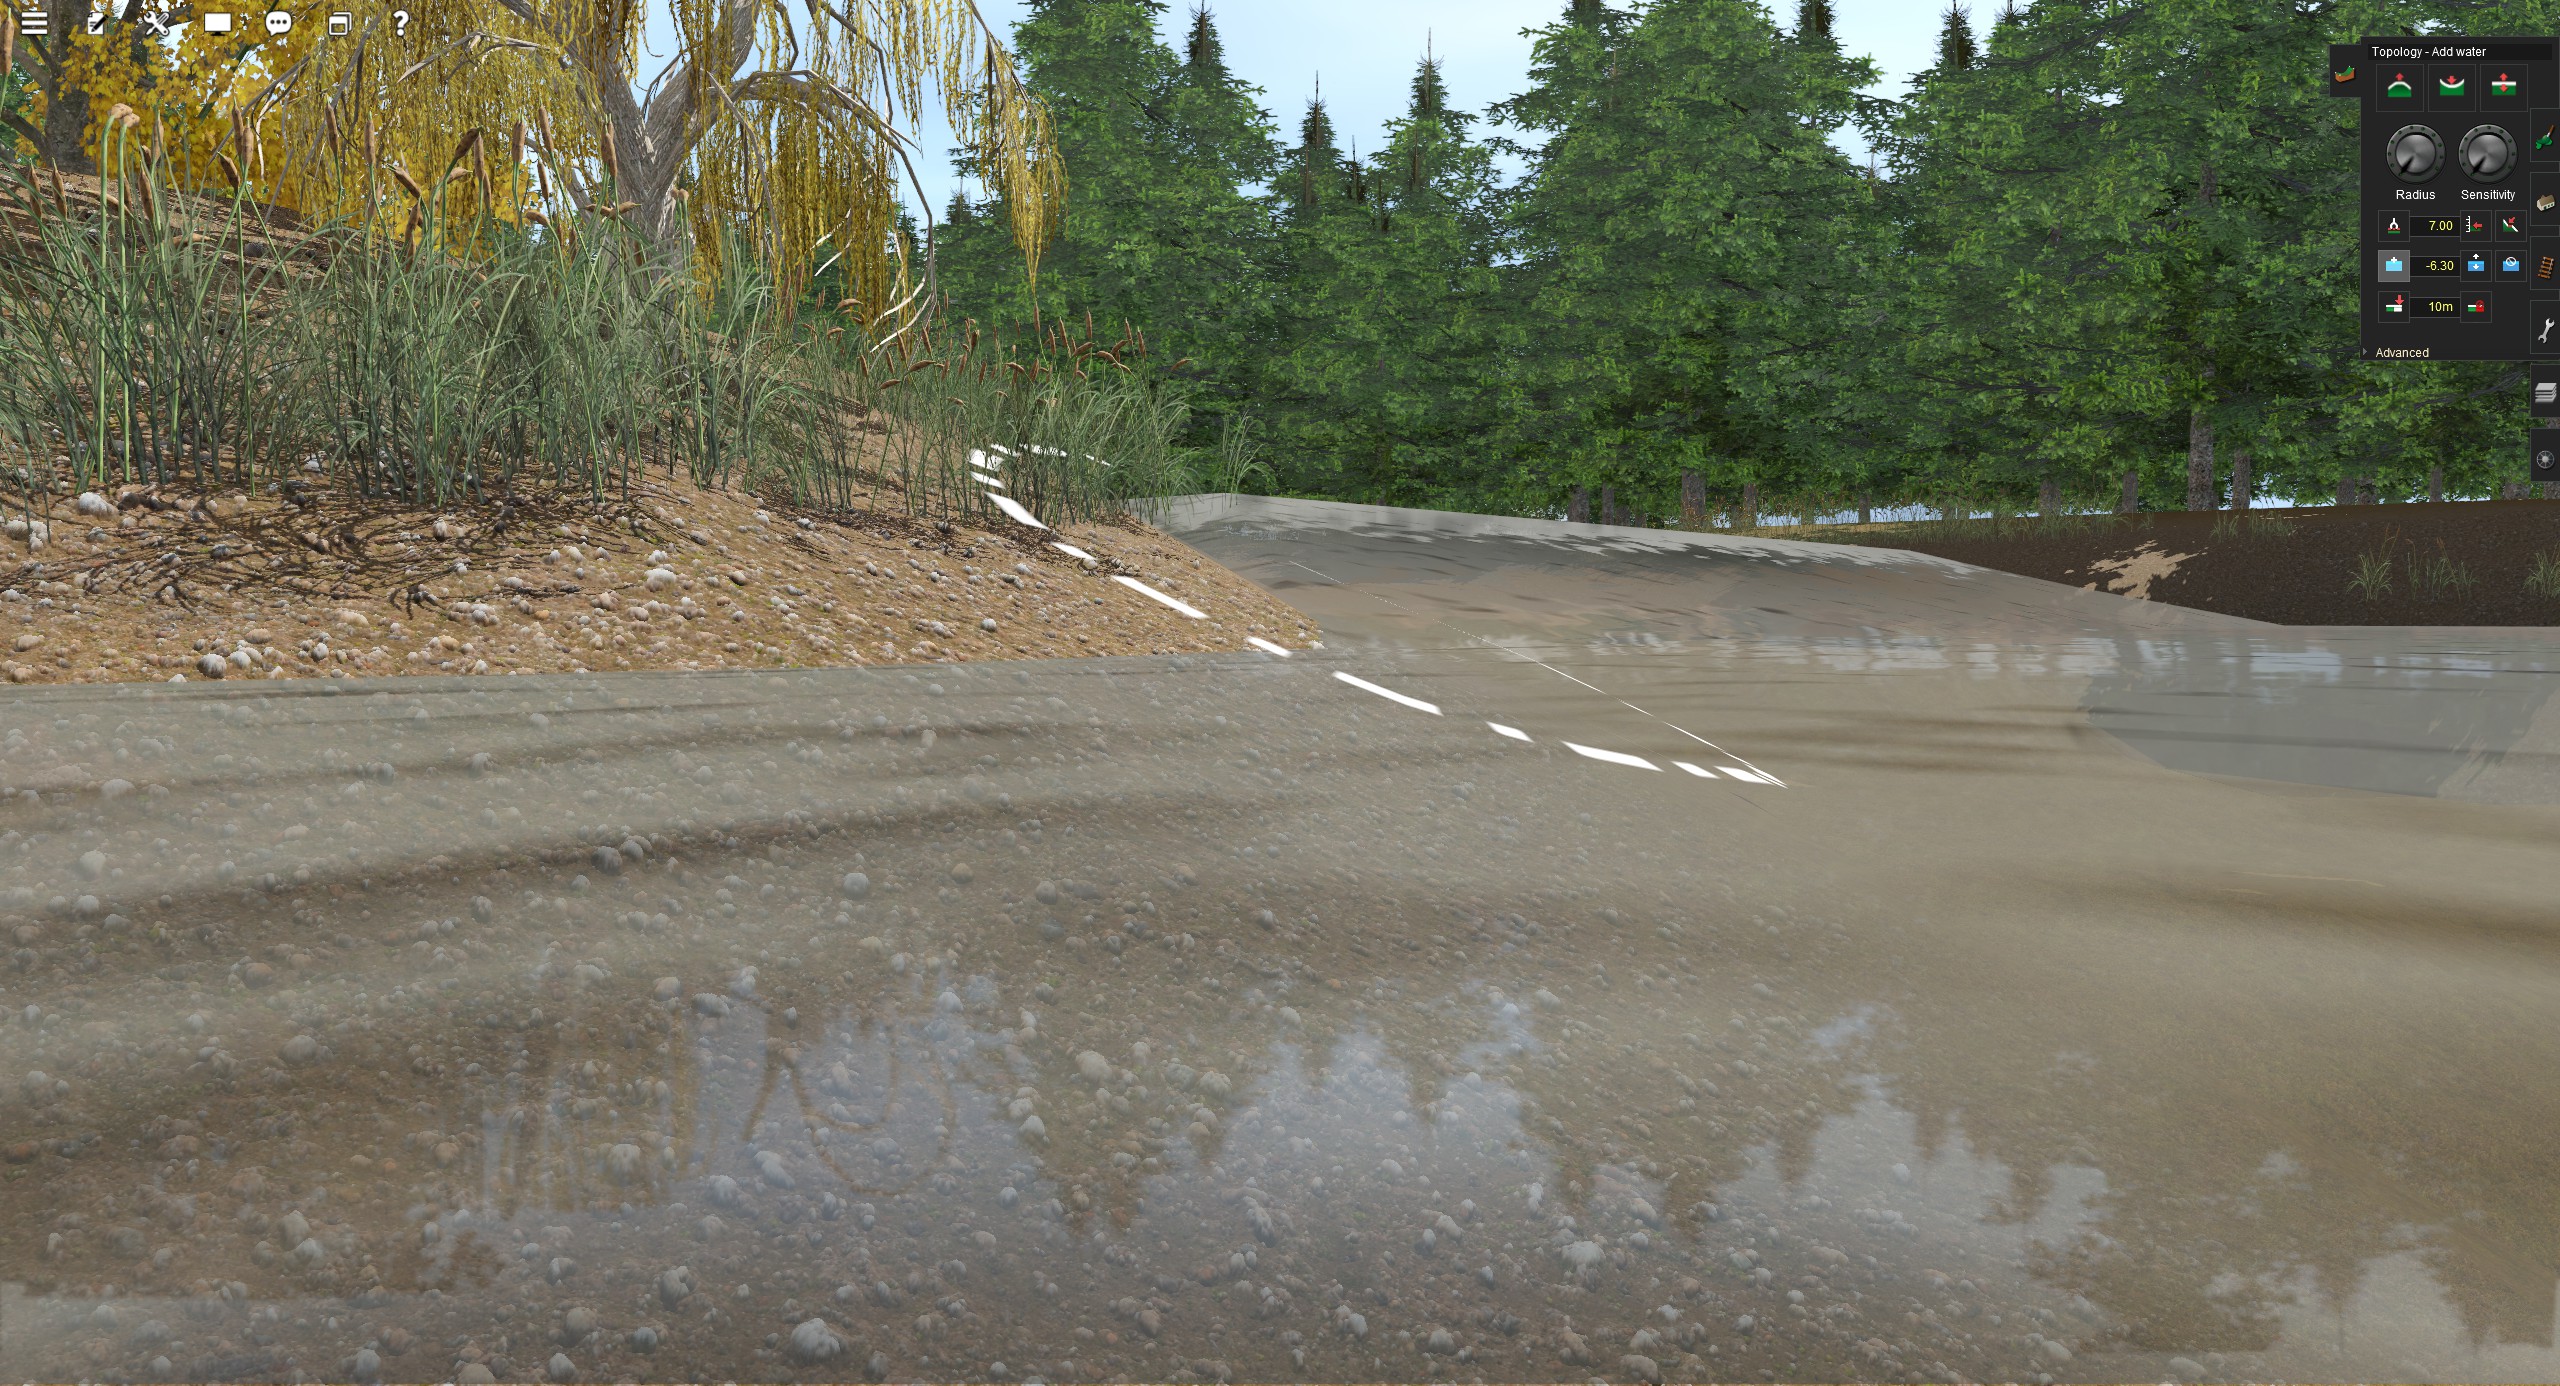
Spline point of some invisible track asset? Cursor circle of the ground texture tool?
It took me a while to figure out what the problem *might* have been. Some would say what good luck - users have been complaining for years about not being able to get water that flows down a slope
Yes this occurs in T:ANE as well. It's an absolute pain in the backside to get to work as intended in either version.
Sadly, I did this by complete accident. And my first idea for a fix yielded no fruit which was to see if there was a surfer on the DLS. :hehe:
I did manage to get it fixed (lots of back and forth playing with a wave) but how I did it originally is beyond me.
It's all sorcery as you said. A height difference between two water plains of more than a few meters can cause this. A surfer would've been perfect.
IanOHoseason
Member
I would prefer to use “add water” when making rivers etc., but as they usually lose / gain altitude over their course, they either disappear or form lakes; I therefore am driven towards spline features which are limited to colour and texture as created.
Do I draw from this thread that it is possible to adjust the level of “water?” If so, I would be very pleased to understand how to do it.
Best wishes
Ian
Do I draw from this thread that it is possible to adjust the level of “water?” If so, I would be very pleased to understand how to do it.
Best wishes
Ian
I would prefer to use “add water” when making rivers etc., but as they usually lose / gain altitude over their course, they either disappear or form lakes; I therefore am driven towards spline features which are limited to colour and texture as created.
Do I draw from this thread that it is possible to adjust the level of “water?” If so, I would be very pleased to understand how to do it.
Best wishes
Ian
When adding water to a higher piece of land mass, but the laid water has defaulted to the 0 default height so cannot be seen, go into wireframe (F9), the water can be pulled up by highlighting the "adjust water level" then move the mouse forward to raise the water. Mouse movement backwards will lower the water.
Another option: The water height can just popped into the "water height value" box prior to laying. To get the height of a lake / river etc, at higher altitude, use the "Get height" tool (above "add water" icon) on the inside of the bank where you would like the water level to be then add that same number into the "water height value" box and add the water to the lake etc. The water can be adjusted if needed by using the mouse. Could try the "Shift" key option (below) to make the seperate heights, but once the water is moved when shift is not held all the water mass will be same level again. I haven't worked away round it yet.
One thing to be careful of, when adding a set height of water to an area, but have already laid some water slightly away at a lower level for example, the newly laid water if it joins with the lower section of water all the water will become the same level. I just keep a grid square water free and mask with textures and rock etc.
Sadly, I did this by complete accident. And my first idea for a fix yielded no fruit which was to see if there was a surfer on the DLS. :hehe:
I did manage to get it fixed (lots of back and forth playing with a wave) but how I did it originally is beyond me.
Yes, I have seen that a few times with a different level of water in the same body of water. To get the water back to same level, use the "water adust level" tool then move the water that has not changed height a small bit and all connected water will return to "normal".**
A cool option for adjusting height level of a small piece of water in a bigger water mass:
**When the "Adjust water height" tool is clicked on and the mouse curser is on a piece of water and "SHIFT" is held down while the mouse is moved forward or back, only a small section of water will be pulled to change height. The rest of the water will remain at the original level. To return to normal, just do as above.
Last edited:
I THOUGHT I had it fixed, but apparently not. But right now I got a bigger fish to fry and that's running amok trying to fix an oddity that's suddenly sprung up. That oddity is PBR Grass 21 suddenly appearing on random baseboard seams. Not everywhere, but wherever I have that texture and a seam happens to fall there. Not the end of the world, and hardly above an annoyance. But it's there, and needs to be fixed.
Sadly, I did this by complete accident. And my first idea for a fix yielded no fruit which was to see if there was a surfer on the DLS. :hehe:
I did manage to get it fixed (lots of back and forth playing with a wave) but how I did it originally is beyond me.
I think somewhere I got a mesh of a pug and putting it on a surfboard would not be that difficult I guess
neville_hill
Well-known member
So if two water rectangles touch corners at a grid point is there any way the two rectangles can be at different heights, or will they always grab each other to form one surface?
So if two water rectangles touch corners at a grid point is there any way the two rectangles can be at different heights, or will they always grab each other to form one surface?
If you're careful, you can get a split between the water planes. Adjusting one or the other a tiny smidge will send them cascading together. If I need to separate heights, I will put the water a full grid-row away if I can and use something else to transition between the two heights. I think it's a lot more realistic that way.
I think that adding water should be as simple as it was in the old VistaPro where we would click on a specific height and let it flood into the valleys and ravines "realistically" (note quotes).
IanOHoseason
Member
Thanks, I’ll try the adjustment when I next have a need. It seems, though, that yo still must go in steps, and not have a seamless flow. Maybe that is a wish to far?
Best wishes
Ian
Best wishes
Ian
I think somewhere I got a mesh of a pug and putting it on a surfboard would not be that difficult I guess
Dear Lord I almost sprayed my monitor with coffee. That is BRILLIANT!
Thanks, I’ll try the adjustment when I next have a need. It seems, though, that yo still must go in steps, and not have a seamless flow. Maybe that is a wish to far?
Best wishes
Ian
You can with great difficulty get it to flow downwards or upwards, I did it once and then messed it up adding a flat bit, so gave up!
RoysTrainz
Rembrandt van Trainz
Yes this occurs in T:ANE as well. It's an absolute pain in the backside to get to work as intended in either version.
Ask Trump he is the best advisor near you maybe get him hooked on trainz so he keeps his feet,fingers and brainless head of the world messing it up.
BTW i not pretend to have running water down the slopes everywhere but if you look at my routes 2019 i am getting pretty close to make it look like running water down the slope sort of and its more than painstaking or sorcery of any kind its called patience,lots of time and retry and at certain point just give up and accept the result as is and hope it not get messed up in some next trainz update in the future.