Applying TurfFX and Clutter via area fill is a real pain!

MSGSapper

Trainz route developer
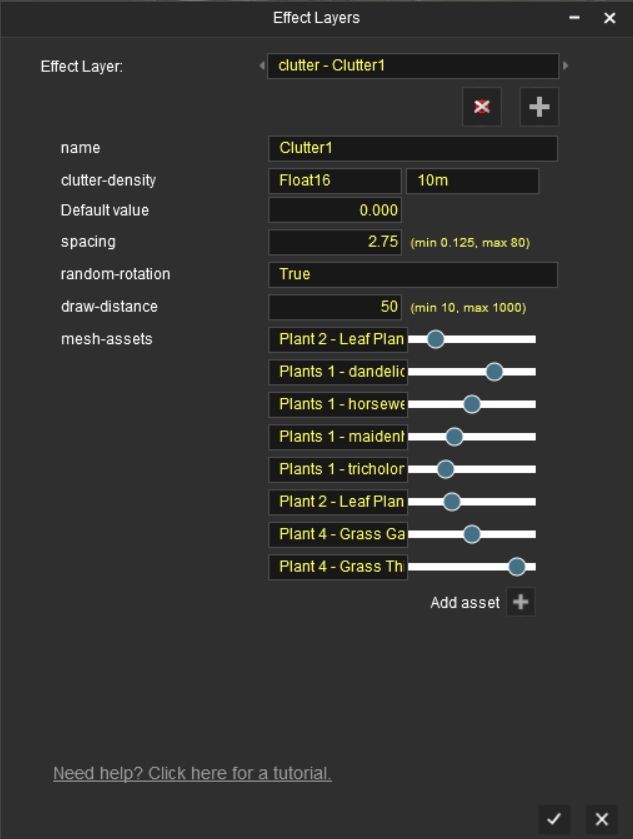
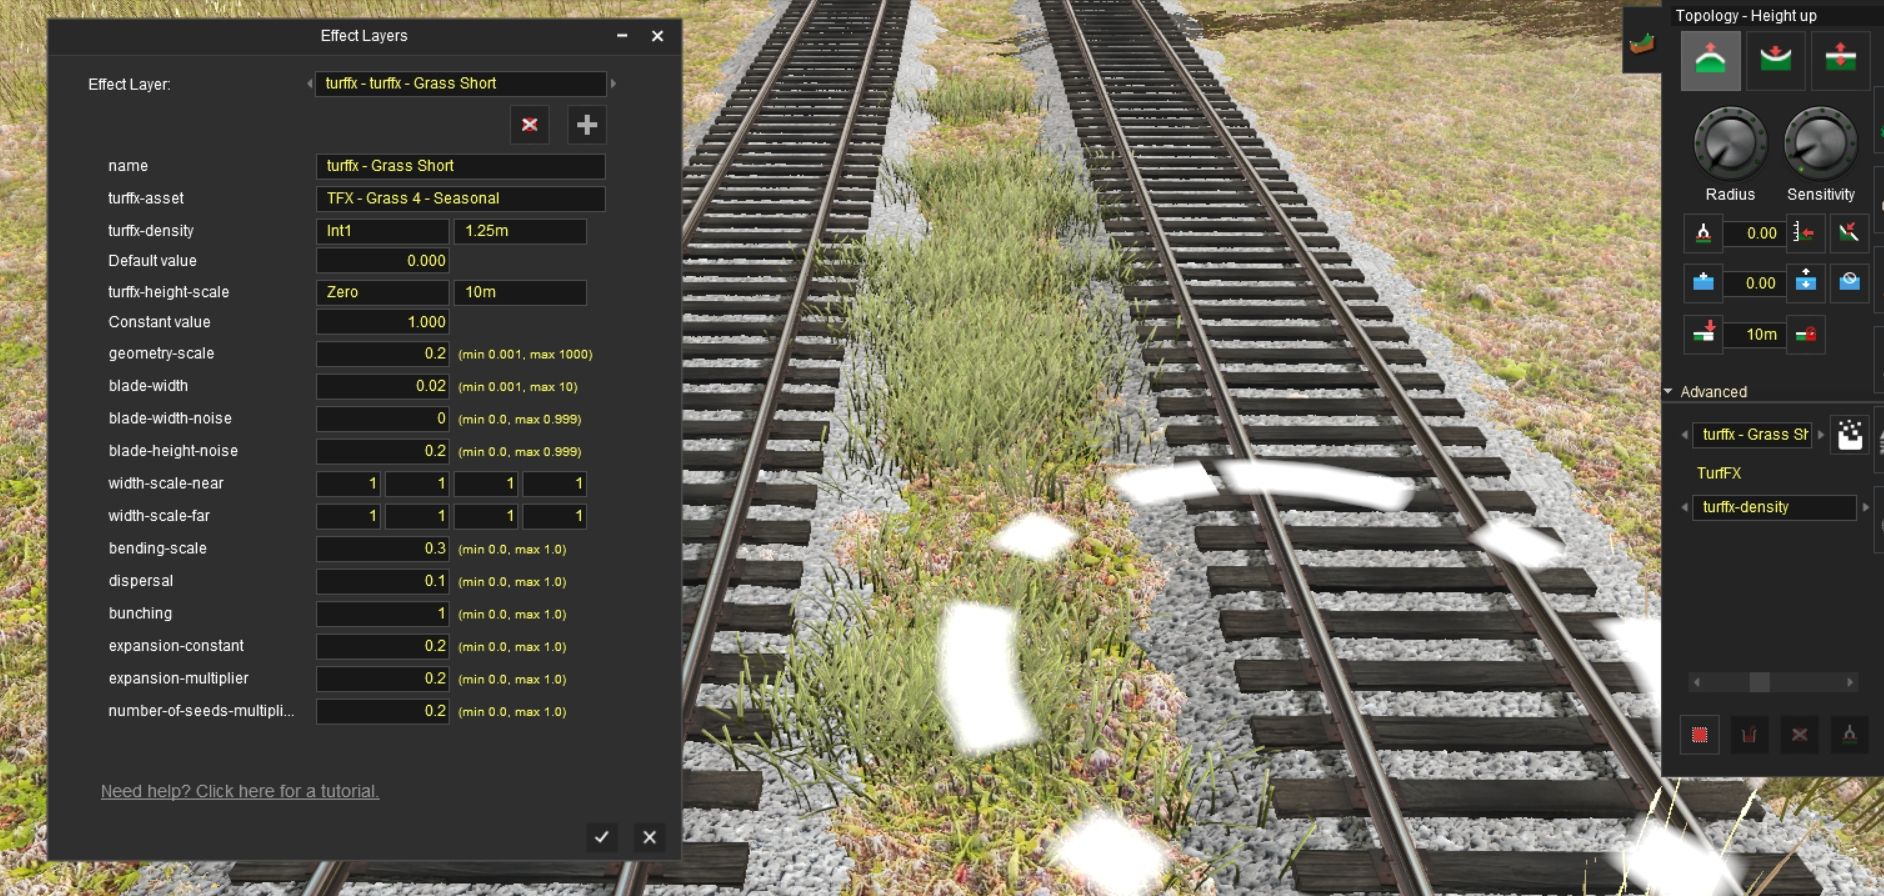
I am in the process of adding TurfFX and Clutter to one of my T:ANE routes in order to bring it up to full TRS19 standards.

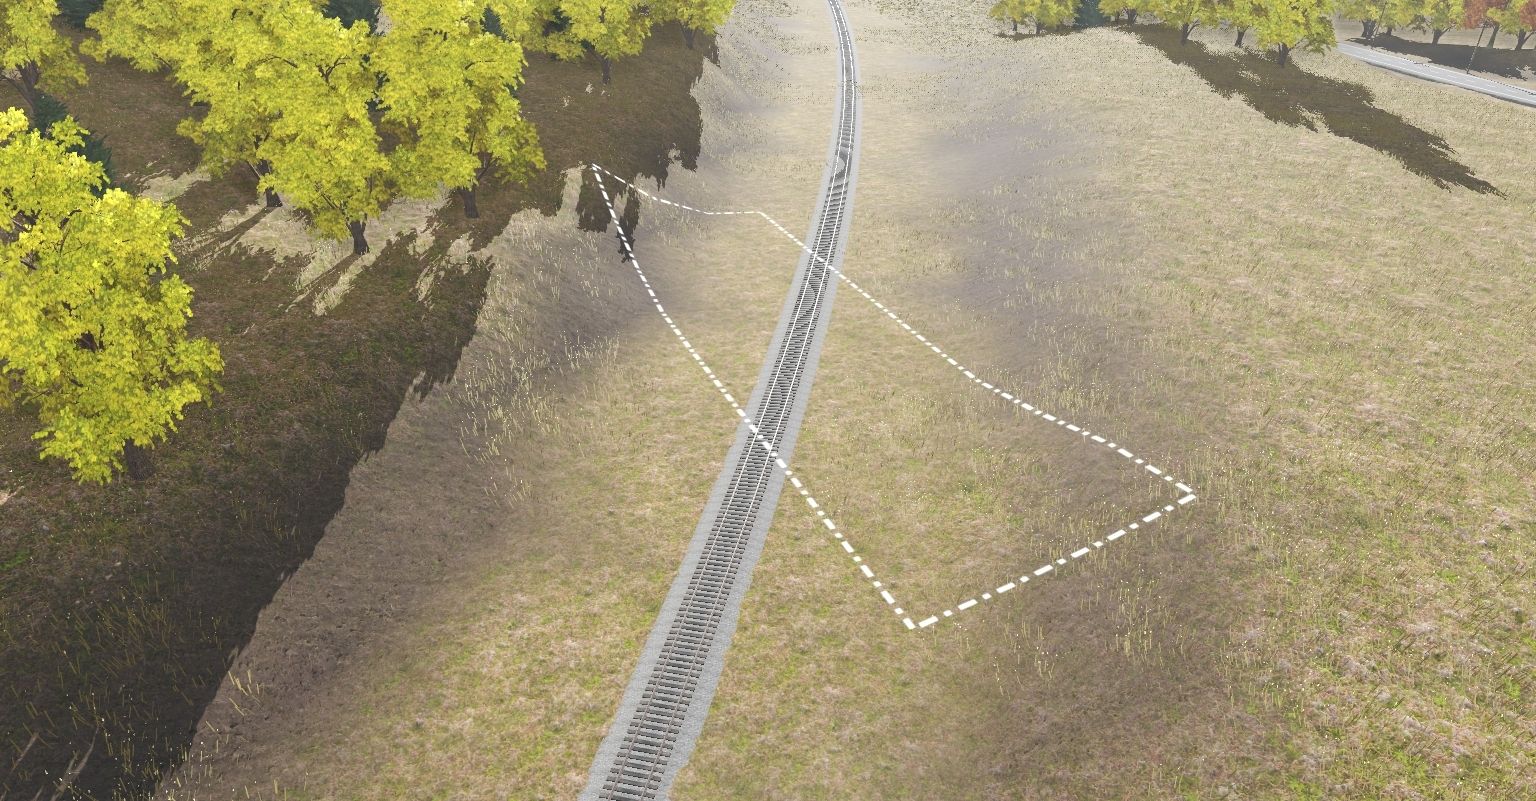
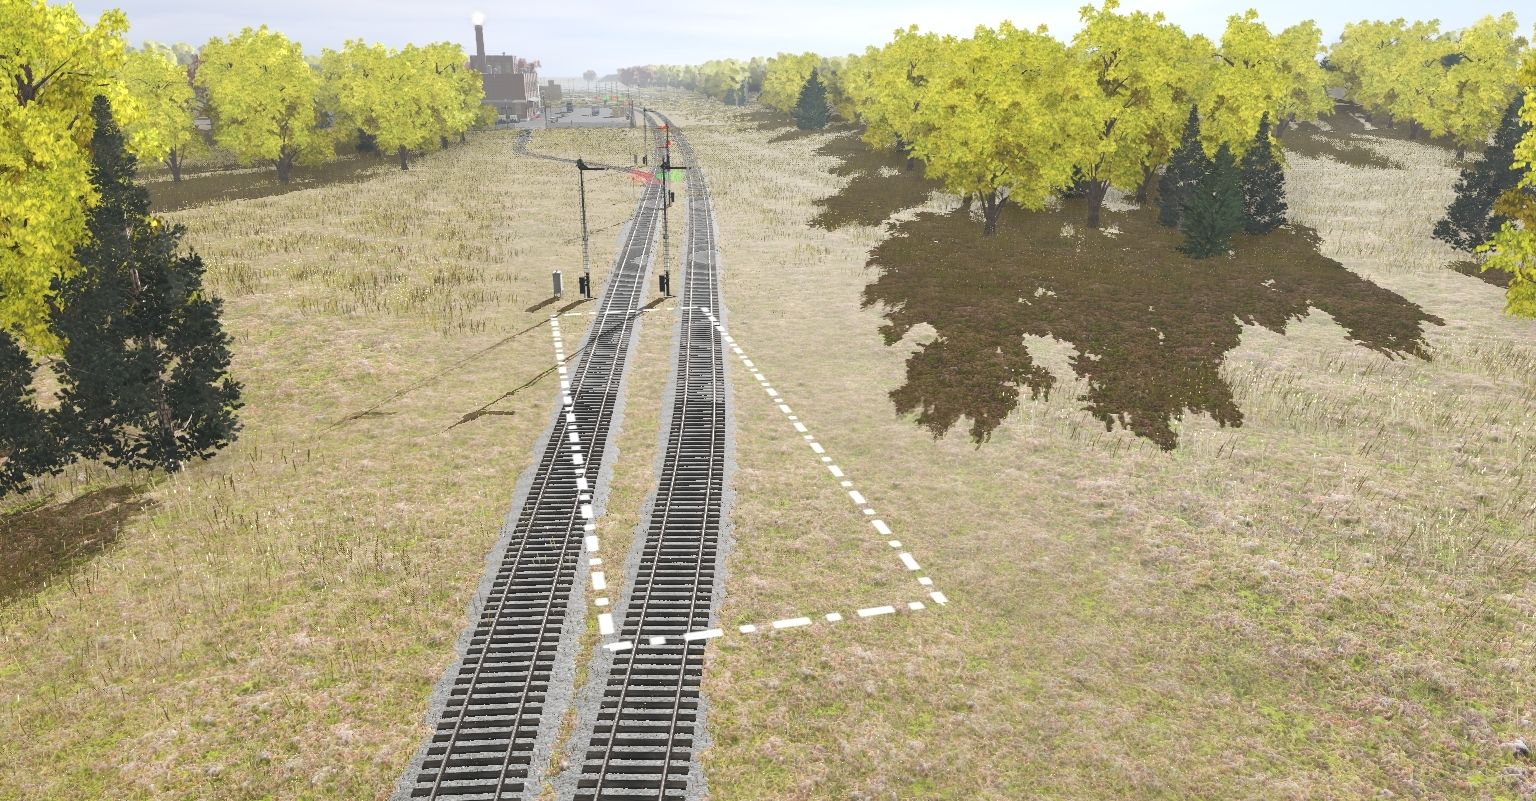
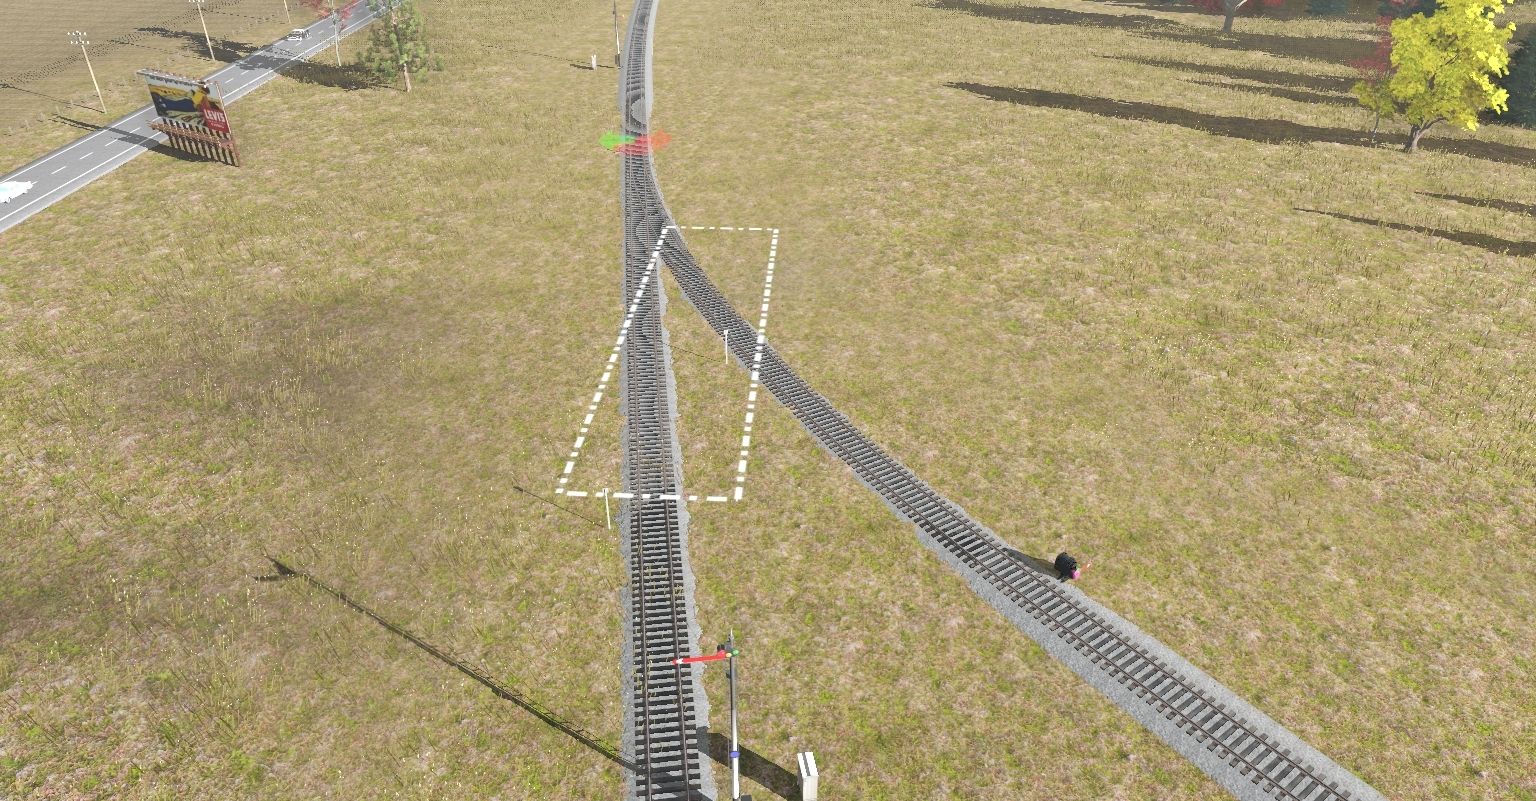
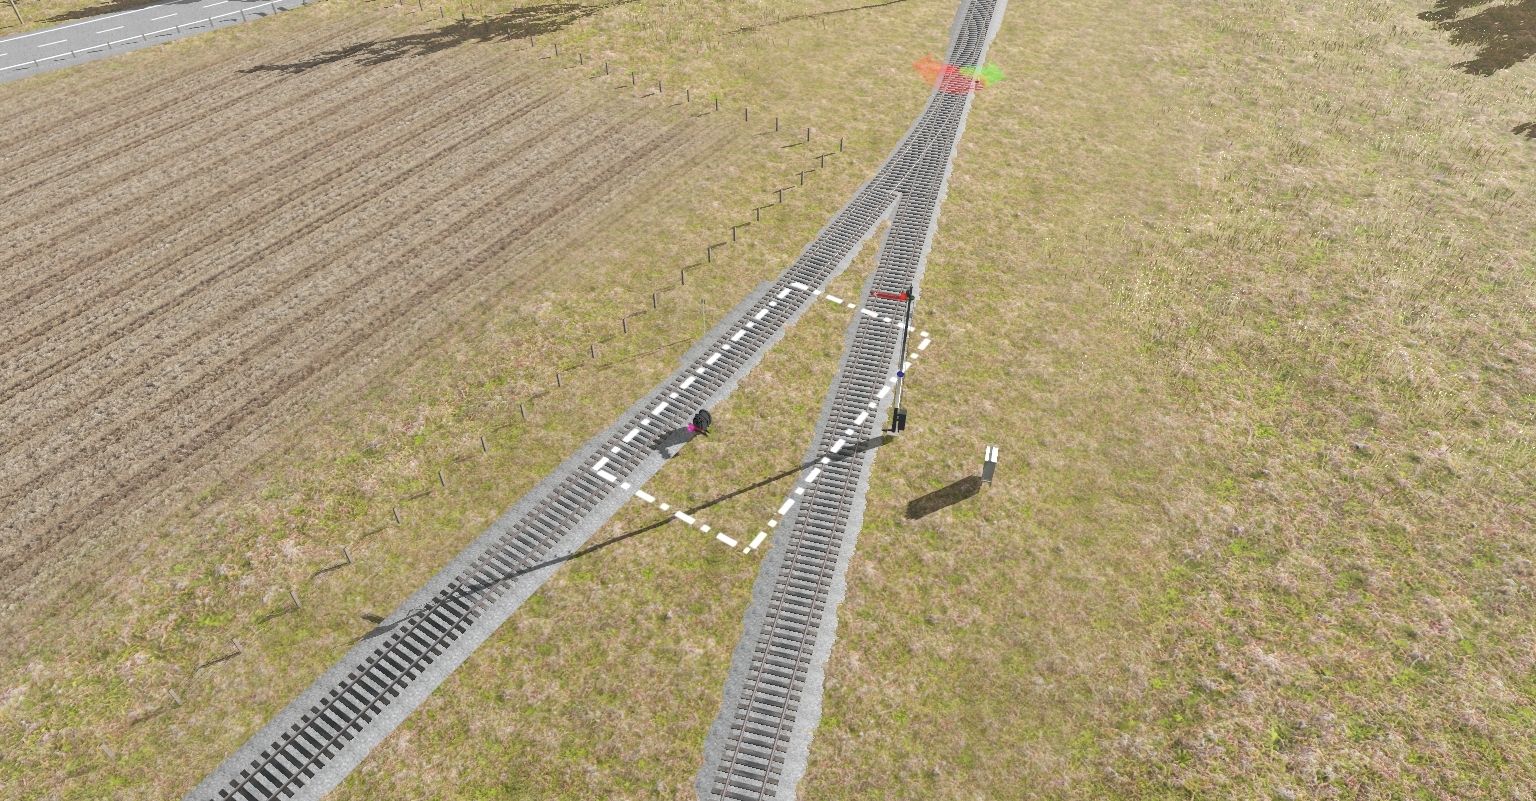
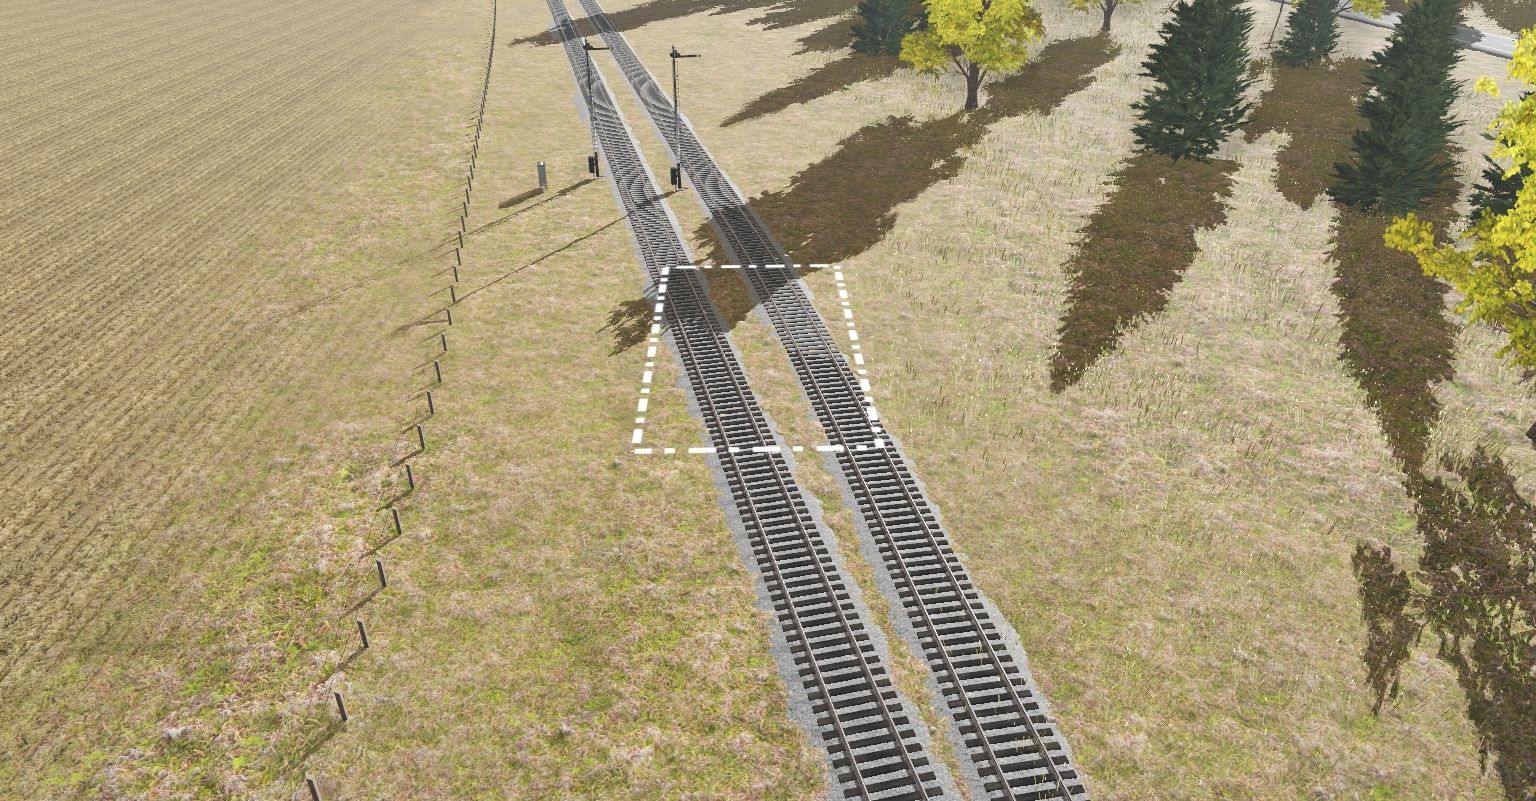
The only way you can add TurfFX or Clutter to the route is via "area fill" in the "Topology" tab, and that is proving to be a real pain and very tedious. There is no precision at all to area fill, and you cannot control the direction of the area fill box or rectangle. This makes it very hard to get TurfFX ir Clutter where you really need it, especially in tight spots or curved areas. Area fill also tends to often place the TurfFX or Clutter where you do not want it and getting rid of it can sometimes be difficult, especially around tracks.

I like TurfFX and Clutter but this function really needs to be moved to the Paint tab instead to allow you to just paint it where you need it.

Bob
 
I like TurfFX and Clutter but this function really needs to be moved to the Paint tab instead to allow you to just paint it where you need it.
There is no real difference between the paint tools for turfx and clutter and the paint tool for textures, except that you use the tools to select either height or density before you start painting. Radius and Sensitivity are equivalent, and the remove tool assists in getting cleaner edges in important areas (although it's difficult to get them really sharp). There is no point in a rotate setting, as there's nothing to rotate.

Other than better control of the tendency to bleed outside the painted area (which I think is a feature of the asset, not the painting) what differences wold you expect to see if it was moved to the paint tool?
 
I agree it's painful. On one route I used a combination of textures only where it's too tight to put the textures down, shorter grass closest to the tracks so it didn't cover over the tracks, and some of the better grass splines and plants by JVC.

Like splines and other similar assets, I find we need to choose our poison carefully. With lots and lots of the new Clutter and TurfFX plants and grasses, it does get a bit slow in Surveyor and worse in Driver. It's a matter of too much of a good thing in this case! What I find helps is limiting the grass and stuff to areas where it can be seen and only closest to the tracks worse best at least for me.
 
It seems all my turffx seems to be on the thin air where the baseboard adjacent would be! Either that or it goes around the boarder of the baseboard. Looks like a few issues to iron out. I initially thought this would be a replacement for all grass splines but I guess we still still have to use them for in between tracks and stuff
 
It seems all my turffx seems to be on the thin air where the baseboard adjacent would be! Either that or it goes around the boarder of the baseboard. Looks like a few issues to iron out. I initially thought this would be a replacement for all grass splines but I guess we still still have to use them for in between tracks and stuff

I forgot about that! I remember having to go back and fix stuff but not a lot. I also did a near tree-for-tree replacement with Speed Tree equivalents. Here's my rendition of your Eagle River. I rebuilt the big mill complex up by Keene and here's some switching being done:

2019-02-09 175223.jpg

2019-02-09 175819.jpg
 
When using the "topology-height" up tool to apply turf-x or clutter to an area, keep the radius down to maybe 10 or 20 meters, and you can have fairly good control. In other words, don't try to do too much area with each left-mouse button click.
 
There is no real difference between the paint tools for turfx and clutter and the paint tool for textures, except that you use the tools to select either height or density before you start painting. Radius and Sensitivity are equivalent, and the remove tool assists in getting cleaner edges in important areas (although it's difficult to get them really sharp). There is no point in a rotate setting, as there's nothing to rotate.

Other than better control of the tendency to bleed outside the painted area (which I think is a feature of the asset, not the painting) what differences wold you expect to see if it was moved to the paint tool?

I disagree. In the paint tab you can PAINT as you go with real time varying of the direction, scaling, radius and and as a bonus, you can hit undo[B/]. Your abilities in the topology tab are much more limited and very inflexible. Basically it must be a square or rectangle and can only go with the grid direction and that's it. Here are some examples:

In this image the rectangle can only be this small which limits it usefulness for tight spaces. Also it must go with the grid which means I am going to have grass on my rail.

TurfFX-Application-SS-1.jpg


In this image the rectangle it at odds with track placement which is curved. The only way I am going to get grass around that track is to make lots of small squares or rectangles, and I have had to do that extensively which is extremely tedious!

TurfFX-Application-SS-2.jpg


In this image another example of the rectangle at odds with the track placement:

TurfFX-Application-SS-3.jpg


and another example:

TurfFX-Application-SS-4.jpg


This image highlights the frequent problem of trying to get grass around junctions.

TurfFX-Application-SS-5.jpg


An another example:

TurfFX-Application-SS-6.jpg


If a route is designed strictly to go along with the linear grid or if you are starting from scratch with no track or structures applied, it's not too bad. The problem comes with retro-fitting TurfFX or Clutter to pre-TRS19 routes as I am doing, especially with realistic terrain that does not necessarily follow the grid and has track with curves as all mine do. I have 14 such routes, most of which have many base boards.

BTW I did look at using the "Height Up" functionality and it is clunky at best.

While I love the new TurfFX and Clutter effects, and the realism they bring to a route, I am beginning to wonder if the tedium and trouble is really worth it. It would be far easier to just build new routes from scratch and forget about updating the old ones.

Bob
 
Last edited:
I agree with you there MSGSapper..
I still use spline grass, and apply the turrfx grass to the bigger groups of the grass like x10, x20. I done this with my Midwestern Branch and Shortline Railroad routes and the results wasn't too bad.

But yeah, the turrfx grass is a really good idea, but to place it in areas that's needed is.... a chore..

I decided to make upgrade anymore routes with the new grass system unless they're being made in TRS19 as like you said, could use that time to make new routes from scratch.

Cheers


I think philskene may have hit on a viable alternative by using HO or N Scale for the routes, which reduces them to just a very few baseboards. With all these new TRS19 bells and whistles, performance trade offs are beginning to become an issue. The more realistic looking the route the more performances suffers as these bells and whistles have a major impact on performance in all but the best graphic cards.

I have been rather impressed with what philskene has been doing and am seriously considering following suit with any new routes I might create. This way you have a very realistic looking route but on just a few base boards which reduces performance impact overall.

I have now spent more time trying upgrade a single T:ANE route to full TRS19 standards then I did on moving several routes to T:ANE from TRS12. It has not been fun at all! The ease of use surveyor tools just hasn't kept pace with applying the new features.

I have to admit that I am seriously considering not upgrading all my T:ANE routes to TRS19. Just too damn much work in trying to upgrade mile after mile of scenery and textures - and that's not counting upgrading the structures!

Bob
 
I disagree. In the paint tab you can PAINT as you go with real time varying of the direction, scaling, radius and and as a bonus, you can hit undo[B/]. Your abilities in the topology tab are much more limited and very inflexible. Basically it must be a square or rectangle and can only go with the grid direction and that's it.


You can do the same with turfx and clutter, except for rotate which isn't relevant. The rectangular or square area fill is only for where it suits - larger rectangular areas that should be evenly filled. Don't use it for small areas or where you need precision. You say the painting is klunky, but you don't say what you would like to be different.

Note that a lot of the control of the painting is in the definition of the turfx, not in the tools. For instance, the minimum radius and the sharpness of the edges. You may need more than one definition for the same grass to get the right range of effects.

I agree that undo is a mess, but then that applies to all the paint procedures, particularly displacement maps.

edit/ If your turfx shows directional features (so you would like to rotate it) then the definition needs adjusting. IIRC you need to increase the bunching and decrease the dispersal (or the other way around). Don't use the supplied examples - they look very ordinary. /edit
 
Last edited:
Hi Bob --

Thanks for the comments above.

One thing that I have found through experience is that it helps to limit the number of different types of TurfFX applied to a route (or, in my case, layout).

In most of my layouts I've used just two -- one grass at two different heights. The only exception thus far is Yuan Gulch where I used two different grasses, each at two different heights, giving four variants in total. Greener grass at the upper level, yellower grass at the lower level:


The layout is on the Download Station. My Forum thread here:

https://forums.auran.com/trainz/sho...uot-The-Yuan-Gulch-quot-Narrow-Gauge-Railroad

Phil
 
I disagree. In the paint tab you can PAINT as you go with real time varying of the direction, scaling, radius and and as a bonus, you can hit undo[B/]. Your abilities in the topology tab are much more limited and very inflexible. Basically it must be a square or rectangle and can only go with the grid direction and that's it. Here are some examples:

In this image the rectangle can only be this small which limits it usefulness for tight spaces. Also it must go with the grid which means I am going to have grass on my rail.

TurfFX-Application-SS-1.jpg


In this image the rectangle it at odds with track placement which is curved. The only way I am going to get grass around that track is to make lots of small squares or rectangles, and I have had to do that extensively which is extremely tedious!

TurfFX-Application-SS-2.jpg


In this image another example of the rectangle at odds with the track placement:

TurfFX-Application-SS-3.jpg


and another example:

TurfFX-Application-SS-4.jpg


This image highlights the frequent problem of trying to get grass around junctions.

TurfFX-Application-SS-5.jpg


An another example:

TurfFX-Application-SS-6.jpg


If a route is designed strictly to go along with the linear grid or if you are starting from scratch with no track or structures applied, it's not too bad. The problem comes with retro-fitting TurfFX or Clutter to pre-TRS19 routes as I am doing, especially with realistic terrain that does not necessarily follow the grid and has track with curves as all mine do. I have 14 such routes, most of which have many base boards.

BTW I did look at using the "Height Up" functionality and it is clunky at best.

While I love the new TurfFX and Clutter effects, and the realism they bring to a route, I am beginning to wonder if the tedium and trouble is really worth it. It would be far easier to just build new routes from scratch and forget about updating the old ones.

Bob


It appears as if you are using the cut & paste tools. If so, why?
 
It appears as if you are using the cut & paste tools. If so, why?

What gave you that idea? Those are rectangles from the fill function in the advanced section of the topology tab. No cut and paste was used in the examples...

Bob
 
TurfFX and clutter appear to be limited to the 10m grid and not 5m as the smallest option which makes things a bit awkward.

I find reducing the grass height to just below the ballast helps in getting grass close to the track see screenshot, bit blurry as reduced the size.

I expect or hope as TRS19 gets further developed, some improvement to applying TurfFx and Clutter will get implemented.

 
Hi Bob --

Thanks for the comments above.

One thing that I have found through experience is that it helps to limit the number of different types of TurfFX applied to a route (or, in my case, layout).

In most of my layouts I've used just two -- one grass at two different heights. The only exception thus far is Yuan Gulch where I used two different grasses, each at two different heights, giving four variants in total. Greener grass at the upper level, yellower grass at the lower level:

Phil

Actually my TurfFX and clutter settings and choices come from my early study of how you did it on some of your routes, which I downloaded and installed.

What you did acted as a guide for getting me started with these new TRS19 features. I went with two types of grass pretty much along the lines of what you did. My clutter choices are a bit more varied however then what you have. Here is an image that shows you what I selected for my clutter:

Clutter-Selection-SS-1.jpg


All my routes to date have been in real scale and not HO/N, which means a lot of baseboards. The application of TurfFX and Clutter has made all those baseboards more of a liability. After watching your efforts I am beginning to appreciate that smaller scale routes may be a better way to go for these new features. Of course that leaves me with the stark choice of no longer updating my older routes and going with just brand new ones or bite the bullet and deal with the less then helpful surveyor tools and a lot of very non-precision tedious application of the new features.

While I haven't decided yet, I know I am not having fun right now and it is a hell of a lot more work then I have had in the past to update from older TRS versions to TRS19 full standards. One route is complete already, a small one called the Progressive, and one much larger one is almost there (ie; the CC&LE 1950s). The thought I am going to have to do this to 12 more of my remaining routes isn't a cheery one......

Bob
 
Based on the posts here I ran an experiment to find out the settings needed for a TurfFX short grass that would work well with my new TRS19 SAP U.S. 132LB Standard Gauge Flat Bottom Track. Here is what I came up with:

TurfFX-Short-Grass-Example-1.jpg


These settings will allow you to place TurfFX short grass on on near my new track without it showing up to much in the track or tie area.

Bob
 
I may be missing something here in the discussion. I have had great success in placing grass close to tracks and roads by adjusting the Turf Density setting to "Int1 2.5m". I use the TFX Grass 4 - Seasonal with a geometry scale of 0.4. The Int1 setting allows you to get full grass density with one click. By adjusting the radius setting very low you can get very close to the track without covering it up. Setting the Dispersal to either 0.1 or 0.2 seems to help in confining the grass from scattering outside the targeted area. The Int4 setting requires four clicks to get full grass density. If you are only using two or three grass types setting the Turf Density to "Int1 1.25M" will get you even closer to the track.

A good example of these setting can be found in Neil Smith's UMR2019 new route now available on the DLS. He has hundreds of miles of grass running very close to the track and roads.

Again I may be missing the point of this discussion, but I have finally figured out the setting of the clunky interface that seem to work for me in applying the grass close to the tracks.

That was a great tip! I took your insights and converted them into an experiment which results can be seen in the below screenshot:

TurfFX-Example-Screenshot-2.jpg


I think I am beginning to understand a little bit more about applying TurfFX and that it is not as quite as inflexible as I originally thought.

BTW in the screenshot are the settings I used, based on your tips, that allowed me to get the grass between the two tracks.

Thanks for those tips!

Bob
 
Bob, Those settings are good.

One other suggestion. If you want thicker turf you may want to try increasing the values of the Expansion-constant, expansion-multiplier, and number-of-seeds multiplier to 0.4 or 0.5. These changes, if made, will automatically apply to all the grass you have already placed that one effect layer. Also another tweak that was discussed on these forums which have proved helpful to me is to use the values 0.1 0.3 1 1 for the width scale far settings. It seems to make the grass look better in the distance. Try it and see if you like the effect.

One caveat in all this. There is a limit to the number of layers you can have in any given route. The number of layers is greatly reduced if all your layers use the value 1.25m in the Turf Density. So use it sparingly. At most I find that I only need 3 or 4 different layers. I end up using the values of 2.5m, and 10m for the grass further from the track in the other layers.
 
Back
Top