The Mojave & Panamint Railroad

Well, once again it's been quite sometime since I've made a viable update. And I believe an explanation is warranted.

The primary cause of delay is out of frustration... Not with the route or the game, but with my PC itself. Courtesy of my Tax Refund I elected to acquire a copy of T:ANE and upon installing it discovered I have an outdated graphics card. So after sever alloyed sighs I bought a suitable graphics card.... and I've been unsuccessful with installing it into my machine. I attempted to install the new hardware multiple successive times, but to no avail. And I became so fed up with the situation I reinstalled the old card and never touched or thought about Trainz for weeks. At some point I hope to take my PC to a professional and see if they can get the darn thing working. As good as the M&P looks in TRS12 it will look even better in T:ANE!

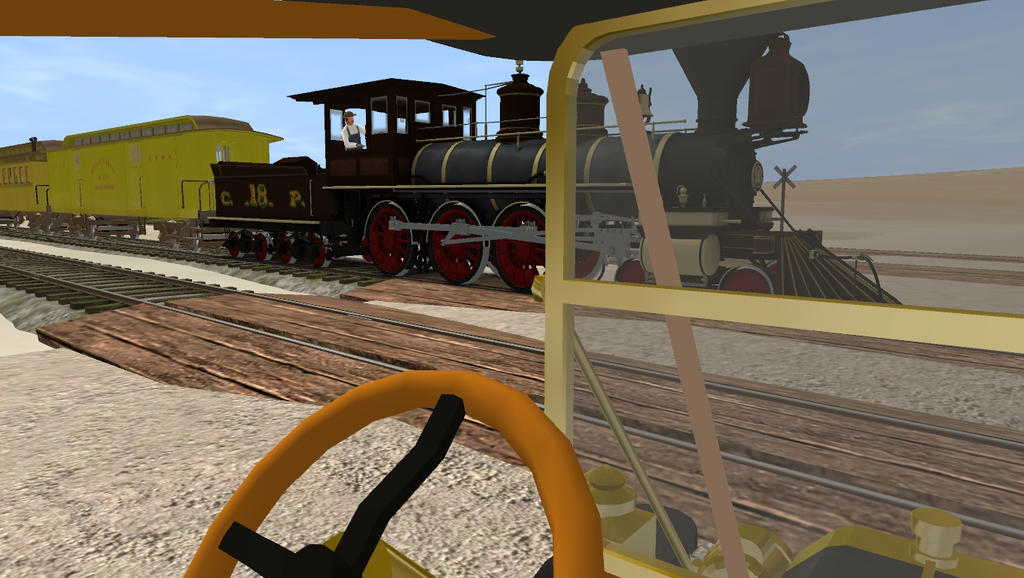
And now with that out of the way lets get to the pictures! First up is small isolated section around milepost 28 or so. (give or take a mile) It's a small dry wash and it was one of the first areas I started "practicing" with textures and vegetation.

dry_wash_by_gunslinger87-db7sflj.jpg


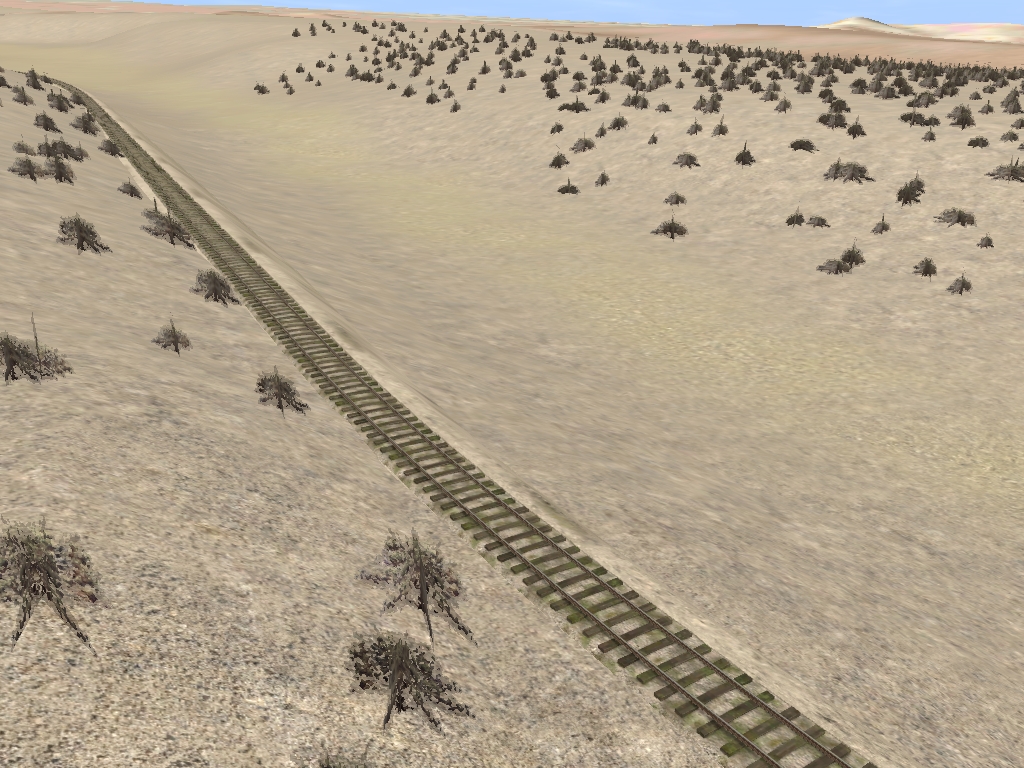
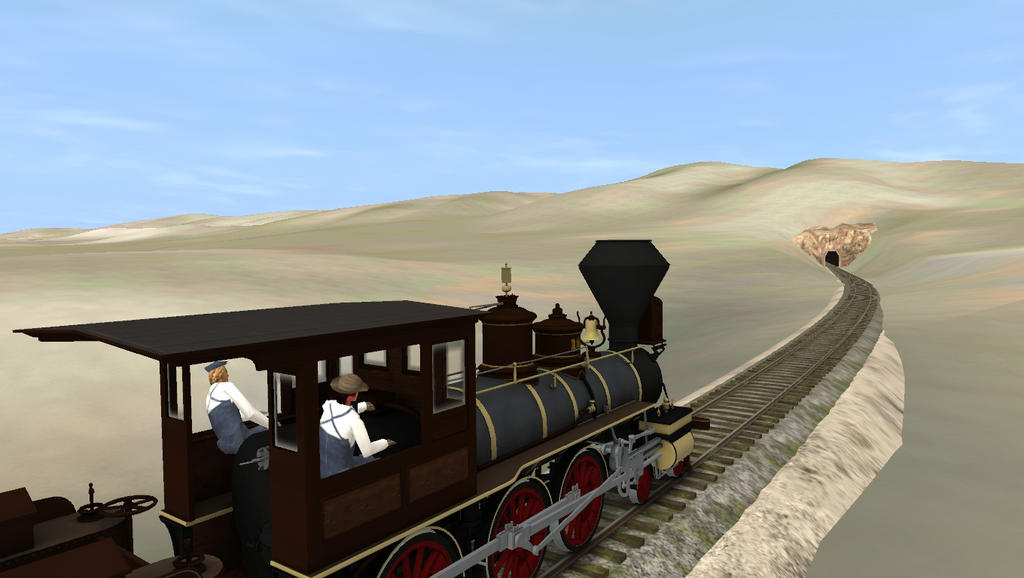
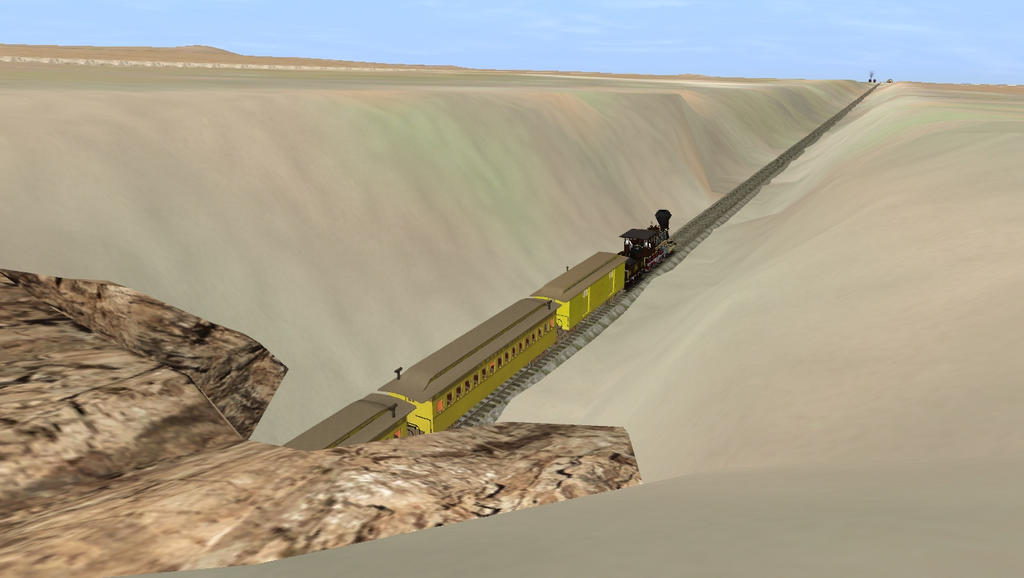
Scenery here is still pretty minimal, but I'll add more as I work my way towards it. At present my scenic focus is on the M&P's "High Line", which starts at Slate Range Pass and ends around the junction for Whitaker. This next shot is looking "south" along the grade and the big canyon bridge is just out of frame to the bottom. For the most part I've only used two different scenery splines to create the effect I have here. The first is a sagebrush spline and the second is a grass spline. The create a good look, but are a bit dark. In particular the grasses which are too green. Tans, Browns, and Yellows would be preferred, but this will most certainly work if I can't find something better in the mean time.

even_more_plants_by_gunslinger87-db8ge1c.jpg


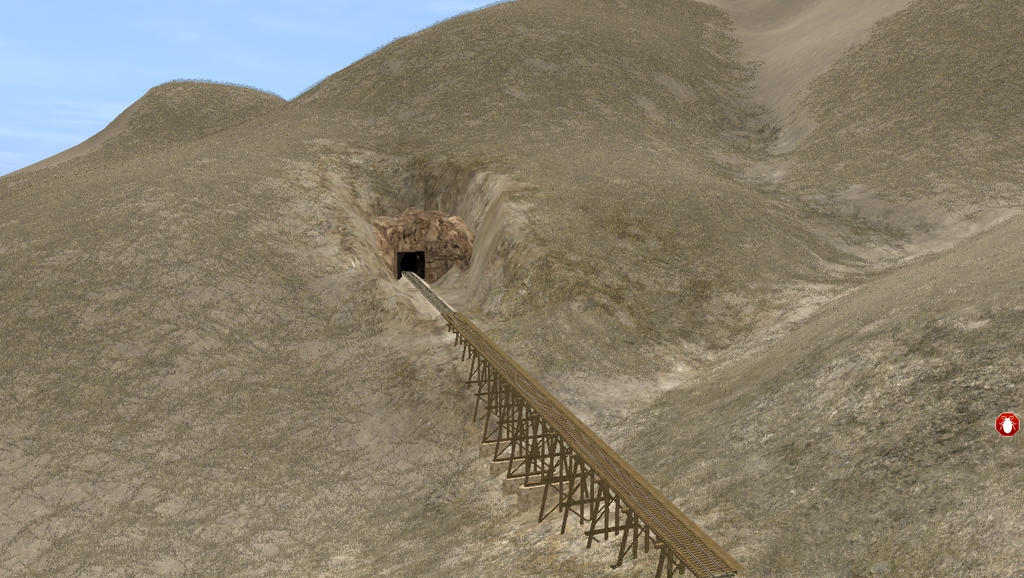
Next is the "North" end of tunnel 3, with added textures and vegetation. I may need to go back and edit some of the splines as I may have some sage brush magically floating inside the tunnel or "growing" off of the walls. And we can't have that, can we?

tunnel_3_scenic_update_by_gunslinger87-db8gdq8.jpg


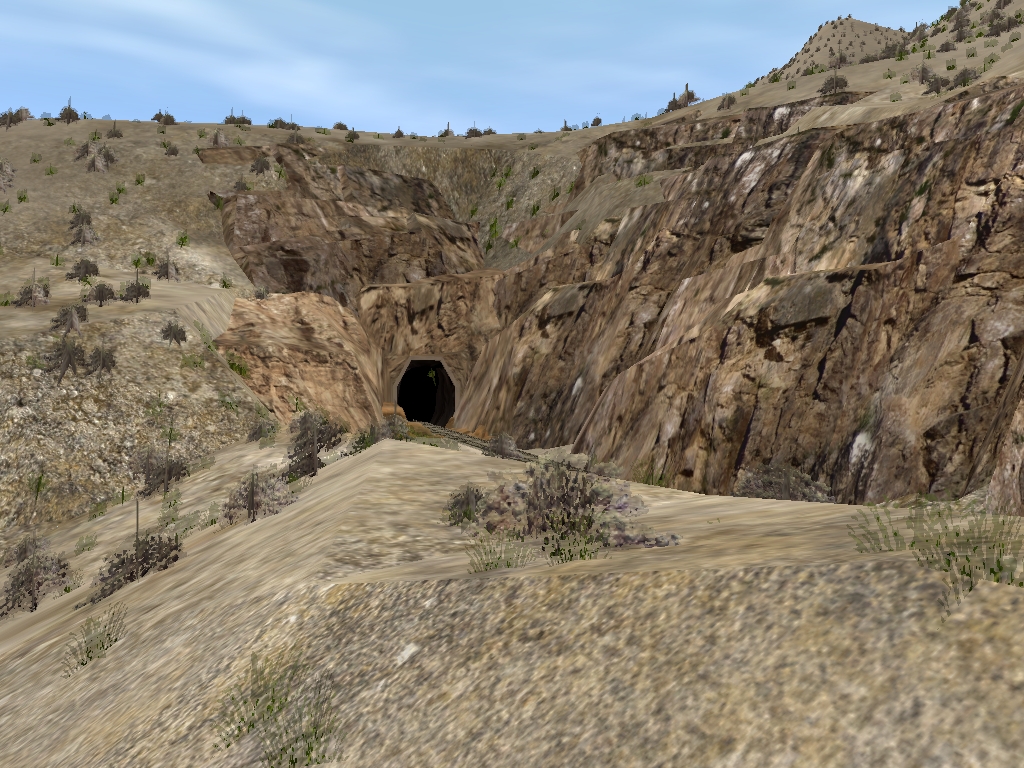
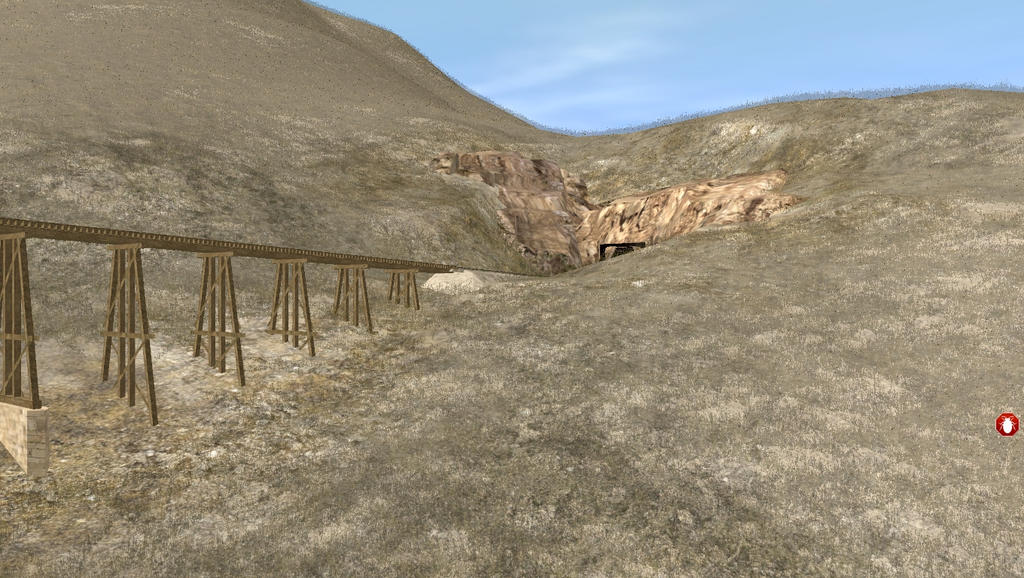
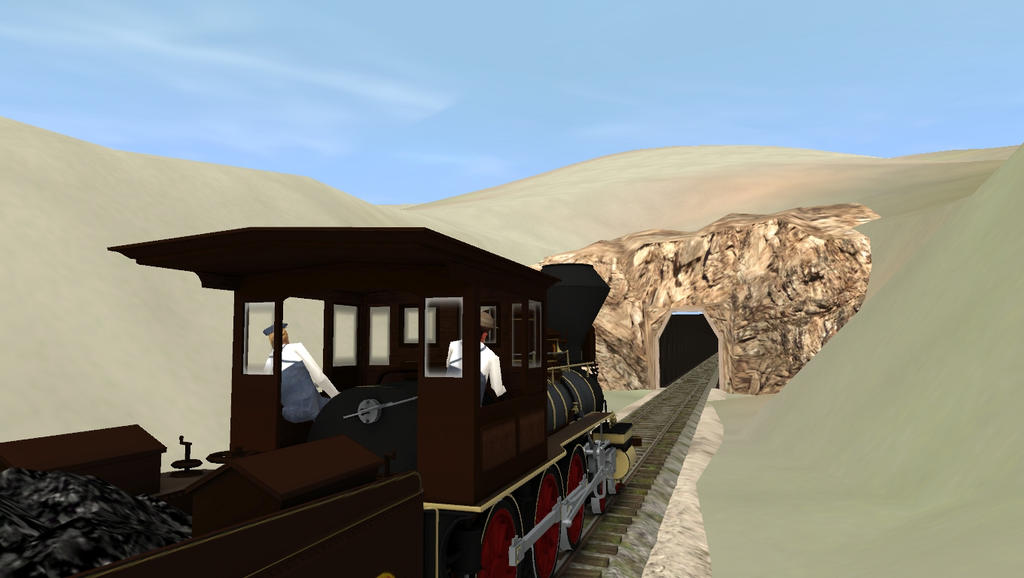
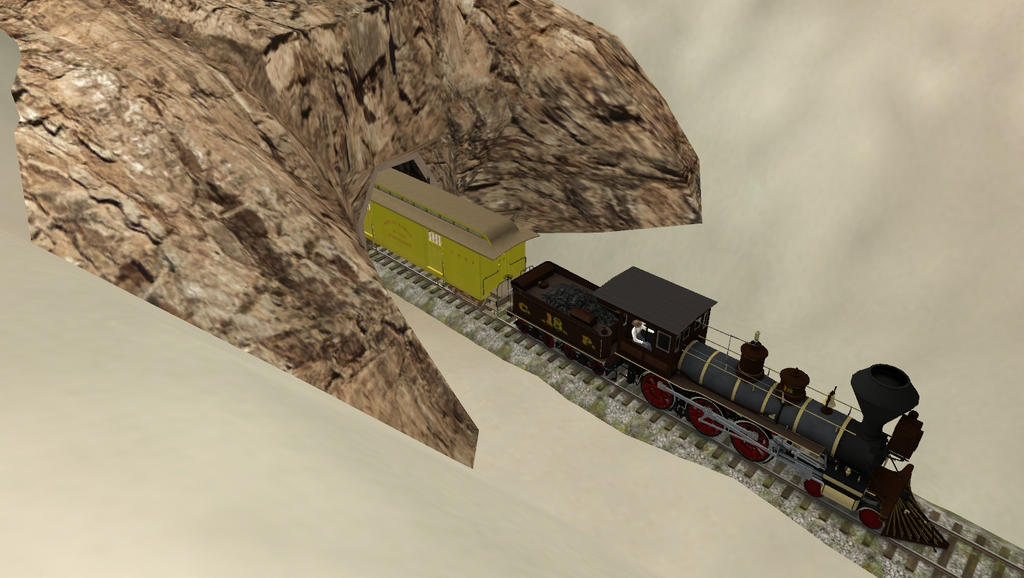
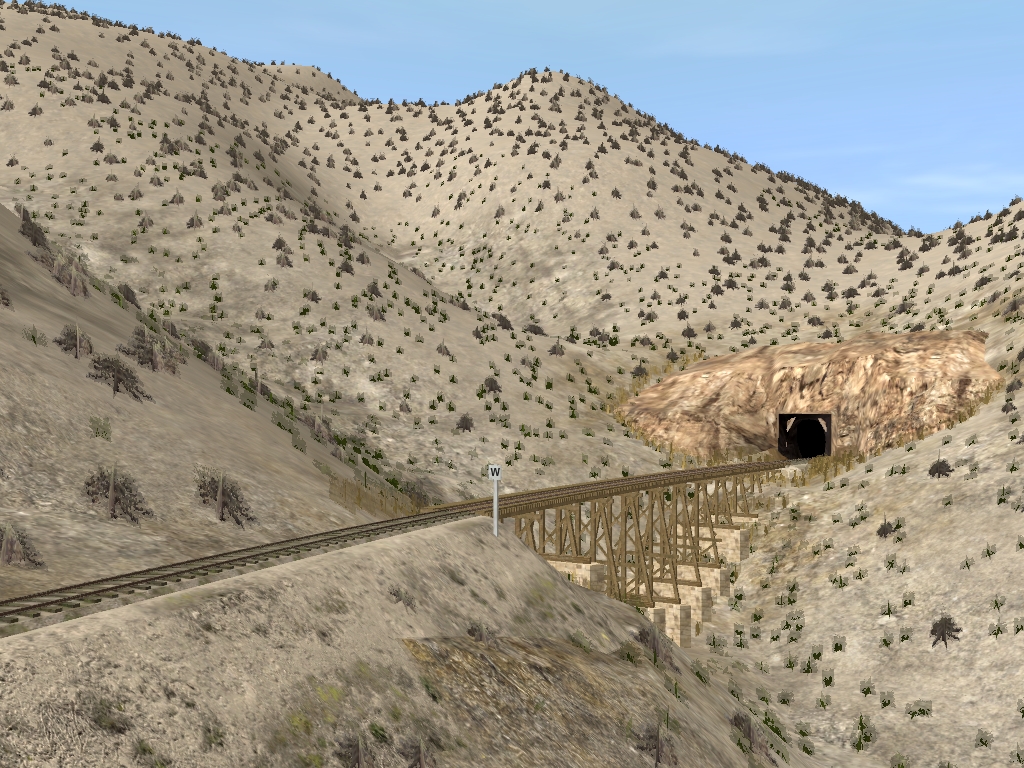
In this next shot we take another look at the "South" portal of tunnel 2. It's probably obvious that this is one of my favorite vantage points. But the scene looks all the better now with some ground cover! Again, I've only used a few different splines to create this effect. Layering them atop of one another creates a great realistic effect.

tunnel_2_scenic_update_by_gunslinger87-db8gdro.jpg


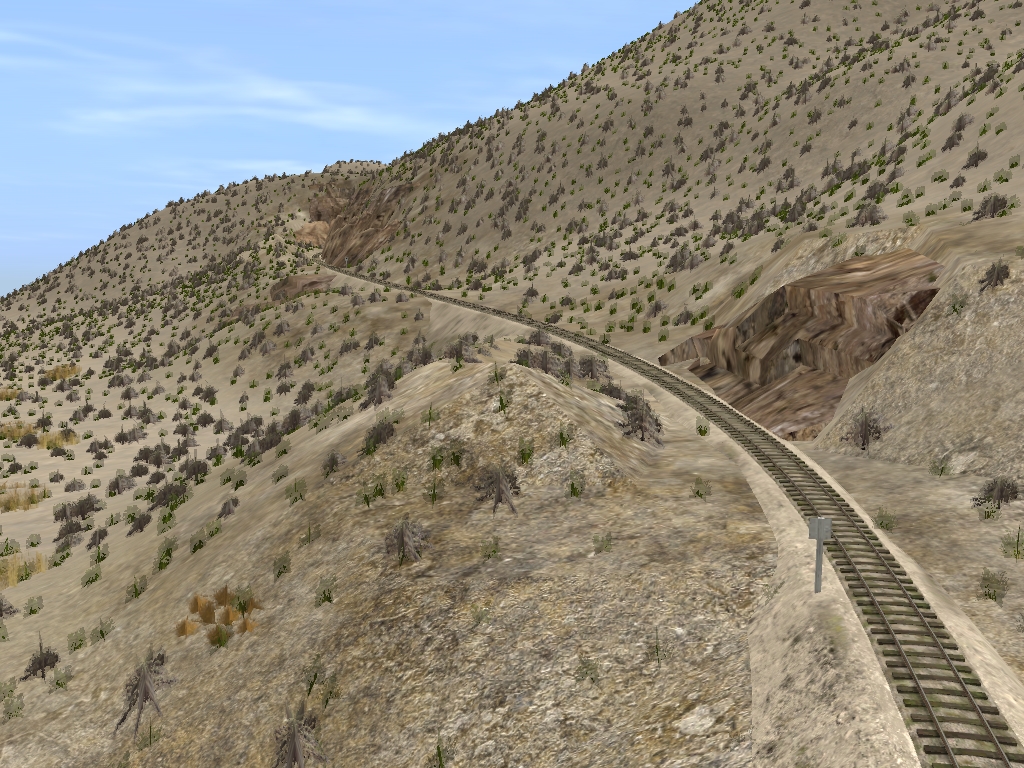
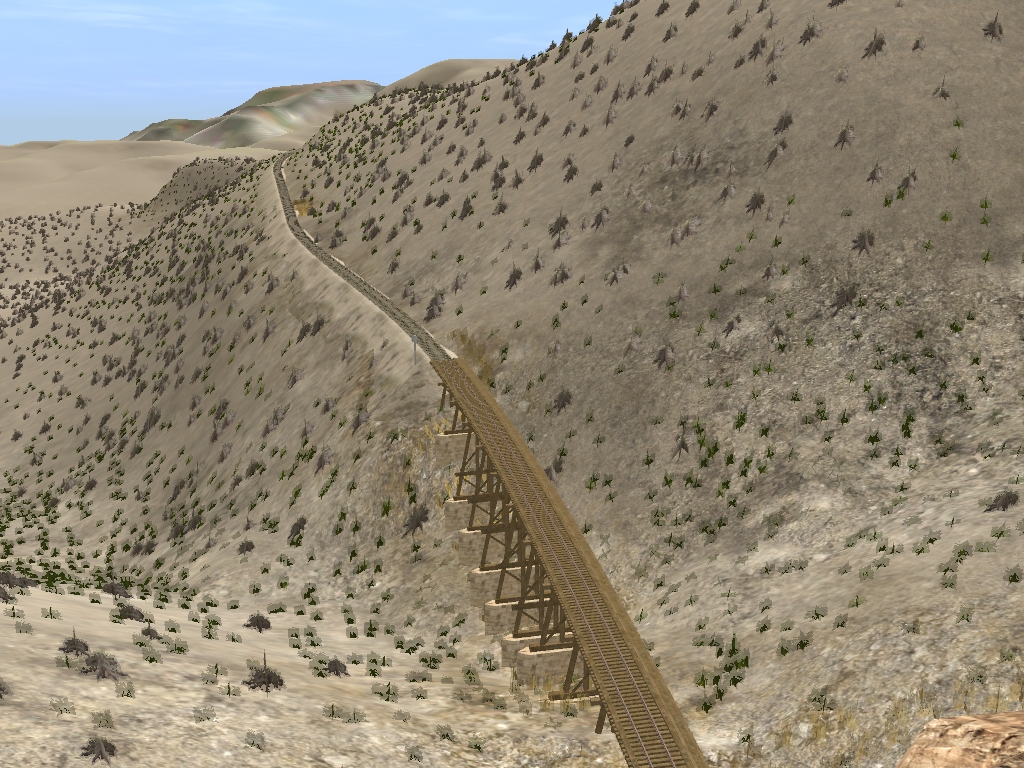
This next view is almost directly above the entrance to Tunnel 2. This time looking "South" to where the line clings dangerously to the mountain side. Although this is a relatively small scene on the railroad it's one of my personal favorites because of how dynamic it is.

highline_looking_back_by_gunslinger87-db8gdxp.jpg


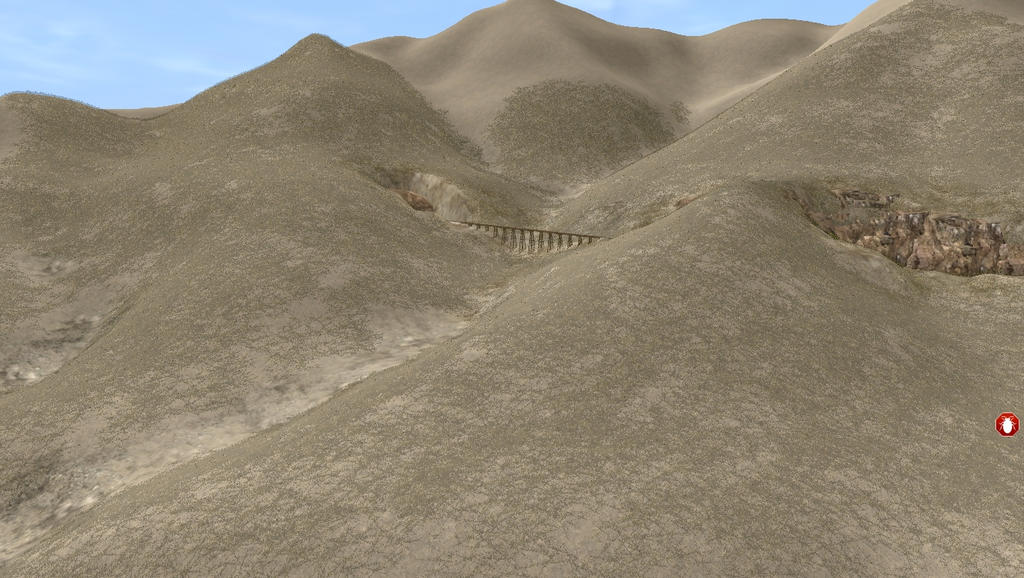
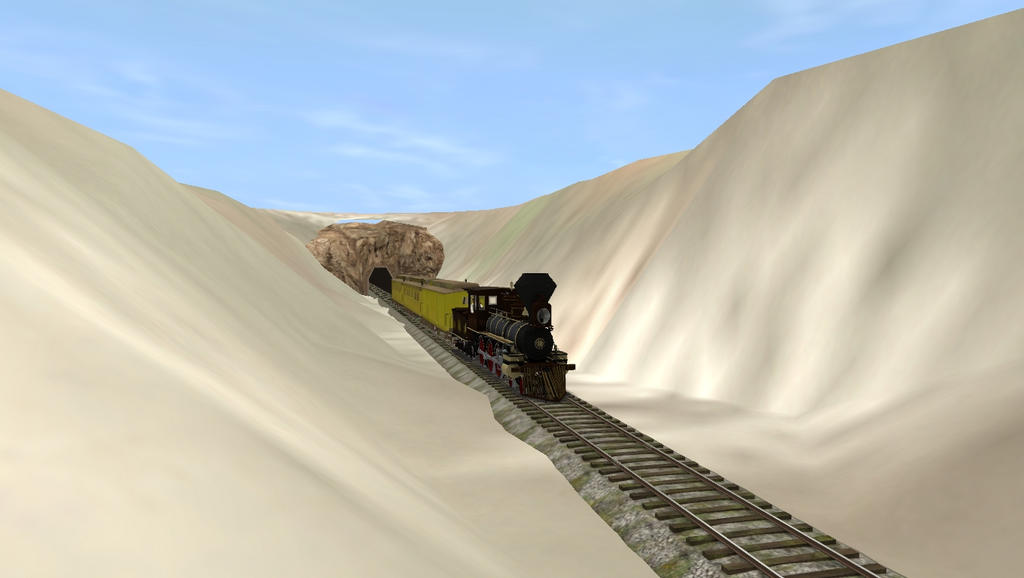
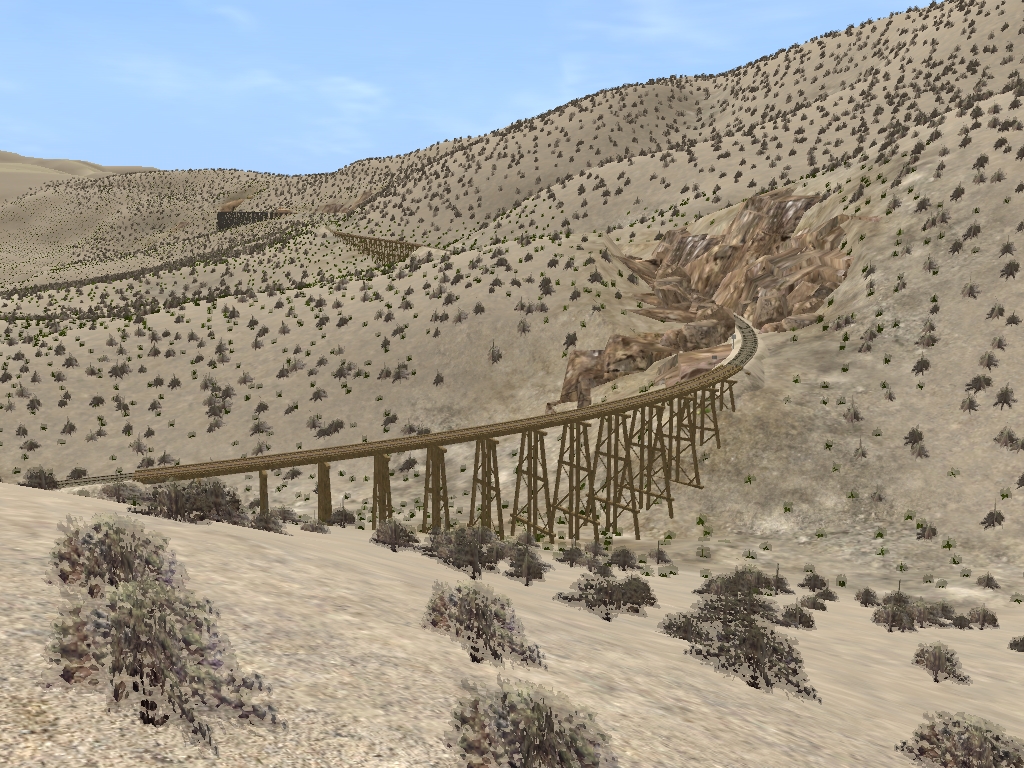
This next view I somewhat stumbled upon when navigating from one place to the next on the map. I REALLY liked how you could look back and practically see all the way back to the Summit tunnel! You can certainly make out the "High Bridge" just before it. I had thought about placing a static camera here, but I felt it would interfere with the tracking one right by the exit of the rock cut. Still makes and excellent vantage point in free-roam though!

starting_to_look_like_a_desert_by_gunslinger87-db8gdsw.jpg


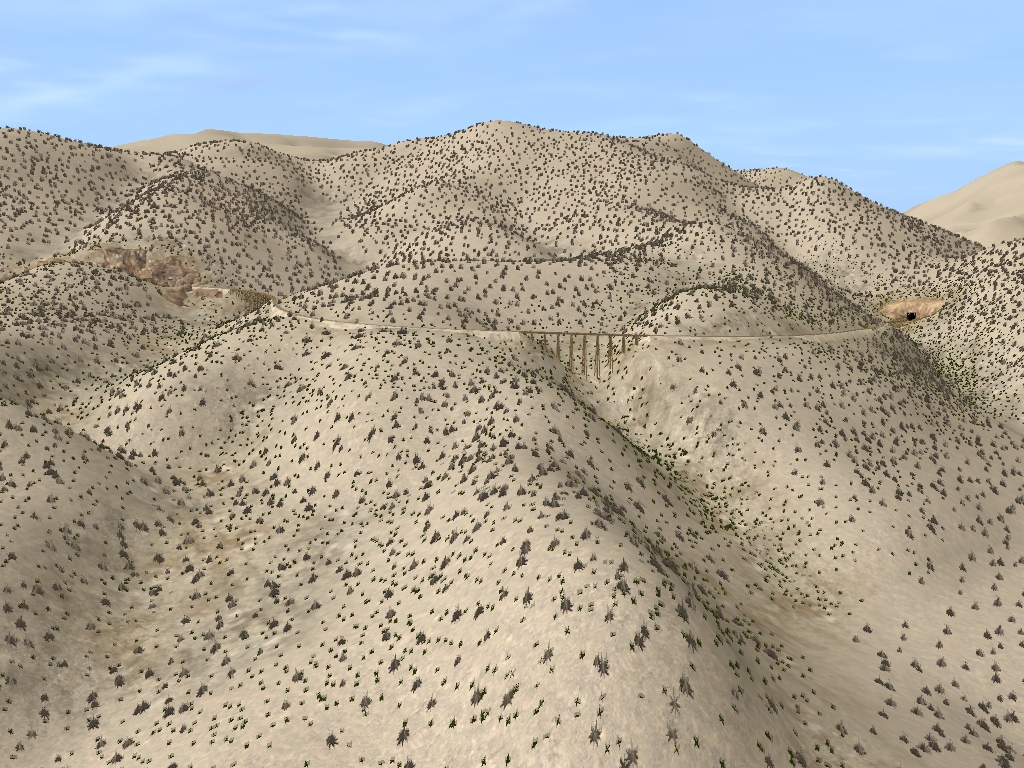
Only a select few have had the privilege of seeing this route in its entirety, but for most it may be difficult to make out some of the proximity of some of the locations along the right-of-way. This next shot shows how close the rock cut is to tunnel #2.

from_cut_to_tunnel_by_gunslinger87-db8ge00.jpg


And for the final shot for this post, here is a view looking out from the high bridge. Things are really starting to look like an actual desert, aren't they!
 
Yeah, I know what you mean. It's a challenge to find the right balance of things. I think part of it to is the colors of the vegetation I've found already. lighter and more pale colors would be preferred, but they are surprisingly difficult to find for some reason.
 
Wow - a very nice looking dessert area!

It looks a bit more dry than the Saddle Mountains crossed by the Milwaukee Road between Othello and Kittitas, Wa - a portion of the MILW I worked on as well (not even finished).
The main problem I always faced was the leak of suitable sage brushes. But as I see you are registered for T:ANE - you should look for some Speed-Tree-Sage and other dessert looking shubs. Dont understand me wrong - your route looks great, but just give it a trail and dont save if you not want to keep it :)

I once thought to decorate a desert like this is just about implementation of some bushes. But in fact it is much harder to get nice results than in decorating a forest!!

Have fun working at your route.
Your's TUME
 
Kegg_Works

And where have you been, I thought you disappeared from the face of Trainz,

Ok , I'm done yelling at you....LOL....:p

Can more than relate to computer issues, I have been thru with GPU, intermittent Motherboard errors, stupid Windows errors, and Ram that doesn't hold up, the gamut!

Do hope you find someone to the get the Video Card you'll need that's:

not to HOT temp wise,

Reliable,

Plays well with Windows?

I'm thinking NVidia would fit in there somewhere? But there are several Gurus here in the know about Video Cards.


I wish you good luck in that regard.


Now as for your Plants, I actually like the way you've done things, your very talented,


Since it's on desert, I do respect others wishes for Less Plants is more in a Very dry and Dusty Desert.

I just looked over your newly planted desert, and enormity of planting all that had to take some serious pains and time.

Keep up the great work,
 
Wow - a very nice looking dessert area!

It looks a bit more dry than the Saddle Mountains crossed by the Milwaukee Road between Othello and Kittitas, Wa - a portion of the MILW I worked on as well (not even finished).
The main problem I always faced was the leak of suitable sage brushes. But as I see you are registered for T:ANE - you should look for some Speed-Tree-Sage and other dessert looking shubs. Dont understand me wrong - your route looks great, but just give it a trail and dont save if you not want to keep it :)

I once thought to decorate a desert like this is just about implementation of some bushes. But in fact it is much harder to get nice results than in decorating a forest!!

Have fun working at your route.
Your's TUME

Yes, I do have T:ANE, but sadly I have to update my graphics card in order to play it. Which, unfortunately, isn't going so well. So for the time being I have to use what is available in TRS12. I've also been using Google Street View to get a better ground level look at the vegetation in the region I'm modeling. I hate to say it, but I may delete all the current scenery splines and star over with grasses and scrubs. So I've been prowling the DLS for suitable grasses and the like. As said, it's still a work in progress. What I've done is just a small portion of the route. I have 37 miles of narrow gauge to scenic and about the same mileage with standard gauge! But at least I'm getting a hang on which textures to use and such. It has made for some good practice. :)
 
I like it, but the amount of vegetation seems a little outlandish...perhaps reducing the congestion would give a more desert-like appearance to the route.

On the contrary, most of the Nevada desert is considerably more congested. If anything, the shrubs should be smaller and closer together, with about the space of your average deer trail between each clump (Southern NV can be a bit more stark, as below. but still very vegetated). Take this, for example:
wilderness-slide.jpg


There should also be some sort of variances...even a solitary tree adds a lot of realism.

snow-side-mountain-in-shadow-las-vegas-nevada-mohave-desert.jpg


Mind you, I'd go for a more Churchillesque deciduous treeset than the classic Joshua tree, since we only have one model of a Joshua.
 
Last edited:
nice work, for what its worth i think images 2 and 3 look the most convincing, they really work well.
its hard doing sparse desert, too little looks bare, too much is an issue for graphics cards and also can be overkill.
i have a lot of this sort of country in the Utah railway. the thing is, you can look at all the images going to try to be accurate , but cameras can make plants look greener or brighter as can particular lighting. bear in mind that a lot of desert plants are quite vivid and as trainboi says, can be VERY prolific,. head high sagebrush is the go in a lot of the uintah canyons and other areas have virtually nothing. lf you ook at sections of mountain near dragon utah, on google earth ,theres a lot of sage even tho its dry as dust out here.
 
It's been a long, long time since I was out in that area but I concur with Trainboi1 and Dangavel. I spent a little time looking at Google Earth's photographs from the Mojave area as well as some of the modern trainz desert routes, virtually everything I saw was densely vegetated.


Photos of Mojave National Preserve, via National Park Service. These were probably all taken during the late spring since that's the best time to go camping out there.

If you have Mojave Sub Division you can see how they handled it, dense and varied near the tracks and mottled texture in the distance.


I'd say this is a little too sparse but this is definitely Joshua Tree territory and they are available on the DLS.

This is how Cajone Pass Xtreme handled it and I'd say that's spot on.


So I'd say you have a good start there.
 
Last edited:
Hello - yes, you are doing the right thing - the best way is to keep trying and studying the reality and sometimes we need to do some areas again. Yeah its reasonable to stay with TS12 for the time being. With the replacement tool it is possible to replace any content easily later on. The only thing I had to learn is, that the replacement tool does not allow to change the hight of the objects within replacement - unfortunately.
Keep up to work at your nice route and enjoy it.

Your's TUME
 
Hey all, been a little while again, hasn't it? (A little while may be a bit of an understatement...)Anyway, unfortunately work on the M&P has been a little slow, however there have been a few updates! Like taking another crack at scenery and got some new content for the route! Thanks to PacifiCoastBorax of course.First up, scenery. Now bare in mind that this is just a small section of the route and it's gonna' take me a while to 'vegetate' the whole ROW. But it is a good start.
scenery_take_2a_by_gunslinger87-dbooy3v.jpg
After looking at some photo comparisons of the region this looks MUCH more accurate now! Took me forever to find some decent grass splines that looked "right" if you know what I mean. Scenically speaking, the ground textures and these grass splines will make a good base to build off of. In retrospect I believe I should have kept my original shrubbery from my first attempt and then add this over it. I think that would have don the job. Oh well, we live and learn, right? So here are another couple of shots to show off the look of things so far.
scenery_take_2b_by_gunslinger87-dbooyf0.jpg
scenery_take_2c_by_gunslinger87-dbooyjq.jpg
I think the grass provides just enough transparency to let the ground textures through. So I think this is going to work out. The only draw back is it takes a LOT of time to do. Next up, NEW LOCOMOTIVES!!
8_and__9_together_by_gunslinger87-dbpdodf.jpg
m_and_p_no__8_by_gunslinger87-dbpdn8a.jpg
m_and_p_no__9_by_gunslinger87-dbpdo4l.jpg
8_and__9_posing_by_gunslinger87-dbpdone.jpg
Yep, finally the spots for engines 8 and 9 have been filled! PCB did an amazing job reskinning Trainboi's NCNG #9 and N-C-O #14 to fill the roles. I made an inquirer with PCB a few days ago on the subject and requested he used N-C-O 14 for M&P #8. Mostly because I like the look of those boiler mounted air tanks and older style headlight. I think it adds some nice variety to the loco roster, since otherwise both engines are identical. So now that leaves only one engine left in order to complete the loco roster, #6. Some time ago Trainboi seemed to take up interest in modeling it, as it's based on a C&S Mogul, with a few cosmetic changes. Been a while since I've heard from him, I hope he hasn't lost interest as I know he'd do a bang-on job of modeling it! But I also understand he has a lot of his own projects to do to which take priority over my little request. Besides, I was elated to see his Stevens Ten-Wheelers released!! Wonderful models they are, and for an earlier version of the M&P would make a lovely addition to the SG portion of the route.I did make a few other updates. Did some more work up at the Whitaker Iron mine and also rebuilt/updated the Ballarat Cemetery. (since it didn't copy right when I had to up and move the whole town 50 yards or so) Sadly I neglected to take any screenshots of that. Hopefully I'll remember to do so the next time I'm working around there.That's about all for now and hopefully, God willing, and with any luck, I'll have some more updates for you shortly!
 
:wave: Looking really nice, wondered what had happened to you, glad to see your doing OK.

:cool: Your grass shrubbery looks really natural..........Thanks for sharing with us.
 
Whew, I was getting worried about you (and your route). Good to hear you and see progress on this fine route.

(Those passenger cars in the background are looking pretty good too)
 
I stumbled upon this thread, and it looks fabulous. Amazing route, Locos, and all based in a real life timeline.

Saturnr
 
Much obliged!! Sorry for the lack of updates. Been having some computer issues so progress has been slow. Though hopefully I'll have some updates after the new year, if not sooner!

Merry Christmas all!
 
Whooo boy. Yet again it has been longer than anticipated to give a real substantial update! Well, more than my last post anyway.


One thing I've been hesitant to do is build the Searles tunnel. Mostly because I had already built a line that went up and over the mountain which I had originally believed to be the original grade from the early days of the line. Turned out it was a shoofly built after a tunnel collapse.... >_<
Well I caved... I deleted the section of track that was the shoofly and built the tunnel. And here are the pics to show you all.


searles_tunnel_by_gunslinger87-dc4q4c3.jpg


the_old_route_by_gunslinger87-dc4q4bo.jpg


In this pic you can see the grade of the old shoofly in the background.


searles_south_portal_by_gunslinger87-dc4q4cq.jpg


in_the_rock_by_gunslinger87-dc4q4gw.jpg


This shot shows the tunnel itself. Ironically it's a 2ft gauge tunnel for a Welsh route, but it was amazingly large enough for even BIG steam power! IT's a bit too square for my tastes, but makes a decent stand-in for now. I think Pencil's tunnel tracks will work much better here once he gets them finished.


searles_north_portal_by_gunslinger87-dc4q4da.jpg


out_of_the_tunnel_and_into_the_cut_by_gunslinger87-dc4q4e7.jpg


northbound_to_searles_by_gunslinger87-dc4q4ez.jpg


In this shot you can see that the tunnel and portal need a bit of tweaking to get it to blend seamlessly into the landsacpe.


pulling_into_searles_by_gunslinger87-dc4q4g7.jpg


leased_power_at_searles_by_gunslinger87-dc4q4fp.jpg


railroad_crossing_by_gunslinger87-dc4q4dw.jpg


I really like this last shot. Although you can't get a good look at the engine, I love the perspective from inside a model T. I may actually place a trackside camera here to make run-by shots more dynamic.


Anyhow, I wish I had more, but that's all for now folks!
 
I recently hiked through the snow sheds in the Sierra Nevadas and there is nothing of the sort that I can find for trainz so if you made this available for download, I would not be mad.
 
Tuckster04, You might have to be specific about what you are looking for. I have 46 snow sheds and snow shed splines just on what I have installed, by bendorsey, colorado71, and others. Many are wood and resemble the pictures I see when I google "Sierra Nevada snowshed" images.
 
Back
Top