When the player enters cab view, the cab interior model occupies the majority of the screen. It's important therefore that cab interior is up to the punishment of close scrutiny. It takes a long time to do a good job and unfortunately there's no escaping it. Sufficient polygonal detail; good texture resolution and careful consideration are key to providing a convincing impression.
For the advanced modeller, there are some suggestions here and here about setting up lighting in your modelling software for rendering out to textures.
For a more hands on approach to texturing for cab interiors, here are a few simple suggestions that can go a long way to adding some extra impact. When creating an interior, spending the time to experiment is a great way discover what works for you and hopefully add to your personal satisfaction with the result.
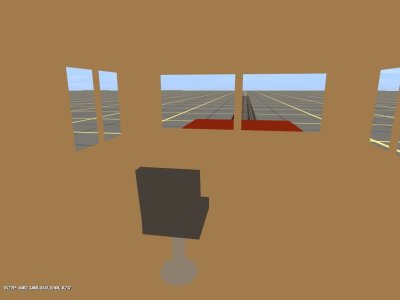
Here a basic cab interior is textured only with solid colours. This has achieved the appropriate hue, but little else. It's not very inspiring and it's very difficult to make out any of the geometry.
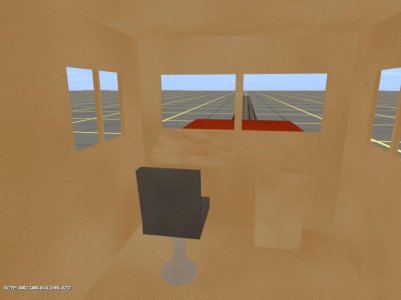
Adding some basic surface detail makes the surfaces more interesting and helps to accentuate details in the geometry. In this case the result has been achieved by adding a cloudy overlay with some simple noise applied to it.
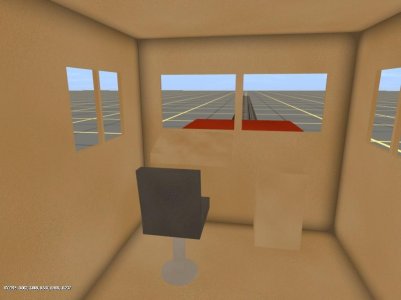
Some shading where the surfaces of the walls meet can really help to reinforce the definition. This can be achieved by such simple means as a black paintbrush.
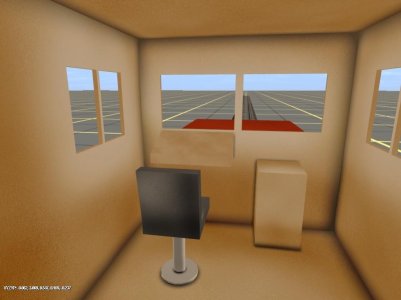
Applying the same technique to smaller details enhances effect. Notice where the electrical cabinet meets the floor and front wall of the cab; and also where the base of the seat meets the floor. In this step some subtle manipulation of the surface lighting has been applied using dodge and burn; resulting in brighter areas around the windows where the surface would logically be affected by light from outside, graduating to darker shades moving further away from the light source.
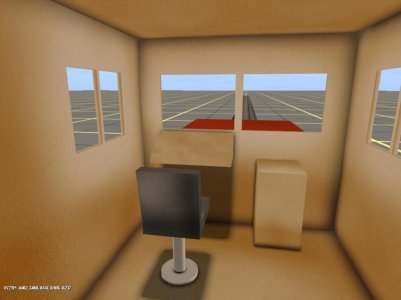
Strong shadows are a good way of adding to the illusion. As textured shadows aren't dynamic depending on the position of the light source, these have been added as though lit from directly overhead, though of course the approach is a matter of personal taste. Strongly directional shadows allow for more interesting effects and can have a lot of impact on the overall impression, though they will be more obviously static when the loco is moving relative to the position of the light source.
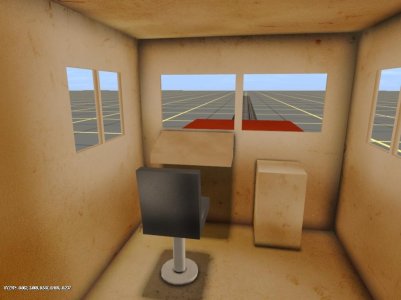
While not relevant if you're aiming for the brand new or newly refurbished look, dirt and damage are a good way of adding to the realism and giving the interior a more lived-in look. This has been achieved by overlaying a photo of a suitable rusty, scratchy old surface.
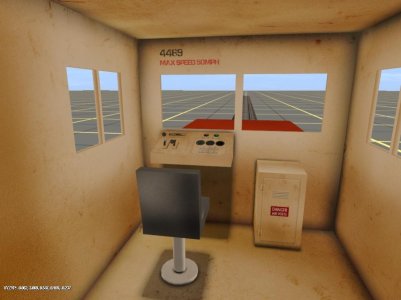
Researching the details is one of the most important steps when it comes to creating a convincing cab interior. The more detail there is to see, the more durable the impression.
The final step will be making the levers, switches, buttons and dials work as they do in the real cab. Further information is available here regarding the different types of cab controls and how to set them up.
For the advanced modeller, there are some suggestions here and here about setting up lighting in your modelling software for rendering out to textures.
For a more hands on approach to texturing for cab interiors, here are a few simple suggestions that can go a long way to adding some extra impact. When creating an interior, spending the time to experiment is a great way discover what works for you and hopefully add to your personal satisfaction with the result.

Here a basic cab interior is textured only with solid colours. This has achieved the appropriate hue, but little else. It's not very inspiring and it's very difficult to make out any of the geometry.

Adding some basic surface detail makes the surfaces more interesting and helps to accentuate details in the geometry. In this case the result has been achieved by adding a cloudy overlay with some simple noise applied to it.

Some shading where the surfaces of the walls meet can really help to reinforce the definition. This can be achieved by such simple means as a black paintbrush.

Applying the same technique to smaller details enhances effect. Notice where the electrical cabinet meets the floor and front wall of the cab; and also where the base of the seat meets the floor. In this step some subtle manipulation of the surface lighting has been applied using dodge and burn; resulting in brighter areas around the windows where the surface would logically be affected by light from outside, graduating to darker shades moving further away from the light source.

Strong shadows are a good way of adding to the illusion. As textured shadows aren't dynamic depending on the position of the light source, these have been added as though lit from directly overhead, though of course the approach is a matter of personal taste. Strongly directional shadows allow for more interesting effects and can have a lot of impact on the overall impression, though they will be more obviously static when the loco is moving relative to the position of the light source.

While not relevant if you're aiming for the brand new or newly refurbished look, dirt and damage are a good way of adding to the realism and giving the interior a more lived-in look. This has been achieved by overlaying a photo of a suitable rusty, scratchy old surface.

Researching the details is one of the most important steps when it comes to creating a convincing cab interior. The more detail there is to see, the more durable the impression.
The final step will be making the levers, switches, buttons and dials work as they do in the real cab. Further information is available here regarding the different types of cab controls and how to set them up.
