Install the app
How to install the app on iOS
Follow along with the video below to see how to install our site as a web app on your home screen.
Note: This feature may not be available in some browsers.
You are using an out of date browser. It may not display this or other websites correctly.
You should upgrade or use an alternative browser.
You should upgrade or use an alternative browser.
Making smooth track curves
- Thread starter rweber95
- Start date


Stationbeem
Over 60's Club
I think this would be better in the "Tips and Tricks" section.
You have the basic idea, but the curve is not perfect in railroad terms. Remember that there should be a transition curve from the tangent (straight) to the actual curve. If you count squares in your diagram, you see that you have 5 squares from your center to the "straight to curve point". But in the middle of the curve the distance to the "center of the circumference is less. This is why I always add a spline point at that center of the curve and adjust distances accordingly. Hope is clear and it helps. ")
cascaderailroad
New member
In order to make a perfect radius curve, with easements, I have to lay track like this for every curve.
http://i525.photobucket.com/albums/cc339/cascaderailroad/Screen_001-4.jpg
http://i525.photobucket.com/albums/cc339/cascaderailroad/Screen_002-7.jpg
http://i525.photobucket.com/albums/cc339/cascaderailroad/Screen_003-4.jpg Draging the MB Quad to match the FT track spline points.
http://i525.photobucket.com/albums/cc339/cascaderailroad/Screen_004-7.jpg The finished MB Quad placed to match the FT track spline points.
http://i525.photobucket.com/albums/cc339/cascaderailroad/Screen_005-2.jpg
http://i525.photobucket.com/albums/cc339/cascaderailroad/Screen_006-2.jpg Draging the track to match the FT track spline points.
http://i525.photobucket.com/albums/cc339/cascaderailroad/Screen_007-3.jpg
http://i525.photobucket.com/albums/cc339/cascaderailroad/Screen_008-1.jpg
http://i525.photobucket.com/albums/cc339/cascaderailroad/Screen_009-2.jpg Drag the remaining spline points into placement.
http://i525.photobucket.com/albums/cc339/cascaderailroad/Screen_010-1.jpg Draging the last track spline into placement.
http://i525.photobucket.com/albums/cc339/cascaderailroad/Screen_011-1.jpg Here is the sweet spot, where exactly to press delete the MB Quad track (at pointer)
http://i525.photobucket.com/albums/cc339/cascaderailroad/Screen_014-3.jpg The plane, as a pointer, to where the MB Quad was deleted.
http://i525.photobucket.com/albums/cc339/cascaderailroad/Screen_015-2.jpg The finished spline locations.
http://i525.photobucket.com/albums/cc339/cascaderailroad/Screen_016-2.jpg Drag the FT track away, and delete it.
http://i525.photobucket.com/albums/cc339/cascaderailroad/Screen_017-2.jpg Curve transitioneasements are needed here.
http://i525.photobucket.com/albums/cc339/cascaderailroad/Screen_018-1.jpg Place 4 temporary spline points on the straight track.
http://i525.photobucket.com/albums/cc339/cascaderailroad/Screen_019-1.jpg
http://i525.photobucket.com/albums/cc339/cascaderailroad/Screen_020-1.jpg Drag the other 3 remaining spline points out to the new placement.
http://i525.photobucket.com/albums/cc339/cascaderailroad/Screen_021-1.jpg The final curve transition after unneeded spline points are moved.
http://i525.photobucket.com/albums/cc339/cascaderailroad/Screen_022-2.jpg Track spacing as per PRR specs.
http://i525.photobucket.com/albums/cc339/cascaderailroad/Screen_023-2.jpg Too wide.
http://i525.photobucket.com/albums/cc339/cascaderailroad/Screen_024-2.jpg Much to far apart.
All of this lack of a trackside "45 Degree Angle" that could lock onto tracks has been holding me up for months on end, delaying my project that could have been finished over 1 year ago.
Could someone please make a track side 45 Degree Angle with track spacing marks like this that locks onto a track at a 90 degree angle ?
Last edited:
I share your pain Cascaderailroad,I spent a good portion of the evening working on my new TGV route only to find that the connection points on the outbound end of station #3 were off by just a fraction of an inch resulting in a derailment & having to spend a considerable amount of time deleting & replacing track as well as going over the whole route(as it stands so far) looking for misaligned station connections.
Sometimes I ohh so wish we could just have a "save element" feature & simply cut & paste a nice curve from one of the prebuilt layouts,or just have a curved section of track as one of the types we can select fromvia the tracks menu in surveyor.
Sometimes I ohh so wish we could just have a "save element" feature & simply cut & paste a nice curve from one of the prebuilt layouts,or just have a curved section of track as one of the types we can select fromvia the tracks menu in surveyor.
cascaderailroad
New member
I will post various screenshots of rulers, protractors, and 45 Degree trangles with track spacing markings on them...but these assets need to me magnetic and click onto track, and also click onto FT !00m Raduis Track. (much like a trackside signal gantry automaticly locks onto a track).
Edit: Out with my non-Trainz loving GF...will edit all these posts ASAP...and will post screenshots
Edit: Out with my non-Trainz loving GF...will edit all these posts ASAP...and will post screenshots
Last edited:
What is the point of a 45 degree triangle? How is this of any use?45 Degree trangles
One way to get an easment is to calculate about how long it should be and place a very short piece of fixed track there, between the easment curve and the main curve. My PRR track guide works for this. One you have finished fiddling with the location and angle of the bit of fixed track and the transition curve of the easment looks nice and smooth, you can then delete the fixed track. Connect the two spline points of the remaining track with a short bit of track spline and use the straighten track tool on it. Now you can set a grade on all of the track as required.
duckblaster
Member
Hmmm --
Maybe try using templates? It makes it quite easy to do this:
Where are the templates? I have downloaded all the templates I could find on the dls but never seen those.
I've recently figured out what makes decently looking curves. I'm sure there are tutorials on this somewhere but I've just been playing around on my first project and I'm not seriously concerned about making things perfect.
Curves look their best when they have straight track on either side of them. Letting Trainz decided how to curve around the straights seems to be the least stressful way. As for switches, the same rule applies. Always try to alternate Straight-Curved-Straight. While using the B key is your friend, the Undo is your enemy. I've found sections I've straightened long ago undone from a simple undo command. If only I wasn't so undo-happy. :/
I also never use double-or-more-track except in perfectly straight yards. I will use double track to make sure I lay perfectly straight track but I eventually rip it up to lay two sets of single track. I then use single track to lay curves between the double track to see how it looks.
Hope this helps!
Where are the templates? I have downloaded all the templates I could find on the dls but never seen those.
Look for "Guide Curve xxxxxx" by "Mr.Den" on the DLS. His kuid is 141417.
Hi duckie --
The template show in my post #6 above is kuid:37522:9994, "90d_100-400m Template".
For wider radius curves look for "Curve Radius 500m 90 degree" kuid:142427:30017. In this series there are also 750m, 1000m, ... versions.
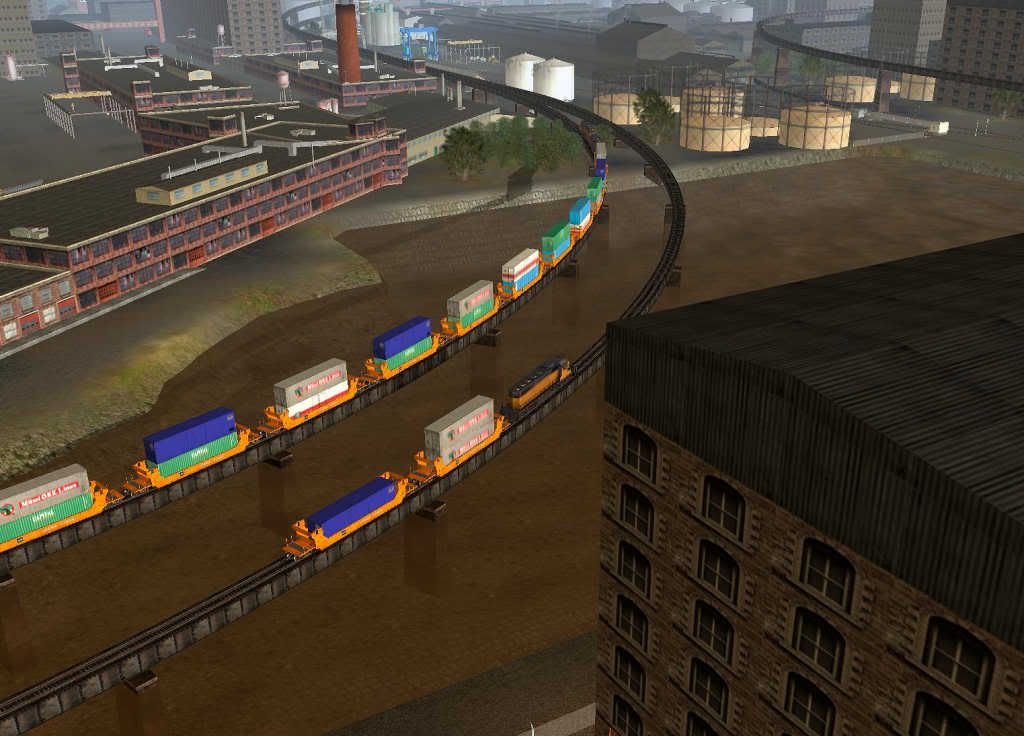
I'd suggest using as large a radius as possible. In real life there just aren't many curves less than 400m. I used 100m curves in "DowntownTraction" because traction railroads were a little bit different from mainline outfits. This is a 100m curve leading down to the lower level:

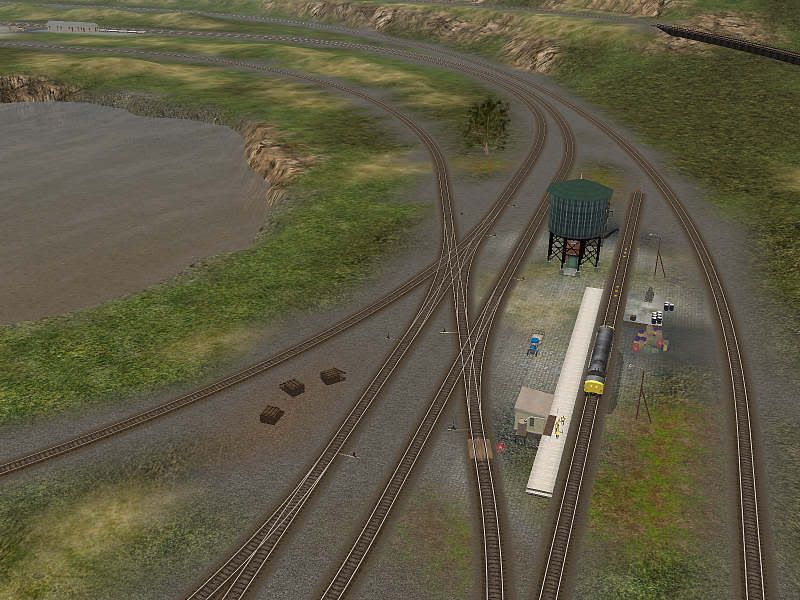
I can't remember what radius this is on "IndustRail", maybe 300m or 400m, but it's certainly too sharp for real life:
Milaga --
"Letting Trainz decided how to curve around the straights seems to be the least stressful way."
I agree with the "less stressful" part, but the resulting curve never looks quite right.
"Curves look their best when they have straight track on either side of them."
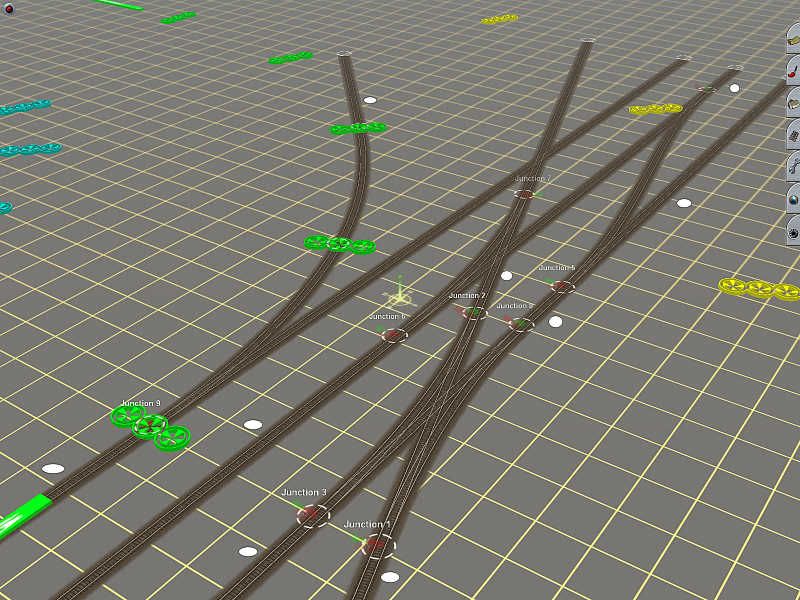
Absolutely! In that first screen shot of mine in post #6 the Straighten Tool has been used on the sections of track marked with a white circle.
Phil
The template show in my post #6 above is kuid:37522:9994, "90d_100-400m Template".
For wider radius curves look for "Curve Radius 500m 90 degree" kuid:142427:30017. In this series there are also 750m, 1000m, ... versions.
I'd suggest using as large a radius as possible. In real life there just aren't many curves less than 400m. I used 100m curves in "DowntownTraction" because traction railroads were a little bit different from mainline outfits. This is a 100m curve leading down to the lower level:
I can't remember what radius this is on "IndustRail", maybe 300m or 400m, but it's certainly too sharp for real life:
Milaga --
"Letting Trainz decided how to curve around the straights seems to be the least stressful way."
I agree with the "less stressful" part, but the resulting curve never looks quite right.
"Curves look their best when they have straight track on either side of them."
Absolutely! In that first screen shot of mine in post #6 the Straighten Tool has been used on the sections of track marked with a white circle.
Phil
cascaderailroad
New member
Hi duckie --
The template show in my post #6 above is kuid:37522:9994, "90d_100-400m Template".
For wider radius curves look for "Curve Radius 500m 90 degree" kuid:142427:30017. In this series there are also 750m, 1000m, ... versions.
I'd suggest using as large a radius as possible. In real life there just aren't many curves less than 400m. I used 100m curves in "DowntownTraction" because traction railroads were a little bit different from mainline outfits. This is a 100m curve leading down to the lower level:
I can't remember what radius this is on "IndustRail", maybe 300m or 400m, but it's certainly too sharp for real life:
Phil
The prototype Horseshoe Curve is the metric equivilent of a FT 200m Radius track.
Thats like a 1200' semi circle across the valley.
Last edited:
Similar threads
- Replies
- 11
- Views
- 684
- Replies
- 5
- Views
- 309
- Replies
- 6
- Views
- 804
- Replies
- 1
- Views
- 1K