Basemap A-B-C-D...etc...etc
To see if it works in TRS2009...First you have to download Basemap A, B, C, D...etc from the DLS or the Auran-Black Pages.
There is a download pack containing Basemap A-Z as well as Basemap 0-9 ... (38 empty basemap files)
If it shows up in TRS2009 Surveyor, and you can lay it on a "Create New" route experimental baseboard, adjust the height so it is just hovering above the test baseboard...
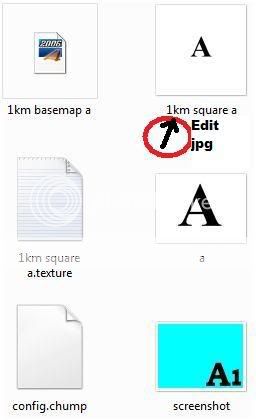
Now you can procede going to your C/ProgramFiles/Auran/TRS2009/Local folder...Search Local folder by typing: "Basemap" it should be one of the first 10 folders in "Local" (as it is there in mine). (hint) In extra-large icon view, the folder will be viewed as a partially opened folder icon, white or turquoise, with a big "A" hanging out of a Local folder.
Find the wierdly encoded file which contains all the Basemap files, and explore that Local file...
In that file will be subfile: "1 km square a" which is a 1024x1024 jpg image.
DO NOT delete the folder ! Instead-"Edit" that image, Clear Image, and replace it with your own 1024x1024 jpg image, and save.
http://www.g0akh.f2s.com/Trainz/Basemap_tutorial.html
I just downloaded Basemap-A to Z, & Basemap-0 to 9...now I can place a map jpg in each one for easy placement of 38 map and image overlays on baseboards
I have customized my folders, and meticulously edited the screenshot image and pulled them to the edge of the page, (alphabet and numerals) in "Paint" so the Basemap images show hanging out to the folders for easy retrieval, in "Large Icons".
_____________________________________________________________________________________________________
This is the folder image that you "EDIT". and replace the photo with your new jpg image.
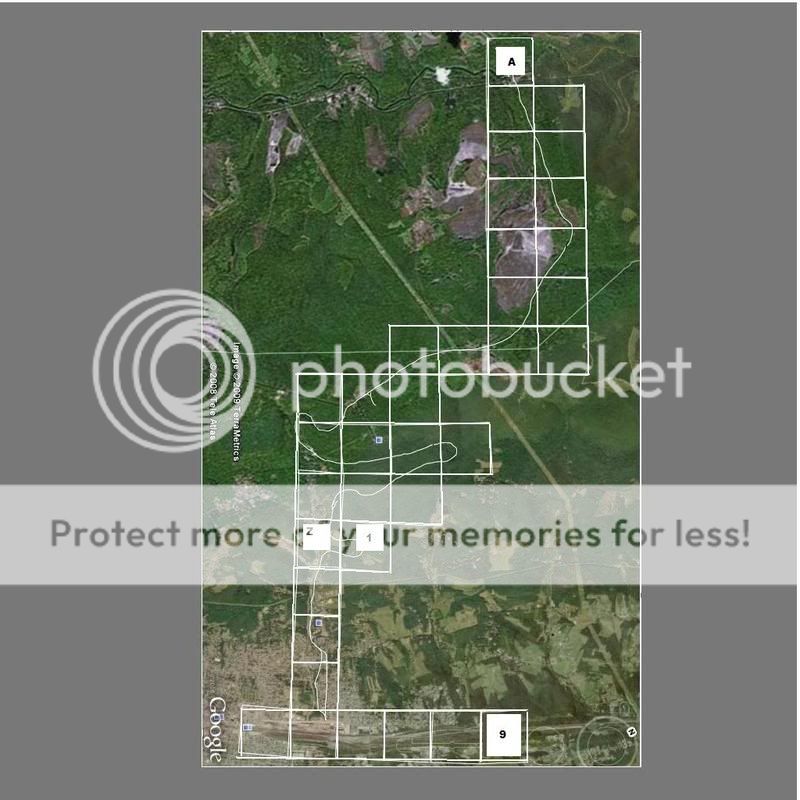
An older,obsolete photo of my basemap gridwork...but it gives you the general idear !
By clicking on the "Historical" content map view, you can get a B&W higher quality photo image...Example of an overall view of 1km x 1km basemap grid (drawn with the Google earth "Add Ruler" - Path) (metric-kilometer setting).
Example of a 1km x 1km basemap, it does not have to be exactly square, and not exactly 1km x1km, just a roughly square image. ("Snip" an image a little bigger than 1km x 1km, and you can fine tune and position and overlap the basemaps). Hint: edit the Trainzoptions File, way out to a fish eye, wide angle view at approximately: -surveyorfov=135, or as high as 185 for easyer manipulation of basemaps. (remember to reset the fov back to 35, later on when playing the game).
Using Google Earth-Ruler-Kilometer-Path as a tool to "Paint" lines where tracks go.
The Wopsy RR (Kittanning Indian-Wopsononock-White Mans Rock Land) Altoona PA-The most often bankrupted and traded RR (1890-1912)-(Abandoned 1920)-AKA: Altoona & Wopsononock RR, Altoona Clearfield & Northern, Altoona & Beech Creek RR, Pittsburgh Johnstown Ebensburg & Eastern RR, Altoona & Johnstown RR, Altoona Northern RR.
I can store 38 basemaps, all "snipped" images ready for use.
Making sure all the basemaps get laid in the same (exact) degree of rotation, is the key for lining them up.
However, I had to set my Trainzoptions File settings to Surveyor FOV-185. As they are cumbersome, and hard to manipulate.
With DEMs, basemaps are really difficult to use, as they don't conform to the hills and valleys...but they still do work if you raise the basemap above the highest terrain.
Anyone needing help creating a basemap image or map, feel free to contact me.

")