TUME’s Simulation of “The Milwaukee Road”

Yea, I have to ask Tume, I've been a quiet fan of your work for a long time.... I originally Grew up in Covington, a stones throw from Maple Valley and the MLW Mainline there up to Snoqualamie Pass. I would be very curious on how to aqquire your routes and assets. Particularly the EP-1 Biploars.....

http://www.oldmilwaukeeroad.com/content/proud/photopages/photo05b.htm

Not many locomotives could pull, or push, 2x Steam modern steam locomotives the opposite direction they were trying to go (1 of the ones in the photo is an Articulated to boot)..... The bridge in the picture by the way still stands, I've walked across it XD.

Falcus
 
Hallo,

I am trying to post a video here – we will see, how it works :)

Just change quality settings to 480p for a better performance.


Your’s TUME
 
Last edited:
I pre-ordered my T:ANE Deluxe Edition copy the other day, now i just have to download it and enjoy the great route!

EDIT: I was just exploring your route and content. The route is absolutely stunning and I love it. Same goes for your custom content. I have one question for you though.... With your Covered hopper for the milwaukee, The text "Milwaukee Road" on the side is in the left aligned position of the covered hopper in which the sign "america's resourceful railroad" would sit. I was just wondering if my research is off and I missed something or if you did not even realize that with all the busy times building and upgrading the route. I know that my content is not perfectly to what the actual road had, so it doesnt bother me that it is that way, just some other people in the future that are hardcore milwaukee fans may realize the same thing. So this turned out to be longer then i thought so sorry

EDIT2: I also have achieved the feat of breaking the couplers on a long train on a hill causing it to accellerate to over 100 mph through Avery taking out other trains and most likely millions in product. fun times haha


Hallo,

sorry for such a Long delay.

Yes the hopper has not been created especially for the MILW. To save on time I just used an undecorated DLS hopper to create my seasonal hopper car set. I did not attache the extra sign onto the MILW hopper because these signs appeared quite late at the hoppers - may after the beginning of the 70s which is the time frame I want to deal with.
But thank you for your information if I ever go to create hoppers from scratch, I will consider it.

Your's TUME
 
Progress at the Drexel-Alberton-Route-Extension

Hallo,

here some screens about the progress at the Drexel-Alberton-Route-Extension.
Now the time has come to do the final decoration at a portion of land ever in the extension. Until now just tracks were laid,all the way through as well as HV and Telegraph lines, roads and rivers have been built. In addition to this a lot of houses have been placed ito the town sides of St.Regis and Superior - many still needs to follow.
Also the big bridges (both MILW and NP) over the Clark Fork River still needs to be created from scratch in gmax.
And one day everything needs to be switched into T:NAE as I am still working in TS12 building the extension.

16775918965_281b8fced6_o.jpg


16568645697_696fc78f4f_o.jpg


16588524340_2642b63863_o.jpg


16750053196_24394f2da7_o.jpg


16774833952_df9626d52e_o.jpg


Your's TUME
 
I'm looking forward for the extension of your route. Your Milwaukee Road route included in Trainz 2010 was my favorite, and it still is among my favorites. However, when you get it done, I hope that it doesn't kill my frame rates. However, I wish that the horns on your locomotives weren't 'fixed', as the horns produce one long note. I wish that you can 'vary' them, so that you can blow the horn for a railroad crossing, long-long-short-long.
 
I agree @jordan412 about the horns, It would be awesome for them to not be fixed as he said. I a few months back found a gentleman on Youtube that has some videos containing a WABCO-E2 which is the horn that was used on the Joes. The link I have is not the best for taking sound from, but he has 3 or 4 using this horn or other ones. Also he has one using 2 of them. One of his videos had sound taken from it for an electric train in another game. I just dont remember which video. I thought I would share this video and maybe some others can do some digging about it.

https://youtu.be/NY9axlbEaiA
 
Hello,

thanks for the video link - interesting :)

Well, due to the delivery deadlines of all third party content assets there was no time left to take care about the MILW-horn-sound anymore. Sorry for that.
I had much much other things to get finished in front of the deadline back that time. During the last days before the deadline I only had sleep for a few hours and I rally was not able to create a new horn-sound although I planned to do so before. But by the way I planned a lot but had no time to make it real. Unfortunately I am working in my job during the day to earn the money which I need to pay my food and my flat and all the hardware and software stuff required to support my trainz hobby :)
So therefore I hope you can forgive me about the sound :)

But I also have a source file of a MILW-horn-sound. Of course I could create a new horn sound considering the latest standards which is using three parts of sounds - the start sound of the horn, the idle sound and the end sound which fades out if the user stopped pressing the horn-key.

Of course I coule send the improved MILW-horn-sound-asset to N3V so that they can use this within my MILW-electrics rather than the sound like it is now.
But you need to know that everything third party file or date which comes from outside into a software company needs to pass some kind quality procedures to make sure that this new stuff does not contain anything which could cause problems inside the new software product. I don't know how this is handled by N3V but I am sure they have something like this as well. It is not just about copy and past of some files or folders. Bugs are inside of each new software. This makes a bug fixing process necessary which goes hand in hand with alpha and beta testing. And this process would be a never ending story (much more as it seems to be anyway) if the developers would allow new bugs to sneak in e.g. via improved files which just have been pasted in without any prove that it does not cause any problems for the whole software product. Therefore a software developer must set deadlines for the acxeptens of third party files and any other data.
All I can do is to create an imroved MILW-horn-sound-asset and to ask my contact man at N3V if there is enough time left (and I guess it is very busy over there at the moment) to take care of the new asset and to implement it into T:NAE.
I don't can make any promisses and it would be very understandable if that new asset cannot become part of the new T:ANE. But in this case there would be other oportunities like inside a future T:NAE update or something like this :)

Your's TUME
 
Hallo,

just some newly decorated portions of the Drexel-Alberton-Extension.
A westbound moves through St. Regis River Valley not far behind St. Regis.
Eventually the train moves across the former "End of Simulation" a little east of Drexel. The undecorated stripe still marks the place where both routes have been connected.

Please note - the screens still have been captured using TS12 :)

16753916408_8853123746_o.jpg


16319210364_533cf5ec5a_o.jpg


16319208834_a027fd813a_o.jpg


16941605375_a3fda987b4_o.jpg


16940635171_741caa9bf8_o.jpg


16940278722_d7410865b8_o.jpg


16940632291_a4ec60641f_o.jpg


16915789946_f28171f690_o.jpg


Your's TUME
 
Last edited:
Hello,

again something about the progress in creation of the Drexel – Alberton – Extension but in connection with some description about my way to create such a route.
Before the route creation starts it is essential to do a lot of investigation to collect as much information as possible about the Rail Road the landscape and the towns. Great help provides Google – Maps but it indicates the current state which contains not all needed information to create Rail Road which is abandoned today. For details like the position of sidings or wayside buildings and other structures it is important for study a lot of old pictures. Also the historical USGS – Topo – Maps are very helpful.
Route creation itself can be divided in some steps. Some of these steps needs to be done one after each other, some can be carried out parallel.

Step 1 – Terrain only Route:
At first a terrain only route is required. Like the terrain only route for Avery – Drexel has been done by Scott Monsma who sent that route over to me in back 2006, the Alberton – Extension has been created by James Moody. At this point again many thanks to Scott and James!

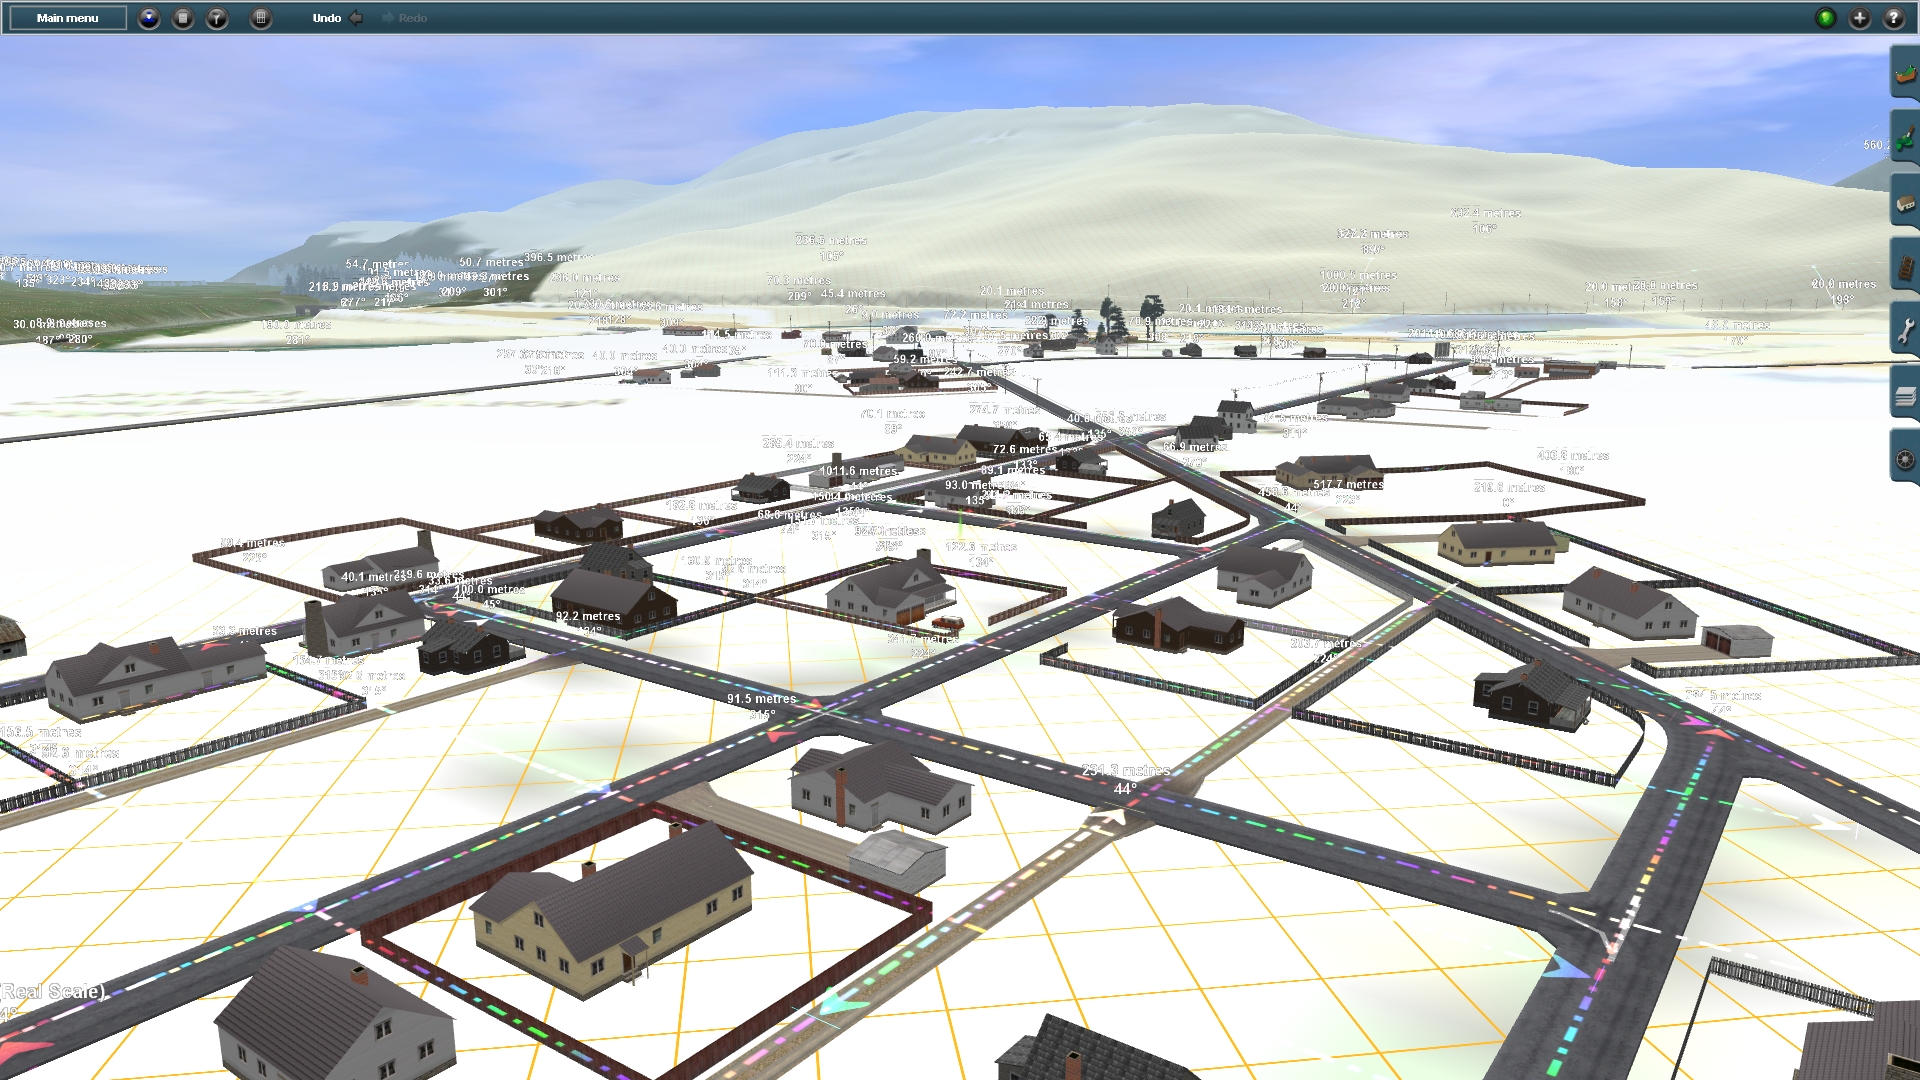
Step 2 – The main Tracks, Roads and Rivers:
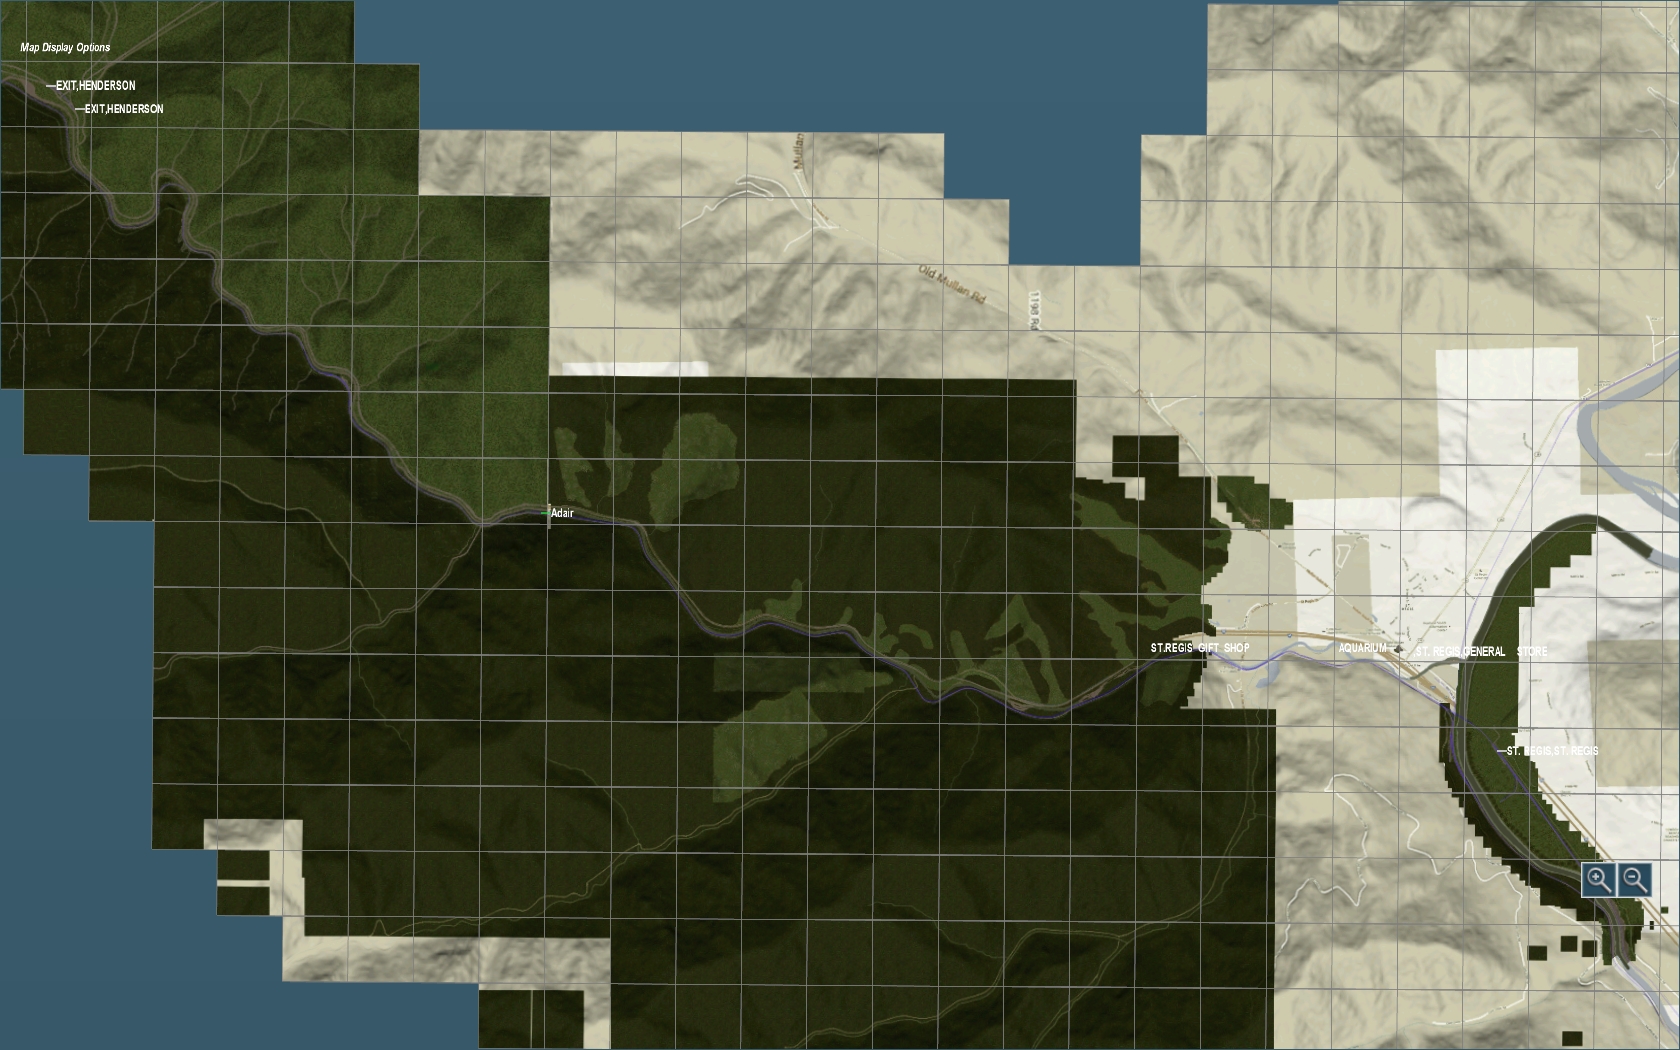
The second thing with needs to be done right at the beginning is the implementation of the main tracks. At this step I did not take care about any sidings or small roads. This step is very important for the quality of the route. The goal is to find the right position of the main tracks in relation to the main rivers and the main roads and to the towns along the way as well as in relation to the terrain relief. One information contains the route itself due to the map texture applied all over it. But sometimes such map-textures are not exactly. Fortunately Google – Maps provides a nice measurement so the position of the main tracks, the main rivers and the main roads can be figures out in relation to each other quite easy. By orientation on the map texture and by using the rulers in trainz it is now possible to implement these things into the route. At the end the track, roads and rivers used to look from above very similar like in Google – Maps. But still we don’t have adjusted any heights to the track spline points.
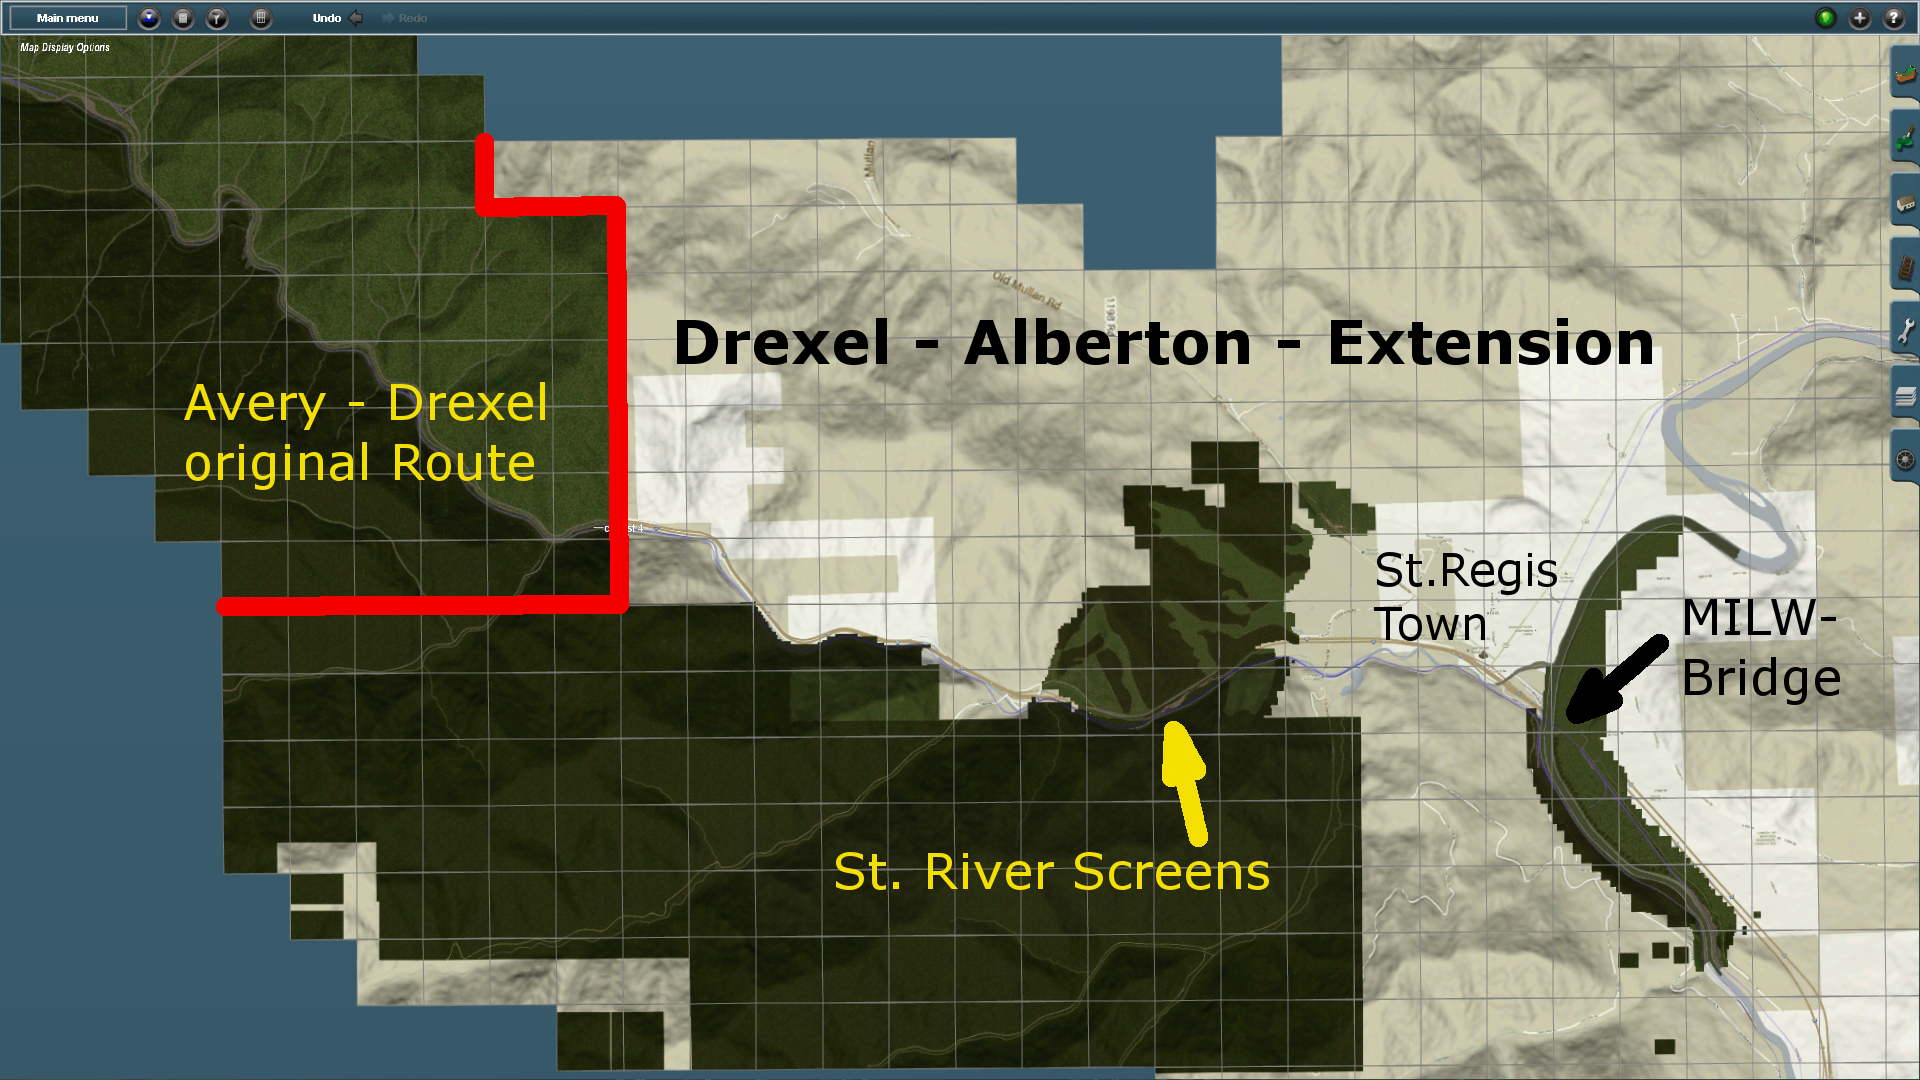
At the present state the main track, roads and rivers has been implemented at the right place all the way from Drexel via St. Regis, Superior and Alberton to the east end of the terrain route near Missoula, Mt.

Step 3 – Height Adjustment of main Tracks, Roads Rivers:
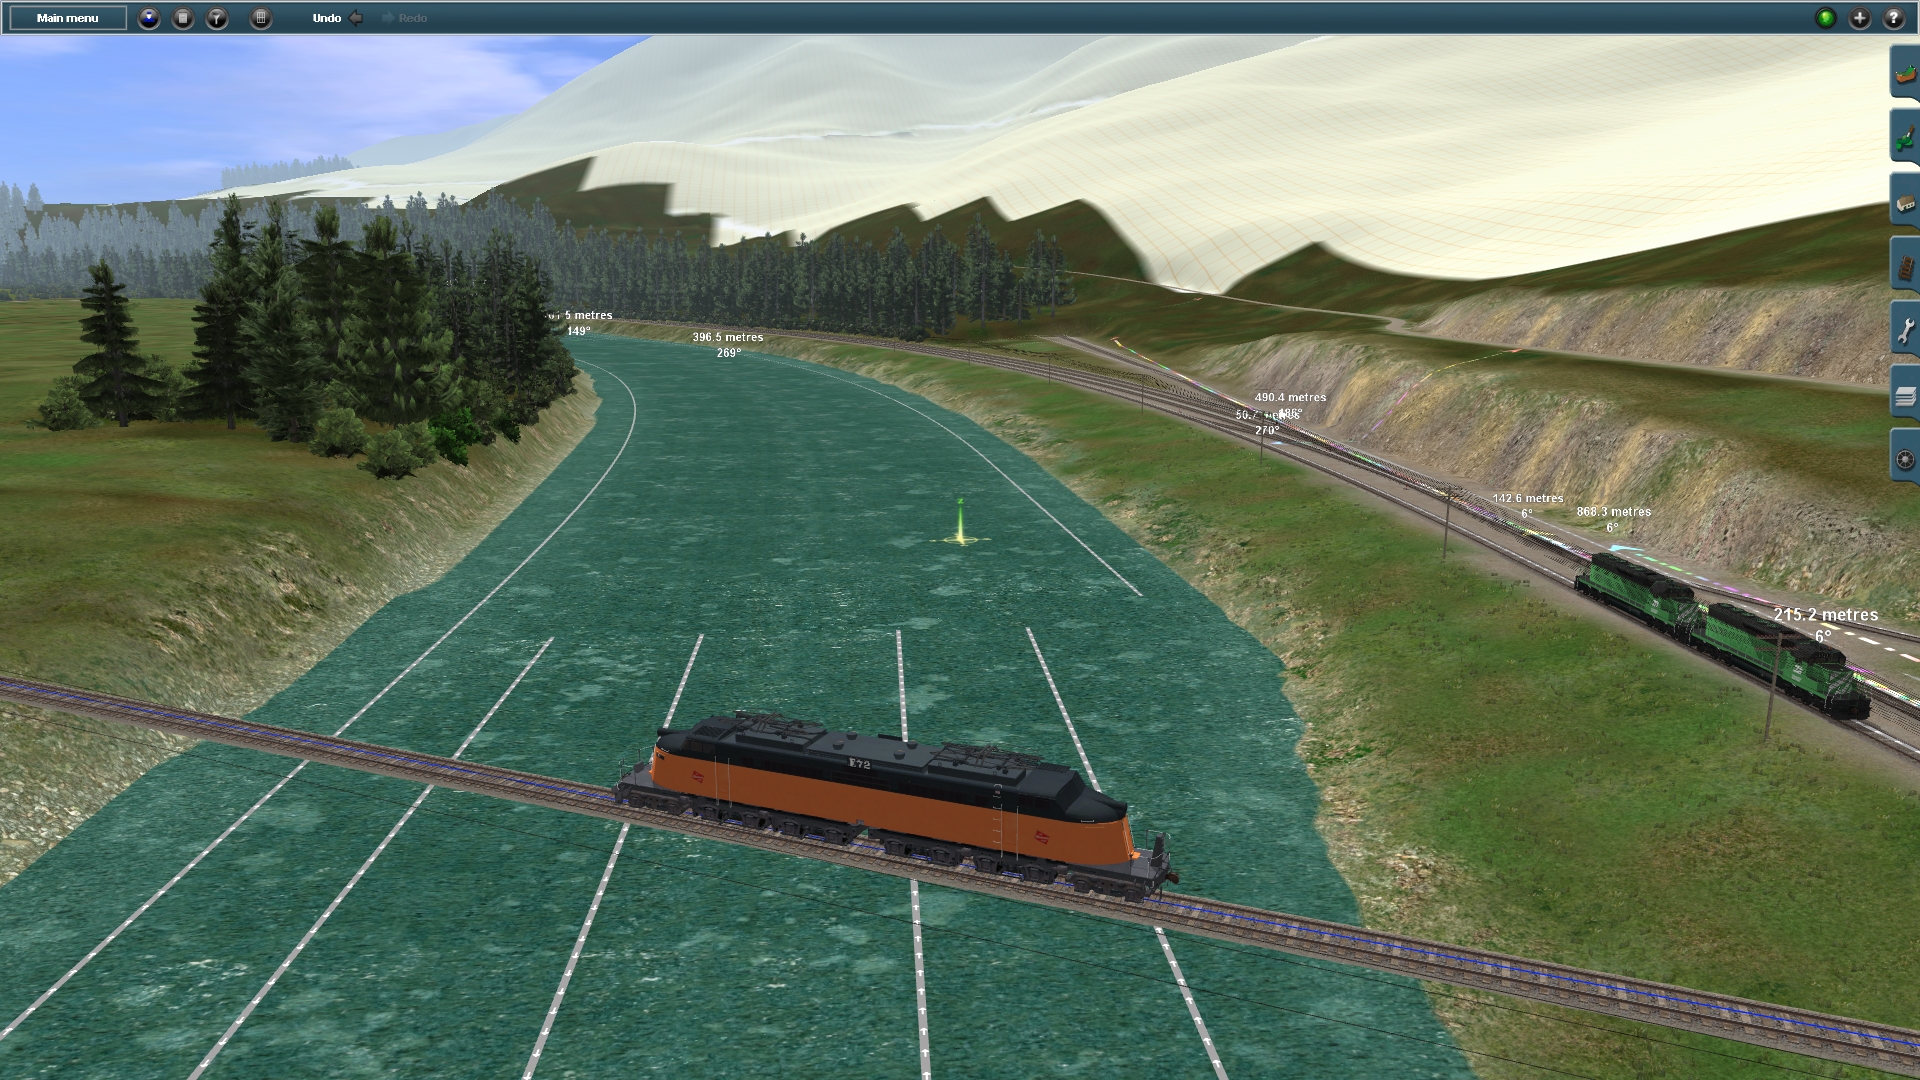
Unfortunately the terrain relief at a terrain only route is not exactly enough to stay with it as it comes out of the creation process. In case of the Alberton – Extension the route included lots of hollows and bumps mainly along Clark Fork River which unfortunately also affected the terrain for both MILW and NP ROWs. But even without this special challenge the terrain needs a lot of attention – especially close to tracks, roads and rivers. At the beginning it is important to find some points inside the route where the height of tracks, roads and rivers is quite valuable or derivable from photos. The first height point at the Alberton – Extension was given by the last track spline point at the Avery – Drexel Route. The second position is at the NP – Depot at St. Regis, Mt where the MILW line went over the NP line. Unfortunately this place is located right beside Clark Fork River and the terrain included several bumps and hollows making it impossible to estimate any track height from the terrain being around. Therefore is was necessary to consider both rail corridors and the Clark Fork River in a radius of about 5 Kilometers around St. Regis to work out the needed height information. The height of Clark Fork River has been figured out first and has then been used as a reference. Sometimes methods like the arithmetic mean provided help. Also one thing is quite sure – rivers does not flow uphill. After estimation of the river height old photos helped a lot to find out the height position of the NP tracks just located next to the river. The height difference e.g. could be figured out from several different pictures indicating a train of boxcars running on the NP line. By measuring the boxcars at the pictures and the distance of the tracks above the river provided the needed information. As the height of the NP tracks near St. Regis has been determined, it was not too complicate to find out in which height the MILW tracks once crossed over the NP line. From this point forward it was not too difficult to determine the height of each track spline point along both Rail Roads to create smooth uphill going lines toward Alberton.
The height adjustment for the main tracks and rivers has now been done all the way through the route. The main roads, mainly the Interstate 90 and the old Highway 10, has already been height adjusted from Drexel to Tarkio but still needs to be done further east.

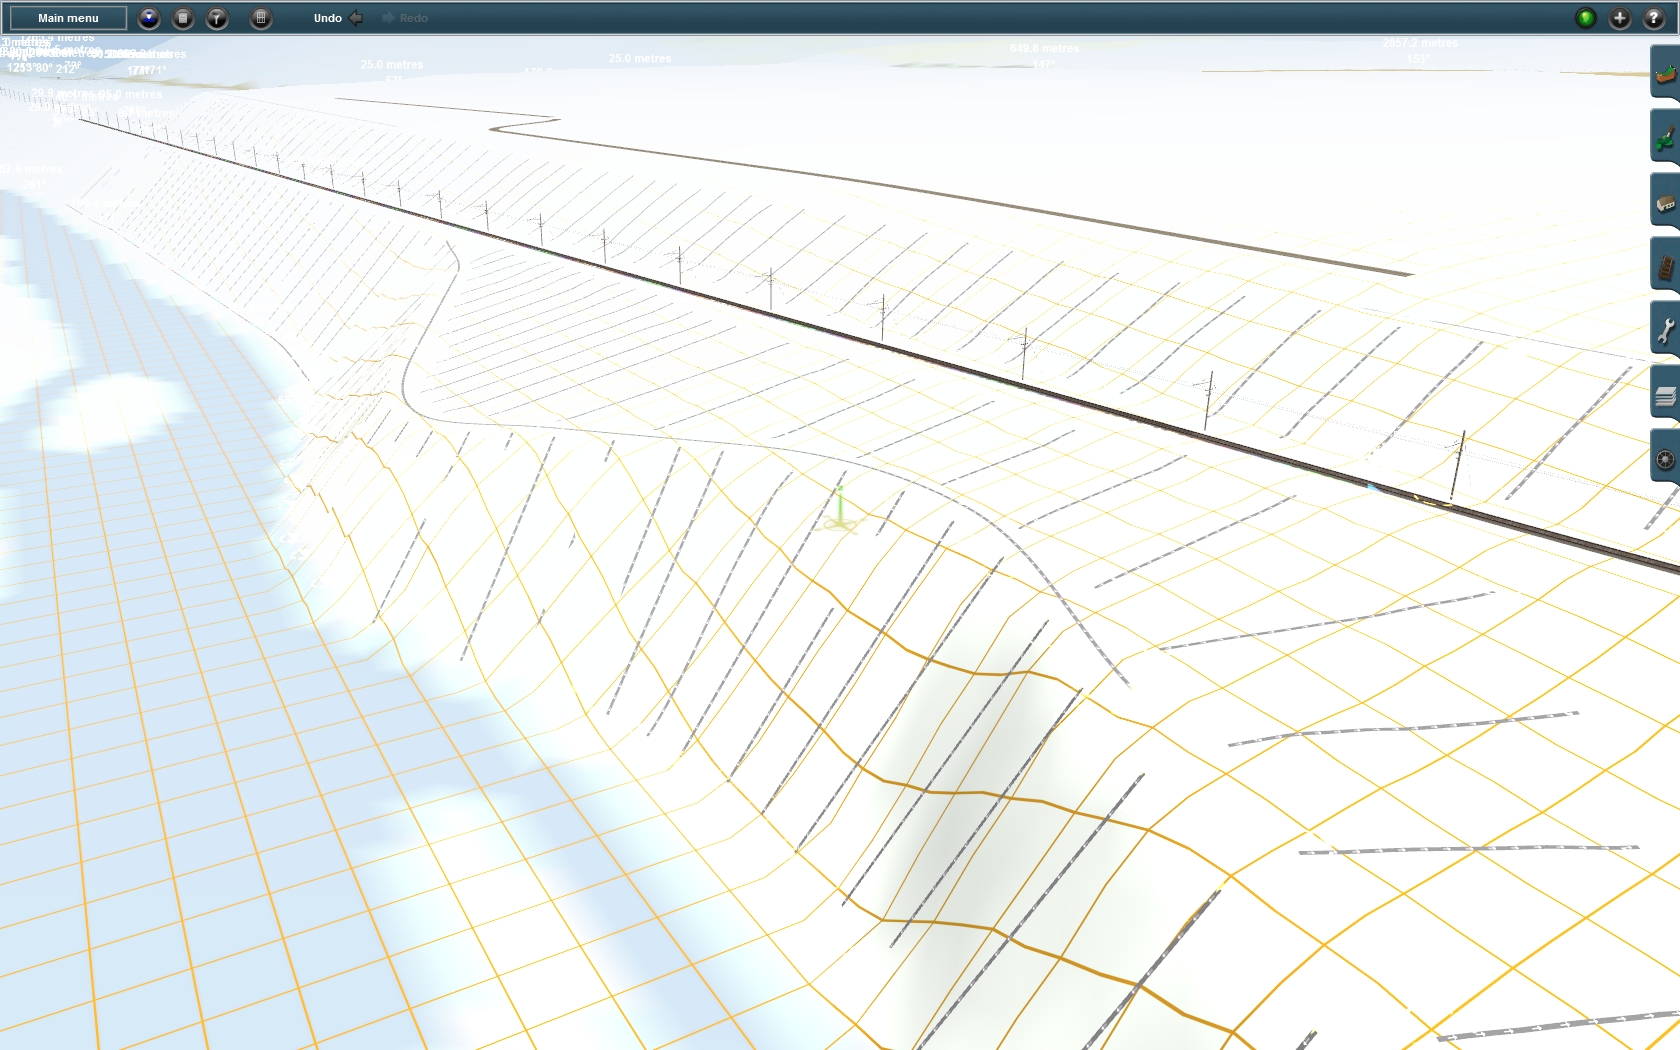
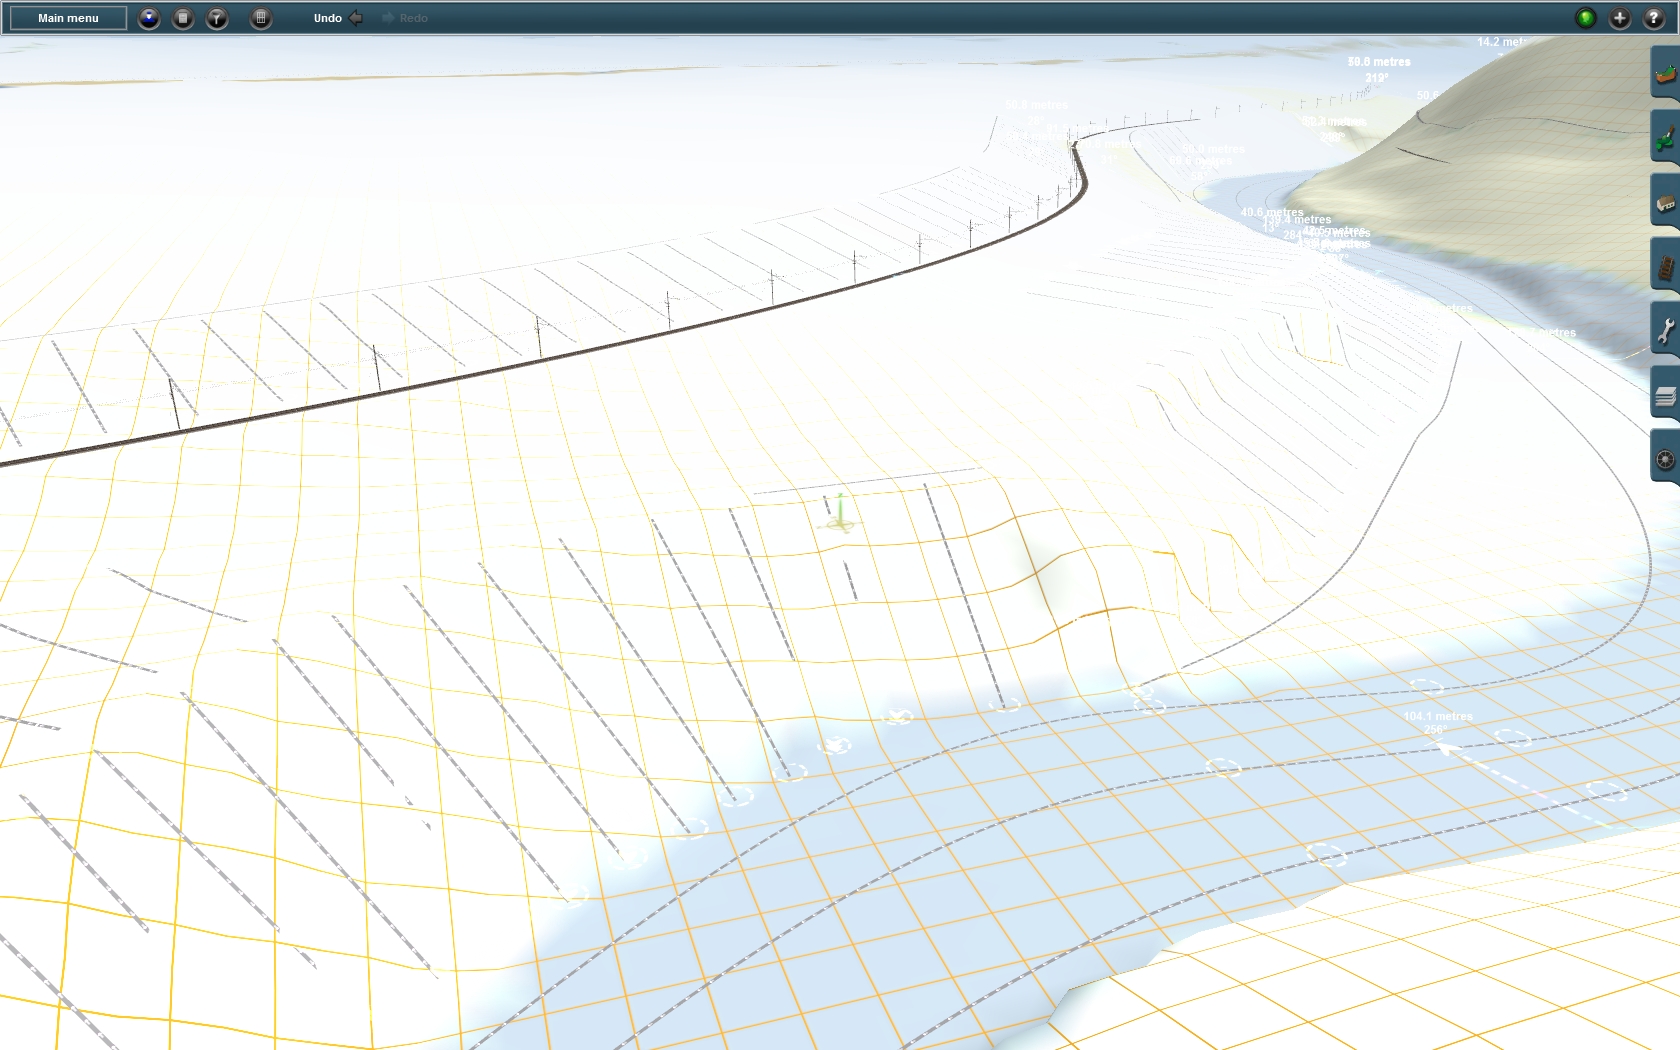
Step 4 – Terrain Forming:
As mentioned the terrain only route contained several hollows and bumps mainly along the main rivers and the area left and right of it. This also affected the terrain where both Rail Roads are situated. Therefore the whole terrain at the river sides and the embankments of the Rail Roads needed to be reworked and finished manually. This requires to study the appearance of these areas very carefully by using the information from Google – Maps and several pictures. In this route many, river sides and rail embankments are just slops falling straight down from its maximum height towards the riverbed. This allowed the use of helper splines which have been implemented in a short distance to each other just along a slope segment which was to create next. The main terrain changing has then been done by using the “adjust ground to spine” tool followed by some detail adjustment work been carried out manually.
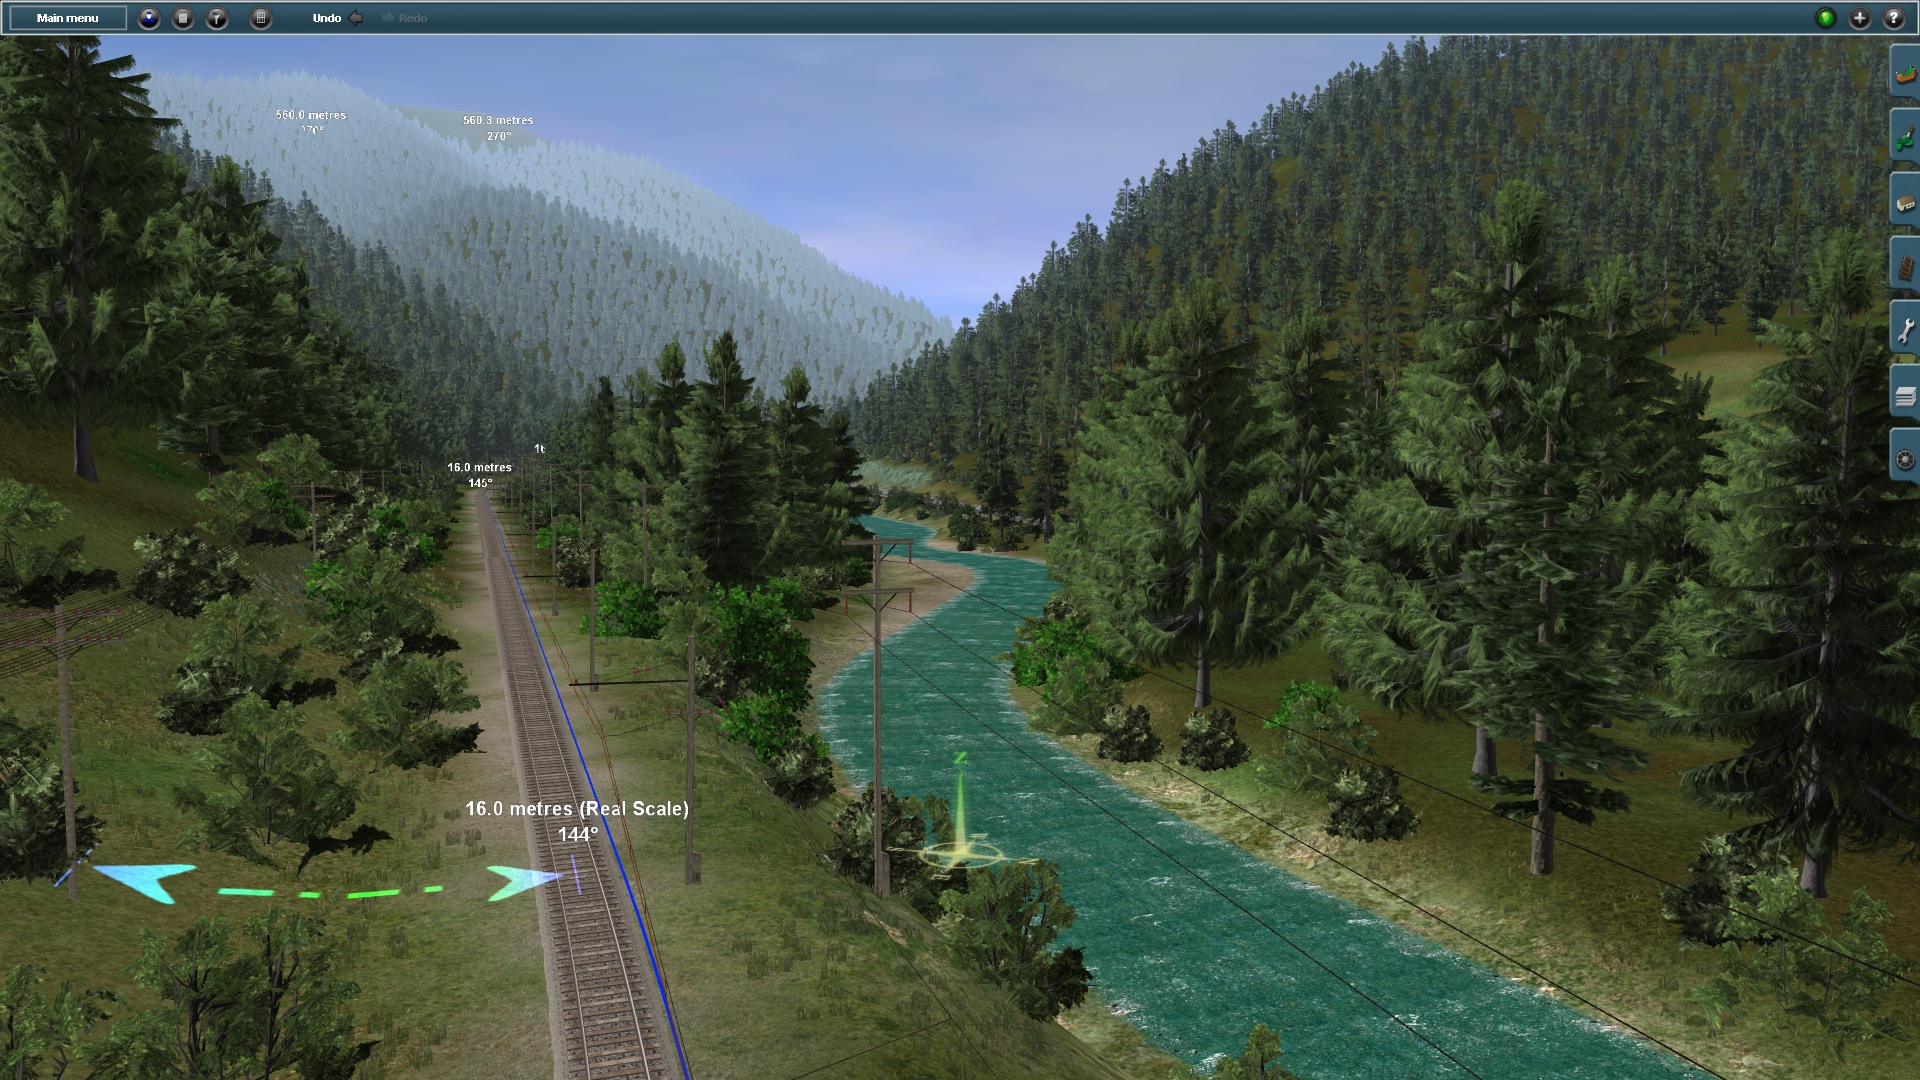
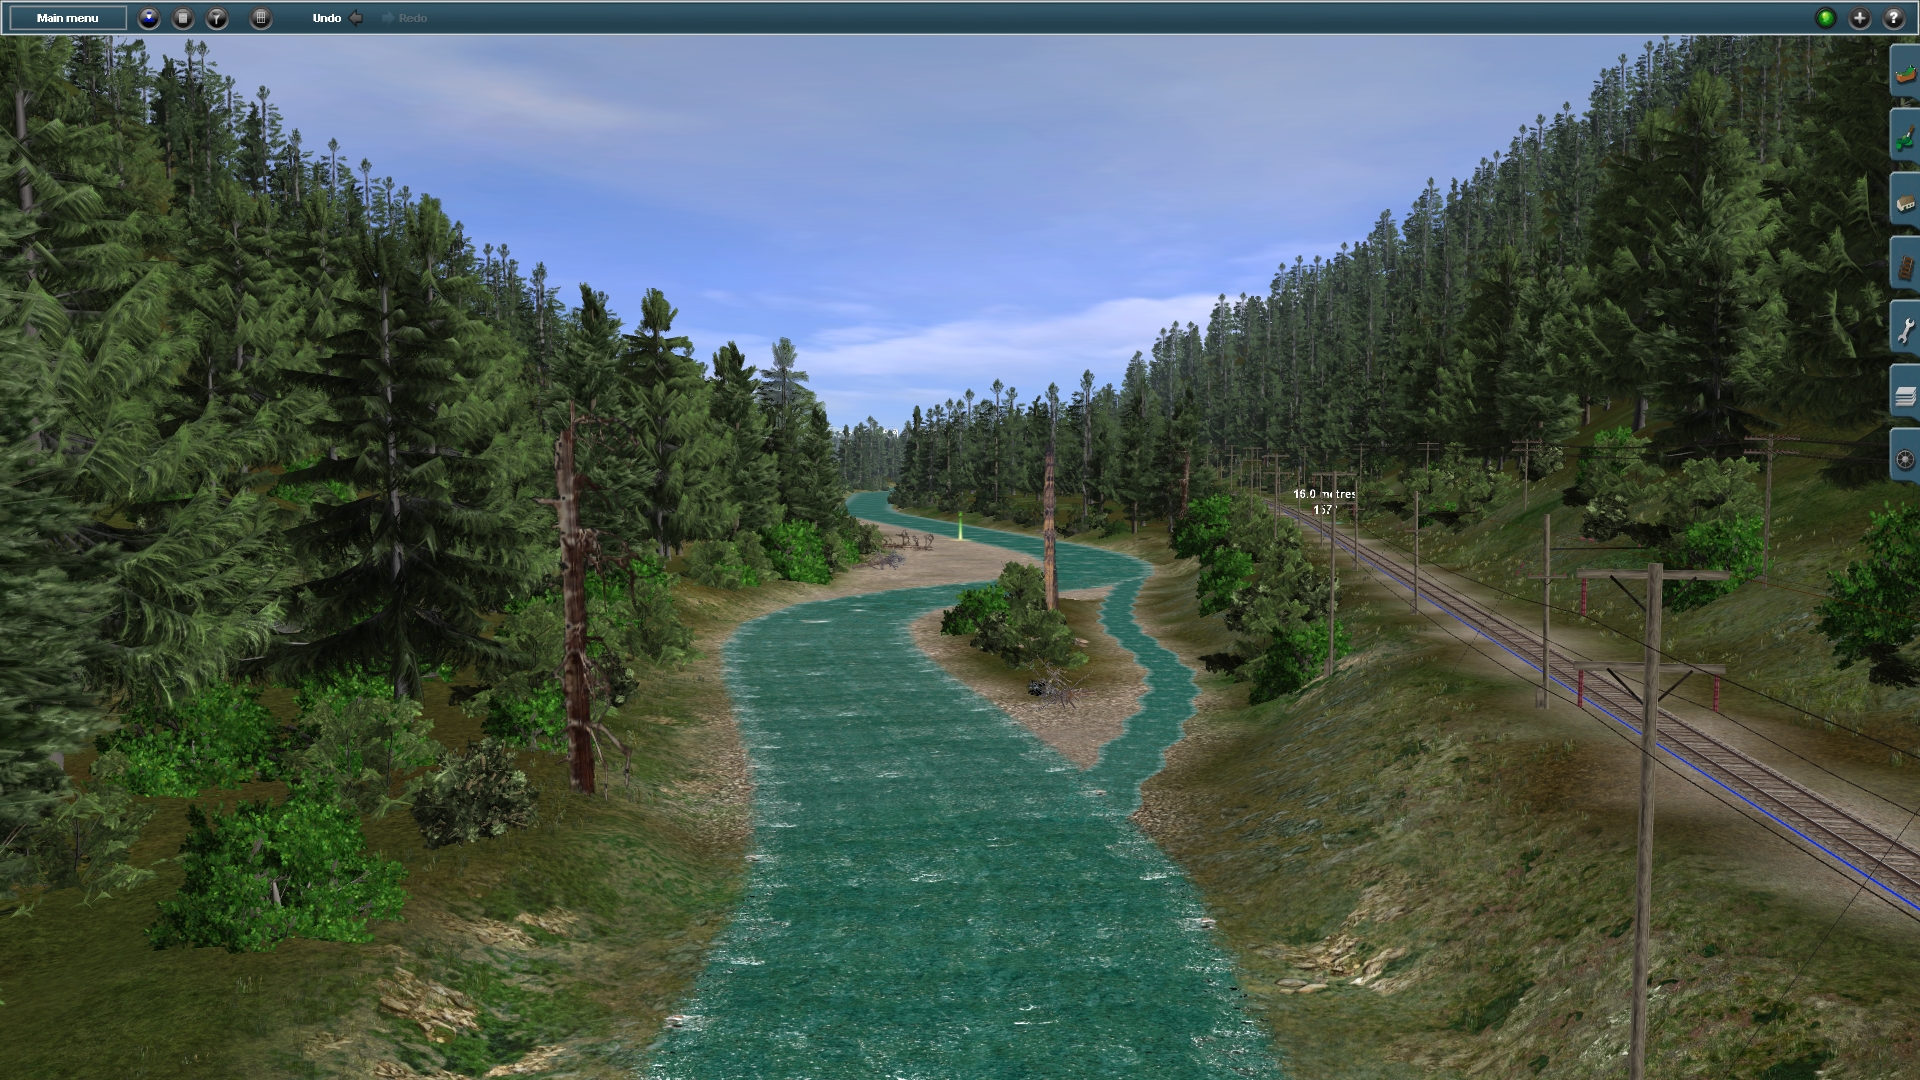
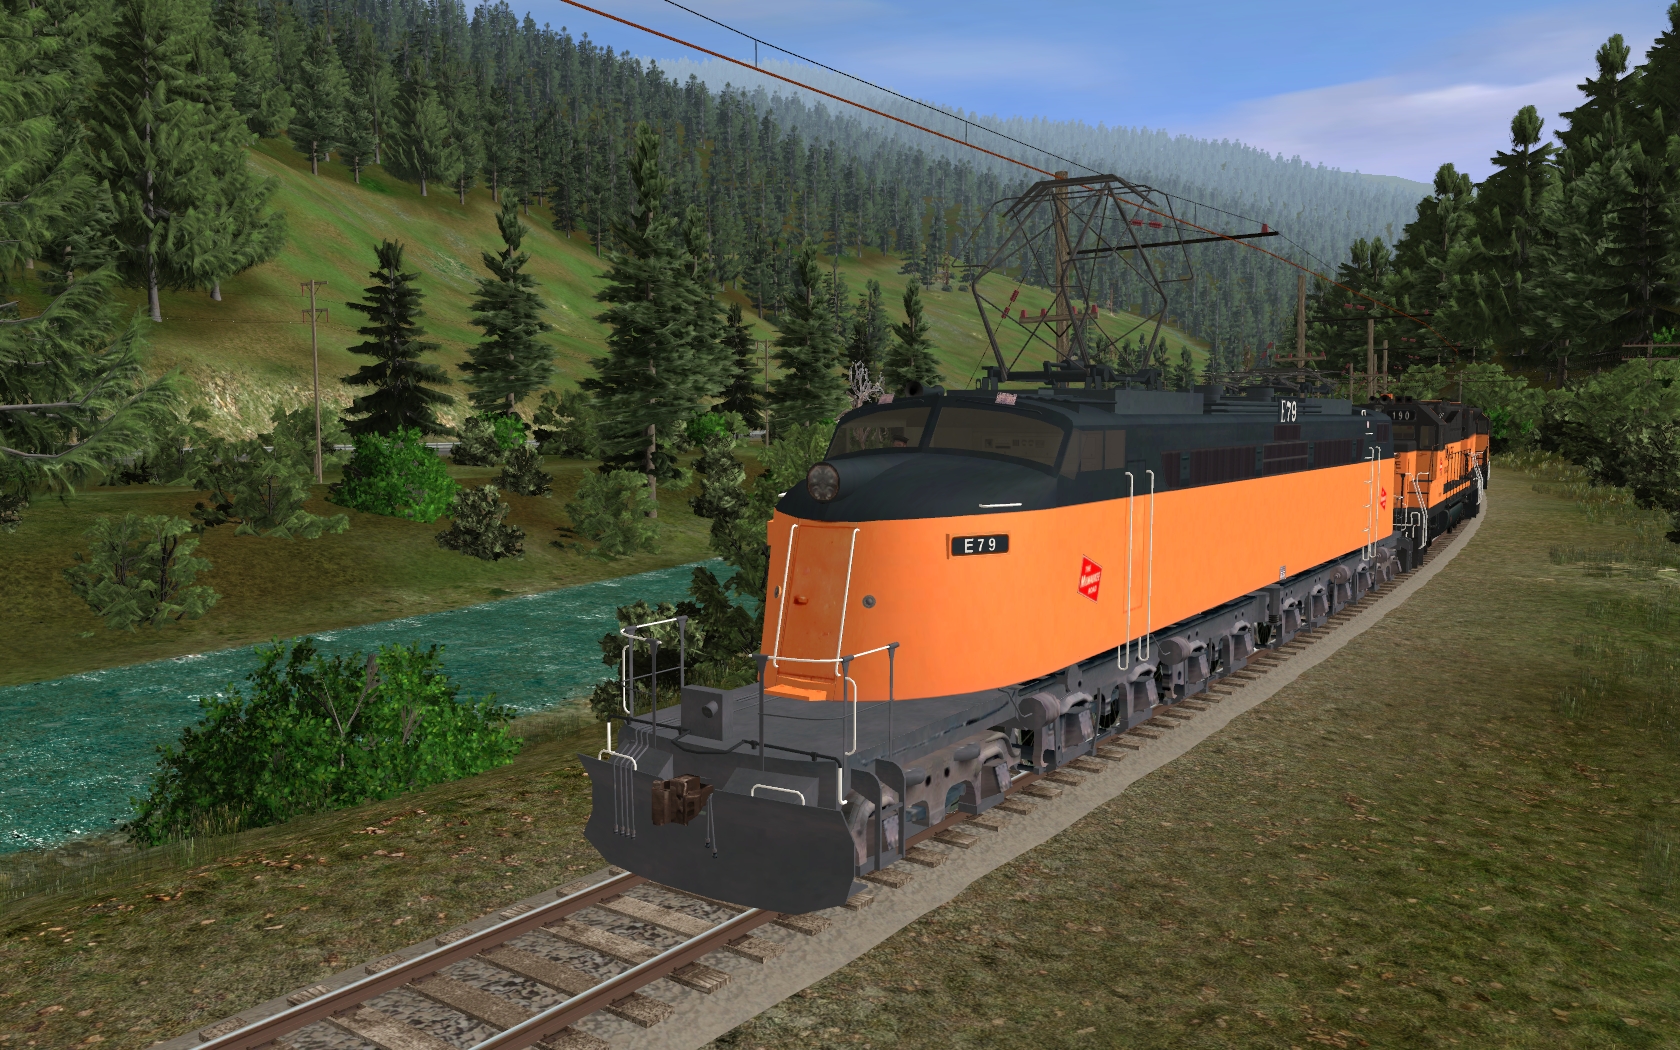
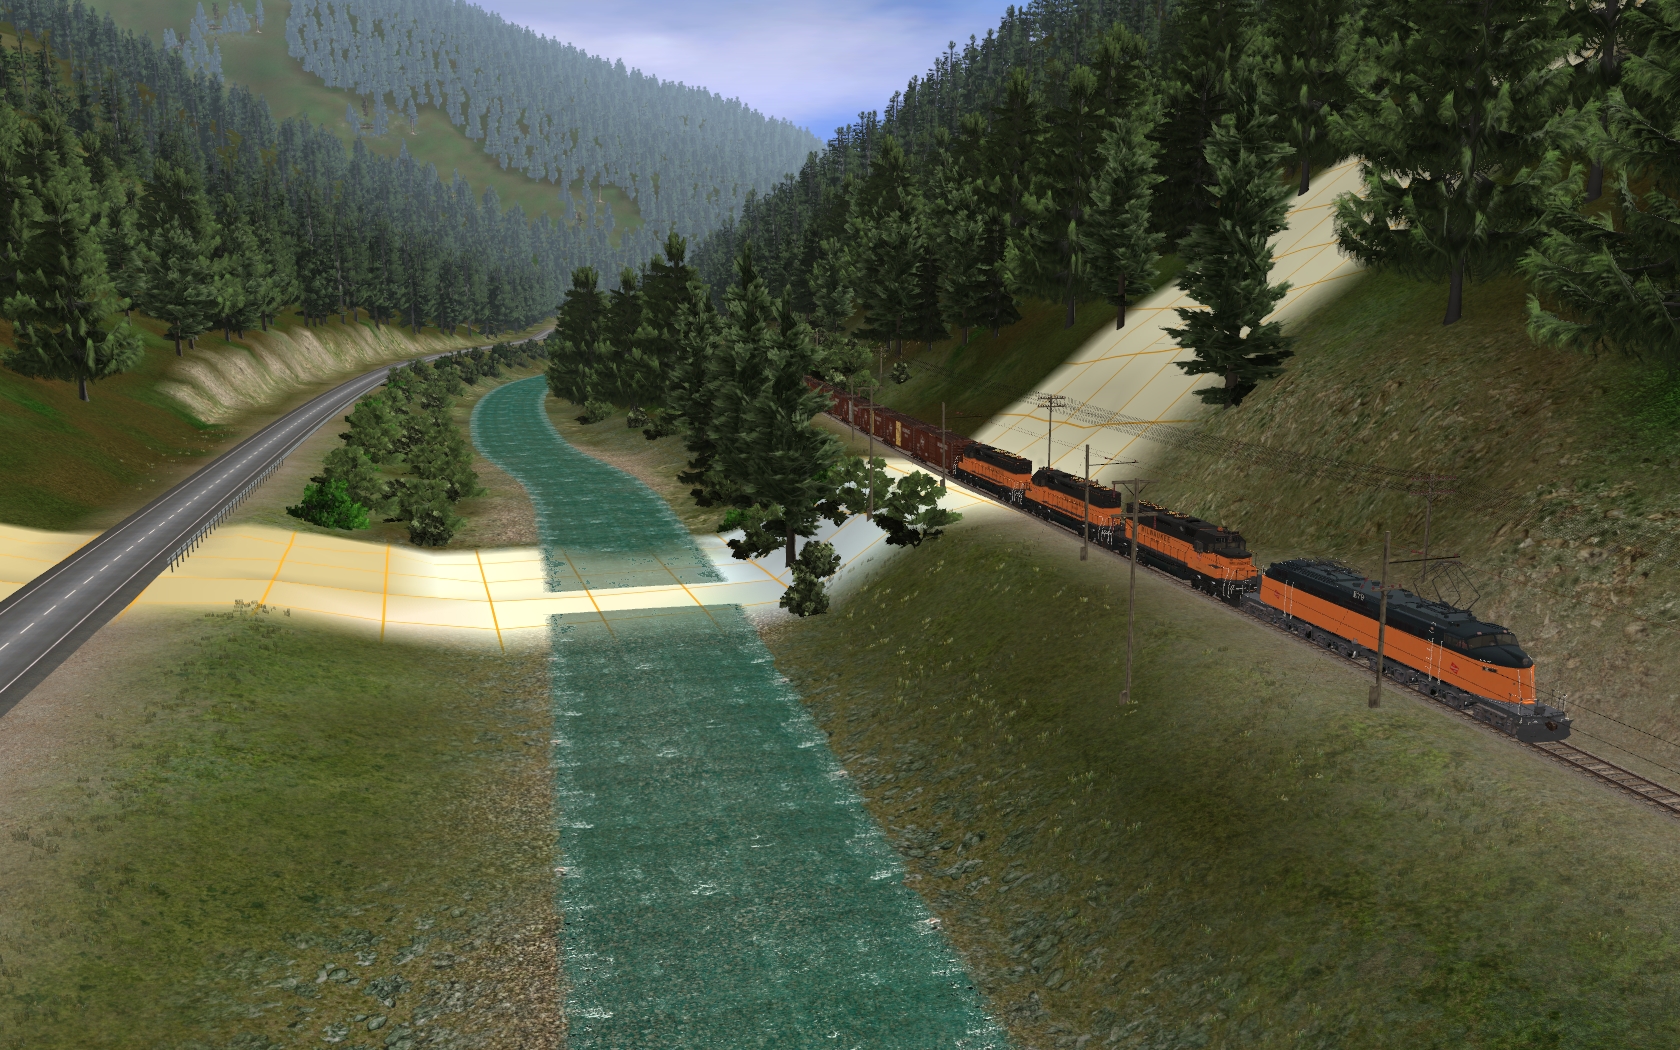
The terrain besides St. Regis River has been finished. At present the height adjustment work along Clark Fork River has been done from Drexel to about 7 Kilometers southeast of Superior. From that place the terrain at the MILW side of the river has been finished all the way to Tarkio. Also the terrain at both sides of Clark Fork River has been done from St. Regis about 10 Kilometers alongside the NP-Paradise-Shortcut. The terrain adjustment besides the NP-Line has been finished from St. Regis to about 7 Kilometers southeast of Superior. Within the terrain forming progress along Clark Fork River and the Rail Roads also the MILW-catenary-splines and the MILW-HV-power-splines has been positioned from Drexel to Tarkio and the telegraph lines reaches from Drexel to St. Regis.

Step 5 – Implementation of side Tracks, Roads Rivers and Buildings:
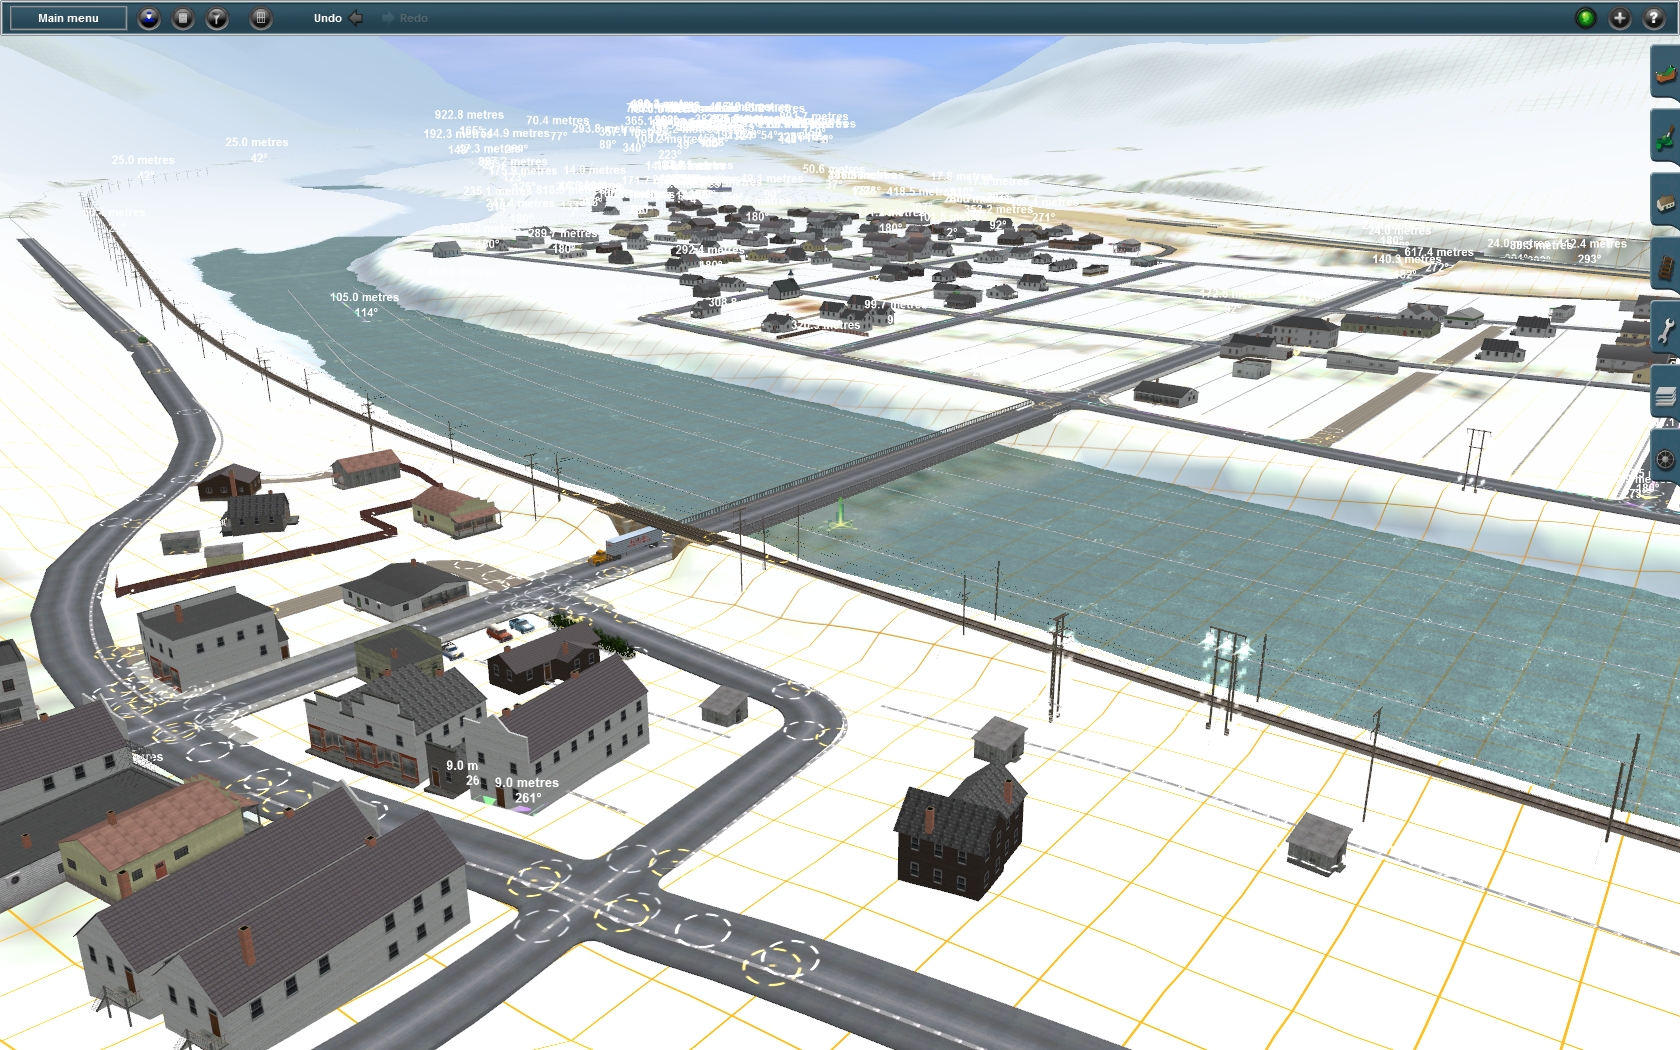
As soon as the main tracks roads and rivers has been adjusted in its height, also the work at the side tracks, roads and rivers can be stared. Also in this step it is important to compare the route creation results permanently with Google – Maps and photo information. This step is also about creation of the streets inside the towns. This needs to go hand in hand with the placement of all the buildings and houses. Here it is quite important to measure the position of the street crossings and the distances between the roads very carefully in Google – Maps. Due to the narrowness in the towns any misalignment or wrong distances between streets could – and mostly will – result in wrong looking corners inside the towns which reduces the recognition level.
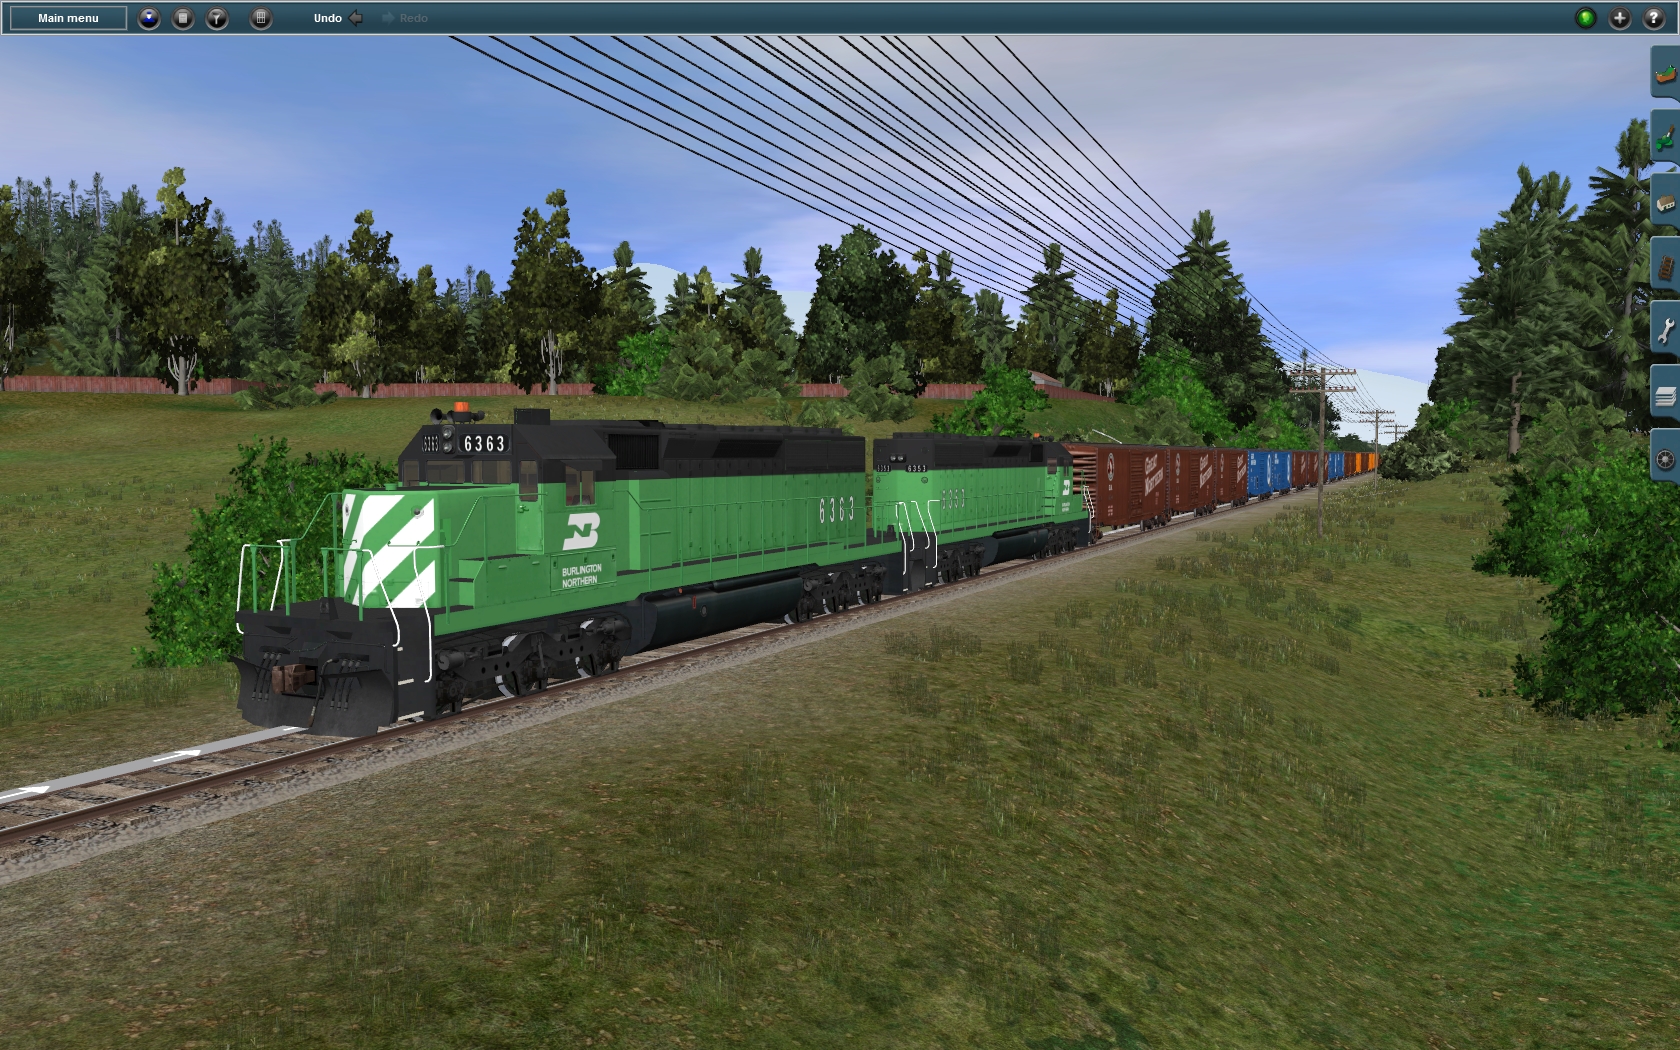
At the present state all side tracks, roads and rivers has been finished from Drexel to St. Regis and at St. Regis itself. Also the street network at Superior has been done. The houses and buildings has been implemented from Drexel to Superior except the buildings which could not been placed in due to a lack of suitable assets. The houses in the town Superior has been placed to about 50%. Also the siding tracks has been placed at both Rail Roads from Drexel to Superior and at Tarkio.

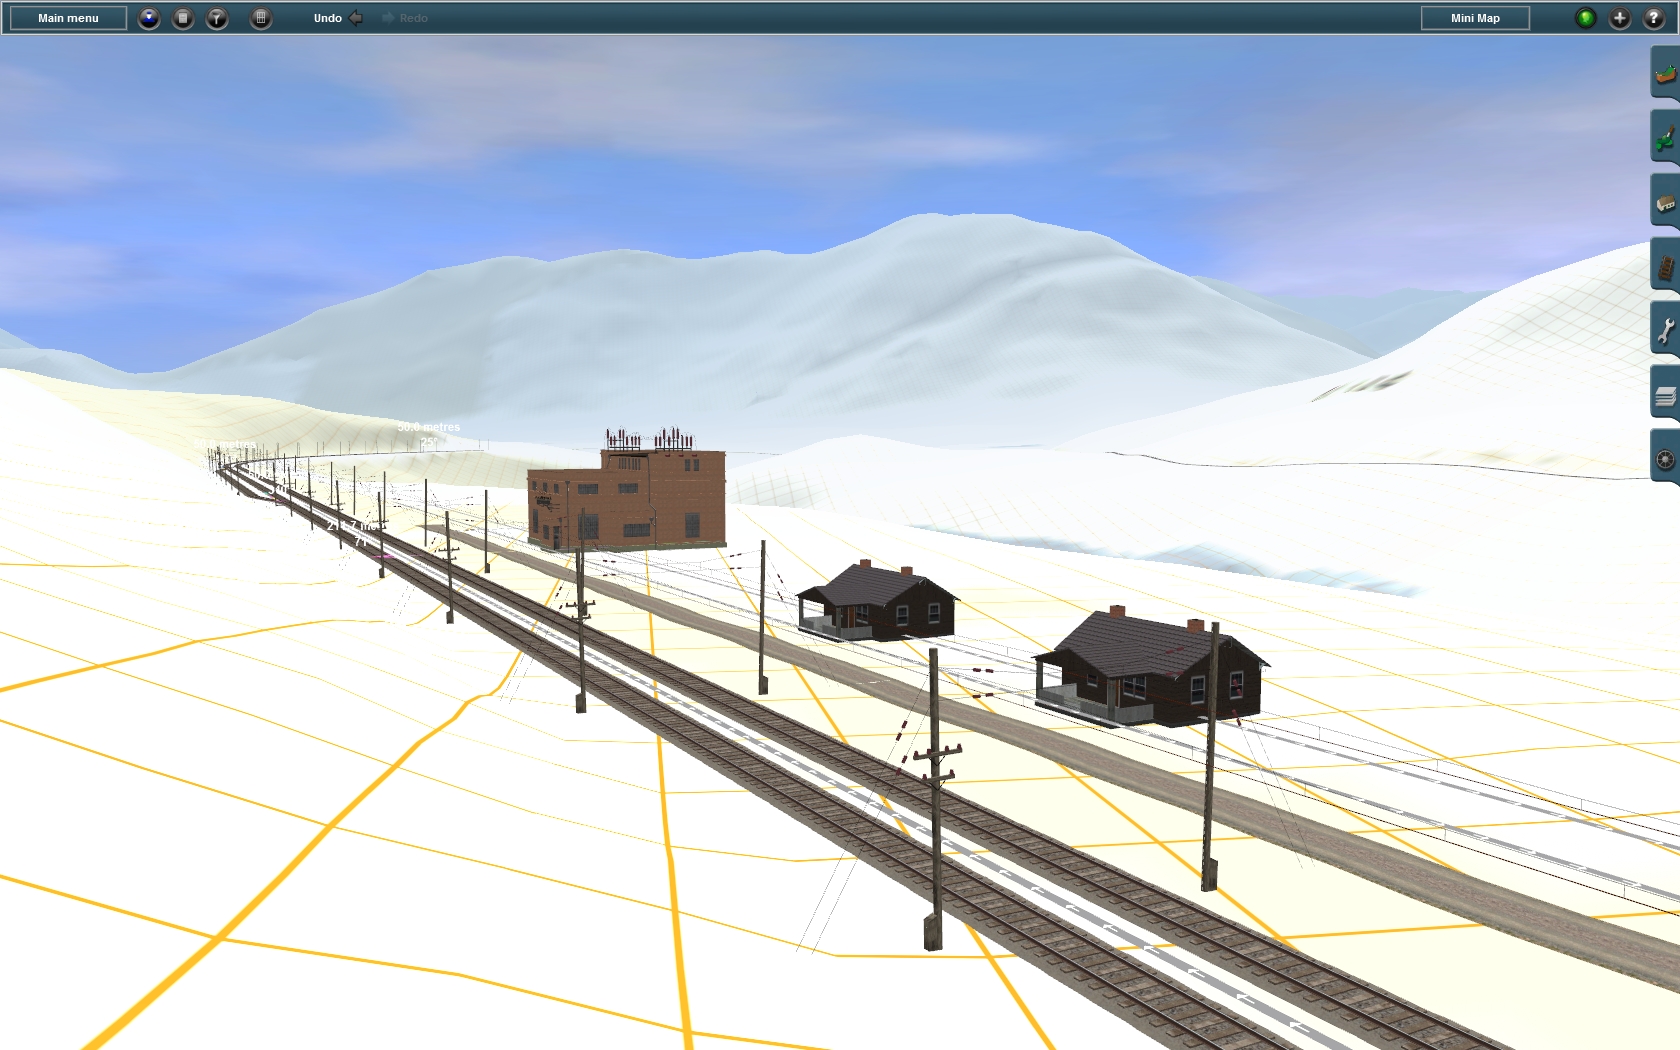
Step 6 – Terrain Decoration:
This step is about to decorate the land within the required ground texture and environmental assets like speed trees and grass splines. Again this needs to compare the result of the route progress with Google – Maps, to meet the reality as close as possible. Also this step is about implementation of more nice looking details and goodies making the route real and interesting looking. This eventually applies charm and character to the route and creates these little corners we like to take screens from.

Step 7– Content Creation:
Of course all the content required to create such route needs to be created first. At the moment I could lean back onto the huge number of assets I created before. But the Alberton - Extension still requires a lot of new assets. The assets are for example several bridges over Clark Fork River, the MILW depot at Alberton and the NP/BN depot at St. Regis as well as some other MILW/NP/BN trackside houses and structures. In addition to this I need to create a quite known and characteristic looking Motel and the Court House and the High School at Superior besides some other houses for Alberton. Of course it is not possible to create every house and structure individually and it is also not the aim to do so. But the most known buildings and structures should be created individually which increases the recognition level of the whole route.


17124029570_c671c78586_o.jpg


17311591065_00ac21f94f_o.jpg


17285640786_2505d643cc_o.jpg


16689134594_a0d8166912_o.jpg


17124009318_4236f0c134_o.jpg


17311144581_fc1a868704_o.jpg


17309764872_71d3227c1e_o.jpg


17311147621_f856b69199_o.jpg


Your’s TUME
 
I've got a quick question TUME:
On your Avery-Drexel route, what was the name of the sound object, that large yellow thing, that you used with your river splines? I'm using your river splines on a route I'm working on and I'd like to also use the same sound object on my route.
Also, there are two Wabco-E2 horns on the Download Station:

Wabco E2 Horn
by trw1089
<KUID2:126323:54007:1>

Wabco E2
by digiext
<KUID:126982:54004:1>

Maybe you'll make an update of your EF1 and EF4's using one of these horns.
 
Back
Top