Install the app
How to install the app on iOS
Follow along with the video below to see how to install our site as a web app on your home screen.
Note: This feature may not be available in some browsers.
You are using an out of date browser. It may not display this or other websites correctly.
You should upgrade or use an alternative browser.
You should upgrade or use an alternative browser.
Model Railroadz
- Thread starter kimo505
- Start date


luvintrainz
Point, Click Destruction!
Is this one that will be released? If so, goodbye to the next few weeks of my life! LOL!
Fluffinator
New member
Hey... Hey Eso? I can has please? I can give you an internet cheeseburger and uhh... some stuff?

nickelplateroad
Active member
ESO,
Whoa ! Oops my pant down.. Sorry pulled up my pant.... I wanna those layout sent me..... Coool
Cheer,
NKP
Whoa ! Oops my pant down.. Sorry pulled up my pant.... I wanna those layout sent me..... Coool
Cheer,
NKP


nickelplateroad
Active member
ESO is famous!!!!
NKP
NKP

nickelplateroad
Active member
Chris,
I haven't heard from you since three weeks... :Z
NKP
I haven't heard from you since three weeks... :Z
NKP


gremlin1812
New member
G'day trainboi1, nice route, looks like a really fun route to drive.
Regards
Barrie
Regards
Barrie
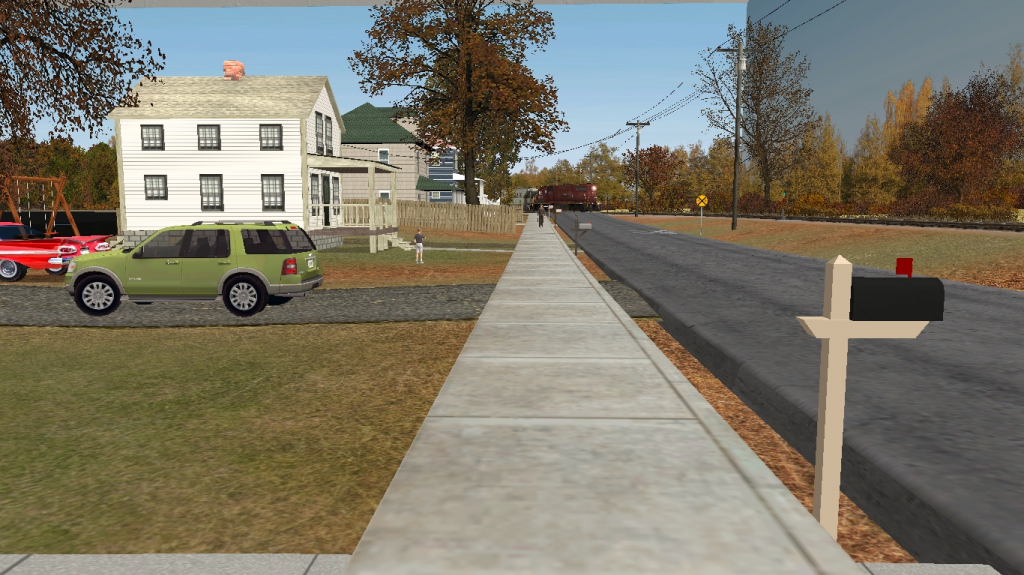
This thread is amazing and the idea behind it is fantastic. I'm very impressed by all the great screen shots and helpful "how to" hints that have been posted here, and it has rekindled my interest in Trainz after a very long absence.
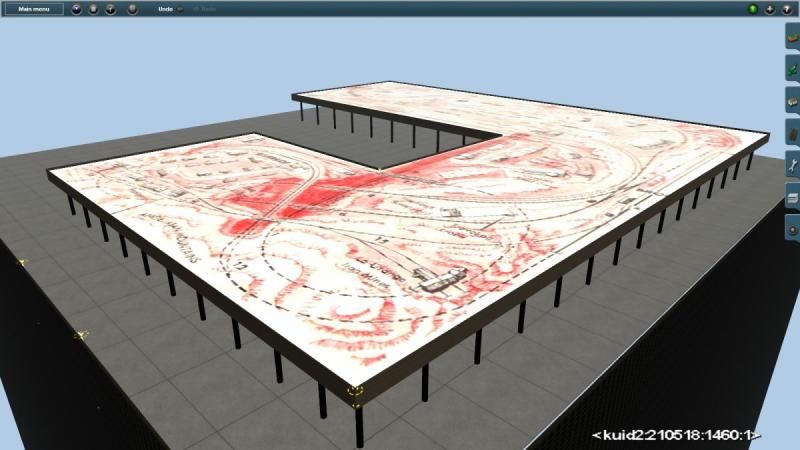
I started tinkering with a few ideas, and have come up with a process for transferring printed track plans into Trainz as high-resolution pseudo-basemaps that are shaped like the layout itself. There are many details still to be worked out, but I wanted to share my progress so far and start getting some feedback. The following images show the Fox River Grove RR, a 12x12 foot N-Scale layout that appeared in the February 1975 issue of Model Railroader and was designed by Frank E. Stastny. It has been one of my favorite plans for a long time, so I decided to use it for my testing; although, seeing it now, I do not think I would actually build it in Trainz as there is too much hidden track.
In any case the images that follow show the results of my experiments so far. The layout was put together very quickly and is not intended to be any great showpiece, just to demonstrate what I am trying to accomplish.
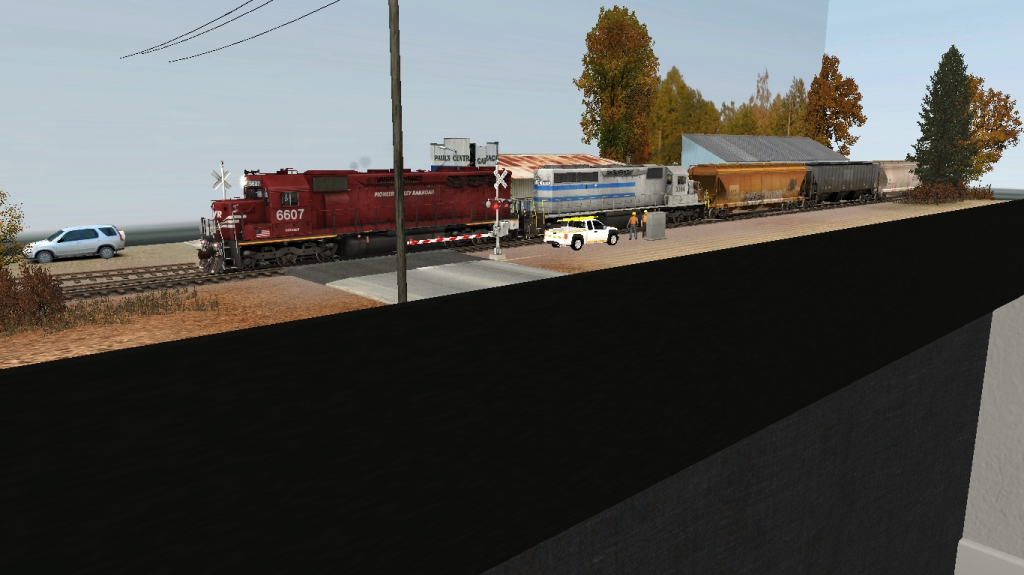
Shot #1 is the overall layout.
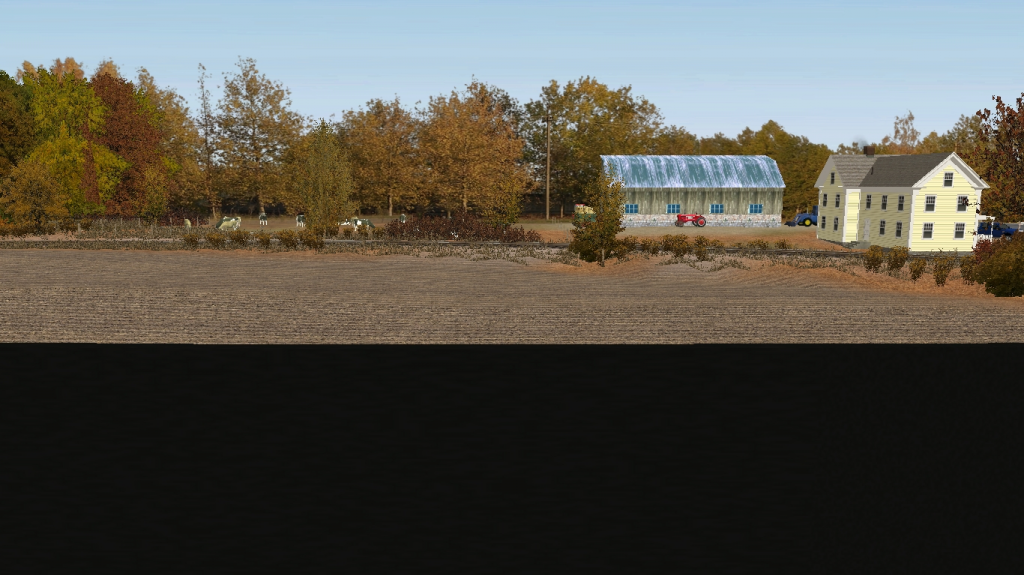
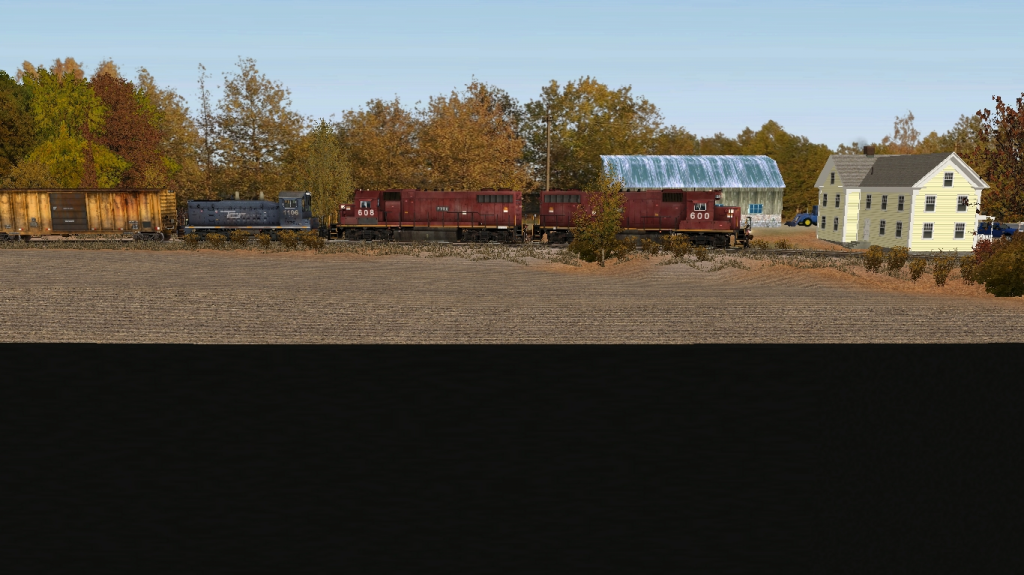
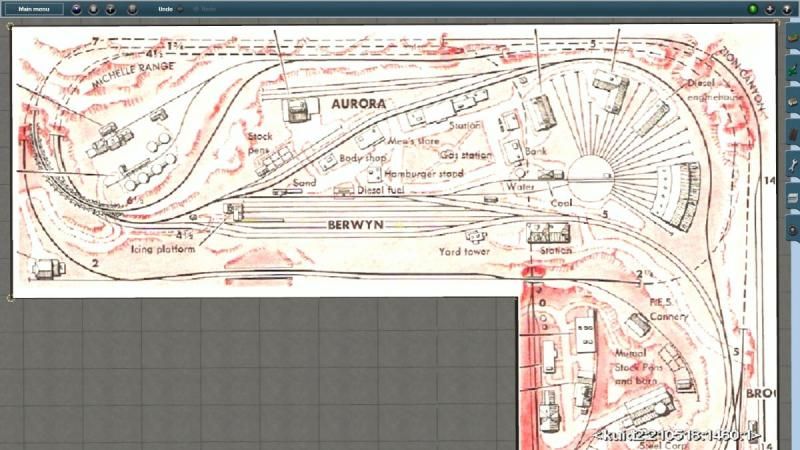
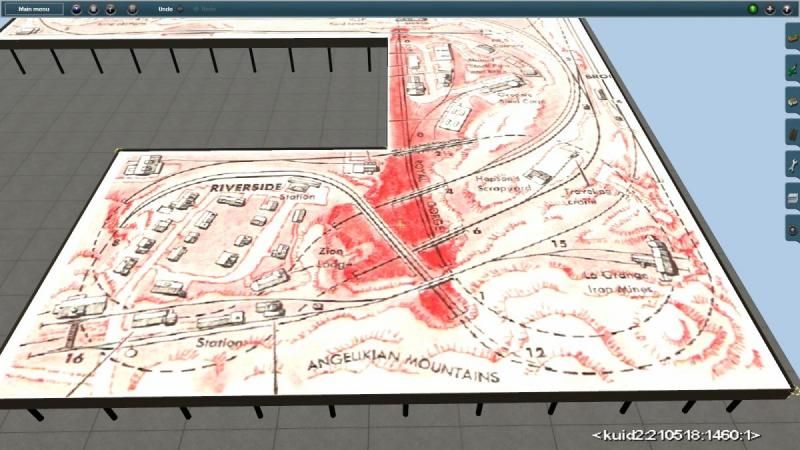
Shots #2 and #3 show the detail that is possible with this method.
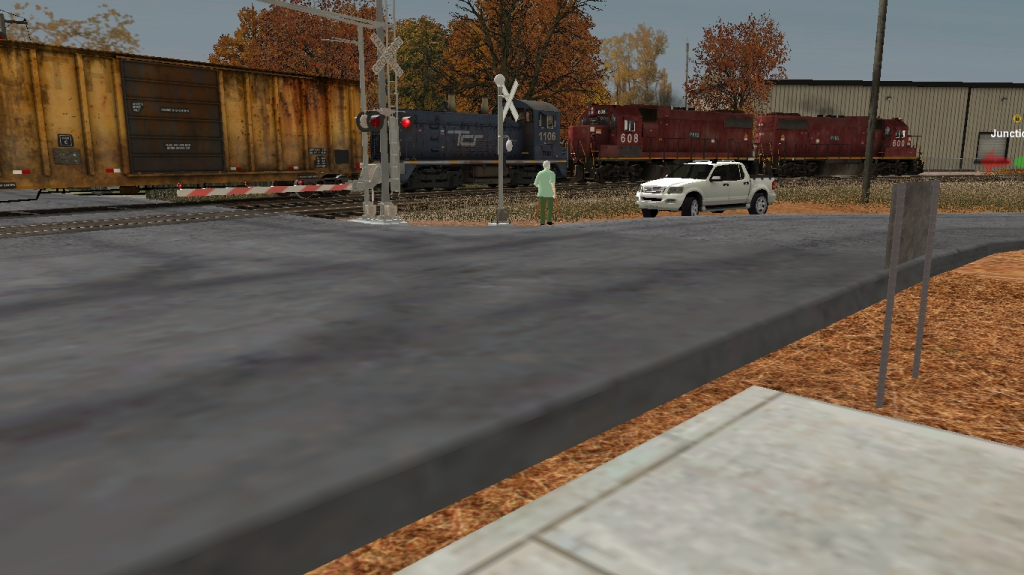
Shot #4 shows what the image looks like when you are zoomed in close enough to actually do some work.
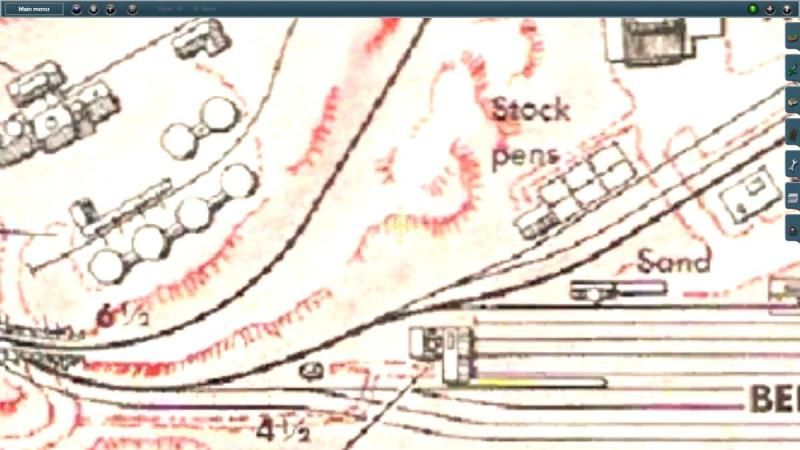
In the end this actually wasn't all that hard to achieve, although there were several subtle "gotchas" that I discovered along the way that turned out to be very important to achieving the right end result. The only tools I used were IrfanView, SketchUp and my RubyTMIX exporter (and of course a scanner); in fact, I think the "surrounding room" could also be done with SketchUp and RubyTMIX, but my experiments have not reached that point yet.
Opinions about this process are welcome. A short tutorial on how this was accomplished can be found a few posts down.
Thanks again to the OP for this awesome idea and for everyone who has contributed to this thread so far.
Regards,
-Mike
I started tinkering with a few ideas, and have come up with a process for transferring printed track plans into Trainz as high-resolution pseudo-basemaps that are shaped like the layout itself. There are many details still to be worked out, but I wanted to share my progress so far and start getting some feedback. The following images show the Fox River Grove RR, a 12x12 foot N-Scale layout that appeared in the February 1975 issue of Model Railroader and was designed by Frank E. Stastny. It has been one of my favorite plans for a long time, so I decided to use it for my testing; although, seeing it now, I do not think I would actually build it in Trainz as there is too much hidden track.
In any case the images that follow show the results of my experiments so far. The layout was put together very quickly and is not intended to be any great showpiece, just to demonstrate what I am trying to accomplish.
Shot #1 is the overall layout.
Shots #2 and #3 show the detail that is possible with this method.
Shot #4 shows what the image looks like when you are zoomed in close enough to actually do some work.
In the end this actually wasn't all that hard to achieve, although there were several subtle "gotchas" that I discovered along the way that turned out to be very important to achieving the right end result. The only tools I used were IrfanView, SketchUp and my RubyTMIX exporter (and of course a scanner); in fact, I think the "surrounding room" could also be done with SketchUp and RubyTMIX, but my experiments have not reached that point yet.
Opinions about this process are welcome. A short tutorial on how this was accomplished can be found a few posts down.
Thanks again to the OP for this awesome idea and for everyone who has contributed to this thread so far.
Regards,
-Mike
Last edited:
Looks interesting to me. Would be nice to be able to do as there are some routes I would like to make. The only thing I could see that would be hard to do is make terrain with this as the 'image' would move up and down. Is there a way to lock and objects height? I guess you could lay all the track then make the terrain would have to play around with it I suppose.
nickelplateroad
Active member
How do that?
NKP
NKP
Similar threads
- Replies
- 7
- Views
- 440
- Replies
- 22
- Views
- 951